
ausf
Master at Arms
Just doin' it.
I'm not going to super detail the bridge and shuttle bay as planned, because I know It'll just sit in the box and I want to recapture the 'can't wait' feeling I had when I was searching and waiting for it.
My backup plan was to build a faithful reproduction of the studio model, with the blank side and exposed wires, wood planking, etc.
So I started with the bussards. I add a voltage regular to cut down on the speed of rotation and cut the depth of the inner dome back to distance it from the outer dome. Messing around I found increasing the gap between the two created a cool ghostly effect. I opened up the LED channels and added some reflectors. The strips are mylar tape and add a nice effect. Unfortunately none of this is accurately captured on the photos due to the lights and high shine of the outer dome.
The photo is pretty close in color but lacks detail. The video is wildly off in color.
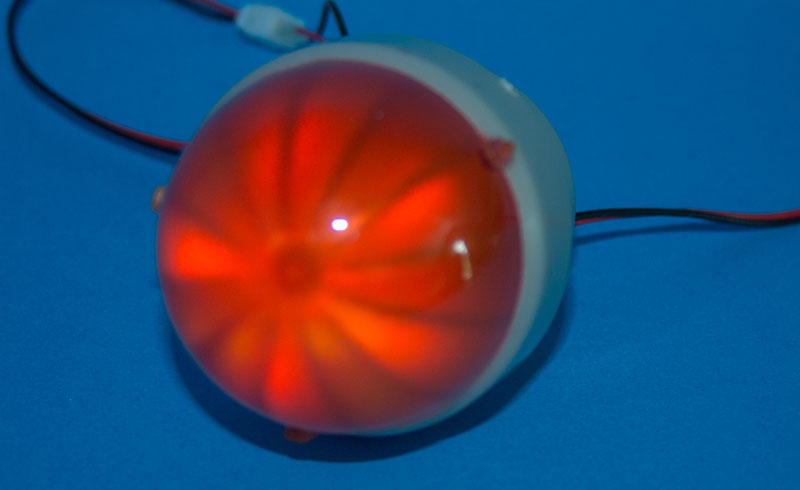
It's painted on the inside with three Vallejo transparent colors mixed with matte varnish. The both sides of the inner and inside of the outer dome are sanded with 1500 grit paper to diffuse the lighting. I added a bunch of pieces from the color sprues to break up the blinking lights.
Anyway, Next up is to spray the inner surfaces for light blocking and add the windows before closing it up and doing the seams.
I'm not going to super detail the bridge and shuttle bay as planned, because I know It'll just sit in the box and I want to recapture the 'can't wait' feeling I had when I was searching and waiting for it.
My backup plan was to build a faithful reproduction of the studio model, with the blank side and exposed wires, wood planking, etc.
So I started with the bussards. I add a voltage regular to cut down on the speed of rotation and cut the depth of the inner dome back to distance it from the outer dome. Messing around I found increasing the gap between the two created a cool ghostly effect. I opened up the LED channels and added some reflectors. The strips are mylar tape and add a nice effect. Unfortunately none of this is accurately captured on the photos due to the lights and high shine of the outer dome.
The photo is pretty close in color but lacks detail. The video is wildly off in color.
It's painted on the inside with three Vallejo transparent colors mixed with matte varnish. The both sides of the inner and inside of the outer dome are sanded with 1500 grit paper to diffuse the lighting. I added a bunch of pieces from the color sprues to break up the blinking lights.
Anyway, Next up is to spray the inner surfaces for light blocking and add the windows before closing it up and doing the seams.
")


