
-
Modelers Alliance has updated the forum software on our website. We have migrated all post, content and user accounts but we could not migrate the passwords.
This requires that you manually reset your password.
Please click here, http://modelersalliance.org/forums/login to go to logon page and use the "Forgot your Password" option.
You are using an out of date browser. It may not display this or other websites correctly.
You should upgrade or use an alternative browser.
You should upgrade or use an alternative browser.
Su-2 in 1/48 goes down in flames !
- Thread starter Old Dog
- Start date
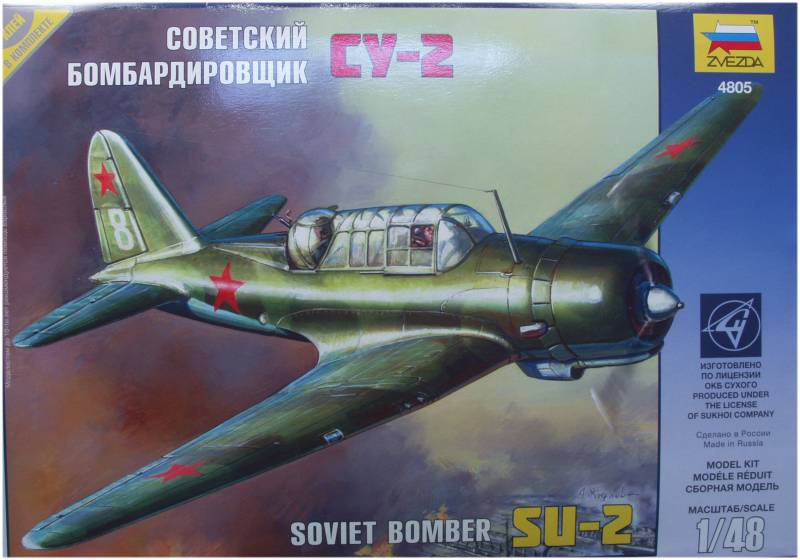
Su-2 in 1/48
Oh cool!
Oh cool!
phantom II
Master at Arms
Su-2 in 1/48
Alright, another interesting build Watching with interest
Cheers, Christian B)
Alright, another interesting build
Watching with interest Cheers, Christian B)
Skinny_Mike
Well-known member
Su-2 in 1/48
Su-2 in 1/48
Ah, I think I see them tucked in the left corner now that I go back and look closely!
Just wanted to let you know in case you hadn't!
Warren, I already have the corrected cowl and engine and the replacement control surfaces, I'm going to pass on the wheel wells. I never look at that area once it goes in the display cabinet anyway
Ah, I think I see them tucked in the left corner now that I go back and look closely!
Just wanted to let you know in case you hadn't!
Old Dog
Well-known member
Su-2 in 1/48
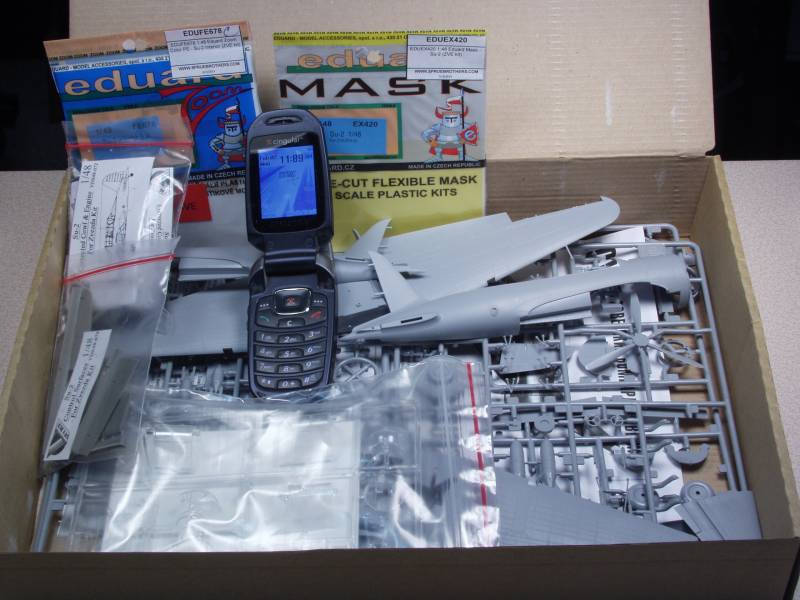
OK, off to the races. I tend to have a bad habit with kits, I plunge into them until I hit a problem area then tend to pause to think about solutions, get distracted, and go off in a different direction. However with this one once I got started I couldn't stop. So far everything has fit well and I've hit no stumbling blocks. In some cases I forgot to stop and take photos. Anyway here is what has gone down so far...
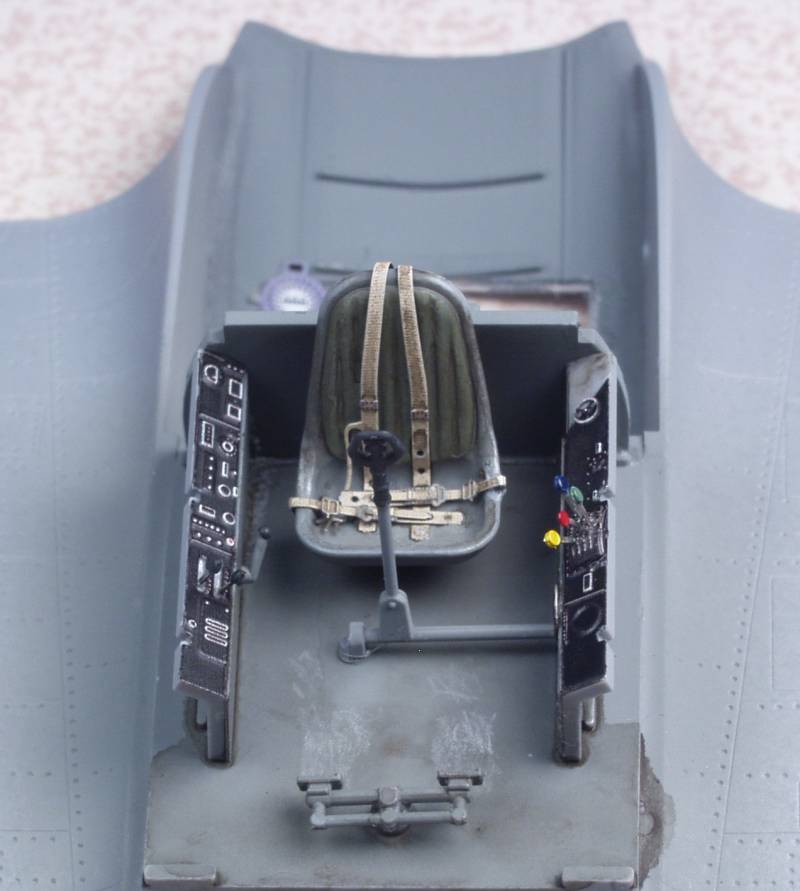
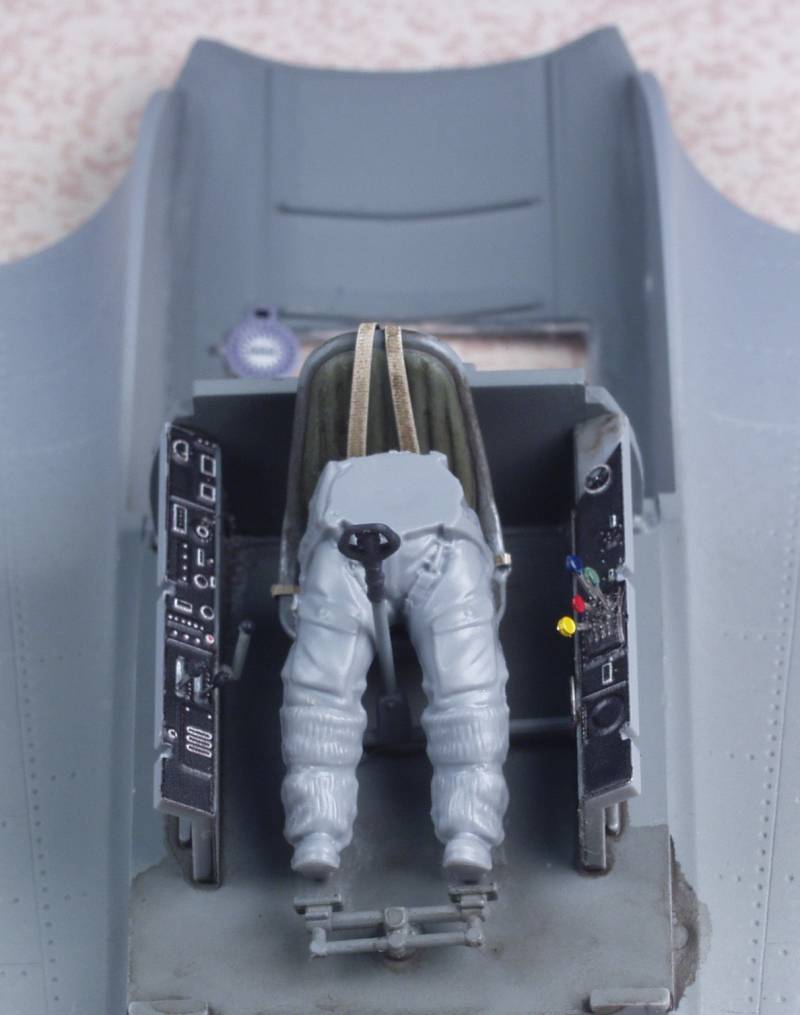
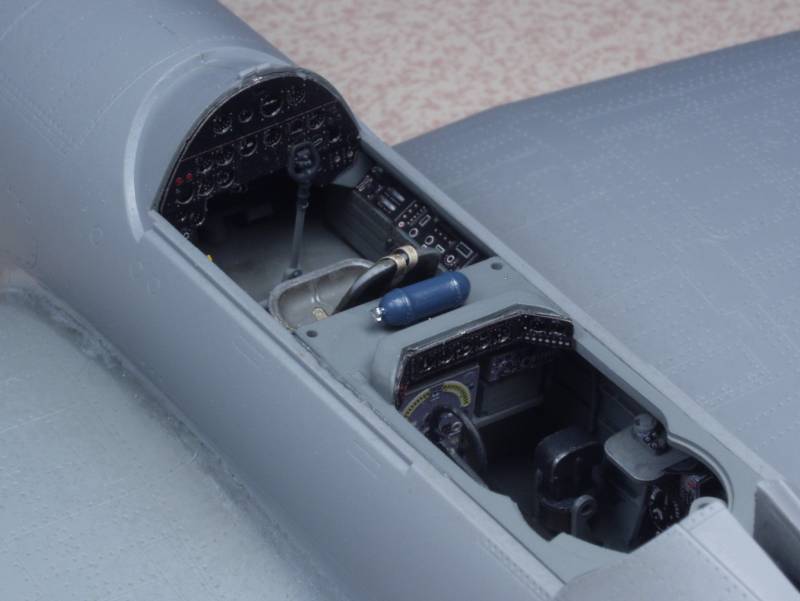
As usual the cockpit came first, the pilots office is assembled on top of the wing so the wings were assembled first. I used the Eduard Zoom set. The pit looks pretty roomy to me and it seemed that the rudder pedals were a bit off.
Sure enough a test fit using the lower torso of the pilot confirmed it would be quite a stretch to reach them, they won't really show so I wasn't inspired to move them.
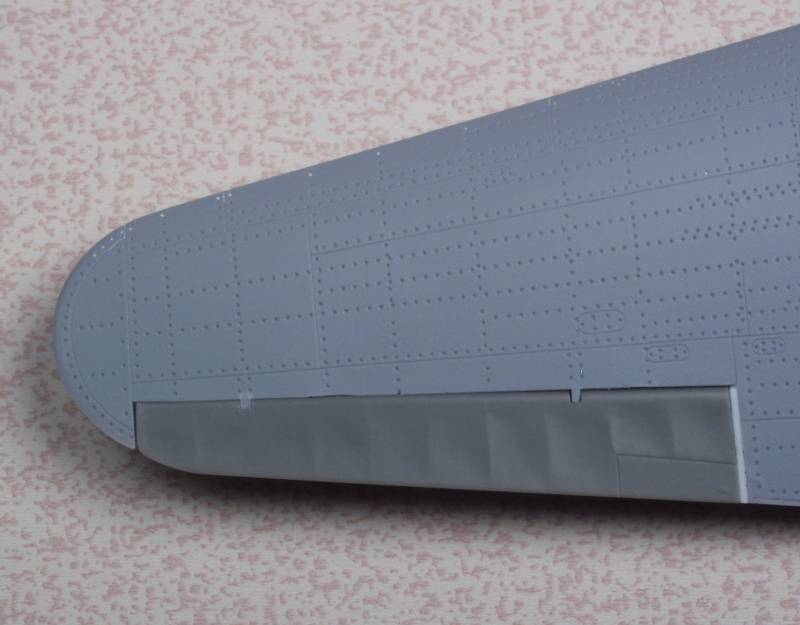
On the wing a test fit of the Vector ailerons showed them to be a bit short (or they are correct and the opening is too long).
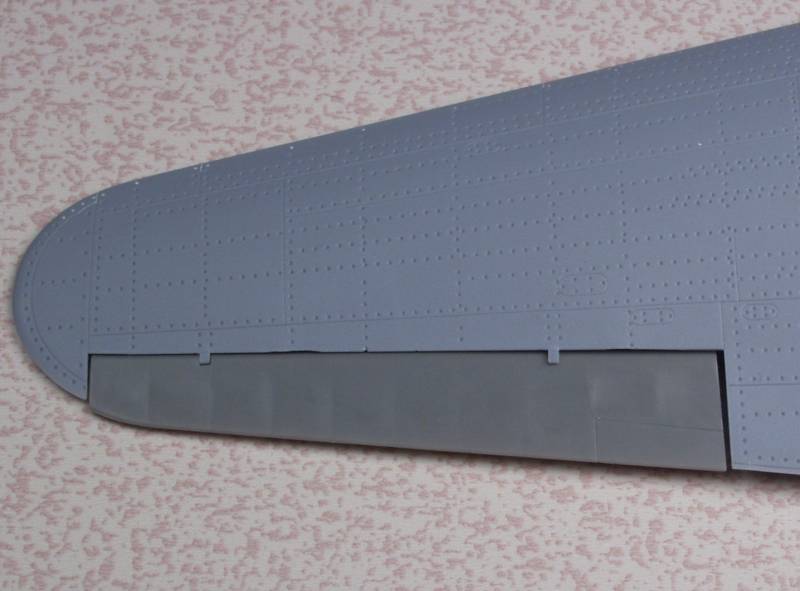
An easy fix with a bit of styrene
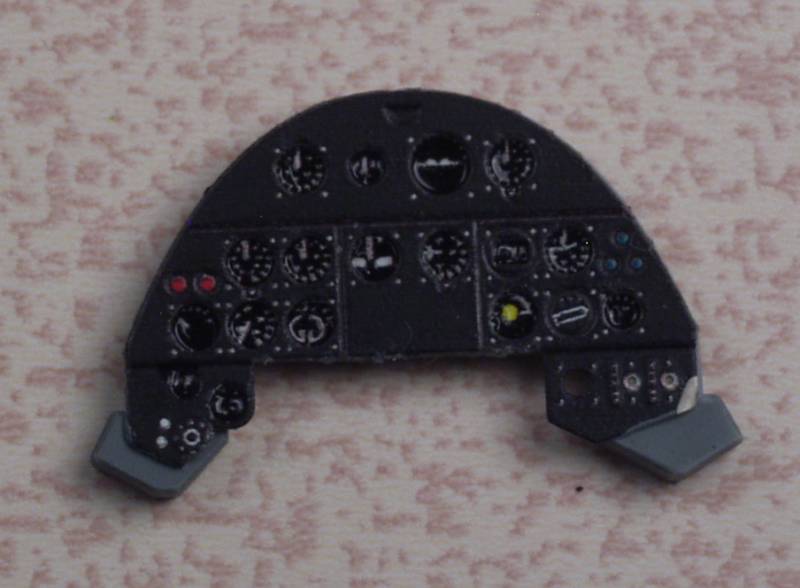
Instrument panel
Port side wall in the bombardiers position. My choice for the interior gray turned out to be a bit darker than I might have liked and the shadow wash only made it darker. In the end not all that much is visible.
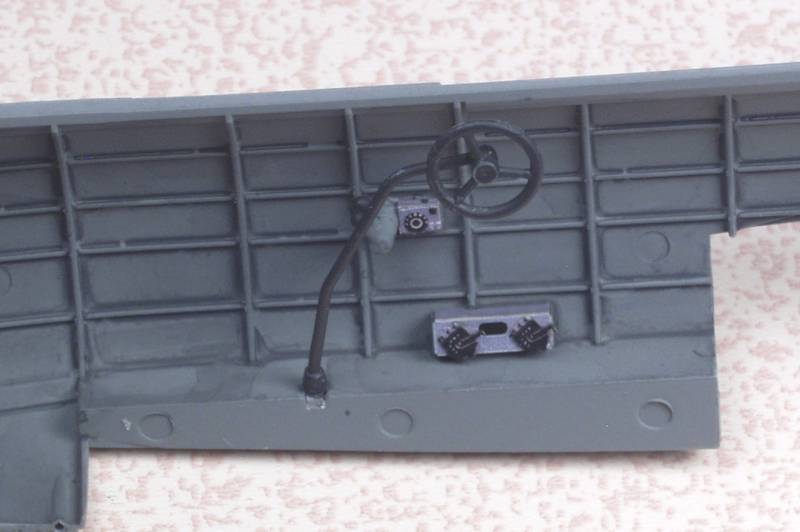
Starboard side all, not a lot of detail but considering how much is visible later it is more than adequate for me.
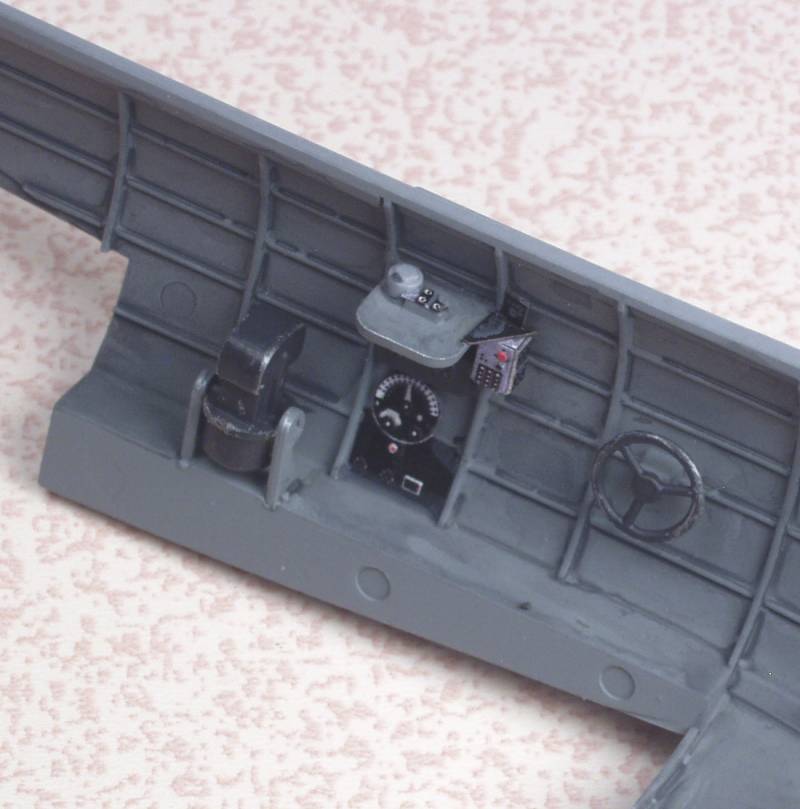
Upper deck for the same position.

The Vector engine was assembled and valve rods and ignition wiring added. I had some issues with this one that I have not had with other Vector engines, perhaps the mold was nearing the end of its life but the cylinders really didn't fit well which cause alignment issues with the valve rods. Fortunately once buried in the cowling it should be that noticeable.

Jumping ahead the fuselage has been assembled and the wing and horizontal stabs attached. I decided that I could live with the kit detail on the elevators versus the work required to cut them off and attach the vector parts. Fit in both cases was quite good, the wing to fuselage fit so tight I was afraid I was going to break something but it finally snapped into position. No seam work has been done in any of the next few photos.
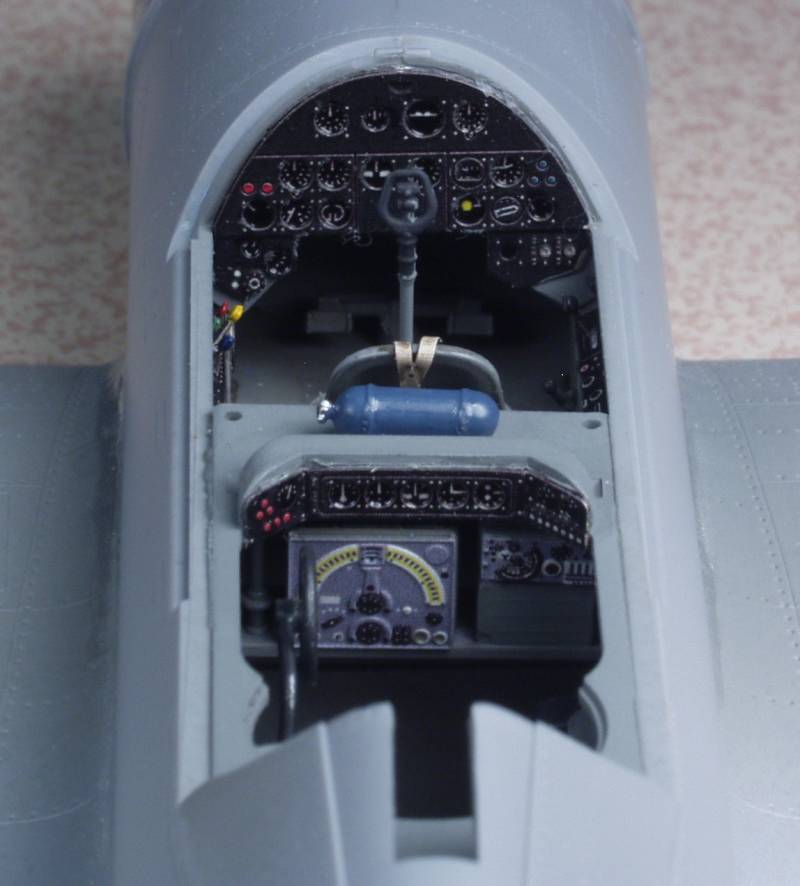
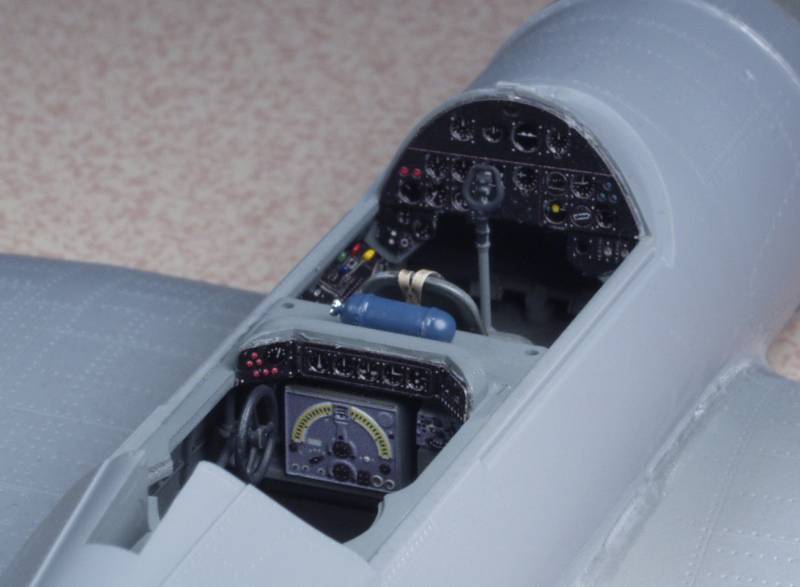
There is still a roll over structure to be added between positions but I think I'm going to leave that and the cabin and turret glazing off till after painting, again to make masking easier.
The cowl fits nice and snug so I'm going to leave it till after painting and install it and the engine after painting to reduce the masking work load
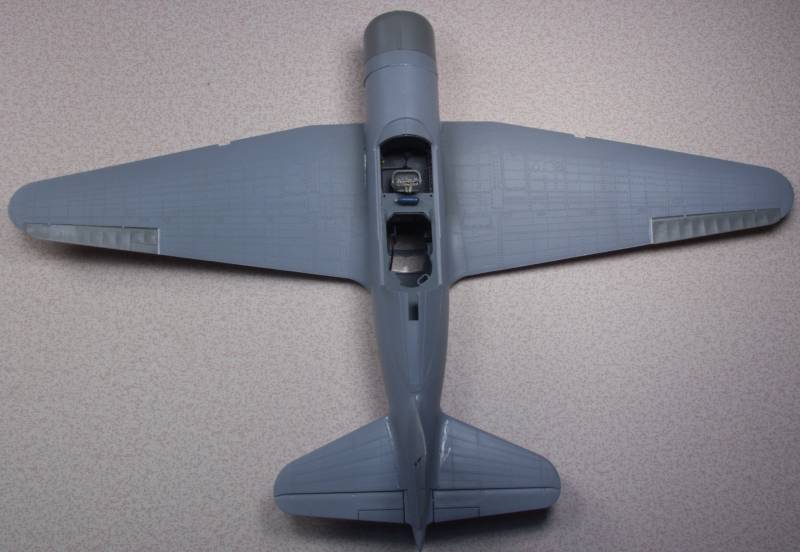
I need to mask all of the clear parts, do a bit of seam work and it will be ready for some color.
Thanks for looking in !
OK, off to the races. I tend to have a bad habit with kits, I plunge into them until I hit a problem area then tend to pause to think about solutions, get distracted, and go off in a different direction. However with this one once I got started I couldn't stop. So far everything has fit well and I've hit no stumbling blocks. In some cases I forgot to stop and take photos. Anyway here is what has gone down so far...
As usual the cockpit came first, the pilots office is assembled on top of the wing so the wings were assembled first. I used the Eduard Zoom set. The pit looks pretty roomy to me and it seemed that the rudder pedals were a bit off.
Sure enough a test fit using the lower torso of the pilot confirmed it would be quite a stretch to reach them, they won't really show so I wasn't inspired to move them.
On the wing a test fit of the Vector ailerons showed them to be a bit short (or they are correct and the opening is too long).
An easy fix with a bit of styrene
Instrument panel
Port side wall in the bombardiers position. My choice for the interior gray turned out to be a bit darker than I might have liked and the shadow wash only made it darker. In the end not all that much is visible.
Starboard side all, not a lot of detail but considering how much is visible later it is more than adequate for me.
Upper deck for the same position.
The Vector engine was assembled and valve rods and ignition wiring added. I had some issues with this one that I have not had with other Vector engines, perhaps the mold was nearing the end of its life but the cylinders really didn't fit well which cause alignment issues with the valve rods. Fortunately once buried in the cowling it should be that noticeable.
Jumping ahead the fuselage has been assembled and the wing and horizontal stabs attached. I decided that I could live with the kit detail on the elevators versus the work required to cut them off and attach the vector parts. Fit in both cases was quite good, the wing to fuselage fit so tight I was afraid I was going to break something but it finally snapped into position. No seam work has been done in any of the next few photos.
There is still a roll over structure to be added between positions but I think I'm going to leave that and the cabin and turret glazing off till after painting, again to make masking easier.
The cowl fits nice and snug so I'm going to leave it till after painting and install it and the engine after painting to reduce the masking work load
I need to mask all of the clear parts, do a bit of seam work and it will be ready for some color.
Thanks for looking in !
phantom II
Master at Arms
Su-2 in 1/48
Wow, the cockpit is much nicer than I would have guessed.
I keep having the same issue with the aftermarket fight control . I believe it's shrinkage of the resin . :vmad
Definitely watching
Cheers, Christian B)
Wow, the cockpit is much nicer than I would have guessed.
I keep having the same issue with the aftermarket fight control . I believe it's shrinkage of the resin . :vmad
Definitely watching
Cheers, Christian B)
Su-2 in 1/48
Very cool.
Nothing to worry about with the seat Gary, it's in the full back position to allow easy entry and exit, also notice the rich Corinthian leather for added luxury...(that might be lost on the young folks.
Very cool.
Nothing to worry about with the seat Gary, it's in the full back position to allow easy entry and exit, also notice the rich Corinthian leather for added luxury...(that might be lost on the young folks.
Sherman 18
Master at Arms
Su-2 in 1/48
Looking very nice!
Looking very nice!
Old Dog
Well-known member
Su-2 in 1/48
Thanks guys, Ian the Su-2 is close to the same size as the Il-2, in round numbers Il-2 span=48', length=38'; Su-2 span=47', length=34'.
Last night I hit my first glitch on the kit. I was just starting to apply the Eduard masks to the clear parts, on one of the first ones I needed to pull it off and reposition. When I went to stick it back on, it wouldn't stick. The tape had pulled the future off. :facepalm I have only had this happen one other time and guess what, it was another Zvezda kit, the Pe-8. Back when I built it the future wouldn't even stick to the clear parts, just beaded up and ran off. On this one it appeared to coat OK but didn't stick. I should have suspected when I cut the parts off the sprue as the plastic feels soft when cut. In fact it's so flexible you can bend it without breaking as show below.
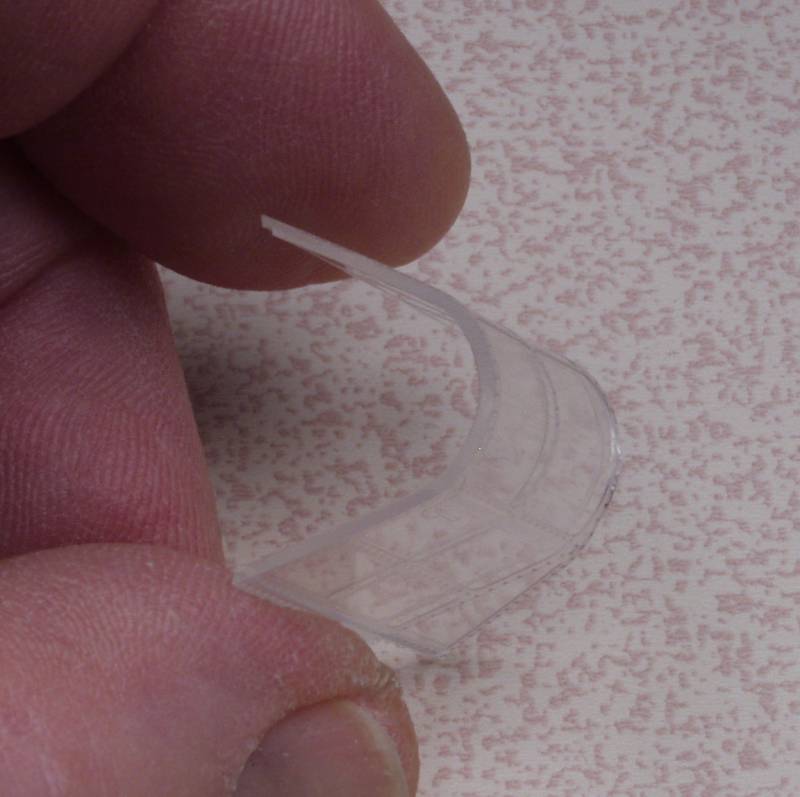

How many canopies can you do that to and have them spring back to the original shape. This is not a game changer and I was able to save the mask by dipping it in Windex for a few seconds then letting it air dry. The material is soft and will scratch so use care in handling. I don't recall on the Pe-8 having any issues gluing it with clear parts cement. I'm going to test an unused part with super glue to see if it will frost when exposed to that. Probably the biggest issue would be for those using acrylic paints as these will likely not stick any better than the future did. On the Pe-8 I used Alclad on it and I still had some of it chip off when I removed the masks. It's always something :S
I also noticed as I was looking over the paint schemes and marking instructions that the instructions call out that decal 6 be used at all locations regardless of what it is, whoops ! Decal 6 is the instrument panel decal ! Fortunately it's all pretty self evident
Thanks guys, Ian the Su-2 is close to the same size as the Il-2, in round numbers Il-2 span=48', length=38'; Su-2 span=47', length=34'.
Last night I hit my first glitch on the kit. I was just starting to apply the Eduard masks to the clear parts, on one of the first ones I needed to pull it off and reposition. When I went to stick it back on, it wouldn't stick. The tape had pulled the future off. :facepalm I have only had this happen one other time and guess what, it was another Zvezda kit, the Pe-8. Back when I built it the future wouldn't even stick to the clear parts, just beaded up and ran off. On this one it appeared to coat OK but didn't stick. I should have suspected when I cut the parts off the sprue as the plastic feels soft when cut. In fact it's so flexible you can bend it without breaking as show below.
How many canopies can you do that to and have them spring back to the original shape. This is not a game changer and I was able to save the mask by dipping it in Windex for a few seconds then letting it air dry. The material is soft and will scratch so use care in handling. I don't recall on the Pe-8 having any issues gluing it with clear parts cement. I'm going to test an unused part with super glue to see if it will frost when exposed to that. Probably the biggest issue would be for those using acrylic paints as these will likely not stick any better than the future did. On the Pe-8 I used Alclad on it and I still had some of it chip off when I removed the masks. It's always something :S
I also noticed as I was looking over the paint schemes and marking instructions that the instructions call out that decal 6 be used at all locations regardless of what it is, whoops ! Decal 6 is the instrument panel decal ! Fortunately it's all pretty self evident
Similar threads
- Replies
- 54
- Views
- 11K
- Replies
- 104
- Views
- 21K