
-
Modelers Alliance has updated the forum software on our website. We have migrated all post, content and user accounts but we could not migrate the passwords.
This requires that you manually reset your password.
Please click here, http://modelersalliance.org/forums/login to go to logon page and use the "Forgot your Password" option.
You are using an out of date browser. It may not display this or other websites correctly.
You should upgrade or use an alternative browser.
You should upgrade or use an alternative browser.
Soviet ASU-57 assault gun...DONE!
- Thread starter sharkman
- Start date
Forthcoming SPG Build....FOUND ONE!
Might need it!
:drunk
Good Luck Warren
Tony lee
Might need it!
:drunk
Soviet ASU-57 assault gun
That's one way to put it Dave!

Going to be very interesting :coolio
That's one way to put it Dave!
Soviet ASU-57 assault gun
Off to the races! My wife is gone on conference this week so I'm watching the two girls and one of them has a fever! Needless to say, not much progress but I wanted to start into this right away!
SInce the only other armor kit I have to compare this to is the Tamiya type 1, it is clearly no Tamiya kit! But, not that bad on first sight. They were very considerate to provide a part/sprue map and little tabs beside each part on the sprues but failed to attach numbers to either of these so it is going to be a guessing game which parts to use! The parts are listed on the jumbled instructions though!
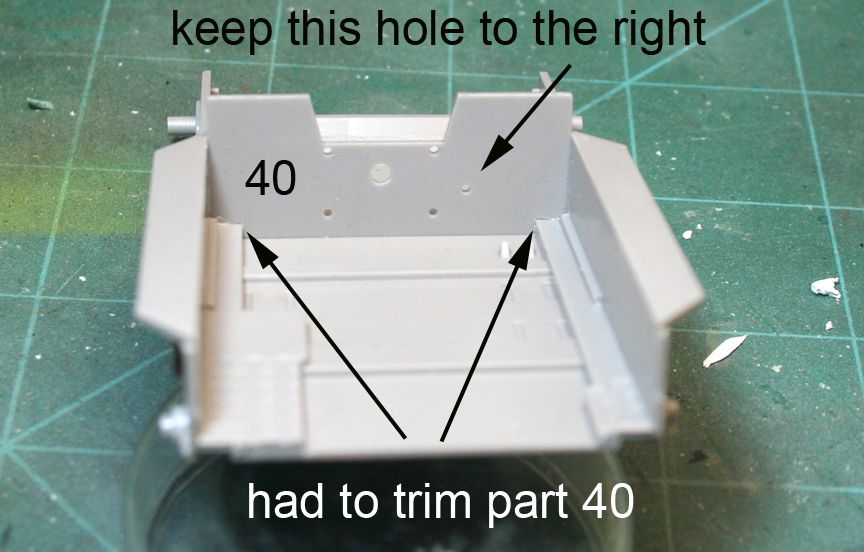
I did get the lower hull together. These 4 pieces actually went together very nicely, just had to really watch which way part 40 went in as that wasn't clear in the instructions.

40 had to be trimmed as well where indicated, just a little shave of the knife.
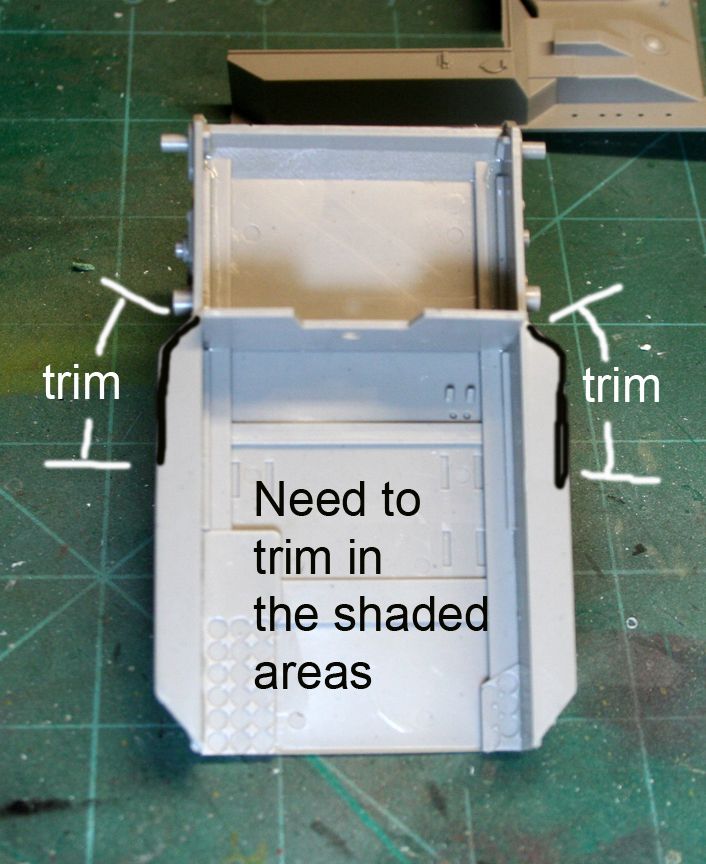
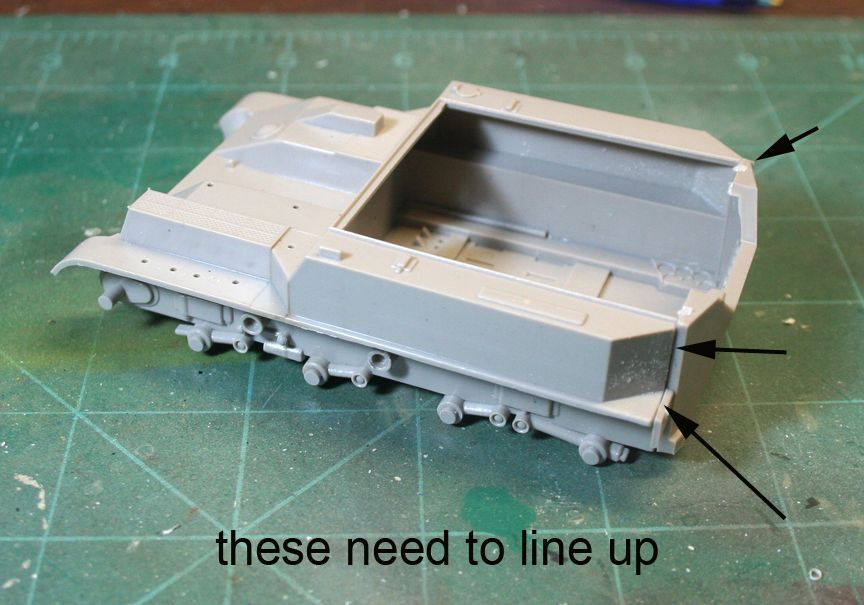
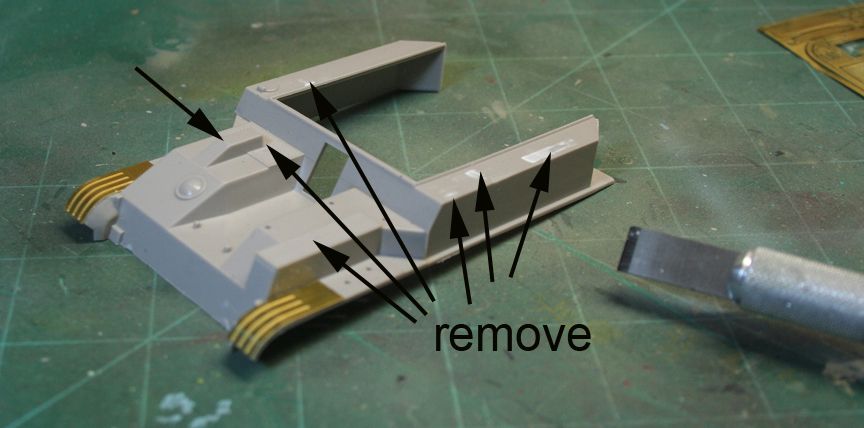
I then discovered why I read that there were fit issues with the hull. the upper hull has many! First one being this area by the drive gears. It needs some major trimming

Then, one needs to trim the forward parts of the sponsons (?) I think that is what these are called) on the lower hull.
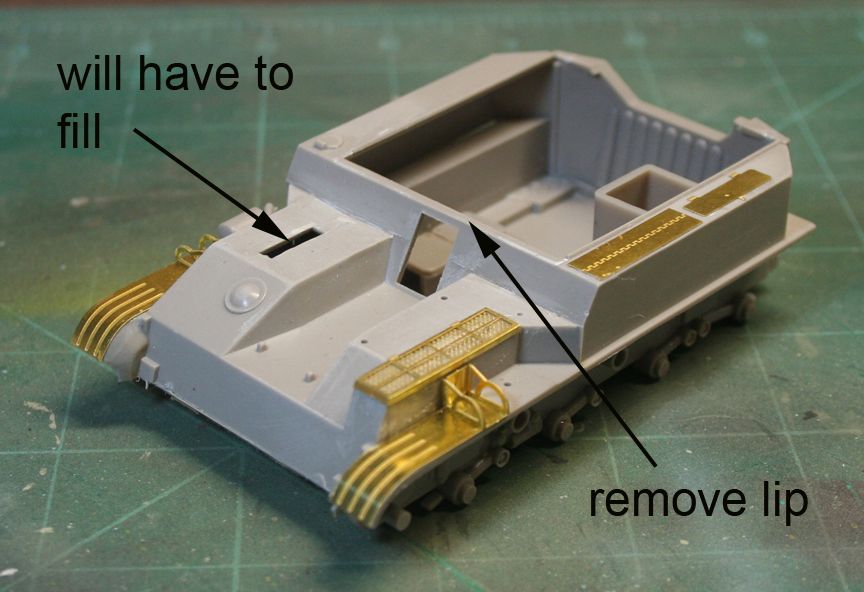
followed by the back areas on the upper hull
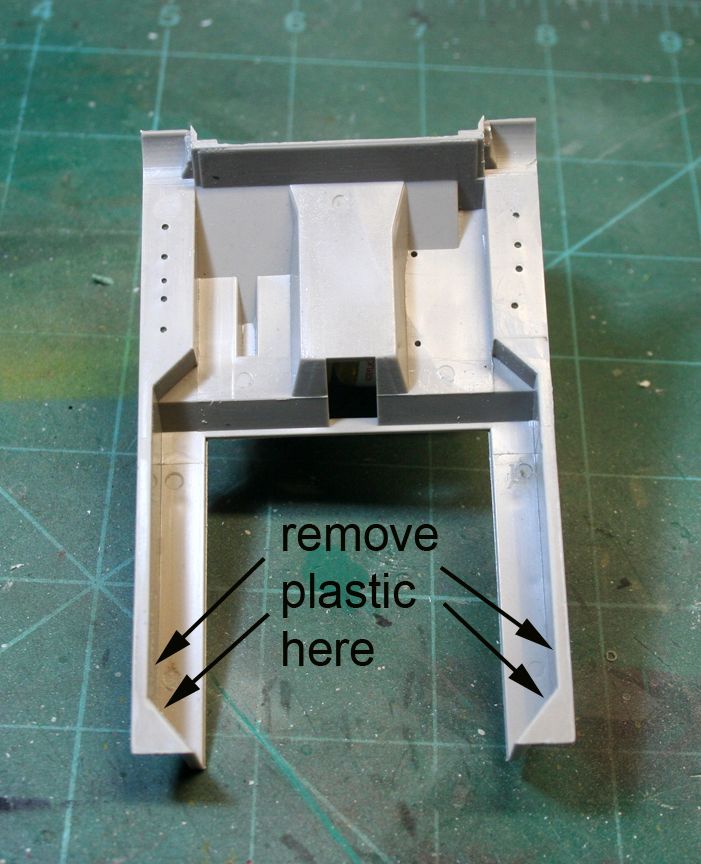
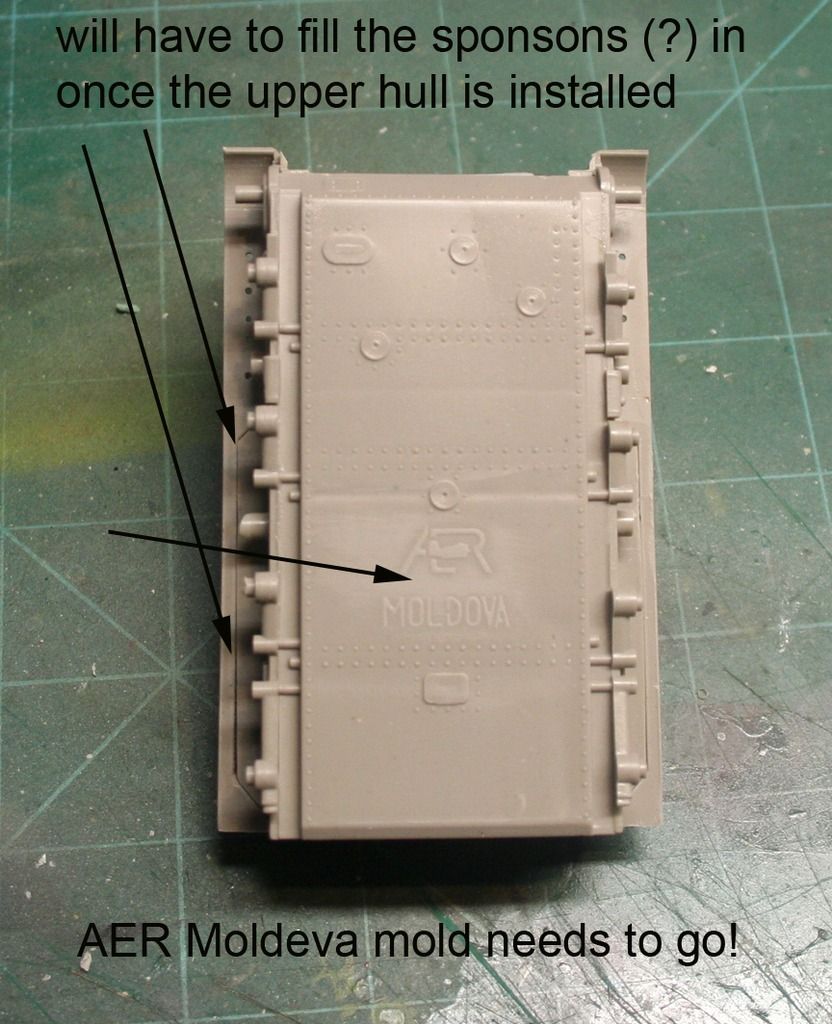
That should get you to a point where the upper hull almost nicely fits on the lower hull. I'll need to fill in these areas more once I glue the upper hull to the lower, and remove the AER Moldova markings!!
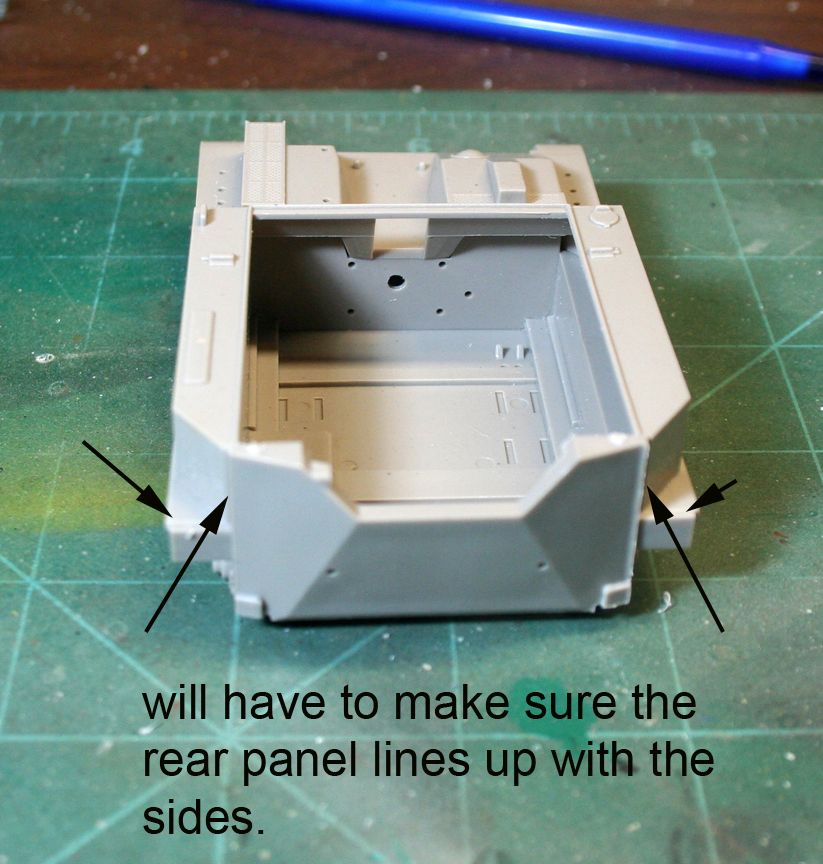
in test fitting the rear plate I found out that the previous rear areas mentioned need more trimming for the rear plate to line up nicely with the rest of the body.
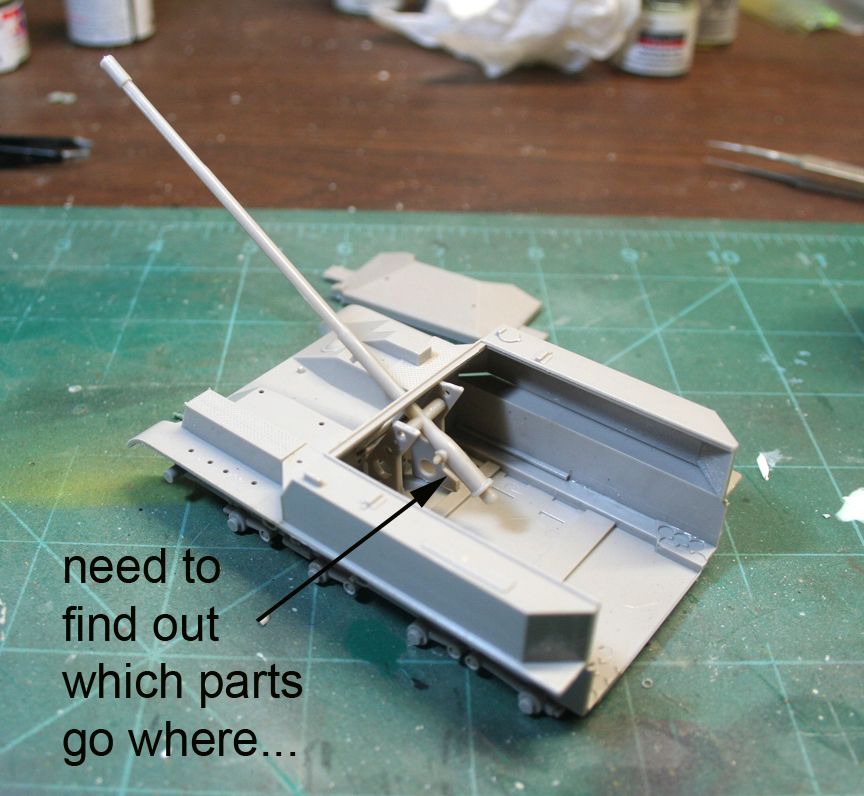
Then lastly, I just tested the gun in place. Have to figure out which pieces are used to build that up!
Off to the races! My wife is gone on conference this week so I'm watching the two girls and one of them has a fever! Needless to say, not much progress but I wanted to start into this right away!
SInce the only other armor kit I have to compare this to is the Tamiya type 1, it is clearly no Tamiya kit! But, not that bad on first sight. They were very considerate to provide a part/sprue map and little tabs beside each part on the sprues but failed to attach numbers to either of these so it is going to be a guessing game which parts to use! The parts are listed on the jumbled instructions though!
I did get the lower hull together. These 4 pieces actually went together very nicely, just had to really watch which way part 40 went in as that wasn't clear in the instructions.

40 had to be trimmed as well where indicated, just a little shave of the knife.

I then discovered why I read that there were fit issues with the hull. the upper hull has many! First one being this area by the drive gears. It needs some major trimming

Then, one needs to trim the forward parts of the sponsons (?) I think that is what these are called) on the lower hull.

followed by the back areas on the upper hull

That should get you to a point where the upper hull almost nicely fits on the lower hull. I'll need to fill in these areas more once I glue the upper hull to the lower, and remove the AER Moldova markings!!

in test fitting the rear plate I found out that the previous rear areas mentioned need more trimming for the rear plate to line up nicely with the rest of the body.


Then lastly, I just tested the gun in place. Have to figure out which pieces are used to build that up!

Soviet ASU-57 assault gun
You're definitely a modeler and making it happen!
Regards,
You're definitely a modeler and making it happen!
Regards,
Soviet ASU-57 assault gun
So Williams Brothers made armor also.
So Williams Brothers made armor also.


Skinny_Mike
Well-known member
Soviet ASU-57 assault gun
Moving right along, that kit looks to be a bit of a bear...
Moving right along, that kit looks to be a bit of a bear...
Soviet ASU-57 assault gun
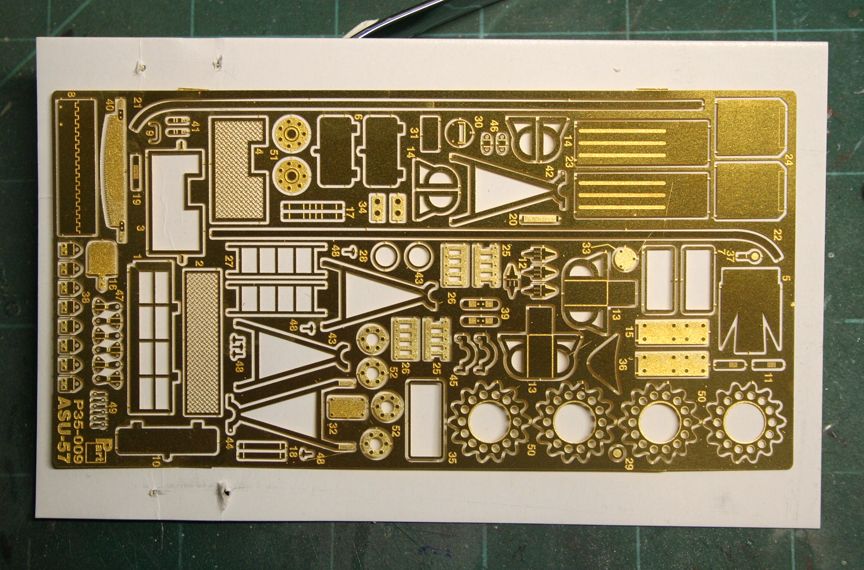
The PE from Part has arrived and I think these additions will really improve this thing!
While it doesn't have some of the parts the OOP Eduard set did, it does have new ones like the drive sprockets which actually fit in the tracks.
Figured out which pieces make up the gun. Getting that together while the mig dries from sanding session
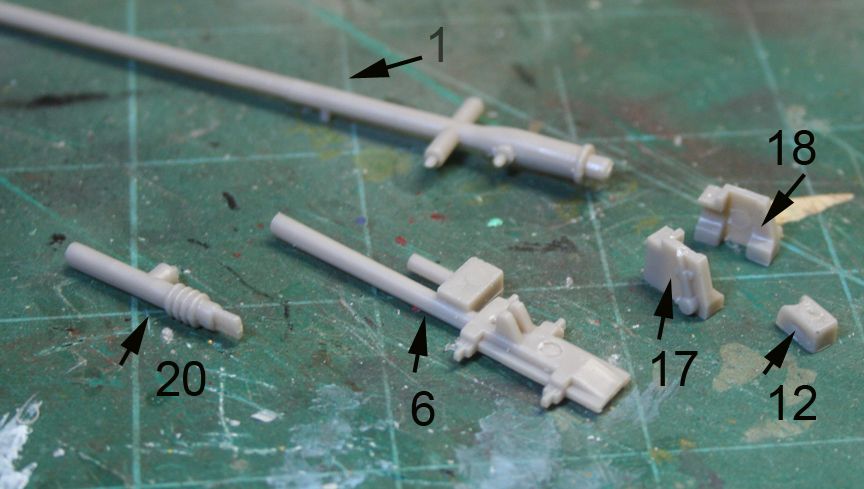
The PE from Part has arrived and I think these additions will really improve this thing!
While it doesn't have some of the parts the OOP Eduard set did, it does have new ones like the drive sprockets which actually fit in the tracks.

Figured out which pieces make up the gun. Getting that together while the mig dries from sanding session

135engineer
Active member
Soviet ASU-57 assault gun
It looks like a pretty straight forward ( older) eastern European kit. I personally have a weakness for eastern European kits they are like kryptonite. Either you will love flat kits or you will never do another one. From the looks of it you are definitely doing a great job. These kits offer a good deal of opportunity to do super detail work. There is not a lot to cut away to make the changes. Keep hangin you're doing a good job. Also " welcome to the dirt side"
It looks like a pretty straight forward ( older) eastern European kit. I personally have a weakness for eastern European kits they are like kryptonite. Either you will love flat kits or you will never do another one. From the looks of it you are definitely doing a great job. These kits offer a good deal of opportunity to do super detail work. There is not a lot to cut away to make the changes. Keep hangin you're doing a good job. Also " welcome to the dirt side"

Soviet ASU-57 assault gun
Back at this little baby after almost three weeks of recent field work (might post some pictures of that later)!
I packaged this up and took it with me but wasn't able to get as much progress as I had wanted.
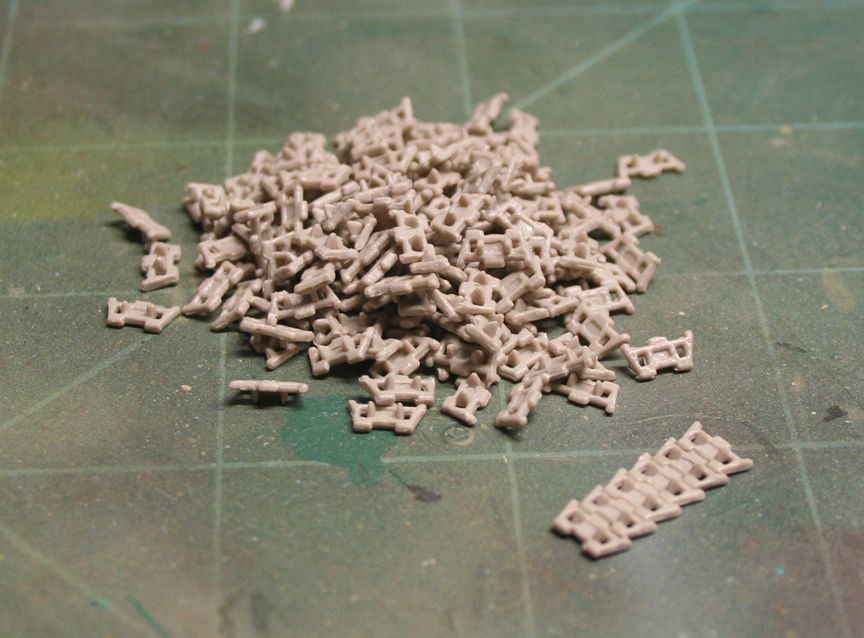
First step was to clean up all the tracks, cutting each one out, filing and sanding and cleaning out the holes, all 192 of them! (starting to think I am going insane!! :gogo ) Still have to figure out how to tackle these, I'm guessing building them in sections, then attaching once the kit is finished....
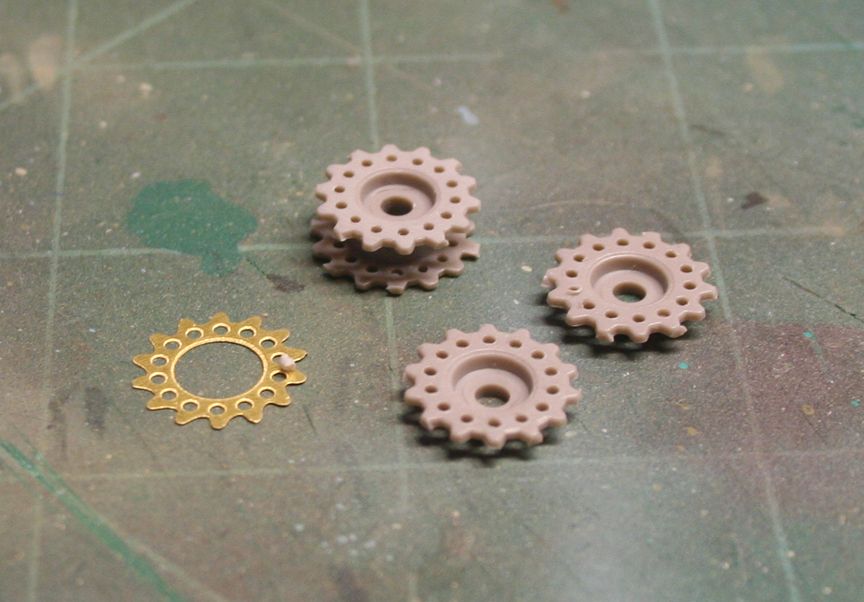
did a bit of work cleaning up the road wheels and the sprockets, these still need more work as the road wheels are too wide for the track guides and the sprockets are too wide for the teeth holes.

My PE set does have new sprockets so I should just have to sand down the kit ones until they fit.
I also got the new fenders on and began to chip off some of the molded features to replace with new PE
and here we are with a fair bit of the new PE attached
Back at this little baby after almost three weeks of recent field work (might post some pictures of that later)!
I packaged this up and took it with me but wasn't able to get as much progress as I had wanted.
First step was to clean up all the tracks, cutting each one out, filing and sanding and cleaning out the holes, all 192 of them! (starting to think I am going insane!! :gogo ) Still have to figure out how to tackle these, I'm guessing building them in sections, then attaching once the kit is finished....

did a bit of work cleaning up the road wheels and the sprockets, these still need more work as the road wheels are too wide for the track guides and the sprockets are too wide for the teeth holes.

My PE set does have new sprockets so I should just have to sand down the kit ones until they fit.

I also got the new fenders on and began to chip off some of the molded features to replace with new PE

and here we are with a fair bit of the new PE attached

 Alot of work but, does look really good so far!!