
-
Modelers Alliance has updated the forum software on our website. We have migrated all post, content and user accounts but we could not migrate the passwords.
This requires that you manually reset your password.
Please click here, http://modelersalliance.org/forums/login to go to logon page and use the "Forgot your Password" option.
You are using an out of date browser. It may not display this or other websites correctly.
You should upgrade or use an alternative browser.
You should upgrade or use an alternative browser.
Revell 1/144 HMCS Snowberry
- Thread starter paddy
- Start date

Heavens Eagle
Well-known member
Ah an experienced pilot that just learned to fly another type of plane. In that case she was probably having a great time of it.

paddy
Well-known member
I have hit my first problem with the hull water line ? the bottom of the hull is red. on the instructions that red line is almost straight but when i transfer it to the model its miles out.... What i did was to count the steel plates on the side so the red line is 2 large 1 narrow plate down from the top at the front its 3 large 1 narrow plate down and at the back its 2 large 1 narrow down. On the instructions thats a straight line give or take a 10th " but on the ship its a banana line ? Any one know if it should be straight ?
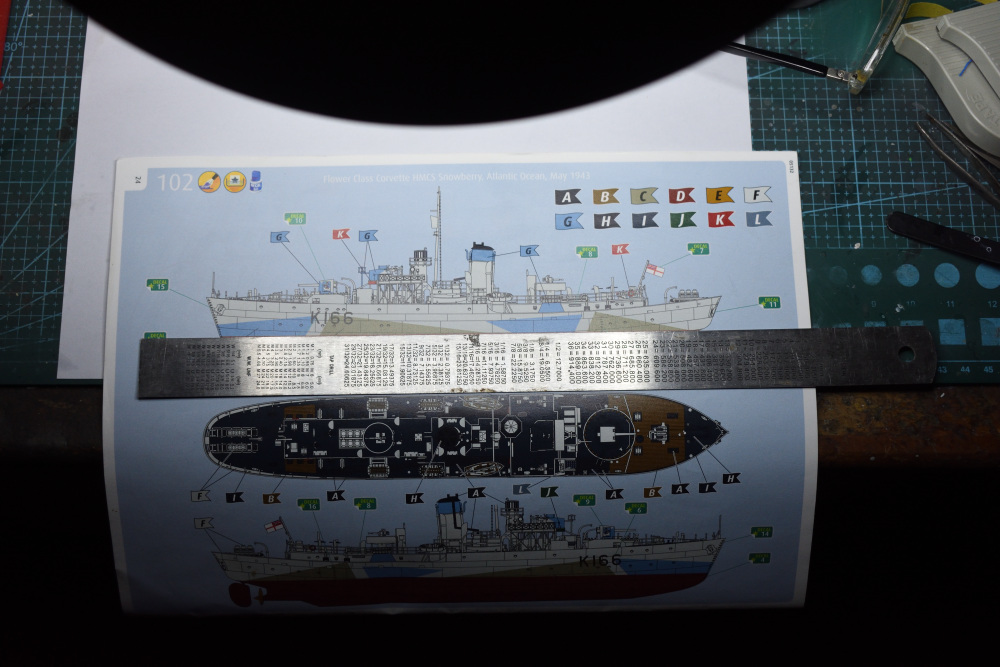
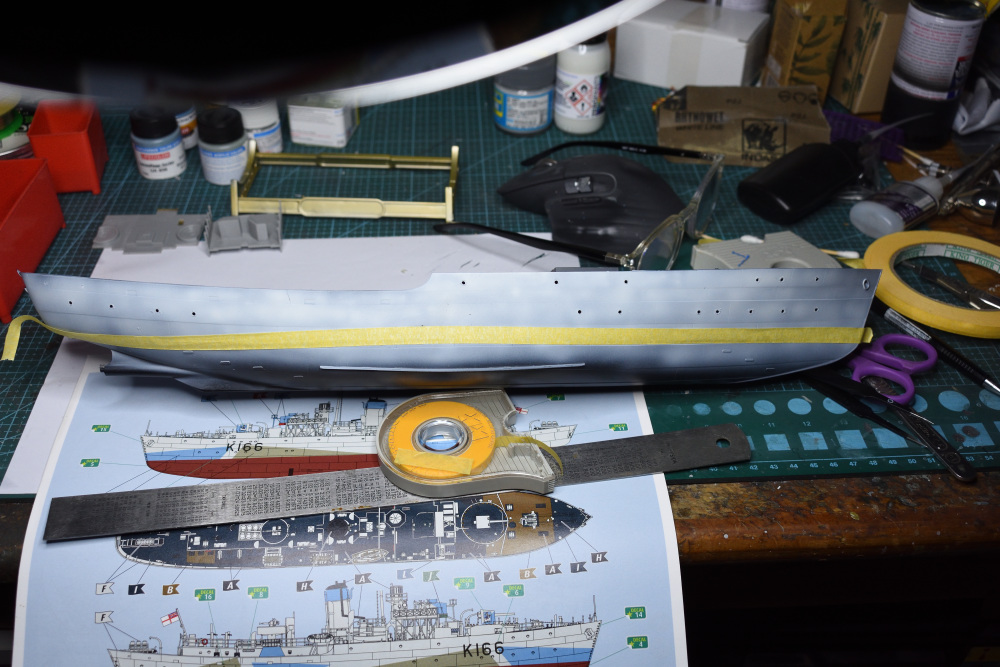
paddy
Well-known member
I think i have worked it out...if i draw a straight line in photo shop like this it looks spot on
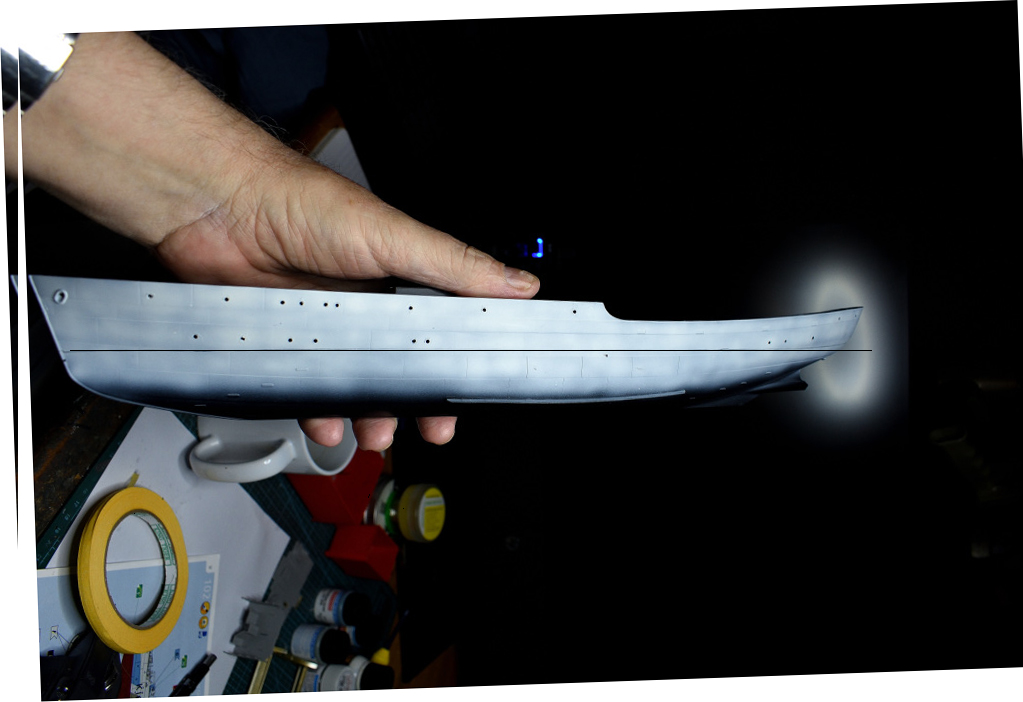
However it only looks like that from exactly that angle because the pic is 2D and the ship is 3D
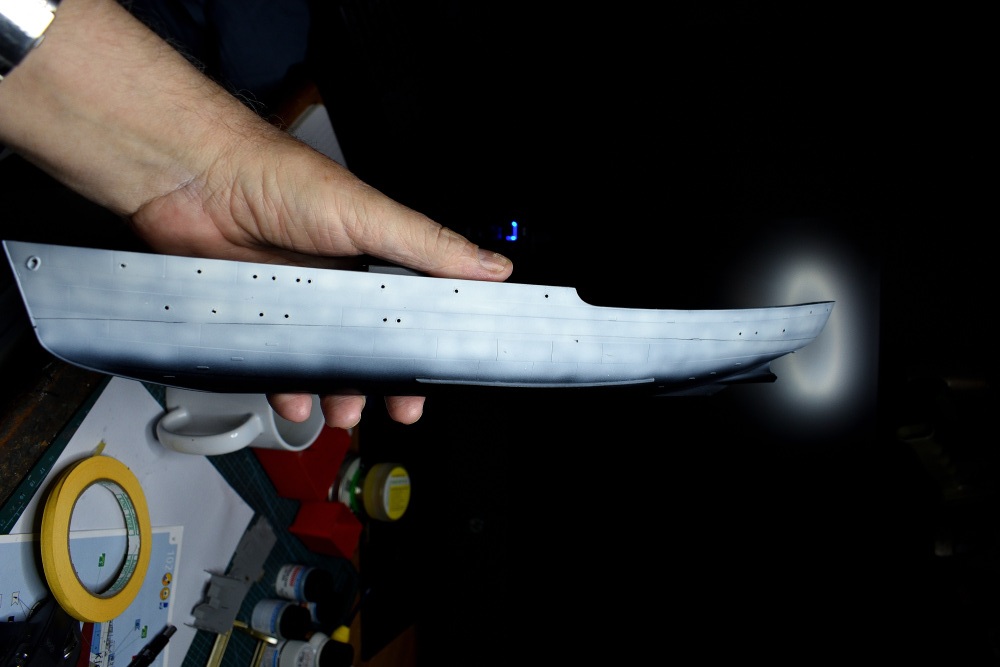
You cant really see it but here i have drawn a pencil line along the same line and now it looks straight so i will go with this
However it only looks like that from exactly that angle because the pic is 2D and the ship is 3D
You cant really see it but here i have drawn a pencil line along the same line and now it looks straight so i will go with this
Heavens Eagle
Well-known member
Yeah, getting the line straight on a ship like this is a pain in the can. I have the Arizona that is on the shelf of doom for various reasons. When I get ready to do the red bottom and black line I plan on setting it upside down, getting the bow and stern points for the line level, then I bought a tool that is made for some wood working thing, and will score along both sides.
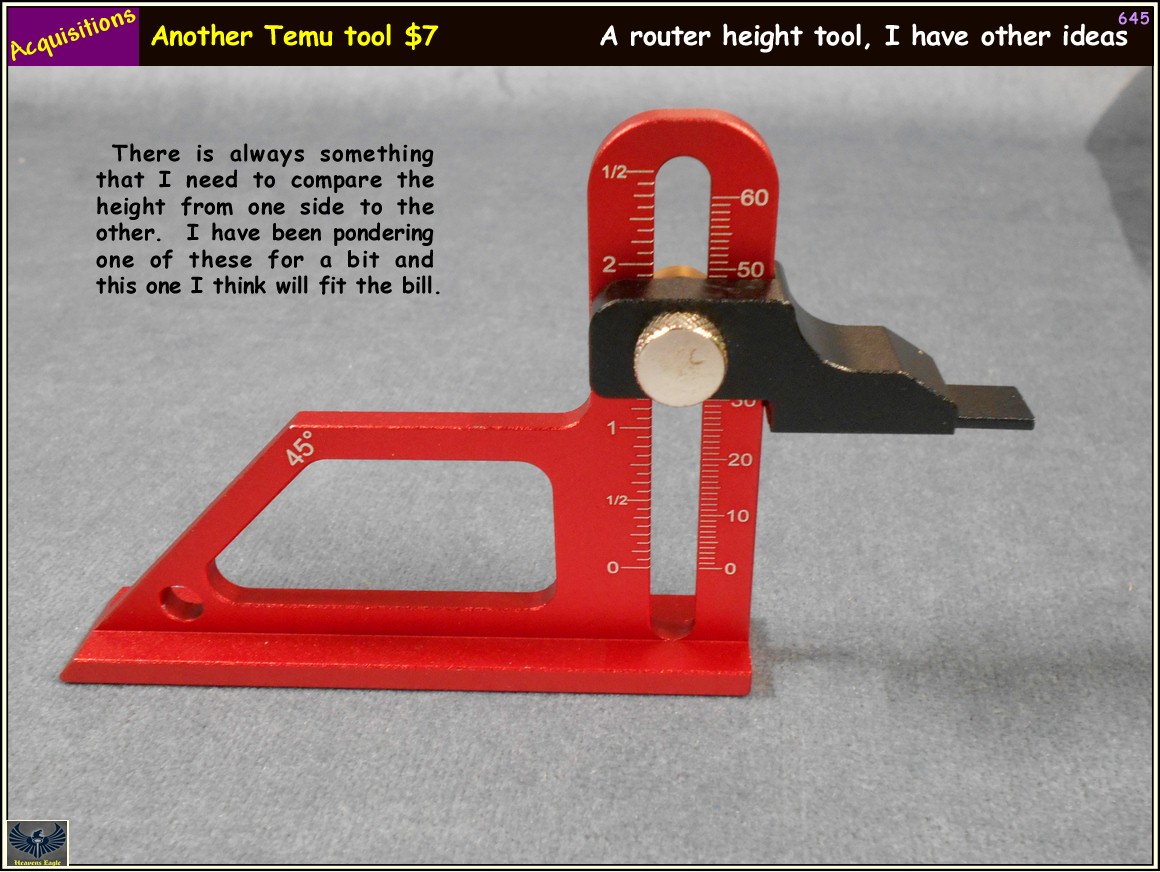

Good fix.

Steve Ski
Well-known member
It's called anal retentiveness, got it myself, lol. Looking great, Paddy, Ruck On.i have an engineers eyeI see things out of line everywhere and its really annoying. .
Ok, the back story would have helped on the front end, Amigo. She just got another rating, awesome, but her eyes still have the look of nervous to me.She has a private and commercial pilots licence and fly's the royal 737 with 1200 hours in her log book , the King is also a commercial pilot and has flown F5 and F16's .
Heavens Eagle
Well-known member
I am a former draftsman and also see misalignment on a lot of stuff. Twenty plus years at a drafting table and computer, I can see the detail differences without much effort. I call it my Mark 1c eyeball which also allows me to find centers on items fairly accurately and a few other details.
As to the Arizona kit, it is the 1/200 scale kit and is 36 inches long, so a bit more of a pain if not done right.
As to the Arizona kit, it is the 1/200 scale kit and is 36 inches long, so a bit more of a pain if not done right.
Last edited:
paddy
Well-known member
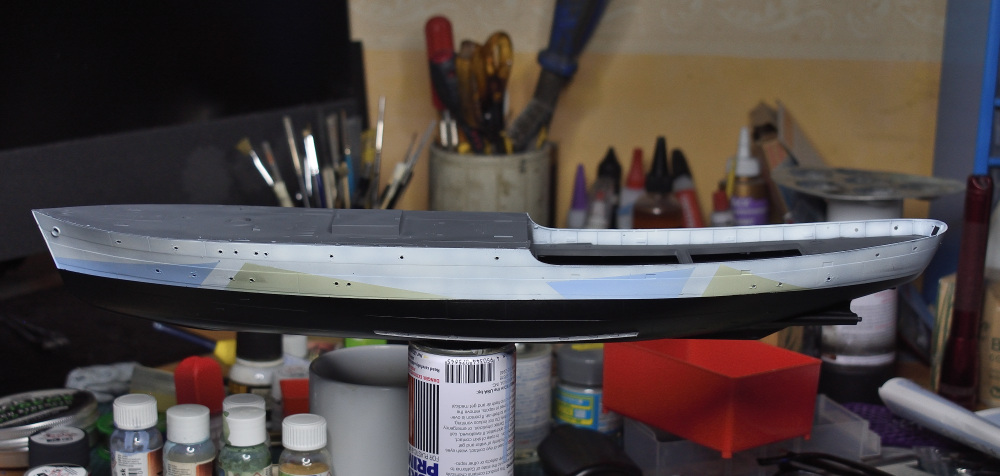
This build is a real departure from the safety of what I have learned over the years, Its quite exciting and I look forward to getting on with the build when I am doing other things. I need my brain working at 100% because trying to overlay the Revell instructions and the Pontus “instructions” ( i use the word loosely) is mind boggling, mainly because Pontus have replaced about 50% of the Revell parts so the Revell instructions are meaningless, and partly because a lot of the Revell parts have Pontus parts added so none of the location points match. This compounded by the lack of Pontus instructions on specific positioning of parts, for example does a wall sit on the floor or butt up against the side of the floor ? and so on. Painting is also a conundrum as most floors are dark grey and walls are white and as most superstructure in more than one level you have a grey white grey white sandwich going on with very small parts which means these parts have to be painted before assembly, nearly all walls are different colours either side. I have mixed the colours for the hull , The white is basic insignia white, the blue is a mix of azure blue and light blue and the green is sky and interior green ( all basic aircraft colours)
I did order the correct colours, but I couldn’t make head nor tail of the paint. These were life colour paints ? I looked them up on Google and the answer was use distilled water to thin them but that made mine coagulate instantly. I tried Tamiya thinners, Mr colour levelling thinners , Acetone and IPN, all made the paint go into a rubber goo. It took me an hour to strip and Clean the H&S and I lost patience with the paint. The odd thing was I opened another new bottle of this paint and there is like a rubber goo in the bottle. I fished some out on to a cloth and there was what looked like hairs in the paint but these were actually like rubber hairs, strange. Any way I used the bottles to colour match some self-mixed paints as above.
The only disappointment so far is not really being able to get on as every part has to be cross referenced to two sets of instruction to see if it’s used or replaced, there are literally thousands of PE parts all randomly numbered on 6 sprues and it can take 10 minutes just trying to find the right part, part number 10 might be on one sprue and No. 11 on another, next to part 789. So it’s hard to settle down and get on with things and make headway.
I always have issues with instructions; they never seem to be written by anyone who has actually built the model ? A huge advantage would be if Pontus supplied instructions for the complete build with Revell and their own parts so you didn’t need to merge 2 sets of instructions in your head.
As it is there is a great on line build as I previously mentioned where a guy has worked out the order of folds on the complicated PE parts for you and clearly shows the mix of parts for all sections……………but even then you need to double check as we are all fallible and he discarded the wooden floor on the bridge saying he had never seen a wooden floor on the bridge of a Corvette……he has now
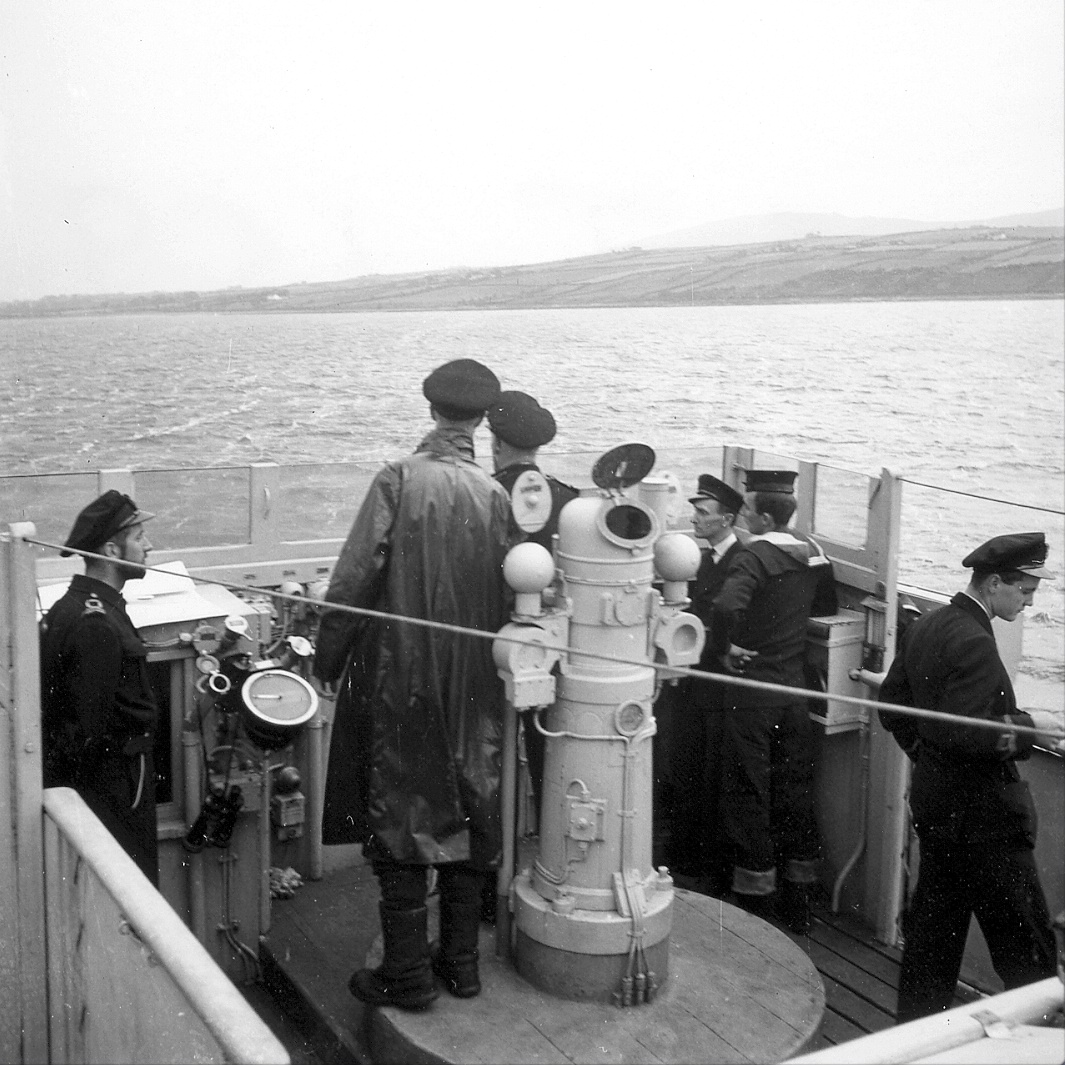
This afternoon i got an email from the paint supplier who tells me he sent the wrong paints....He sent Eastern approaches scheme instead of western approaches. ...... To late now so this is now officially an eastern approaches ship dealing with north Atlantic convoys to Russia and not western Atlantic to north America. Obviosly if i had know anything about ships i would have noticed....much like a ship builder might not notice the wrong factory colours on his first motorcycle Anyway i am not changing it now even though i found the paints unusable i did use them to colour match.
 ,
,
I did order the correct colours, but I couldn’t make head nor tail of the paint. These were life colour paints ? I looked them up on Google and the answer was use distilled water to thin them but that made mine coagulate instantly. I tried Tamiya thinners, Mr colour levelling thinners , Acetone and IPN, all made the paint go into a rubber goo. It took me an hour to strip and Clean the H&S and I lost patience with the paint. The odd thing was I opened another new bottle of this paint and there is like a rubber goo in the bottle. I fished some out on to a cloth and there was what looked like hairs in the paint but these were actually like rubber hairs, strange. Any way I used the bottles to colour match some self-mixed paints as above.
The only disappointment so far is not really being able to get on as every part has to be cross referenced to two sets of instruction to see if it’s used or replaced, there are literally thousands of PE parts all randomly numbered on 6 sprues and it can take 10 minutes just trying to find the right part, part number 10 might be on one sprue and No. 11 on another, next to part 789. So it’s hard to settle down and get on with things and make headway.
I always have issues with instructions; they never seem to be written by anyone who has actually built the model ? A huge advantage would be if Pontus supplied instructions for the complete build with Revell and their own parts so you didn’t need to merge 2 sets of instructions in your head.
As it is there is a great on line build as I previously mentioned where a guy has worked out the order of folds on the complicated PE parts for you and clearly shows the mix of parts for all sections……………but even then you need to double check as we are all fallible and he discarded the wooden floor on the bridge saying he had never seen a wooden floor on the bridge of a Corvette……he has now
This afternoon i got an email from the paint supplier who tells me he sent the wrong paints....He sent Eastern approaches scheme instead of western approaches. ...... To late now so this is now officially an eastern approaches ship dealing with north Atlantic convoys to Russia and not western Atlantic to north America. Obviosly if i had know anything about ships i would have noticed....much like a ship builder might not notice the wrong factory colours on his first motorcycle
Anyway i am not changing it now even though i found the paints unusable i did use them to colour match.
Last edited:
Heavens Eagle
Well-known member
Looks like you are swimming fine in the deep end there Paddy. That hull is looking good!

RichB
Well-known member
paddy
Well-known member
Thanks for that rich, no i hadn't seen that site, between you and me i am already tempted by the matchbox 1/72 model. its crude and ugly and get zero out of ten write ups but what a great challenge once you have learned the detail with this ...
Painted a few small parts last night., i made a bit of a mistake in using a grey primer which is too close the the insignia white top coat so its hard to see what you are doing
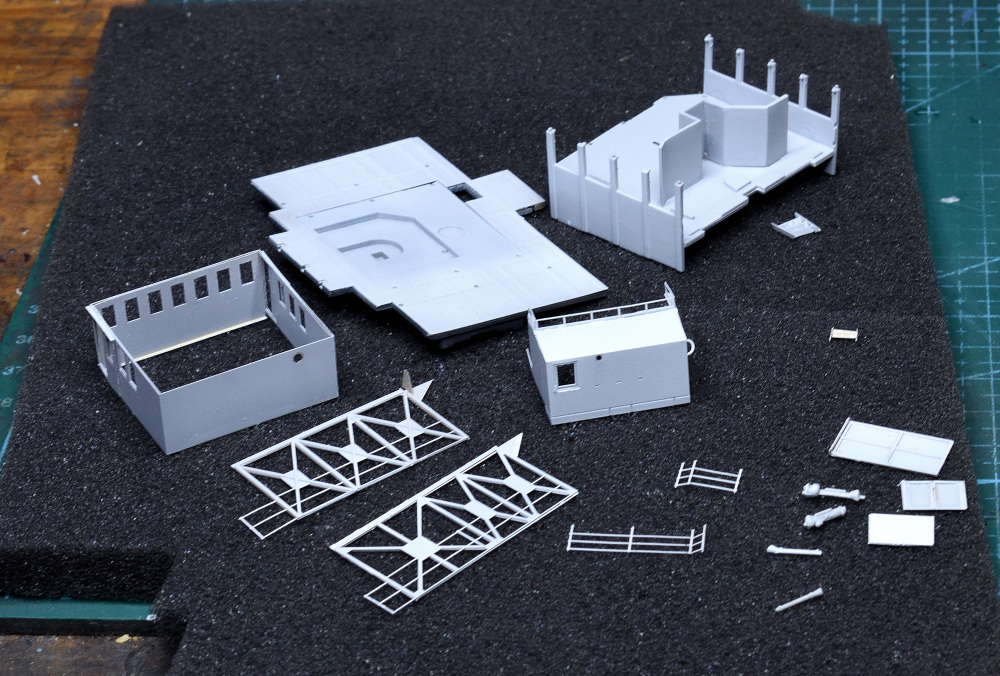
there are quite a few railings with canvas sheets over them as spray protection i guess. Not sure if the canvas would be White washed or more like doped linen with a brown tint , if i just do them white they look like sheet steel as there is no contrast with the rest of the superstructure.
I have put the H&S away now and resumed my search for Badger Krome spares. I know i am hyper critical and tend to bore people but i did work in product design and there are basics in the industry......As a whole it does an excellent job, i guess if you were a finger nail artist etc you might not find any better but i dont like the ergonomics of the thing, its not nice to hold or operate, i can quite explain why but i think it needs to be a bit thicker/substantial , maybe better for a woman's hand , it looks great in chrome and is thus easy clean but it needs some rubber pads or knurled areas to hold it firmly, its a slippery bugger The bowls are two narrow at the bottom making them difficult to clean, and the lids are a nightmare being metal on metal they are not user friendly to slip on and off as they stick if not absolutely square when positioned. Finally the bowl is to near the trigger and gets in the way of your finger.
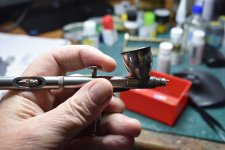 Badger Krome
 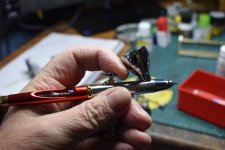 H&S
H&S
you cant see it in the picture but under my thumb on the badger is a plastic rest so you can grip the body.
You cant Fault the operation and results of the H&S but its capabilities are way more than even the best modeller would need and as such it has its annoying idiosyncrasies. As i say i am sure its perfect for fine detail work with Graphic artists but it carries a lot of baggage for a model maker who needs a small spray gun
Painted a few small parts last night., i made a bit of a mistake in using a grey primer which is too close the the insignia white top coat so its hard to see what you are doing
there are quite a few railings with canvas sheets over them as spray protection i guess. Not sure if the canvas would be White washed or more like doped linen with a brown tint , if i just do them white they look like sheet steel as there is no contrast with the rest of the superstructure.
I have put the H&S away now and resumed my search for Badger Krome spares. I know i am hyper critical and tend to bore people but i did work in product design and there are basics in the industry......As a whole it does an excellent job, i guess if you were a finger nail artist etc you might not find any better but i dont like the ergonomics of the thing, its not nice to hold or operate, i can quite explain why but i think it needs to be a bit thicker/substantial , maybe better for a woman's hand , it looks great in chrome and is thus easy clean but it needs some rubber pads or knurled areas to hold it firmly, its a slippery bugger
The bowls are two narrow at the bottom making them difficult to clean, and the lids are a nightmare being metal on metal they are not user friendly to slip on and off as they stick if not absolutely square when positioned. Finally the bowl is to near the trigger and gets in the way of your finger. Badger Krome H&Syou cant see it in the picture but under my thumb on the badger is a plastic rest so you can grip the body.
You cant Fault the operation and results of the H&S but its capabilities are way more than even the best modeller would need and as such it has its annoying idiosyncrasies. As i say i am sure its perfect for fine detail work with Graphic artists but it carries a lot of baggage for a model maker who needs a small spray gun
Let me know what you need. Hell for that matter, I'll send what I got.resumed my search for Badger Krome spares.
I have some lifecolor paints, don't know what I used them for or when. You think you got a bad batch?
Heavens Eagle
Well-known member
As to my H&S brushes, I have Iwata Mac valves on them for air control which with the quick connect on the end gives them a long handle. I guess I also hold them a bit further back and let the back part rest against my hand so that my fore finger is mostly straight. Never really thought about it until I took these photos. Turns out the Mac valve makes a great handle as well as works very nicely to regulate the airflow at the airbrush. Then add the coupler on the end of the hose and it is just comfortable. I no longer have my Krome as I gave it to my daughter along with all the parts.
When I clean these brushes I use a brush to work loose most of the paint inside the cup, then spray it out. I remove the cup and use a Q-tip or cotton swab to clean down in the opening. I reworked my Badger paint cups years ago as they were rather crude and the paint would not flow all the way down into the cavity. The H&S don't have that problem, though I do remember my hesitation on buying one back in the beginning due to the deep narrow opening down in the cup. Not an issue now.
The large cup is a bit more in the way though I never noticed it.
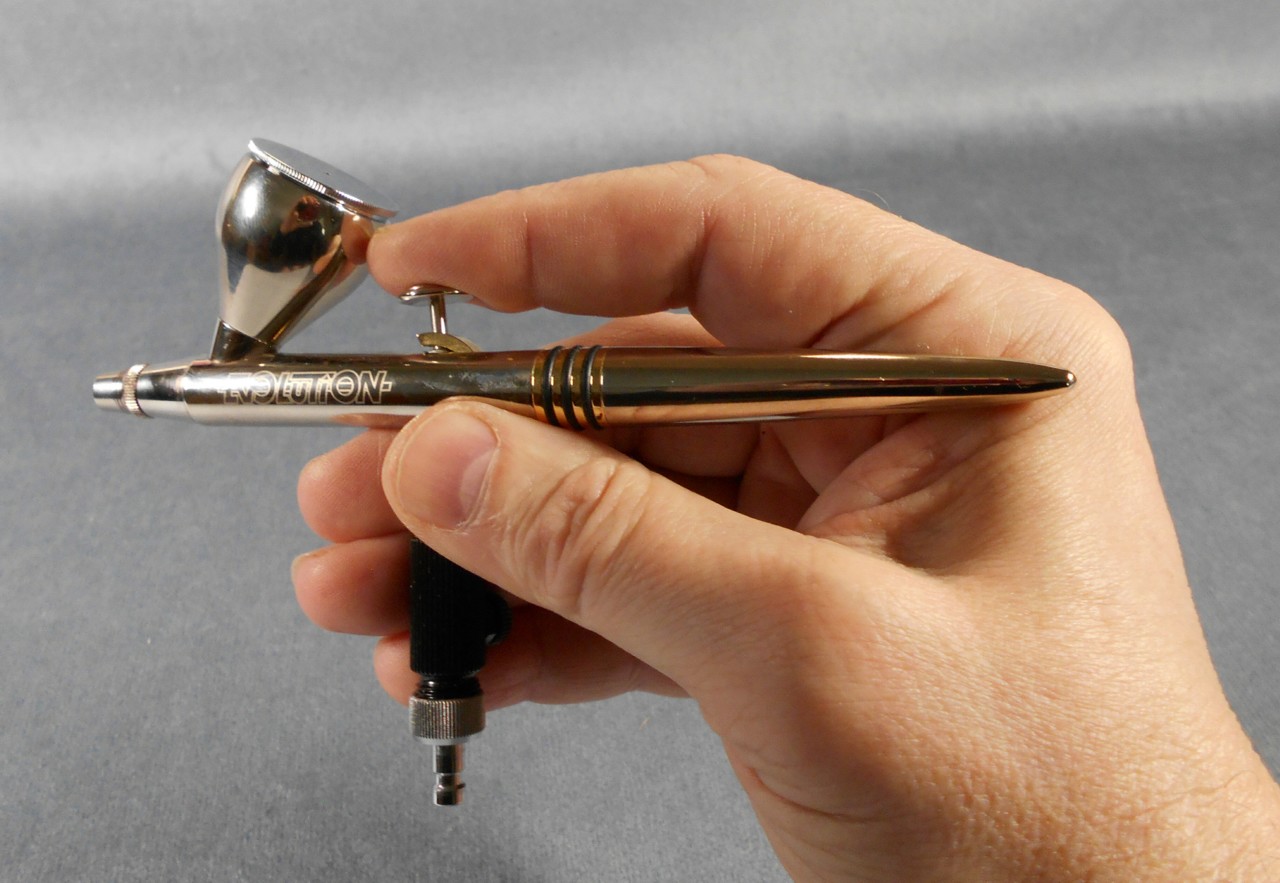
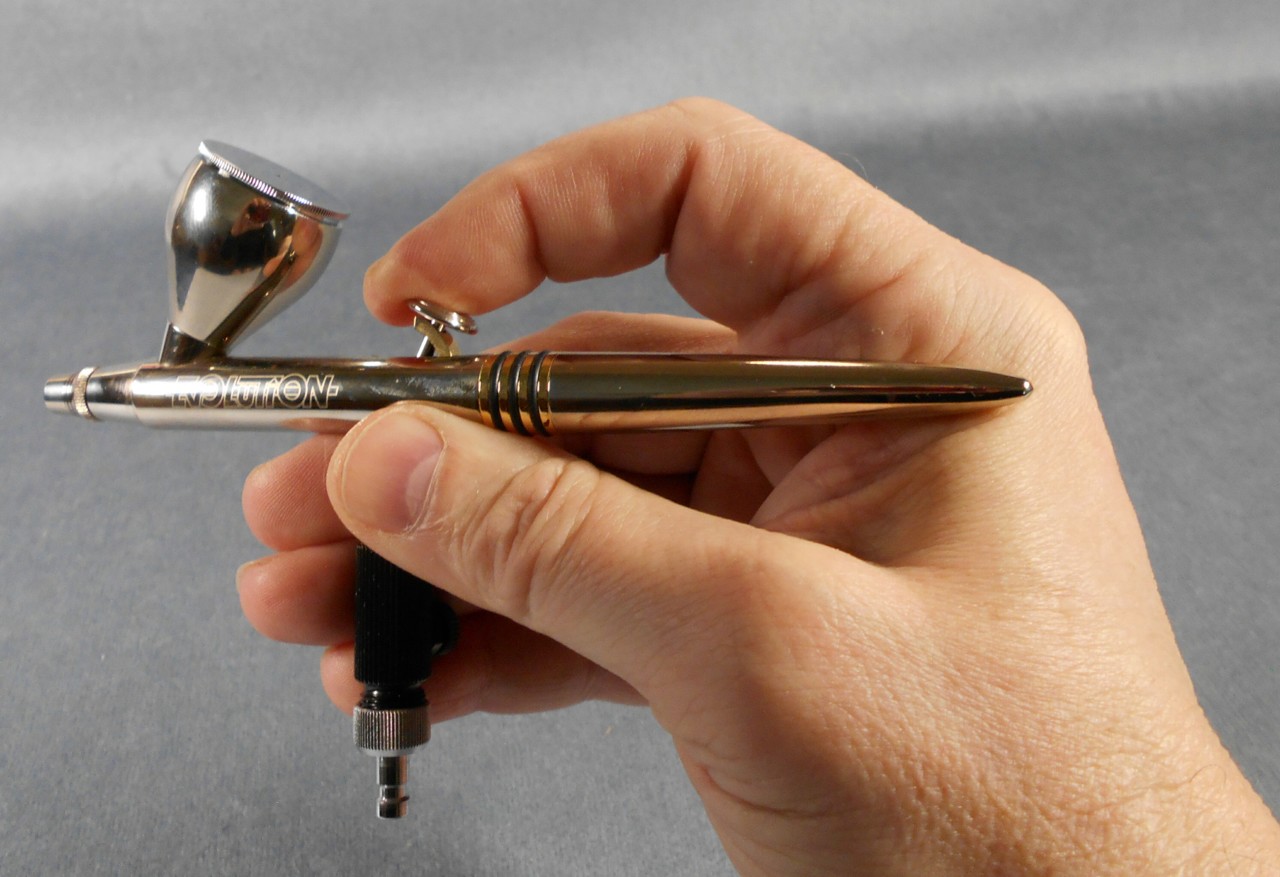
The small cup was never an issue
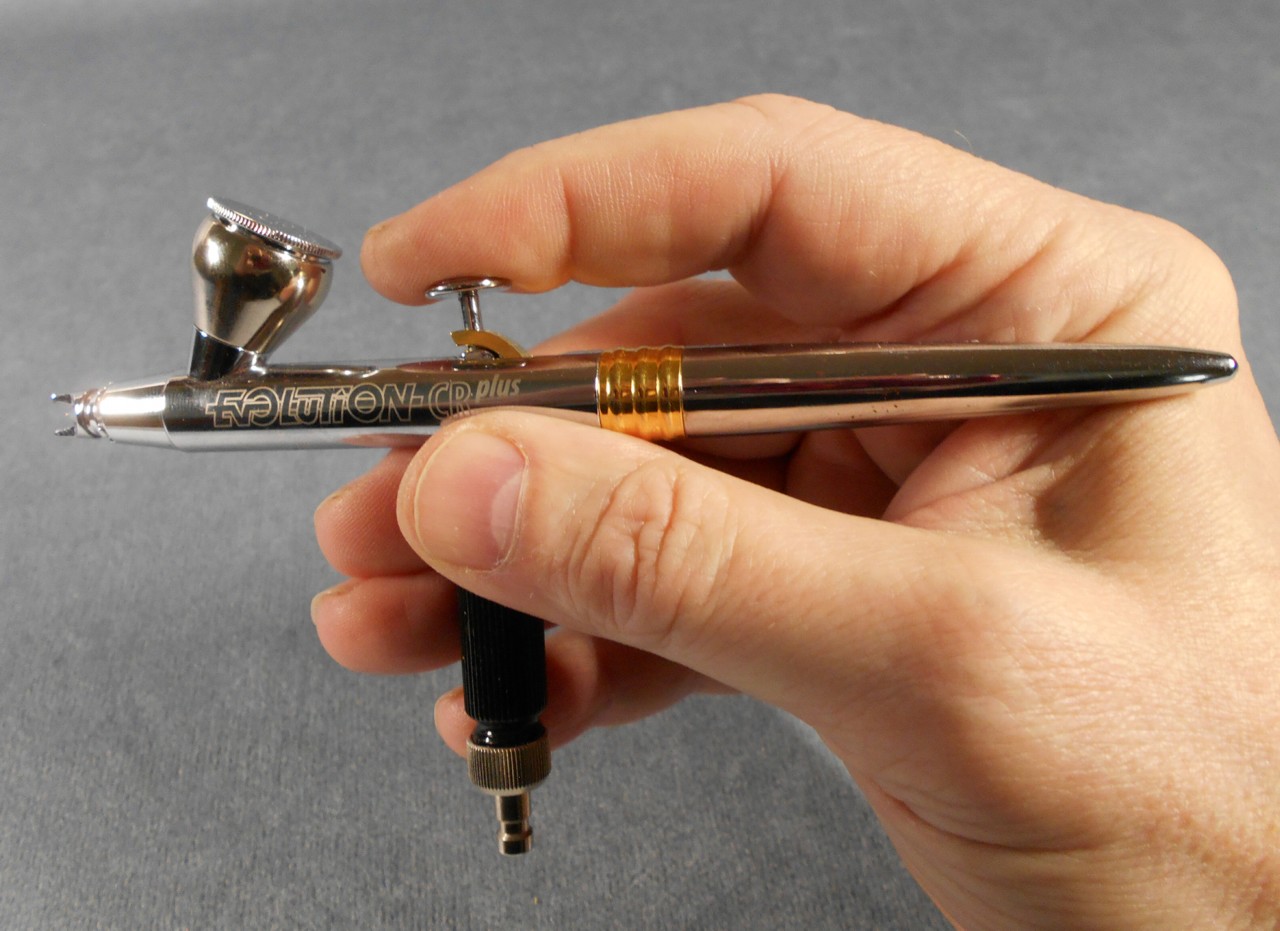
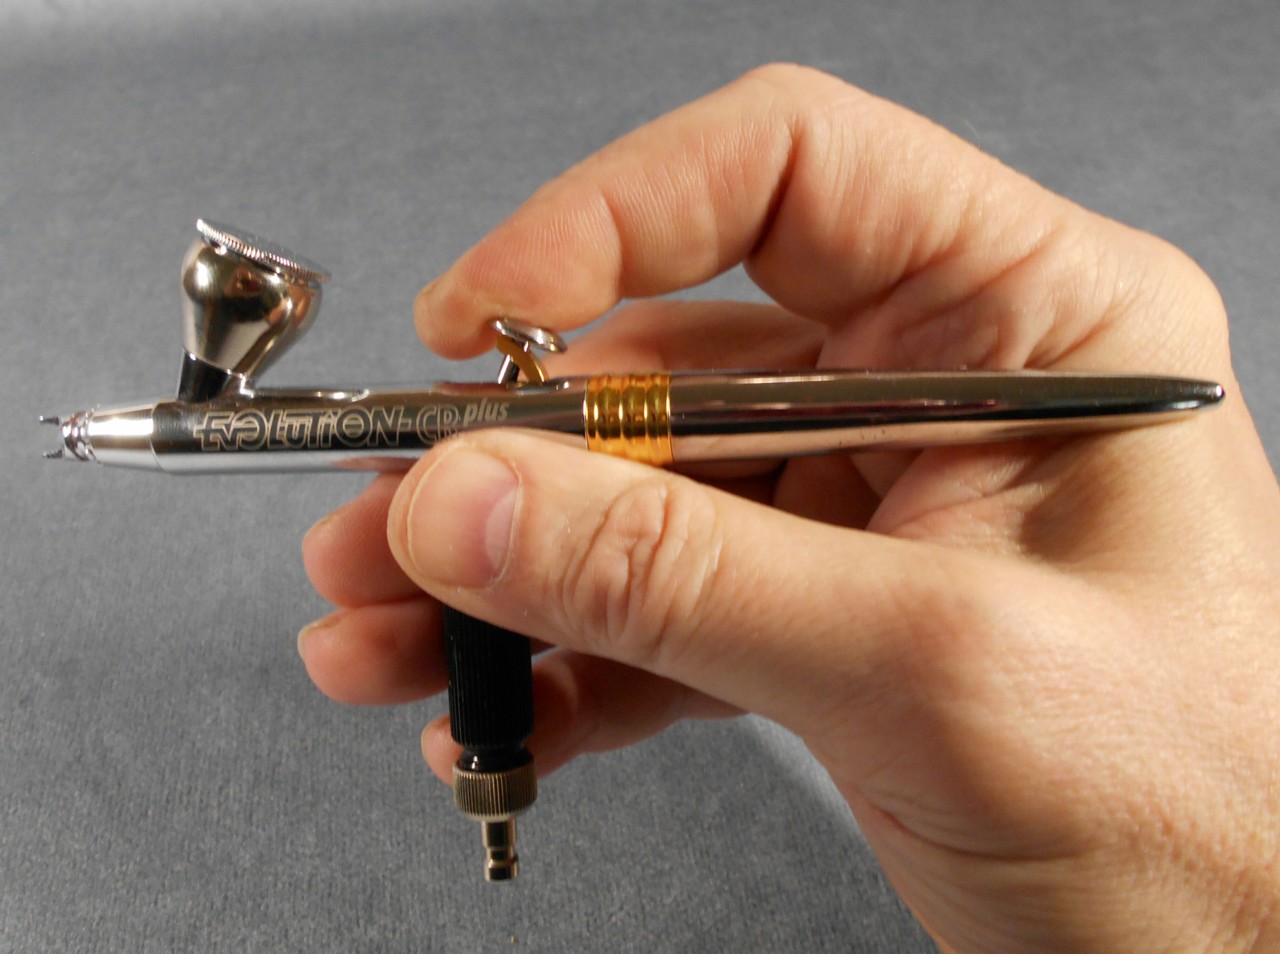
Never really paid much attention before, but the MAC air valve does give a very stable handle.
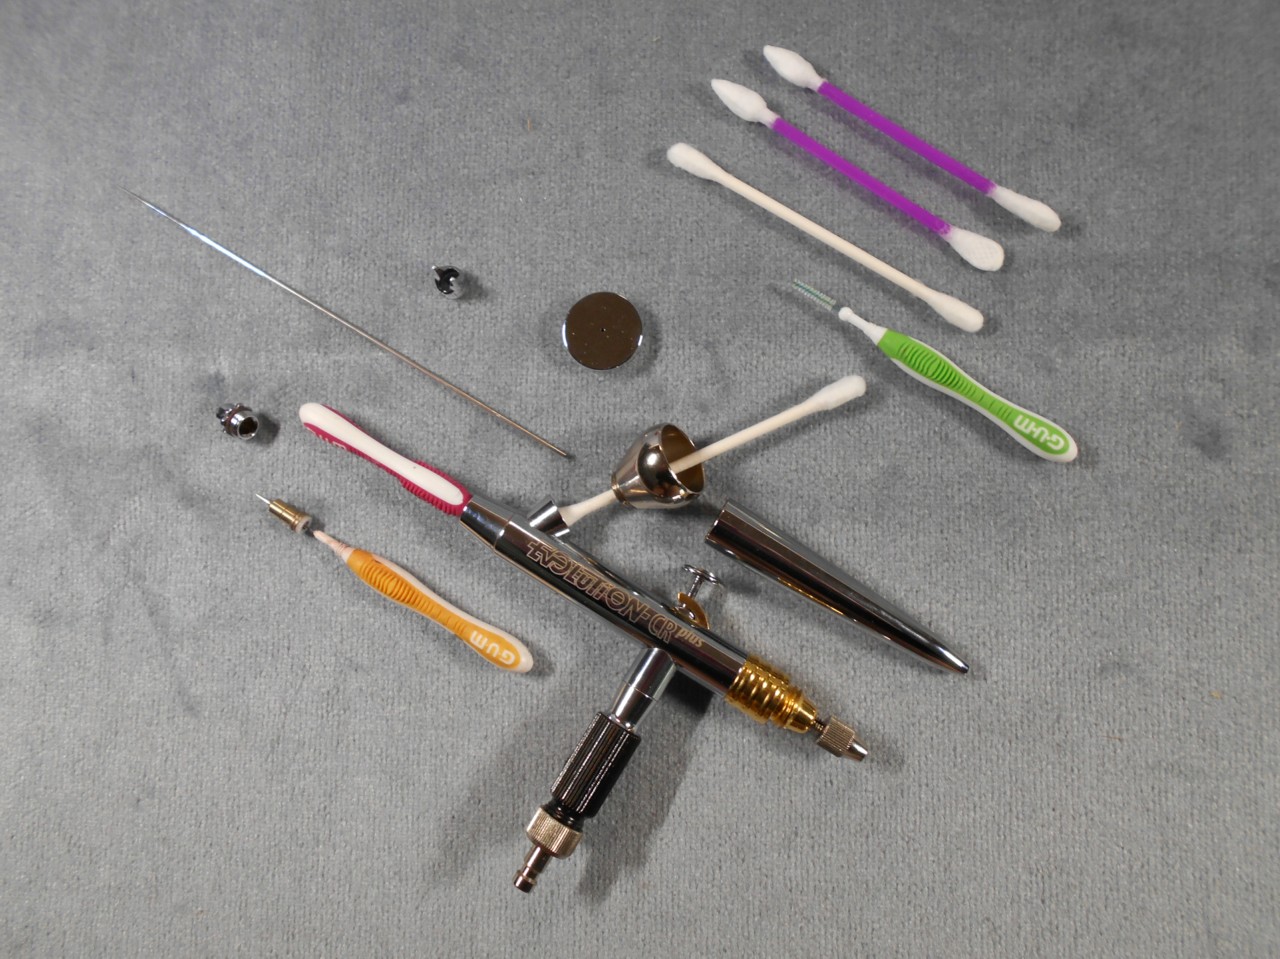
I use these items with solvents to clean it out at the end of a paint session.
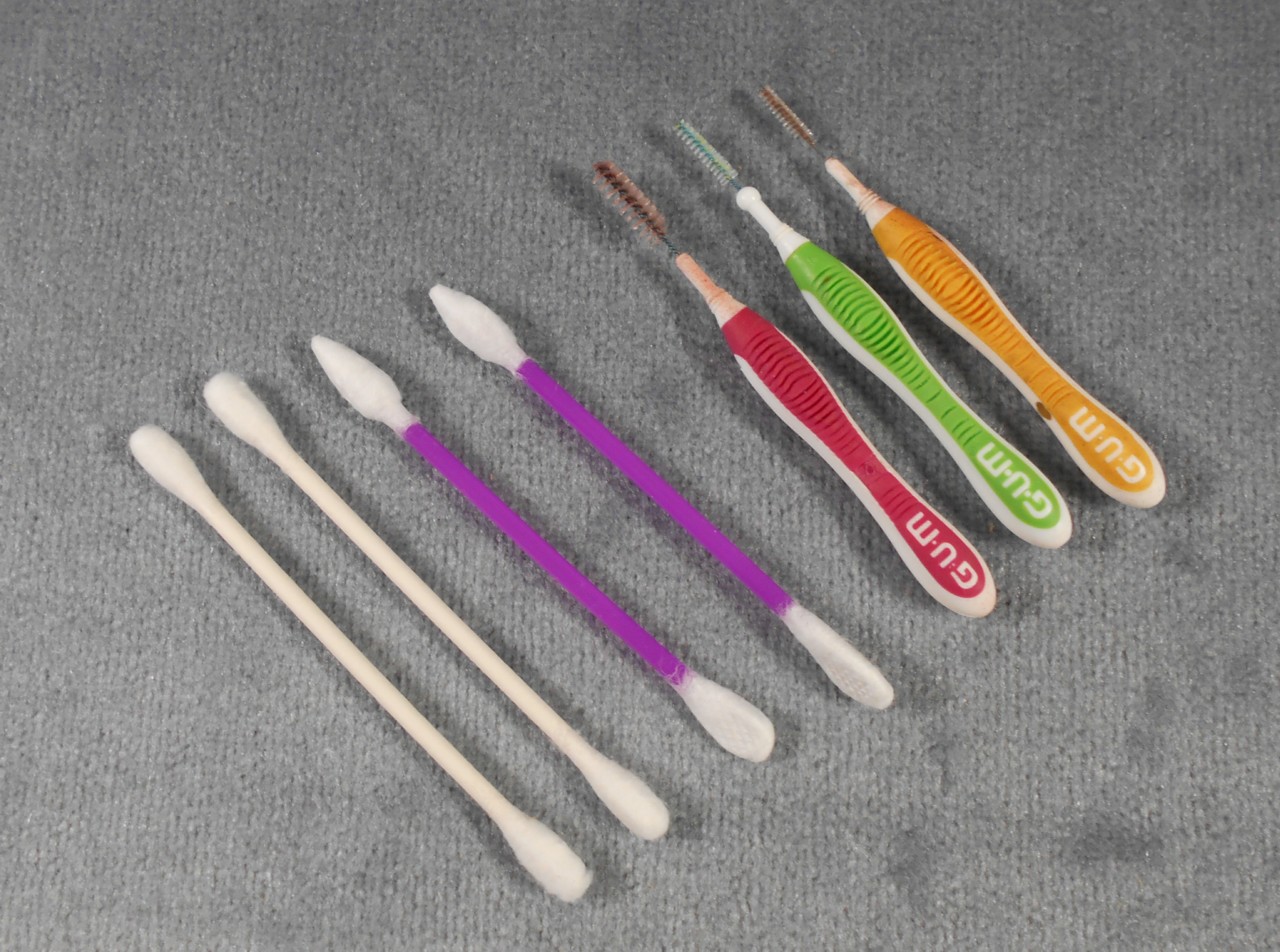
I modified the ends to remove the round ball to allow the parts to insert further into the body of the airbrush. With the red brush it goes back into the opening between the cup and the trigger breaking loose the paint there. When I remove it I blow into the trigger opening which blows the paint/solvent into the cup which can be cleaned with the cotton swab. The yellow brush fits into the tip and gets it cleaned out quite well except for the very tip. If needed a toothpick shaved to a very long sharp point will do the trick.
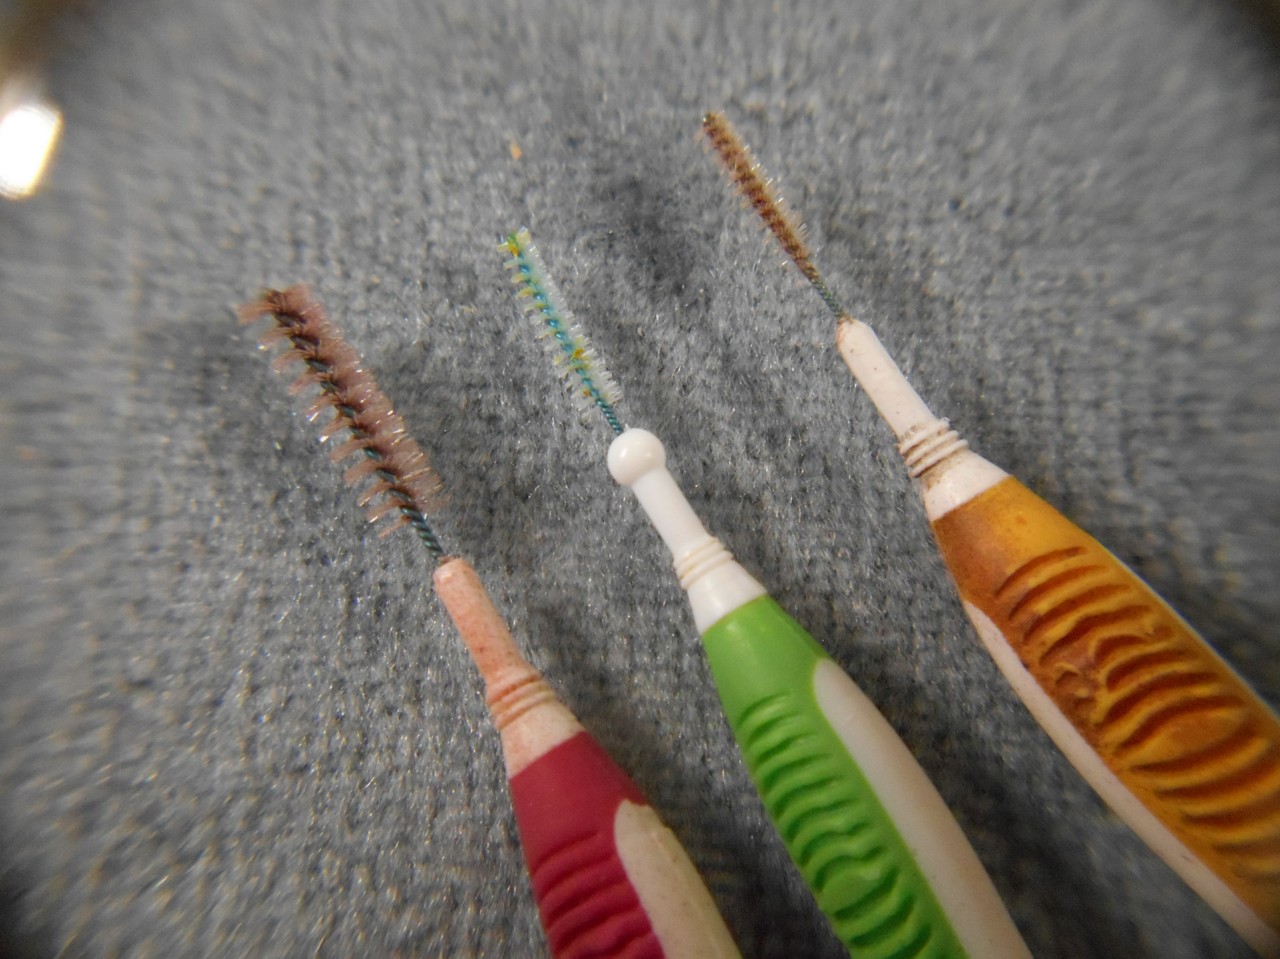
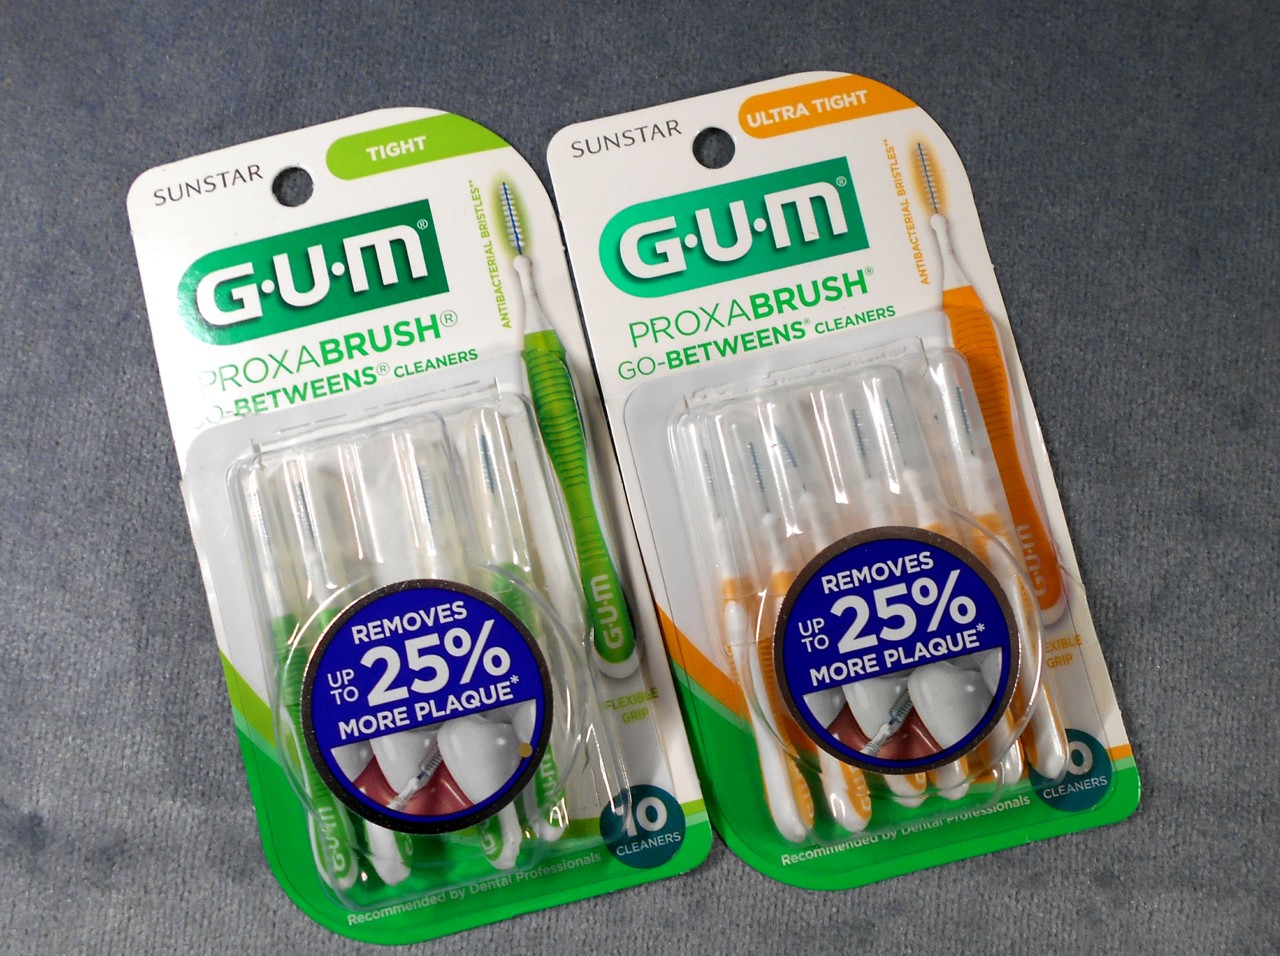
In the US you can find the brushes just about anyplace where you would buy a tooth brush. They are fairly cheap and come in packs of 10 and last quite well even with lacquer thinners.
This probably could have been done in a separate post, and I might make a tool time post for easy reference. Hope it helps Paddy.
When I clean these brushes I use a brush to work loose most of the paint inside the cup, then spray it out. I remove the cup and use a Q-tip or cotton swab to clean down in the opening. I reworked my Badger paint cups years ago as they were rather crude and the paint would not flow all the way down into the cavity. The H&S don't have that problem, though I do remember my hesitation on buying one back in the beginning due to the deep narrow opening down in the cup. Not an issue now.
The large cup is a bit more in the way though I never noticed it.
The small cup was never an issue
Never really paid much attention before, but the MAC air valve does give a very stable handle.
I use these items with solvents to clean it out at the end of a paint session.
I modified the ends to remove the round ball to allow the parts to insert further into the body of the airbrush. With the red brush it goes back into the opening between the cup and the trigger breaking loose the paint there. When I remove it I blow into the trigger opening which blows the paint/solvent into the cup which can be cleaned with the cotton swab. The yellow brush fits into the tip and gets it cleaned out quite well except for the very tip. If needed a toothpick shaved to a very long sharp point will do the trick.
In the US you can find the brushes just about anyplace where you would buy a tooth brush. They are fairly cheap and come in packs of 10 and last quite well even with lacquer thinners.
This probably could have been done in a separate post, and I might make a tool time post for easy reference. Hope it helps Paddy.
Similar threads


- Replies
- 2
- Views
- 427
