-
Modelers Alliance has updated the forum software on our website. We have migrated all post, content and user accounts but we could not migrate the passwords.
This requires that you manually reset your password.
Please click here, http://modelersalliance.org/forums/login to go to logon page and use the "Forgot your Password" option.
You are using an out of date browser. It may not display this or other websites correctly.
You should upgrade or use an alternative browser.
You should upgrade or use an alternative browser.
PART 6F COMPLETED BUILD Mk7c/41 U-Boat Diorama 1945 [Revell #05045 - 1/72]
- Thread starter Brokeneagle
- Start date
Brokeneagle
Master at Arms
Thank you to Cheyenne, Randy, Hood and Luiz.
I'm glad that you guys think the water is going OK as I really needed confirmation because I was a little unsure. I have finished painting the Titanium white on the weekend so I will post again soon and see if you are still happy with the look, as you guys are my best measuring stick for this.
Ian.
Brokeneagle
Master at Arms
B)
I now have a flashy new ribbon at the bottom of my posts
Thank you to the staff for your consideration - I appreciate that, means a lot to me.
Thank you.
:dance
Hopefully I can add to it with a Sci-Fi build ribbon
I will be on to the Karl dio to finish the paint after the uboat but I had better get my head down as time is running out.
Ian.
UPDATE - WHITE HIGHLIGHTS AND DARK AREAS FINISHED.
![IMG_0983[1].jpg IMG_0983[1].jpg](https://modelersalliance.org/attachments/img_0983-1-jpg.128899/)

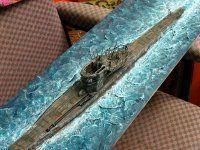


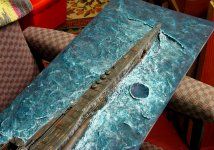
I have finished off the white highlights for the wave tops and churned water areas though after I have added the gloss I will need to consider further detail painting with a fine brush to add more froth patterns to the edge and rear.
Currently I am working on the gloss clear (Next update).
I now have a flashy new ribbon at the bottom of my posts
Thank you to the staff for your consideration - I appreciate that, means a lot to me.
Thank you.
:dance
Hopefully I can add to it with a Sci-Fi build ribbon
I will be on to the Karl dio to finish the paint after the uboat but I had better get my head down as time is running out.
Ian.
UPDATE - WHITE HIGHLIGHTS AND DARK AREAS FINISHED.


I have finished off the white highlights for the wave tops and churned water areas though after I have added the gloss I will need to consider further detail painting with a fine brush to add more froth patterns to the edge and rear.
Currently I am working on the gloss clear (Next update).
Last edited:
Freakin' awesome Ian!!!!!
That looks so great! It reminds me of Pruneau's U-505 from the 80s. Damn, you never cease to amaze me. I love your stuff!


Bob
That looks so great! It reminds me of Pruneau's U-505 from the 80s. Damn, you never cease to amaze me. I love your stuff!
Bob
Adam Baker
Active member
Wow, just amazing work on that water!!
Brokeneagle
Master at Arms
Freakin' awesome Ian!!!!!
That looks so great! It reminds me of Pruneau's U-505 from the 80s. Damn, you never cease to amaze me. I love your stuff!


Bob
Thanks Bob
that's a great compliment, as his U505 dio has been my inspiration for this. I mentioned at the start of the post that I have wanted to capture his brilliant water effect for 20 years but didn't have the 'guts' to give it a go until now.
He mastered the color so well that I followed his mix advice from the VLS article in the super dios book. He really has a knack for color as the addition of Burnt Umber took it from a arty blue to a believable ocean blue.
Thanks lEWIS - i suppose that this build is really my tribute to his masterclass work on u505 - STILL MY FAVOURITE UBOAT DIO OF ALL TIME.


Ian.
Brokeneagle
Master at Arms
Kreighshoer
Active member
ineed, lewis' U-505 dio! your dio is indeed on the same level!
pretty cool stuff!
pretty cool stuff!

Sherman 18
Master at Arms
LOVE IT!
Looks great!

Looks great!


I eagerly await the next update...
Regards,
Regards,
Brokeneagle
Master at Arms
Glad you like the progress
- and Hood, you told me just what I wanted to hear as critique, as I am treating this as a 3d canvas - the drama is everything - glad you see it the way I am intending. :v
I am working on the water runoff over the ballast tanks and water runoff and froth on the wooden deck. Slowly getting there - rigging is next.
Got my Archer decals Kreigsmarine flags yesterday - woohoo.
Replacing the barrells with Brass tube myself.
Still trying to find the right figures.
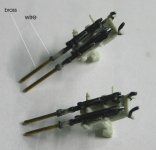
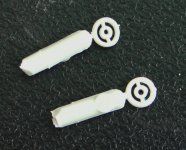
Ian.
Last edited:
Brokeneagle
Master at Arms
STAGE 10 UPDATE - WATER AND RIGGING
Hello again,
i have been working further on the water effects for my UBOAT hoping that I can finish before the Australian Model Expo in June but i think I have missed that boat.
I have added the rigging in wire, and cotton for the lower side rails, to help them look saggy on one side as I have seen this effect in a number of u-boat photos (I think due to wear and damage).
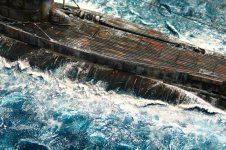
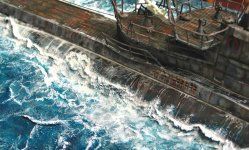
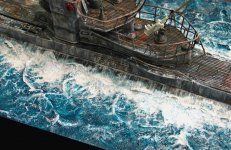
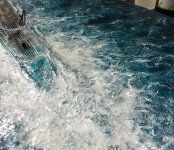
The water was further improved with layers of Tamiya clear acrylic mixed with MIG white pigment - in between this I used white oils. I finished with Tamiya white gloss acrylic and touch ups with white oil paint.
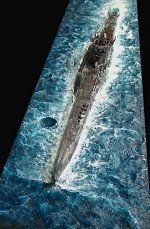
I used various mixes of blue and white with clear to achieve soft and hard white water with depth.
I also added all the water streaking and crazing on the wooden deck, around the rails and pouring down the sides. I then added the water spilling from the deck overflow outlet along the top length of the ballast tanks and hand streaked all of the crazy water patterns as the last of the water empties out after a large wave has crashed over the wooden deck.

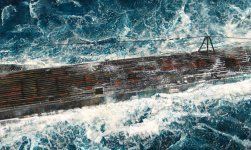
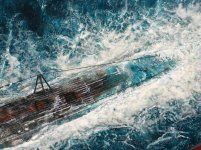
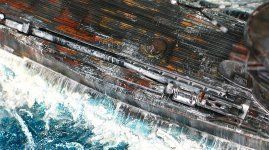
I have started work on the barrels for the weapons as all of the barrels are bent or broken.
* Please also note that when building this kit you must be very careful cutting away the elevation wheels for the guns. I have included a photo above of how I cut them from the sprue to stop the distortion effect when trying to trim them on both sides (on the sprue). I found that I had to cut at the end where the wheel touched the sprue, then cut away the other end with the sprue and trim later - something to do with the Revell plastic.
My final detail effects were the 'wind blown' froth on the forward nose decking, simulating small amounts of white water that is being blown by the wind as the U boat travels forward through another wave. As well as this I have tried to simulate the spidery froth paterns that are left at the edges of the churned -up white water. I have painted these over the cloudy white clear ares but as I stated earlier the photos really don't capture my work properly so I am disappointed that I can't get them to photograph properly.
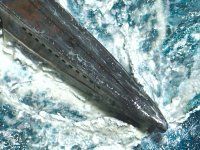
The water was extremely difficult to photograph and kept reflecting the light so that my overall photos just show the white water as brilliant white and hide the subtle water effects. Please refer to the detail photos for water effects but even these do not capture it correctly.
Where the water is so white that you can't see any detail the light has blown out that part of the shot.
The water looks 50 % better when you can see it in person. I will have to correct this for my finished photos.
I hope you can see the difference since my last post, as I have spent another 3 weeks adding this stage of paint with a detailed brush.
Last edited:
Brokeneagle
Master at Arms
50% better??hmy: That must be REALLY good! I love the foam!!
:drinks
Thanks Mike. It really does look better in the flesh without all the reflecting white.
Ian.
Similar threads
- Replies
- 4
- Views
- 938
- Replies
- 8
- Views
- 1K
- Replies
- 2
- Views
- 1K
- Replies
- 50
- Views
- 5K

 I can't wait to see the finished thing