-
Modelers Alliance has updated the forum software on our website. We have migrated all post, content and user accounts but we could not migrate the passwords.
This requires that you manually reset your password.
Please click here, http://modelersalliance.org/forums/login to go to logon page and use the "Forgot your Password" option.
You are using an out of date browser. It may not display this or other websites correctly.
You should upgrade or use an alternative browser.
You should upgrade or use an alternative browser.
Modelcollect E75 Tiger III Complete!
- Thread starter Iron Mike
- Start date
Iron Mike
Master At Arms And Resident Curmudgeon
Thanks guys! Not much bench time of late, but I did get the Friulmodel tracks assembled.
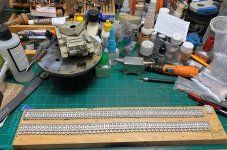
These are a definite improvement over the kit parts and worth the trouble.
Bath time!

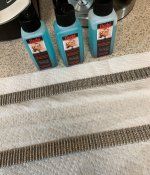
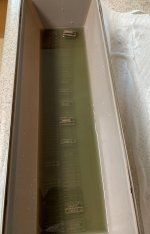
This is the fourth set of tracks I've blackened with these bottles of Uschi blackener. About fifteen minutes later,
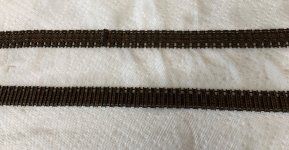
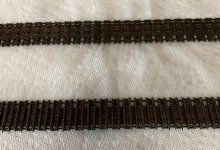
After drying overnight
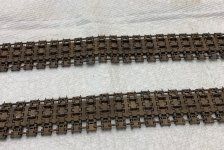
Ready for burnishing the wear pattern with a fiberglass pencil.
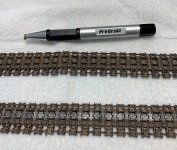
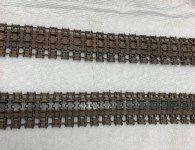
Followed by a mixture of Vallejo pigments, chopped scenic grass and rope fibers, fixed with mineral spirits.

I'll let this dry while I work on the hull. Much more to come, thanks for coming by!


These are a definite improvement over the kit parts and worth the trouble.
Bath time!


This is the fourth set of tracks I've blackened with these bottles of Uschi blackener. About fifteen minutes later,


After drying overnight

Ready for burnishing the wear pattern with a fiberglass pencil.


Followed by a mixture of Vallejo pigments, chopped scenic grass and rope fibers, fixed with mineral spirits.

I'll let this dry while I work on the hull. Much more to come, thanks for coming by!

centaur567
Well-known member
Like guys with big shoes. The size of the track must fit the size of the gun. My rifle is for shooting and my gun is for fun. Gary S. XLV MMXXIV
Iron Mike
Master At Arms And Resident Curmudgeon
Thanks guys! I bought that set of tracks from CRM Hobbies at a Kansas City show way back when, not realizing they were wrong for every kit I had.  I guess this was meant to be.
While I waited for the tracks to dry, I started working on some stuff for the vehicle. I've seen other modelers use a purloined ladder to make mounting and dismounting easier, you know something found along the way that gives you that "I could use that!" moment. I found a couple sticks of brass tube and started playing with dimensions until I found one I thought would work. I annealed the tubing to make it easier to bend, cut it to length and used my PE roller to make the radius. I cut three rungs and broke out the honeycomb jig and the Hakko. Using lots of flux and silver solder, it practically fell together. Guess I did pay attention in shop class.

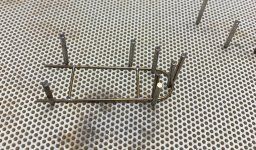

And here it is!

After it cools, I'll dress up the joints a little and get it primed and painted.
Much more to come, thanks for coming by!

 I guess this was meant to be.
 While I waited for the tracks to dry, I started working on some stuff for the vehicle. I've seen other modelers use a purloined ladder to make mounting and dismounting easier, you know something found along the way that gives you that "I could use that!" moment. I found a couple sticks of brass tube and started playing with dimensions until I found one I thought would work. I annealed the tubing to make it easier to bend, cut it to length and used my PE roller to make the radius. I cut three rungs and broke out the honeycomb jig and the Hakko. Using lots of flux and silver solder, it practically fell together. Guess I did pay attention in shop class.


And here it is!
After it cools, I'll dress up the joints a little and get it primed and painted.
Much more to come, thanks for coming by!

Awesome job Mike! 

Brokeneagle
Master at Arms
Yeah Baby!
Rhino
Super Moderator
As a professional, I am impressed with your bitty soldering results! Very nicely done sir!
We are coasting (and celebrating) this weekend. Boomfest is coming up in August, so we will get our AAA on that evening.


 vinton.info
The Blue Angels are flying their new, noisier and faster E-model Hornets in KC this weekend! I hesitate to expose Teresa to that much heat and the mile-long walk you always have to make at an airshow.
 kcairshow.org
We are coasting (and celebrating) this weekend. Boomfest is coming up in August, so we will get our AAA on that evening.


Boom Fest / Boomtown - Vinton Unlimited
Join us for the Boom-Fest Arts & Craft Festival! Get ready for a day of creativity, community, and fun activities! Boom-Fest is coming to downtown Vinton on August 23, 2025 and you're invited to celebrate the talents of local and regional artists, crafters, and vendors. Shop unique handmade...

Home - Garmin KC Air Show 2023
KC's biggest end-of-summer party is scheduled for August 19-20, 2023 at New Century AirCenter featuring the U.S. Navy Blue Angels


 (in German)!


