
-
Modelers Alliance has updated the forum software on our website. We have migrated all post, content and user accounts but we could not migrate the passwords.
This requires that you manually reset your password.
Please click here, http://modelersalliance.org/forums/login to go to logon page and use the "Forgot your Password" option.
You are using an out of date browser. It may not display this or other websites correctly.
You should upgrade or use an alternative browser.
You should upgrade or use an alternative browser.
MFH Matra MS11 F1
- Thread starter paddy
- Start date

paddy
Well-known member
You couldn't build a MFH model with a dremel even if you could slow it down. Its just to physically big and clunky . I have three arroxmax drills, a screwdriver and a high speed engraver so the full set  Battery life is not a problem, i doubt i have used the engraver (which i use as a grinder) for a year and i just checked and its still fully charged. They all charge of a USB on my bench so are charged in use anyway with auto stop when charged Because of the small dia you can get it at very shallow angles.
. .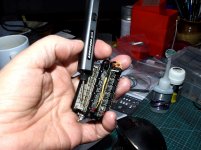
Battery life is not a problem, i doubt i have used the engraver (which i use as a grinder) for a year and i just checked and its still fully charged. They all charge of a USB on my bench so are charged in use anyway with auto stop when charged Because of the small dia you can get it at very shallow angles.. .


Heavens Eagle
Well-known member
Different folks, different experience, different skills. It is whatever you are used to.You couldn't build a MFH model with a dremel even if you could slow it down. Its just to physically big and clunky . I have three arroxmax drills, a screwdriver and a high speed engraver so the full set
. .View attachment 190989
That is one fine engine build Paddy!

Paddy you should try one of those scaled working motors that actually fires up. I mean yours already look like they would turn over, might as well ad some spark to them!
Seen them running on youtube, if it's real or not I don't know.
Must be real, Adam Savage did one.
Haven't looked at the full video, don't think that one runs on gas
Must be real, Adam Savage did one.
Haven't looked at the full video, don't think that one runs on gas
Last edited:
paddy
Well-known member
about as far as i can go without a chassis to check the mounting points with. I need to drill them on to the engine so it needs to be sitting in the chassis to do that. loads more to do to the engine but this is as far as you can go before the engine mounts disappear behind a wall of ancillaries.
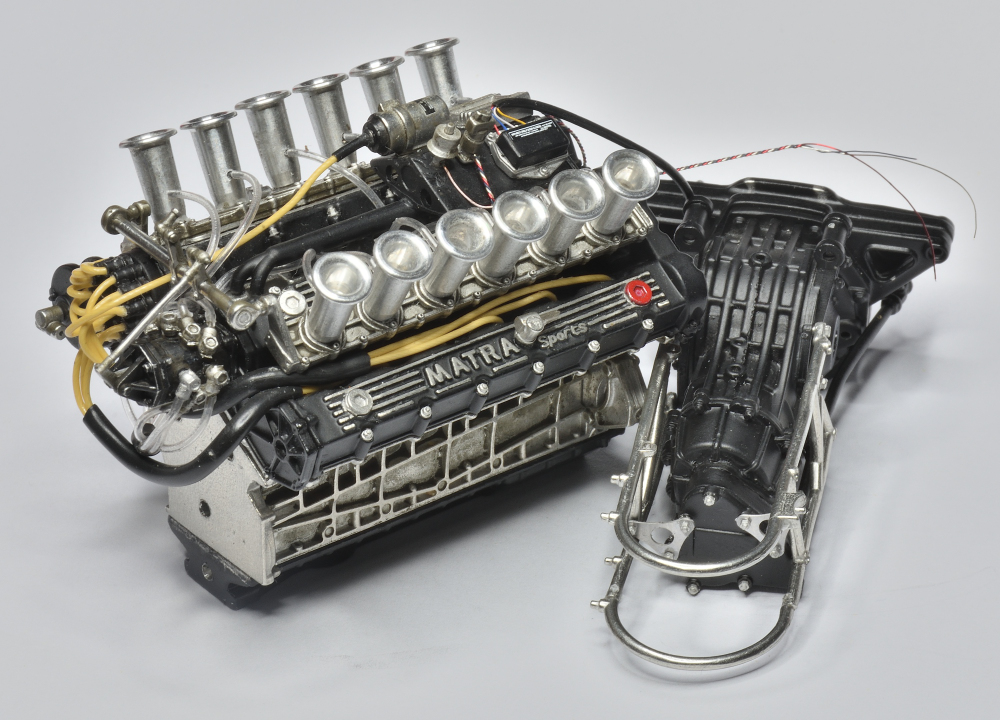
Heavens Eagle
Well-known member
Holy crap Batman! NICE!
My first response was ...
paddy
Well-known member
Slam the brakes on, throw out the anchors chaps, Houston we have a problem
The trick with these kits is to forward plan as far as you can then double it It looks likei am steaming ahead but its all balanced and taped together.
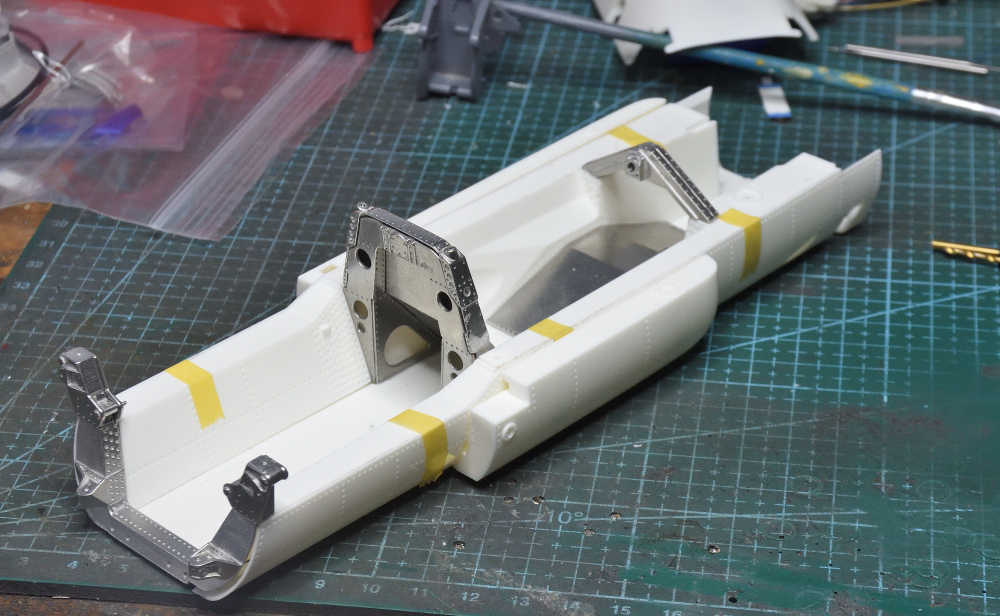
This shows how you mix white metal and resin
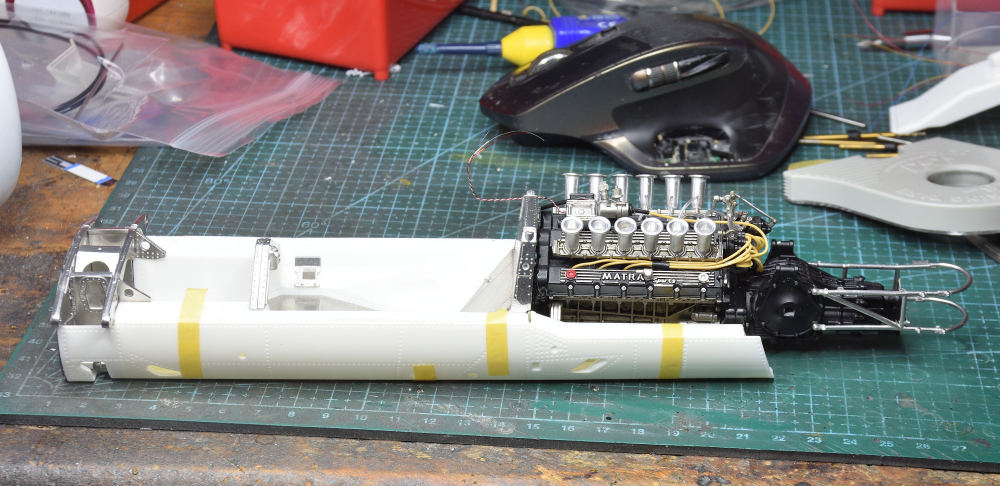
Note above the angle of the "head rest"/engine bulkhead.
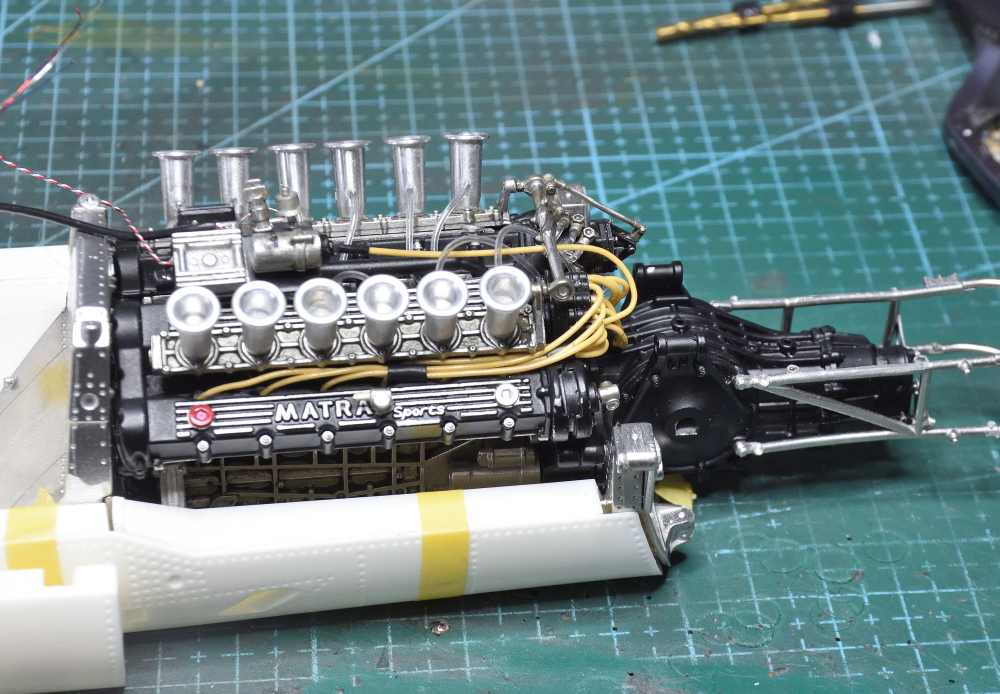
Now look and i cant get the engine far enough forward ? See the gap between the rear engine cradle and the white resin. I think that gap is about the amount i would gain if the front bulkhead was virticle instead of sloping back.
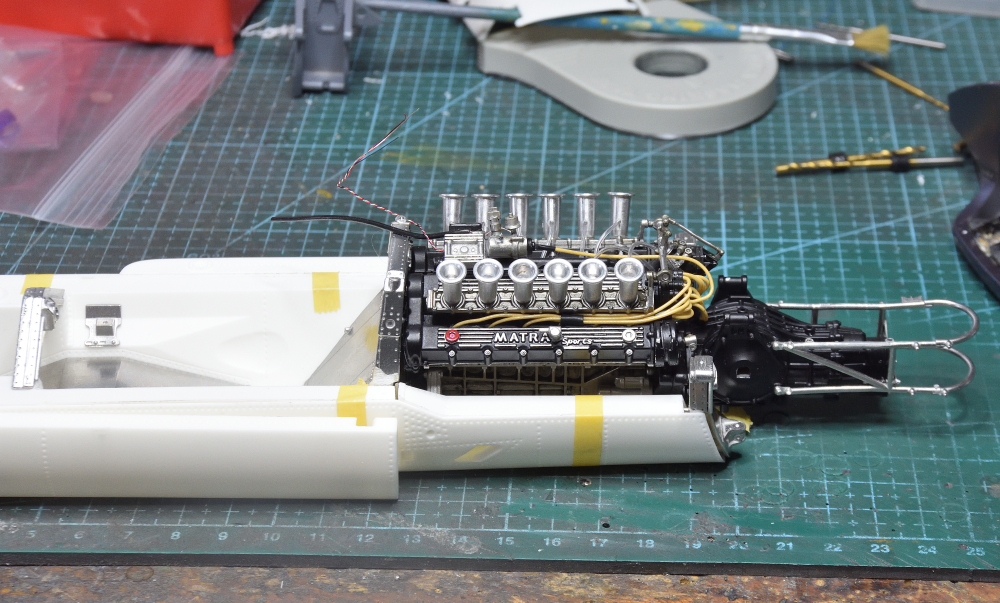
This is a slight issue with MFH in that the parts made of white metal are sometimes a bit wonky and there is no real way of knowing if they are right until you test fit. I can only guess at the problem here unless i can find an original picture with a good side view. Not an angle that people usually take.
I will now strip it all back to parts and see if its possible the bulkhead could be vertical and still fit everywhere else
I would rather be outside but its 95F and its to hot for me.
The trick with these kits is to forward plan as far as you can then double it
It looks likei am steaming ahead but its all balanced and taped together.This shows how you mix white metal and resin
Note above the angle of the "head rest"/engine bulkhead.
Now look and i cant get the engine far enough forward ? See the gap between the rear engine cradle and the white resin. I think that gap is about the amount i would gain if the front bulkhead was virticle instead of sloping back.
This is a slight issue with MFH in that the parts made of white metal are sometimes a bit wonky and there is no real way of knowing if they are right until you test fit. I can only guess at the problem here unless i can find an original picture with a good side view. Not an angle that people usually take.
I will now strip it all back to parts and see if its possible the bulkhead could be vertical and still fit everywhere else
I would rather be outside but its 95F and its to hot for me.
That's hot for anyone. What's the humidity, that's the killer.I would rather be outside but its 95F and its to hot for me.
Heavens Eagle
Well-known member
The wiring on your engine is over the top and looks great so far!

It isn't just your MFH kits Paddy, it is about any big complex kit on the market these days. The big gun I am working on has some accuracy issues that make it not feasible to assemble in transport mode. There are a couple of carriage/gun mount locks that don't line up. It is because who ever did the pattern layout did not take the time to understand how everything works, thus they are about 4-5mm off from where they need to be. There are about 8-10 other items that are off and would make the transport setup all wonky but won't be an issue if set up for firing mode.
Then there is a "detail" part they have that is literally 2 or 3 times too big. After looking at reference photos, I cut it off, left the oversize base, and as there are a number of these connectors, I made 7 little hex nuts that are needed for the electric connections for brakes and brake/tail light.
I have a full spread of photos from someone that took a bunch of photos of one of the s FH18 guns on display and those photos have been a huge help.
Looking ahead and testing fit and all has been a good thing. I did a rework of the ends of the carriage arms as those were completely off, now they are only about 1/3 off. I will try and get some photos up on that mess in the next few days.
It isn't just your MFH kits Paddy, it is about any big complex kit on the market these days. The big gun I am working on has some accuracy issues that make it not feasible to assemble in transport mode. There are a couple of carriage/gun mount locks that don't line up. It is because who ever did the pattern layout did not take the time to understand how everything works, thus they are about 4-5mm off from where they need to be. There are about 8-10 other items that are off and would make the transport setup all wonky but won't be an issue if set up for firing mode.
Then there is a "detail" part they have that is literally 2 or 3 times too big.
After looking at reference photos, I cut it off, left the oversize base, and as there are a number of these connectors, I made 7 little hex nuts that are needed for the electric connections for brakes and brake/tail light.I have a full spread of photos from someone that took a bunch of photos of one of the s FH18 guns on display and those photos have been a huge help.
Looking ahead and testing fit and all has been a good thing. I did a rework of the ends of the carriage arms as those were completely off, now they are only about 1/3 off. I will try and get some photos up on that mess in the next few days.

Not really @paddy as super admins like @moon puppy have super powers!its surprising what a difference a small change can make, fits perfectly now.
View attachment 191062
I should have started a thread but its a bit late now.
Heavens Eagle
Well-known member
@moon puppy
Good Job Bob!
Good Job Bob!
paddy
Well-known member
Not a great start today. I have been trying to find a way of getting the majority of the body built so i can spray it assembled but i cant see its possible. The body wraps round a lot of chassis parts that protrude ( like suspension and steering) so to assemble the body you would also need to Mask off all the protrusions however because of the precise border lines to the paint that wouldn't be possible in a lot of places. Option 2 is top paint all the body panels before i assemble them , thats a dozen panels that would need gluing after spraying.
Anyway to compound my problems i found last night that i have at least 7 parts missing. I contacted MFH last night before i went to bed and this morning when i woke up i have notification from FedEx they have a package from MFH Japan is 9 hours ahead of us so they did their bit while i was in the land of nod. There are 4 versions of this kit from different races. They include different exhausts/wings/ fuel tanks etc. I think in packing they start with a generic kit and then add the extras for one of the 4 versions and i seem to have the generic parts but missing some of the version D parts. As 2 of the parts are the cast metal front suspension top wishbones its not an omission i could work round.
Anyway to compound my problems i found last night that i have at least 7 parts missing. I contacted MFH last night before i went to bed and this morning when i woke up i have notification from FedEx they have a package from MFH
Japan is 9 hours ahead of us so they did their bit while i was in the land of nod. There are 4 versions of this kit from different races. They include different exhausts/wings/ fuel tanks etc. I think in packing they start with a generic kit and then add the extras for one of the 4 versions and i seem to have the generic parts but missing some of the version D parts. As 2 of the parts are the cast metal front suspension top wishbones its not an omission i could work round.


