• Modelers Alliance has updated the forum software on our website. We have migrated all post, content and user accounts but we could not migrate the passwords.
    This requires that you manually reset your password.
    Please click here, http://modelersalliance.org/forums/login to go to logon page and use the "Forgot your Password" option.

Meng 1/32 scale Messerschmitt Me 163B in-progress

I like the cockpit just fine but I don't recall white faced instruments during that time period .

That's what came with the kit ? :hmmm
 
How is it that Meng can get all that fantastic fine detail on the rocket motor but something simple like the proper color for the instrument faces they completely fail? :bang head


Matrixone
 
The rocket motor is now complete, the final couple pipes were glued on and painted and I also did more detail painting to the rest of the motor and its now ready to be put inside the fuselage halves.

hd879c36.JPG


h59e0882.JPG


Matrixone
 
Thanks Dusan!

There is still a long way to go before this one is close to getting any paint put on it...and I hate not having anything to airbrush. :sick:


Matrixone
 
Excellent work! I built the old Hasegawa 163 for the husband of Dr. Lippisch's daughter; he was my dentist. If you like, and if you are working in oils, you might try adding a bit of burnt sienna to the corners and edges of your leather, and blending toward the middle. just a thought.
 
Thanks again guys!

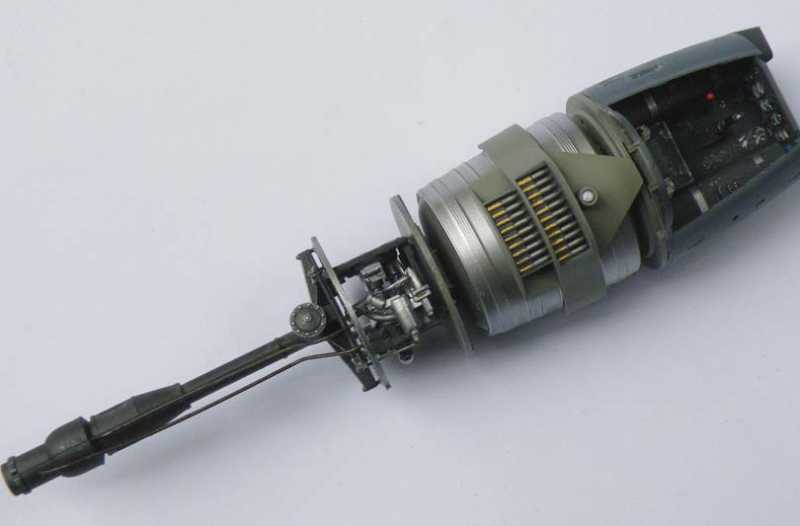
Yes work has been done the Me 163 but sadly not much of it picture worthy....I did get the ammo loaded onto it though and here is a picture of it.

hc589652.JPG

In this picture you can also just barely make out some weathering/detail painting I did on the Walters HWK109-509A rocket motor.

Matrixone
 
Thanks James, White-Wolf, and Paul!

I did some dry fitting of the fuselage halves with the fuselage interior and its a very fussy fit of the parts but once you find the exact spot it seems to fit together okay. Now I am concerned about making a mess of things when I attempt to glue the fuselage halves together...it could get ugly quickly. :unsure:


Matrixone
 
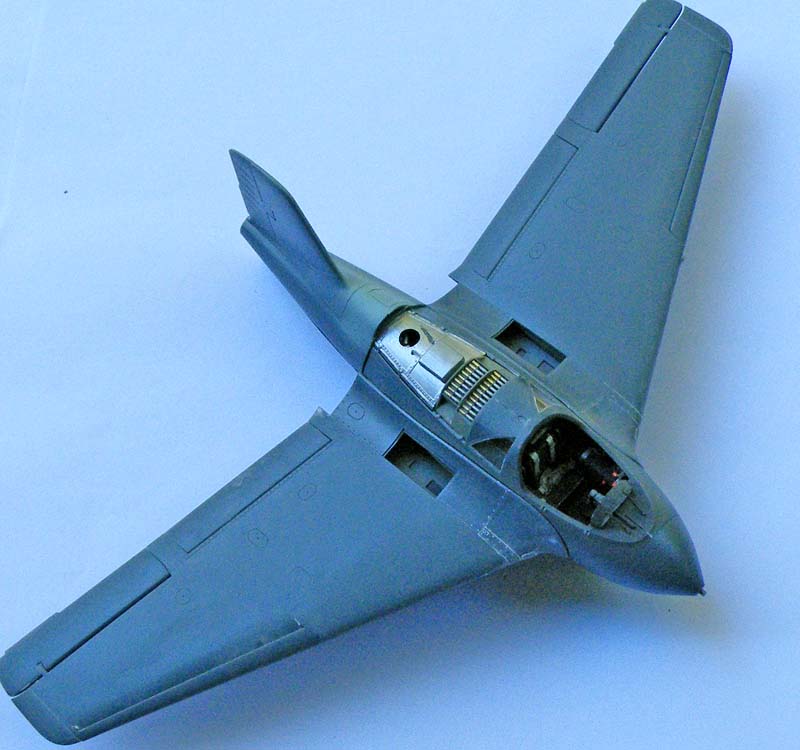
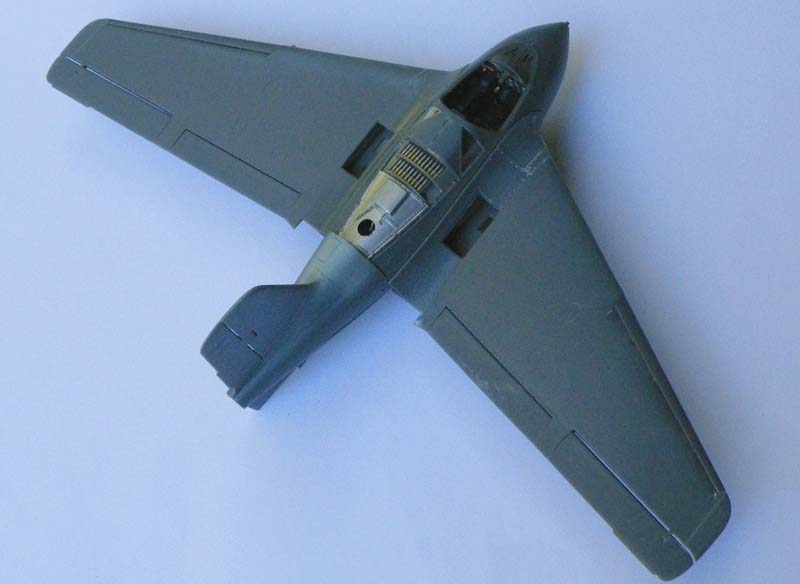
The tail is assembled (but not glued onto the fuselage yet) and the fuselage halves have been glued together. As can be seen in the pictures the fuselage halves have a bit of a gap that will need to be filled.

he8b5941.JPG


h6842982.JPG


Matrixone
 
A small update on this model, the wings are built (but not glued to the fuselage) and the last of the cockpit parts have been added.
The tiny support struts for the glass armor at the front of the cockpit were broken and I had to carefully glue them together...not fun but it worked out okay.
After dry fitting the wings to the fuselage I found them to be a poor fit, not sure what I can do about at this stage since I spent over an hour dry fitting, sanding, and then more dry fitting and sanding without much to show for it. One thing I DO know is that I don't want to destroy any of the ultra fine panel line and rivet surface detail. :unsure:

h271e818.JPG


h2f0e8f6.JPG


Les
 
Looking good. Not sure whats wrong with the wings. I usede some lead wire to make a new armoured glass support after breaking one of mine. (y) (y) (y)
James
 
Back
Top