
Hello Everyone!
I decided to post the threads I had made for the tips and trick section on the old forum since I thought they may be useful. As always any comments or suggestions are highly appreciated.
Dave's Trick # 1
In this thread I will discuss some methods of making your own nuts & bolts. This simple methods will save you time and frustration when scratch building or when adding those missing details to your kit.
All you really need is some round and hexagonal plastic rods of different sizes. These are available at hobby stores or online.

Simple Bolt Head
To make a simple bolt head just cut the hexagonal rod (I’m using a large size to illustrate it better). You can vary the thickness of the bolt by cutting thinner slices. This takes practice so don’t get too frustrated.
Then glue it in place.
Nut & Bolt
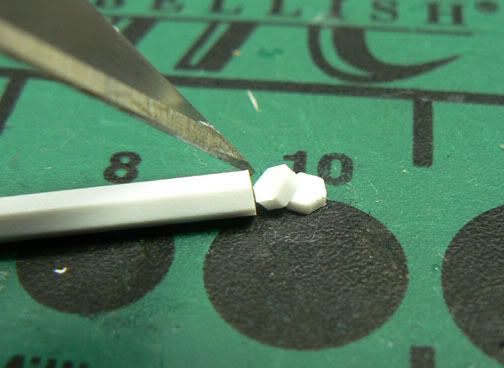
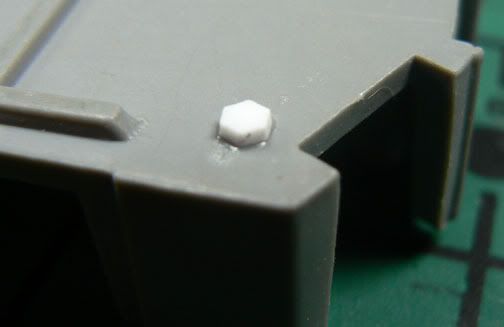
To make the nut & bolt end just cut a hexagonal piece like before then cut a round rod the desired length.
After that, glue the hexagonal part first (the nut) then the round piece (the bolt).

Washer & Bolt
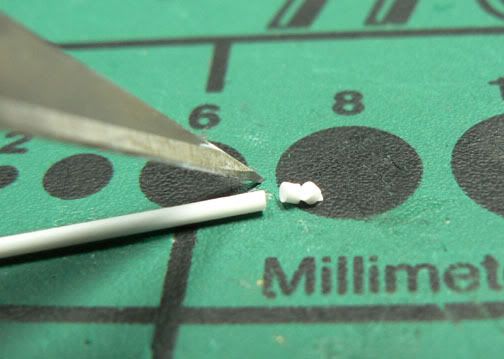
To make a washer & bolt combination simply do the same but now in reverse. First cut a thin disc out of round rod and glue it. This will be your washer so the thinner the better.
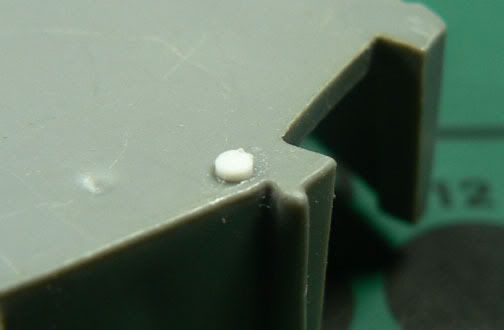
Then cut a hexagonal piece of slightly smaller diameter, and glue it on top of the washer.

If they don’t look completely flat as sometimes is hard to cut at right angles wait until the glue dries and then you can file it or sand it flat.
Simple Flat Head Rivets
A simple way of making simple flat head rivets is using a leather puncher. This is a tool made for making holes in leather belts and stuff. You can buy it at craft stores and it works great on plastic.
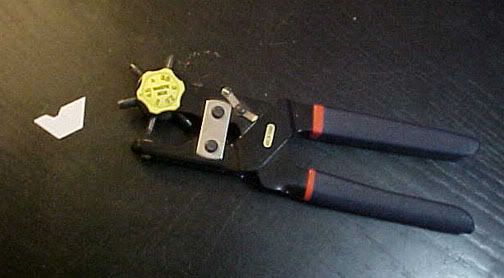
First punch small discs using the smallest diameter available. The smallest I have seen is 2mm; this is rather big for most 1/35 vehicles, but it works good for structures or if you ever need a round disc this is an easy way to cut one.

Then glue the discs to represent a line of flat rivets.

That is all for this week. I hope these methods are helpful.
Model on!
Dave
I decided to post the threads I had made for the tips and trick section on the old forum since I thought they may be useful. As always any comments or suggestions are highly appreciated.
Dave's Trick # 1
In this thread I will discuss some methods of making your own nuts & bolts. This simple methods will save you time and frustration when scratch building or when adding those missing details to your kit.
All you really need is some round and hexagonal plastic rods of different sizes. These are available at hobby stores or online.
Simple Bolt Head
To make a simple bolt head just cut the hexagonal rod (I’m using a large size to illustrate it better). You can vary the thickness of the bolt by cutting thinner slices. This takes practice so don’t get too frustrated.
Then glue it in place.
Nut & Bolt
To make the nut & bolt end just cut a hexagonal piece like before then cut a round rod the desired length.
After that, glue the hexagonal part first (the nut) then the round piece (the bolt).
Washer & Bolt
To make a washer & bolt combination simply do the same but now in reverse. First cut a thin disc out of round rod and glue it. This will be your washer so the thinner the better.
Then cut a hexagonal piece of slightly smaller diameter, and glue it on top of the washer.
If they don’t look completely flat as sometimes is hard to cut at right angles wait until the glue dries and then you can file it or sand it flat.
Simple Flat Head Rivets
A simple way of making simple flat head rivets is using a leather puncher. This is a tool made for making holes in leather belts and stuff. You can buy it at craft stores and it works great on plastic.
First punch small discs using the smallest diameter available. The smallest I have seen is 2mm; this is rather big for most 1/35 vehicles, but it works good for structures or if you ever need a round disc this is an easy way to cut one.
Then glue the discs to represent a line of flat rivets.
That is all for this week. I hope these methods are helpful.
Model on!
Dave