
-
Modelers Alliance has updated the forum software on our website. We have migrated all post, content and user accounts but we could not migrate the passwords.
This requires that you manually reset your password.
Please click here, http://modelersalliance.org/forums/login to go to logon page and use the "Forgot your Password" option.
- Home
- Forums
- Current Campaigns
- Past Campaigns
- Finished Campaigns
- 2016 Campaigns
- Deja Vu All Over Again
You are using an out of date browser. It may not display this or other websites correctly.
You should upgrade or use an alternative browser.
You should upgrade or use an alternative browser.
Ma.K Grosser Hund
- Thread starter MichelC
- Start date
 :drinks


Duke Maddog
Well-known member
That's pretty brilliant! Way to go!
Nice job, painting perfect squares and circles is not an easy thing to do. ")


Time for the decals. That round emblem on the convex surface took quite some sweet talking to get it to conform. I used Daco Strong as a decal softener. Worked well but one has to be careful. It should be swished over the decal with a brush rather than left to soak as it will melt the paint around the decal right down to the primer. Don't ask me how I know...

What's a decaling session without creating some custom decals, eh? B) Here's how to make a red placard with white lettering and a metallic border. Apply red square onto piece of aluminum tape (first primed with transparent metal primer). Then apply white lettering onto red square. The lettering came from the kit's stencils, which Haseg furnishes in both black and white, a nice touch.
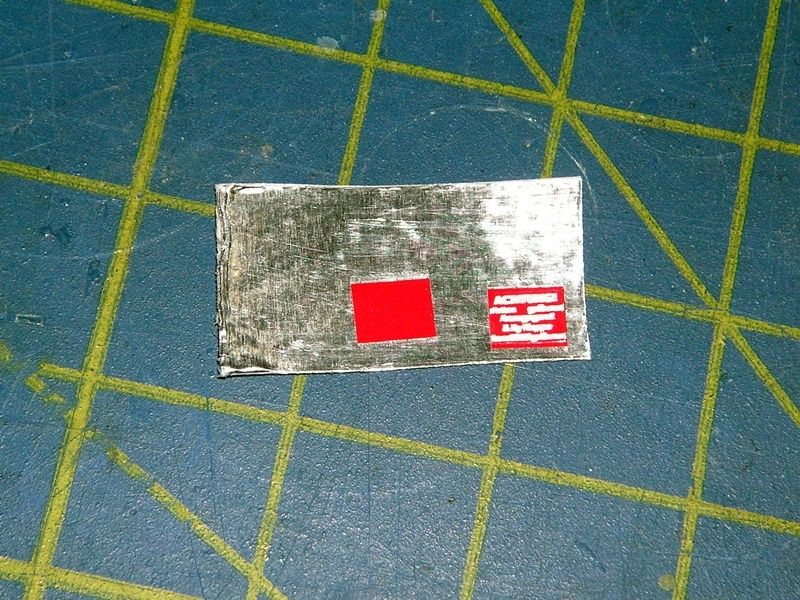
Cut out the placard slightly larger than the red square and, voila!
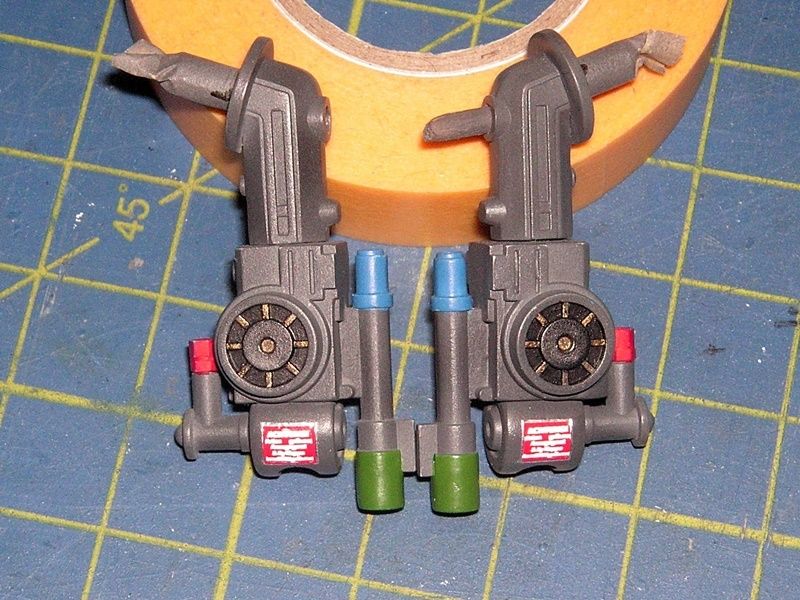
Once all the decals were in place I inflicted some damage, as usual, with a hobby knife.
Last but not least, all decals were post-shaded with the base color to fade them and integrate them with the model.
M

What's a decaling session without creating some custom decals, eh? B) Here's how to make a red placard with white lettering and a metallic border. Apply red square onto piece of aluminum tape (first primed with transparent metal primer). Then apply white lettering onto red square. The lettering came from the kit's stencils, which Haseg furnishes in both black and white, a nice touch.

Cut out the placard slightly larger than the red square and, voila!

Once all the decals were in place I inflicted some damage, as usual, with a hobby knife.

Last but not least, all decals were post-shaded with the base color to fade them and integrate them with the model.

M
Excellent work. First thing i was going to say is something about that decal on a complex curve like that, you made it look like it's painted on. 
Similar threads
- Replies
- 42
- Views
- 2K