• Modelers Alliance has updated the forum software on our website. We have migrated all post, content and user accounts but we could not migrate the passwords.
    This requires that you manually reset your password.
    Please click here, http://modelersalliance.org/forums/login to go to logon page and use the "Forgot your Password" option.

Junkers Ju 290A-5

Excellent job. Looking forward to the completion of the kit.

I have one of these in my stash but never had the courage to tackle that beast. Too big. In any case, your model has inspired me. :hmmm :hmmm

Cheers

Alex
 
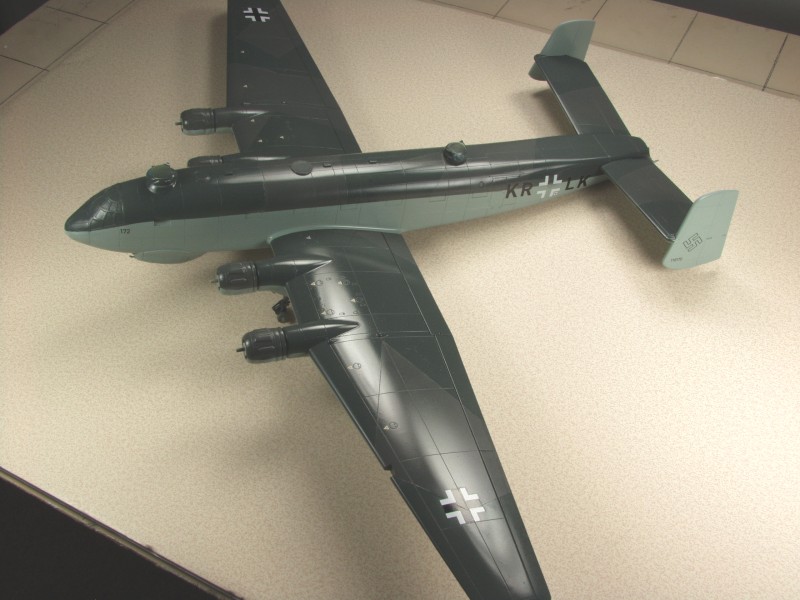
Been a while on this one but I finally have all the stickers on that I intend to apply. The kit decals were thrown in the bag with all the other parts at the factory and suffered mightily for the experience. The sheet had creases in it and a number of the larger decals had chips missing from them. Add to this the Revell decals have a matte finish and always give me fits with silvering which meant that this portion of the build has been anything but enjoyable. The upper wing crosses from the kit sheet were unusable so I replaced them with some Eaglecals which normally work well for me but these wrinkled up when I applied setting solution and would not lay flat regardless of solution used so they were stripped off and replaced with some Techmods which worked great. The under wing markings went on OK but will need to be touched up as they had some chips on them. The decals supplied for the fuselage were the same size as the under wing markings and were way to large to fit as shown in the instructions. I ended up scanning and resizing the letters and printed my own decals and sourced a smaller cross from another sheet. The kit supplies close to 100 stencils but by this time I had about had it with the Revell decals and only used the fuel and oil filler markings on the upper wing, work numbers and first aid compartment decals. Many of the others were dark red stenciling that would go on dark green surfaces and hardly visible except for the ever present silvering. The wing walk markings were way too fragmented to use and scale wise were way too wide anyway. No Swastikas were supplied so those needed to be sourced elsewhere as well.

290-b14.jpg


Anyway, I'm glad that's over with. Next up is weathering, decisions, decisions, should I make it as dirty as this one ? Either they needed a ring job or bad fuel, what ever its really a mess, not sure how far I'll take this.

290weathering.jpg


From now to the end of this campaign updates will be slow due to the lure of outdoor activities.

Thanks for looking !
 
Burf ... All that was discouraging to read as far as wanting to dive in one :S

Glad that you are pressing on though and I know more from your experience . It is looking very sharp at this point.

Wonder if the heavy stains have to do with synthetic fuel . Even the 109's had some heavy staining .

Cheers, Christian B)
 
Thanks for your interest but nothing new to report, as I said the summer season is all about working on outdoor stuff both hobby and home and property upkeep related.

I'm still debating how far to go with weathering on this and time away from it may be helpful. Never can tell, high heat and humidity may drive me back inside.
 
Well, in spite of trying the past couple of weeks to get back to this build, I have had a variety of things preventing me from doing so. Now time has dwindled to the point that to finish what needs to be done without getting sloppy is not possible so I have decided to take my time and forget the dead line. When I do get back to it I'll post in Wesendorf Field.
 
Back
Top