jeaton01
Well-known member
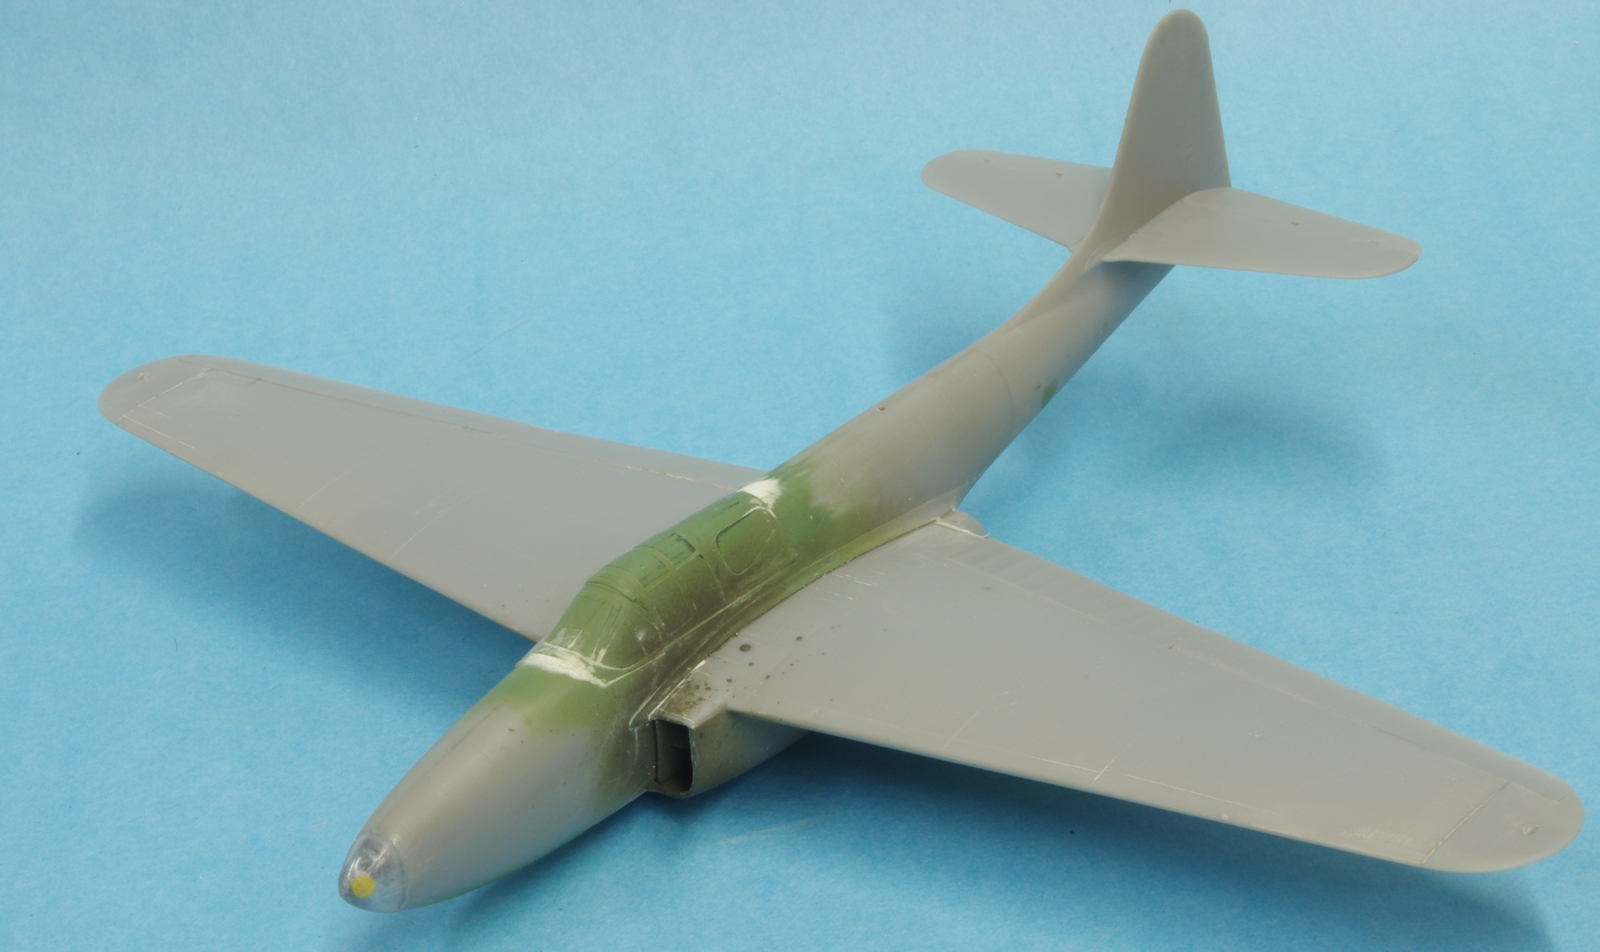
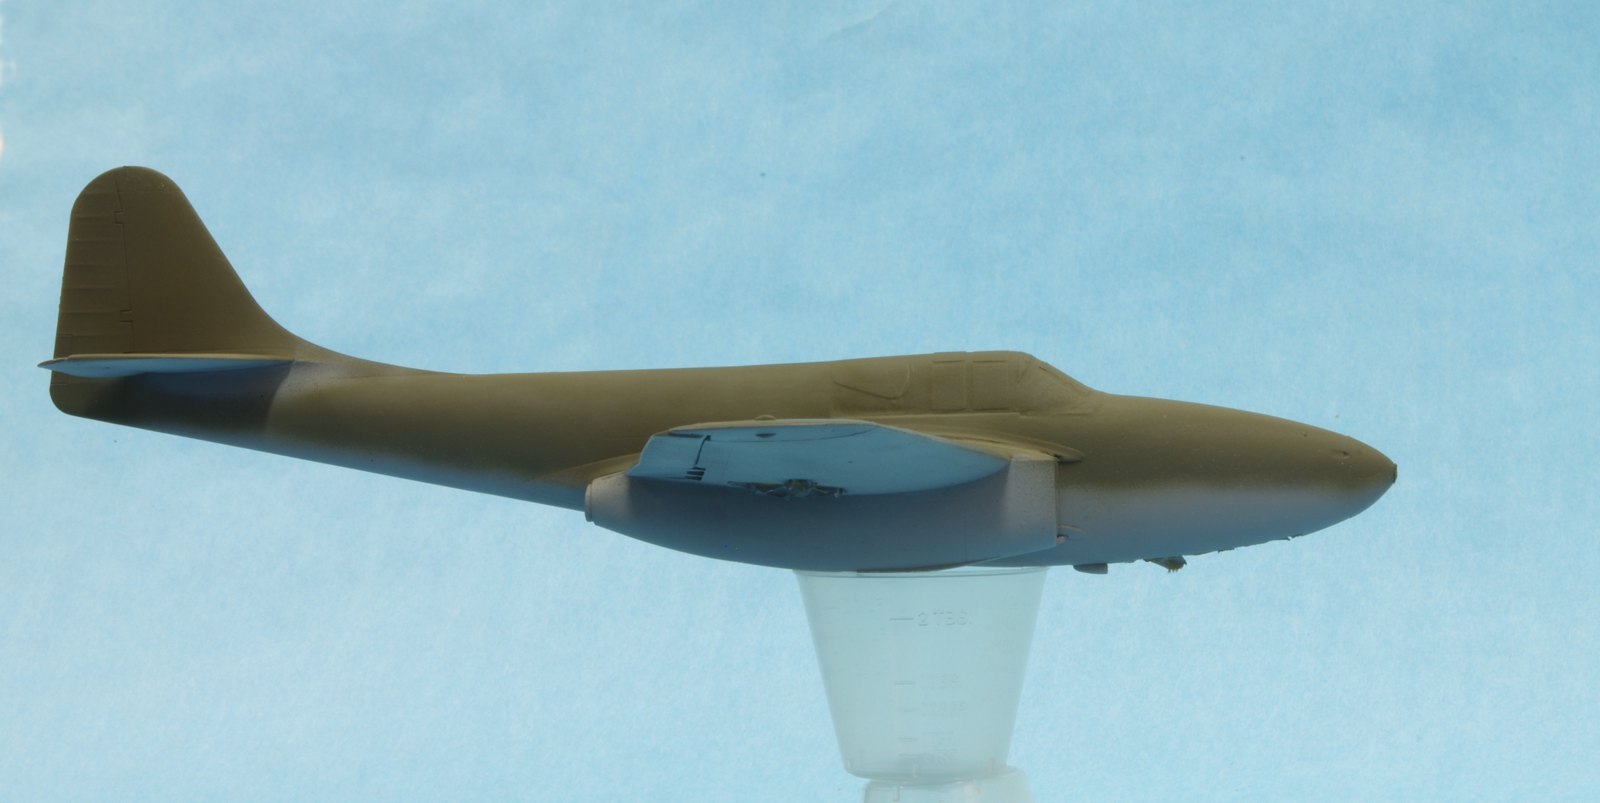
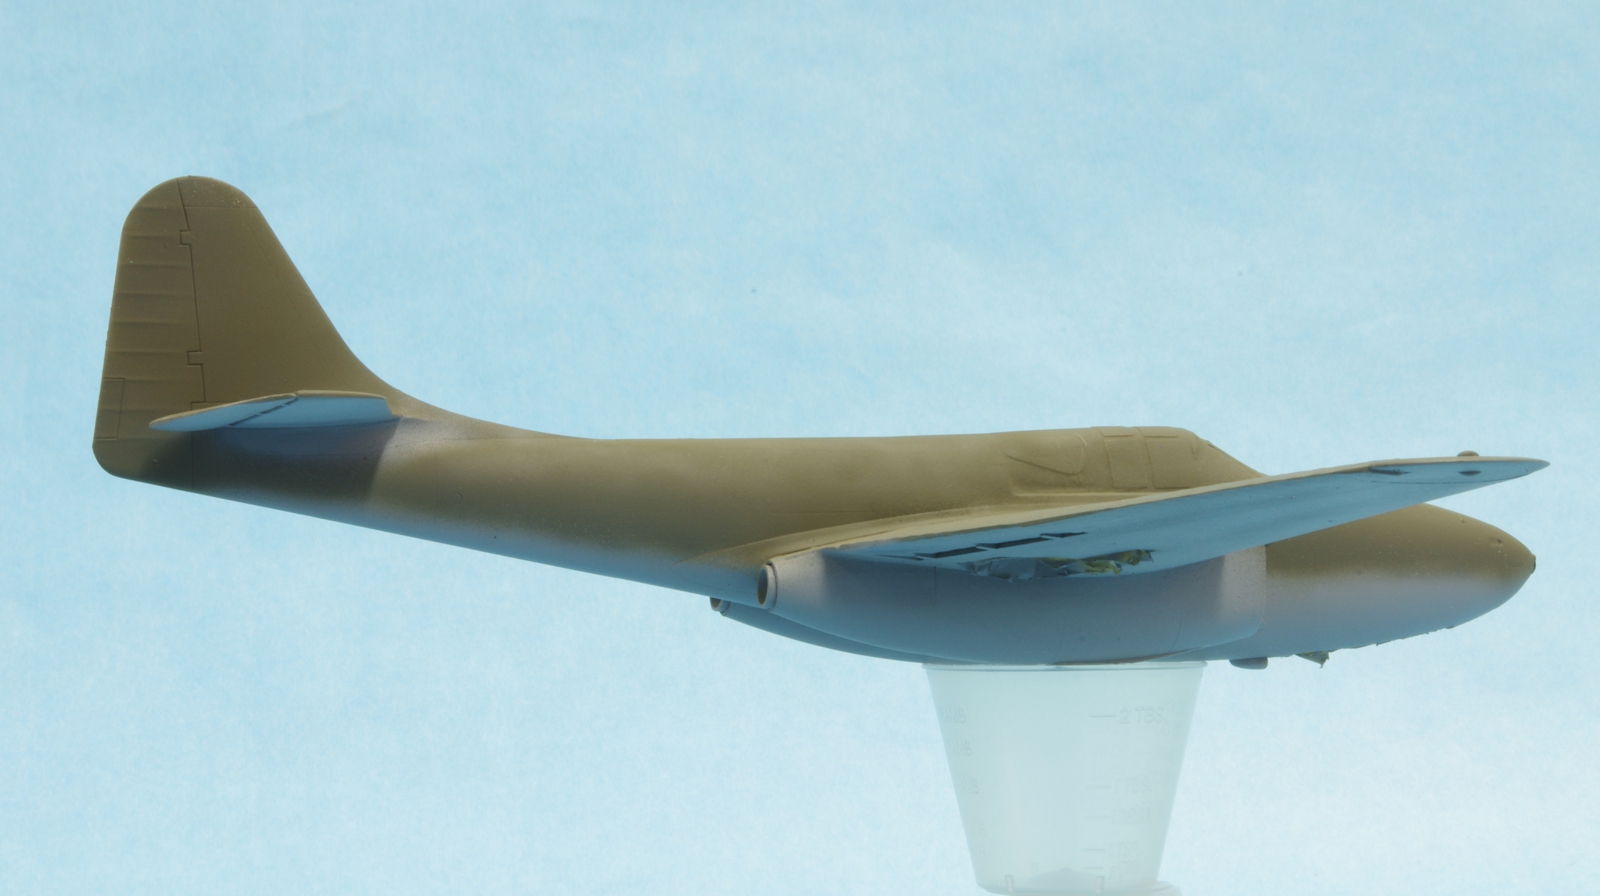
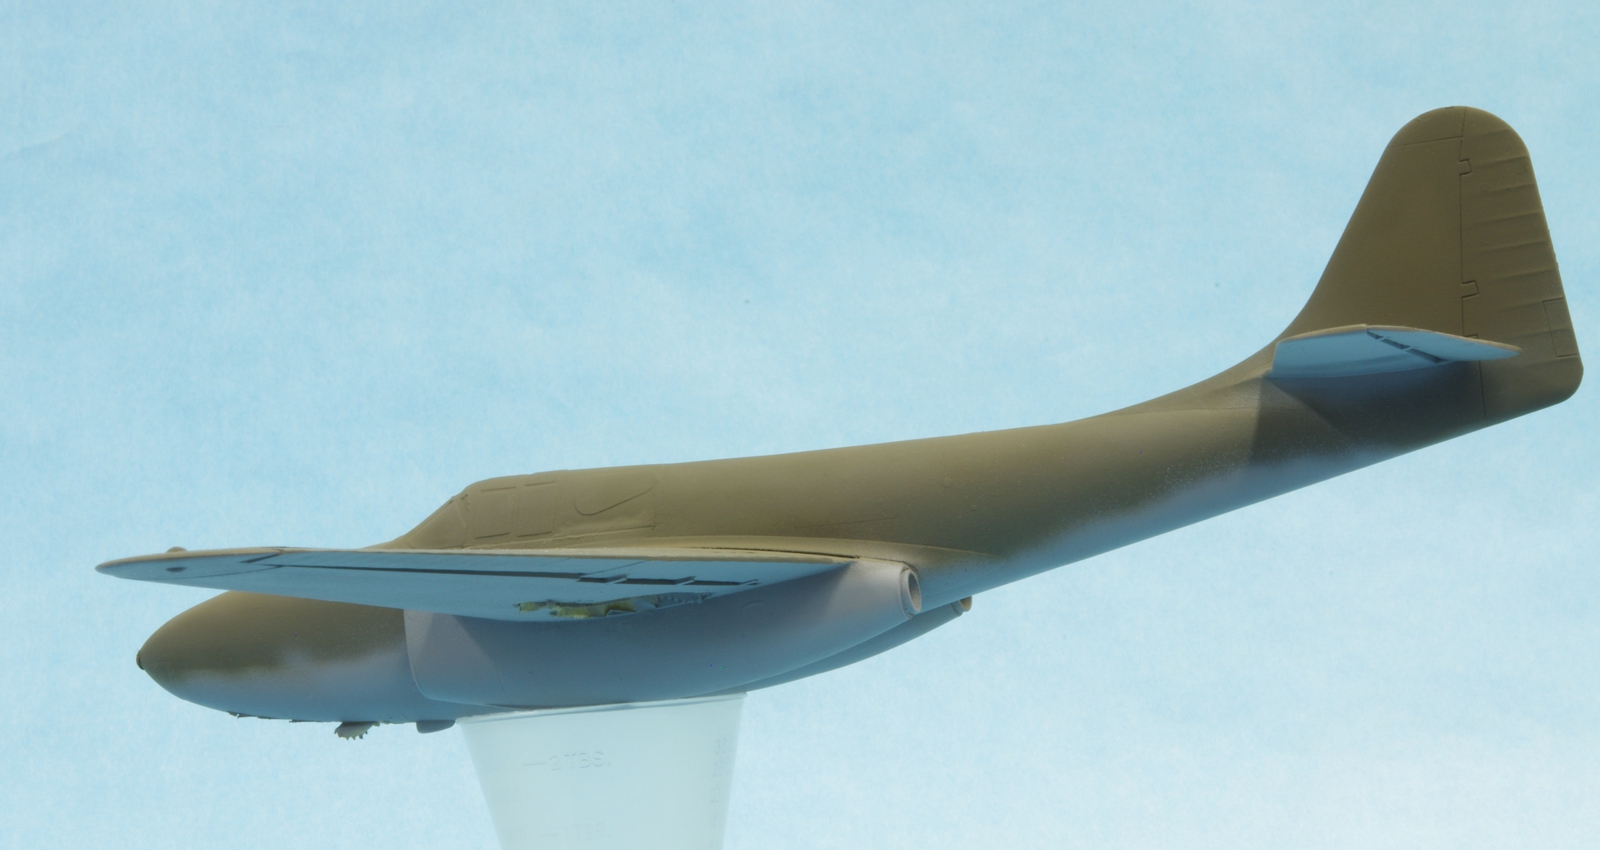
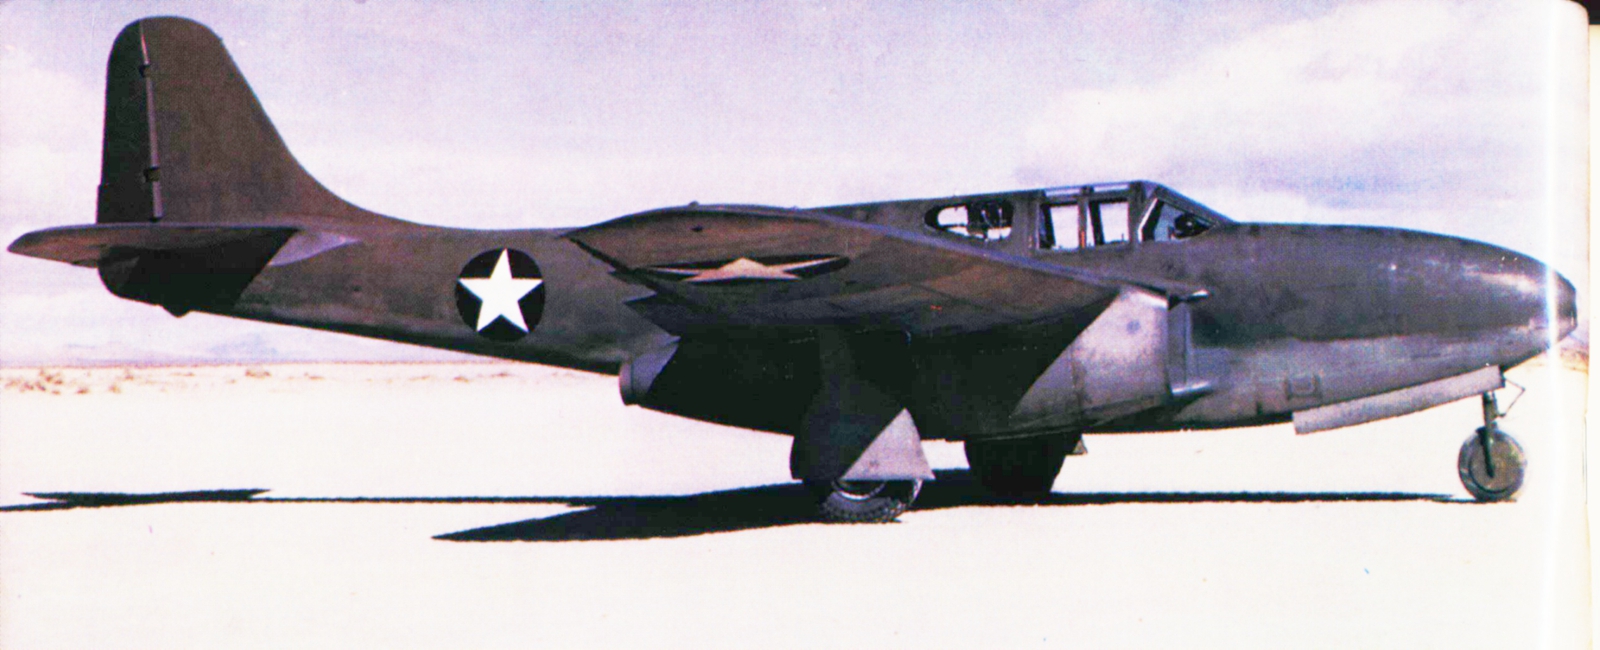
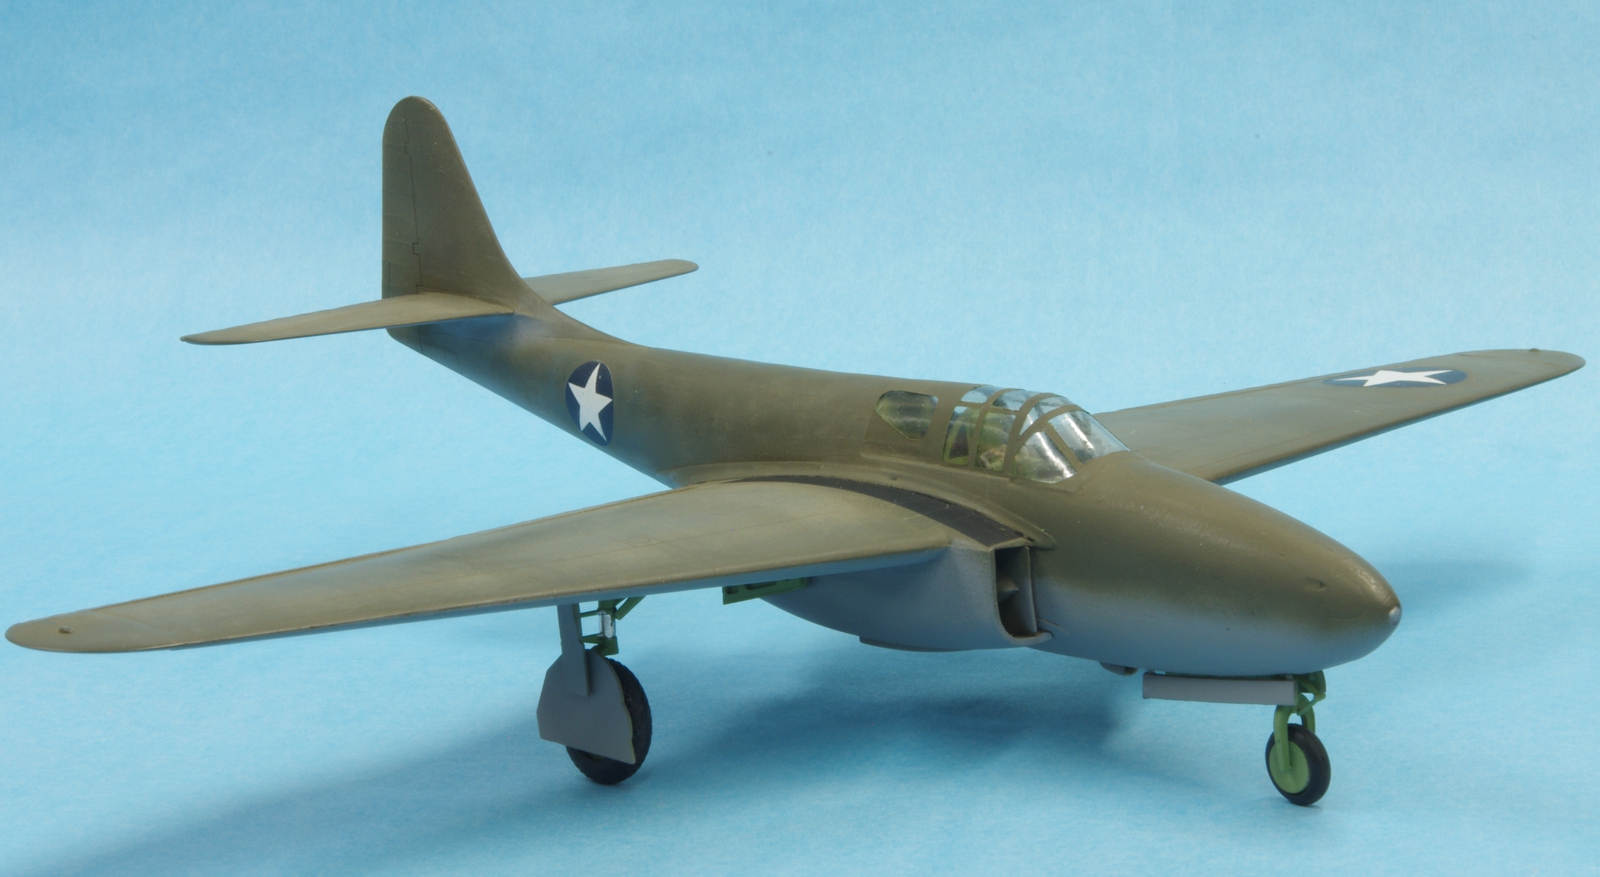
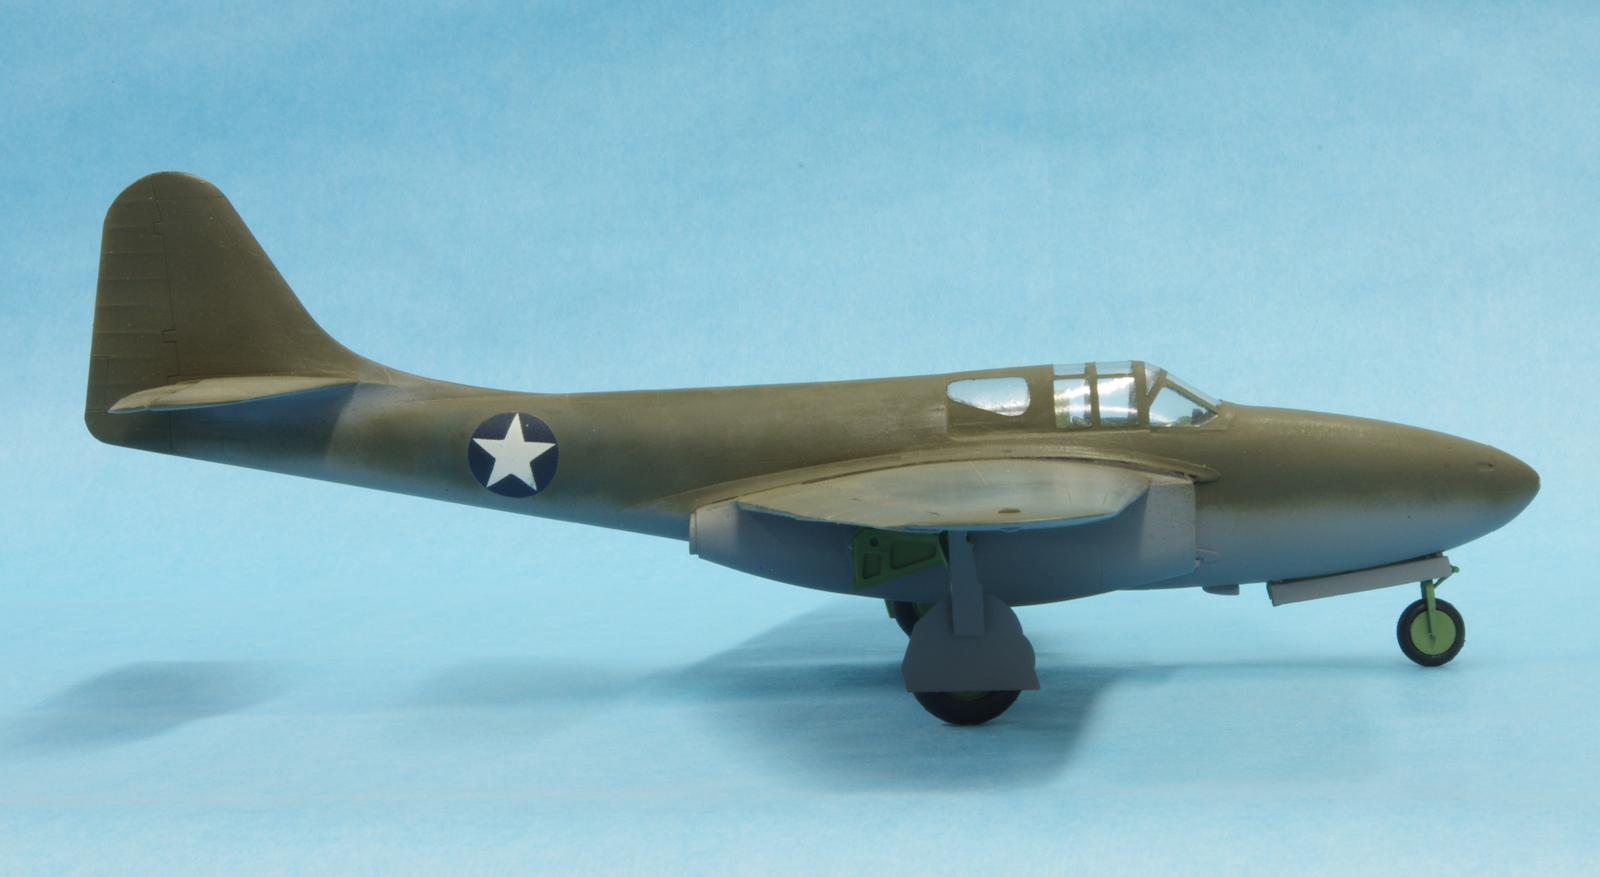
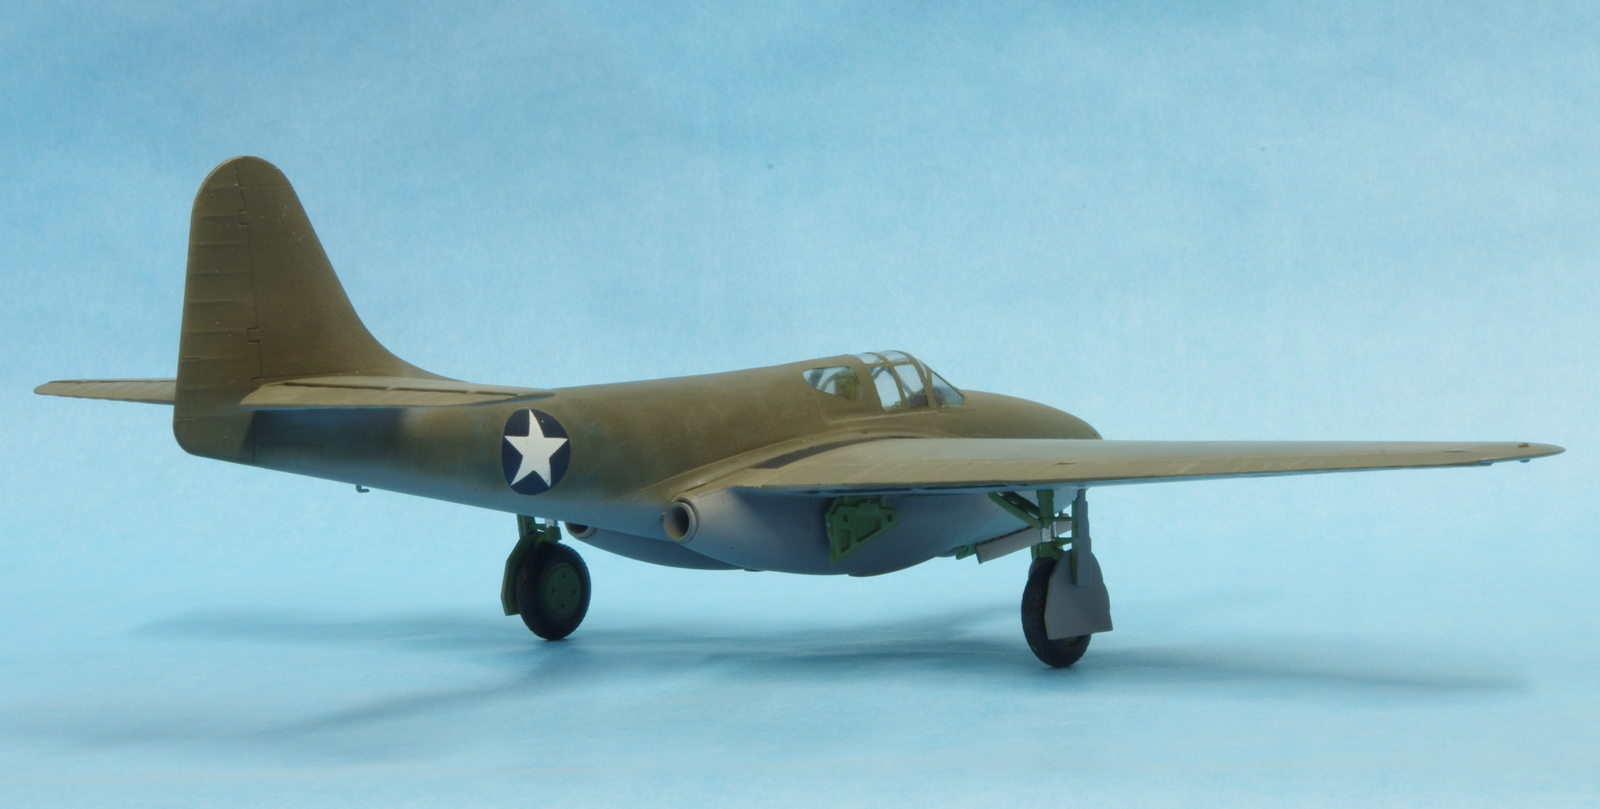
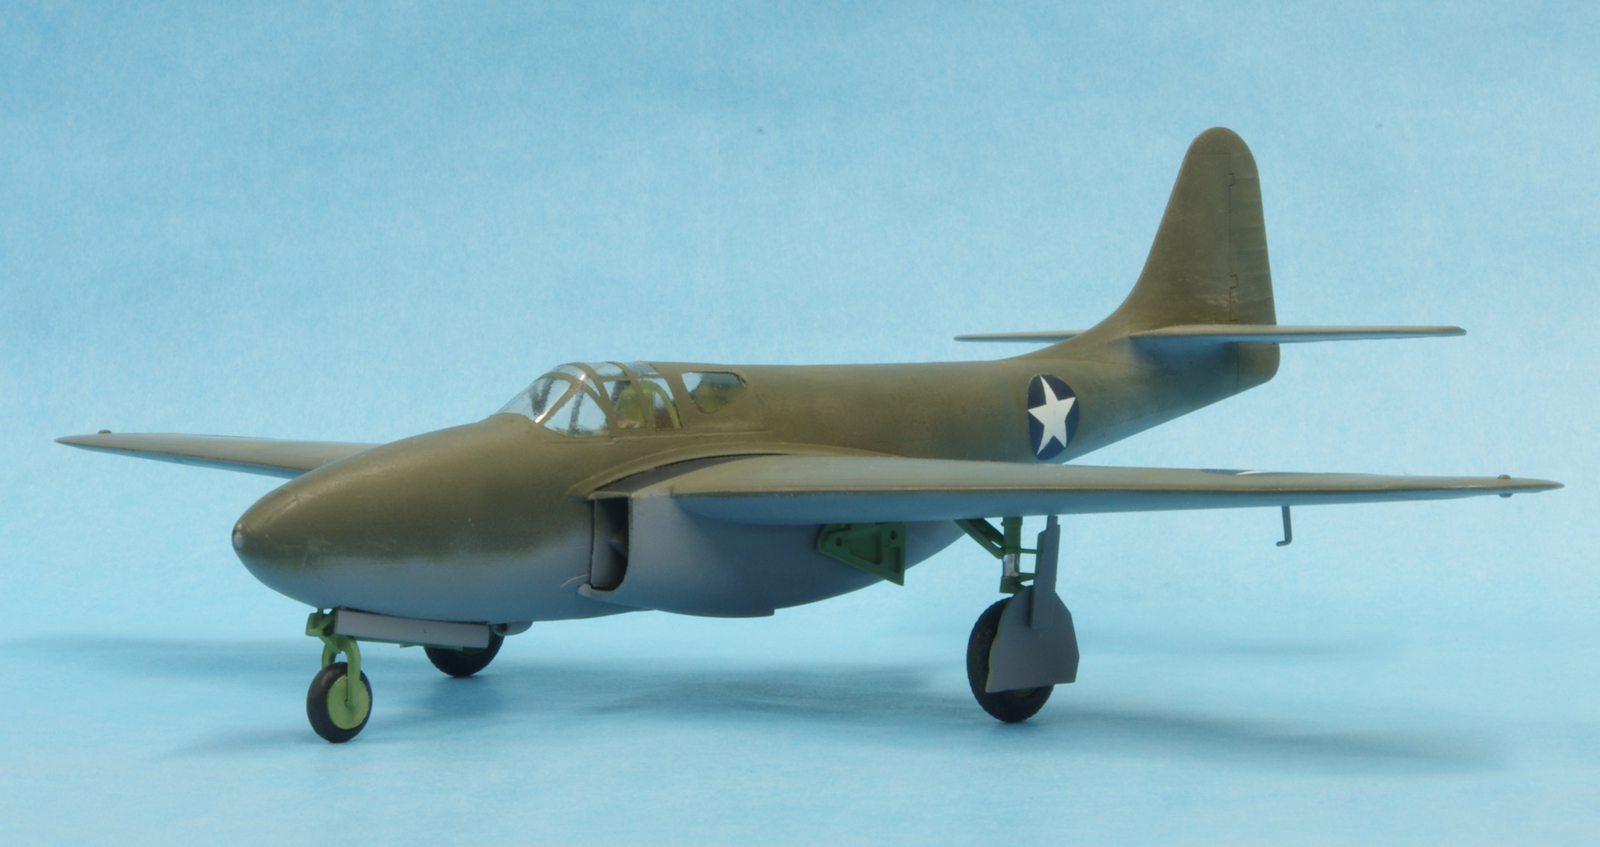
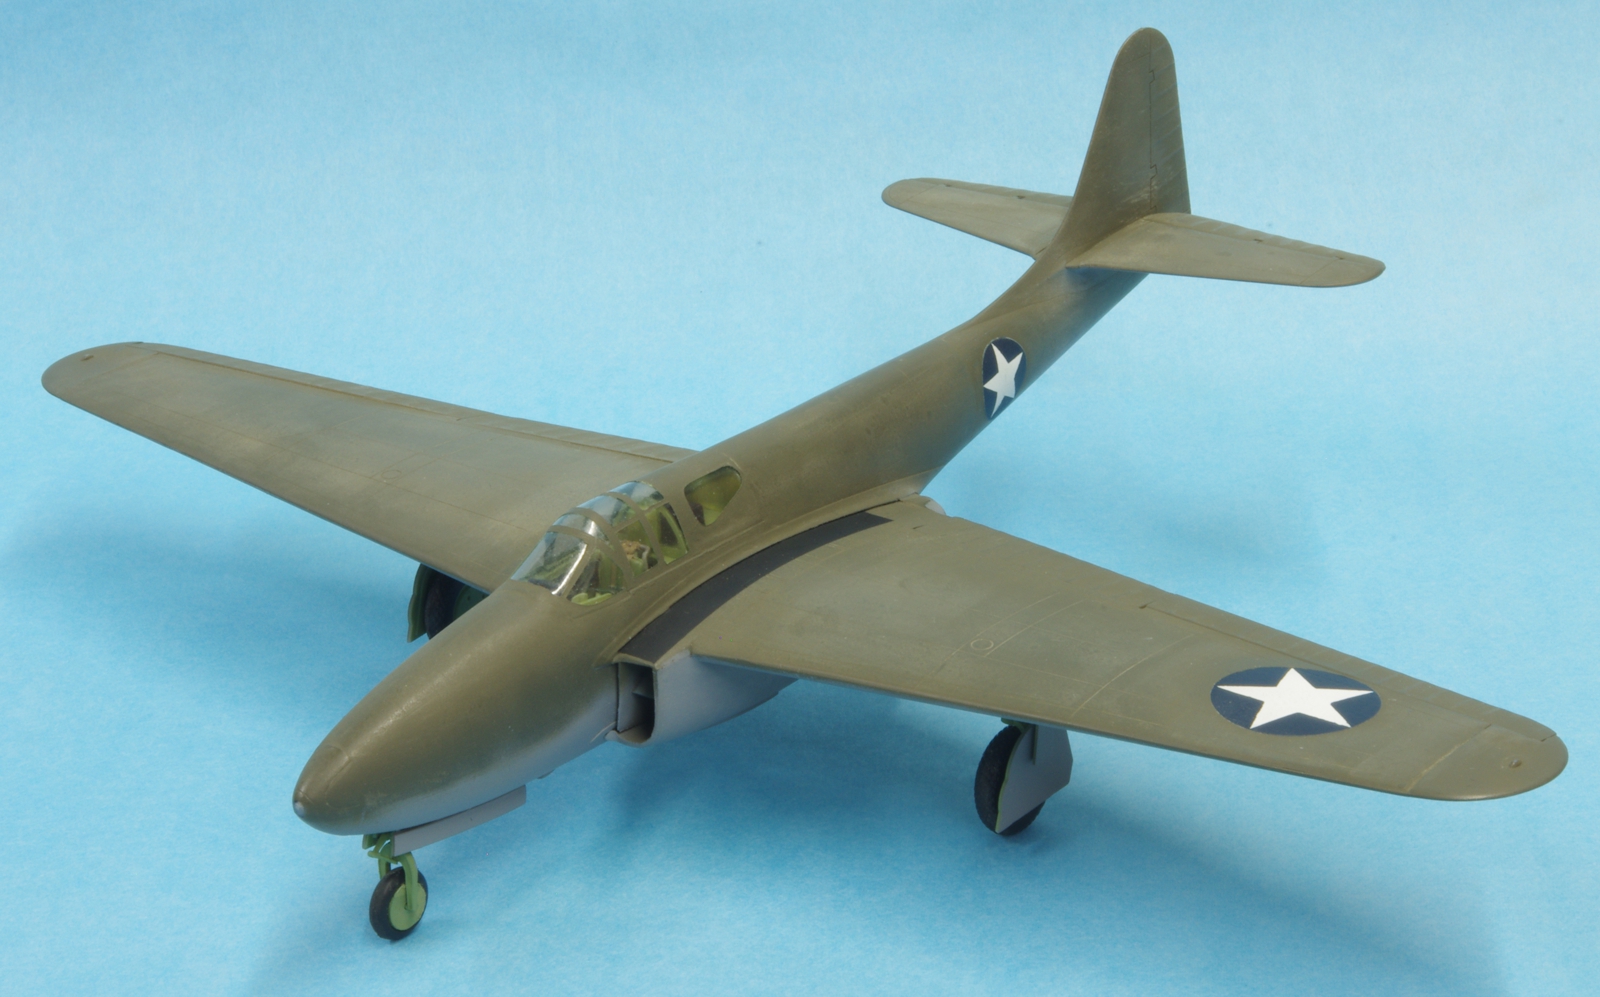
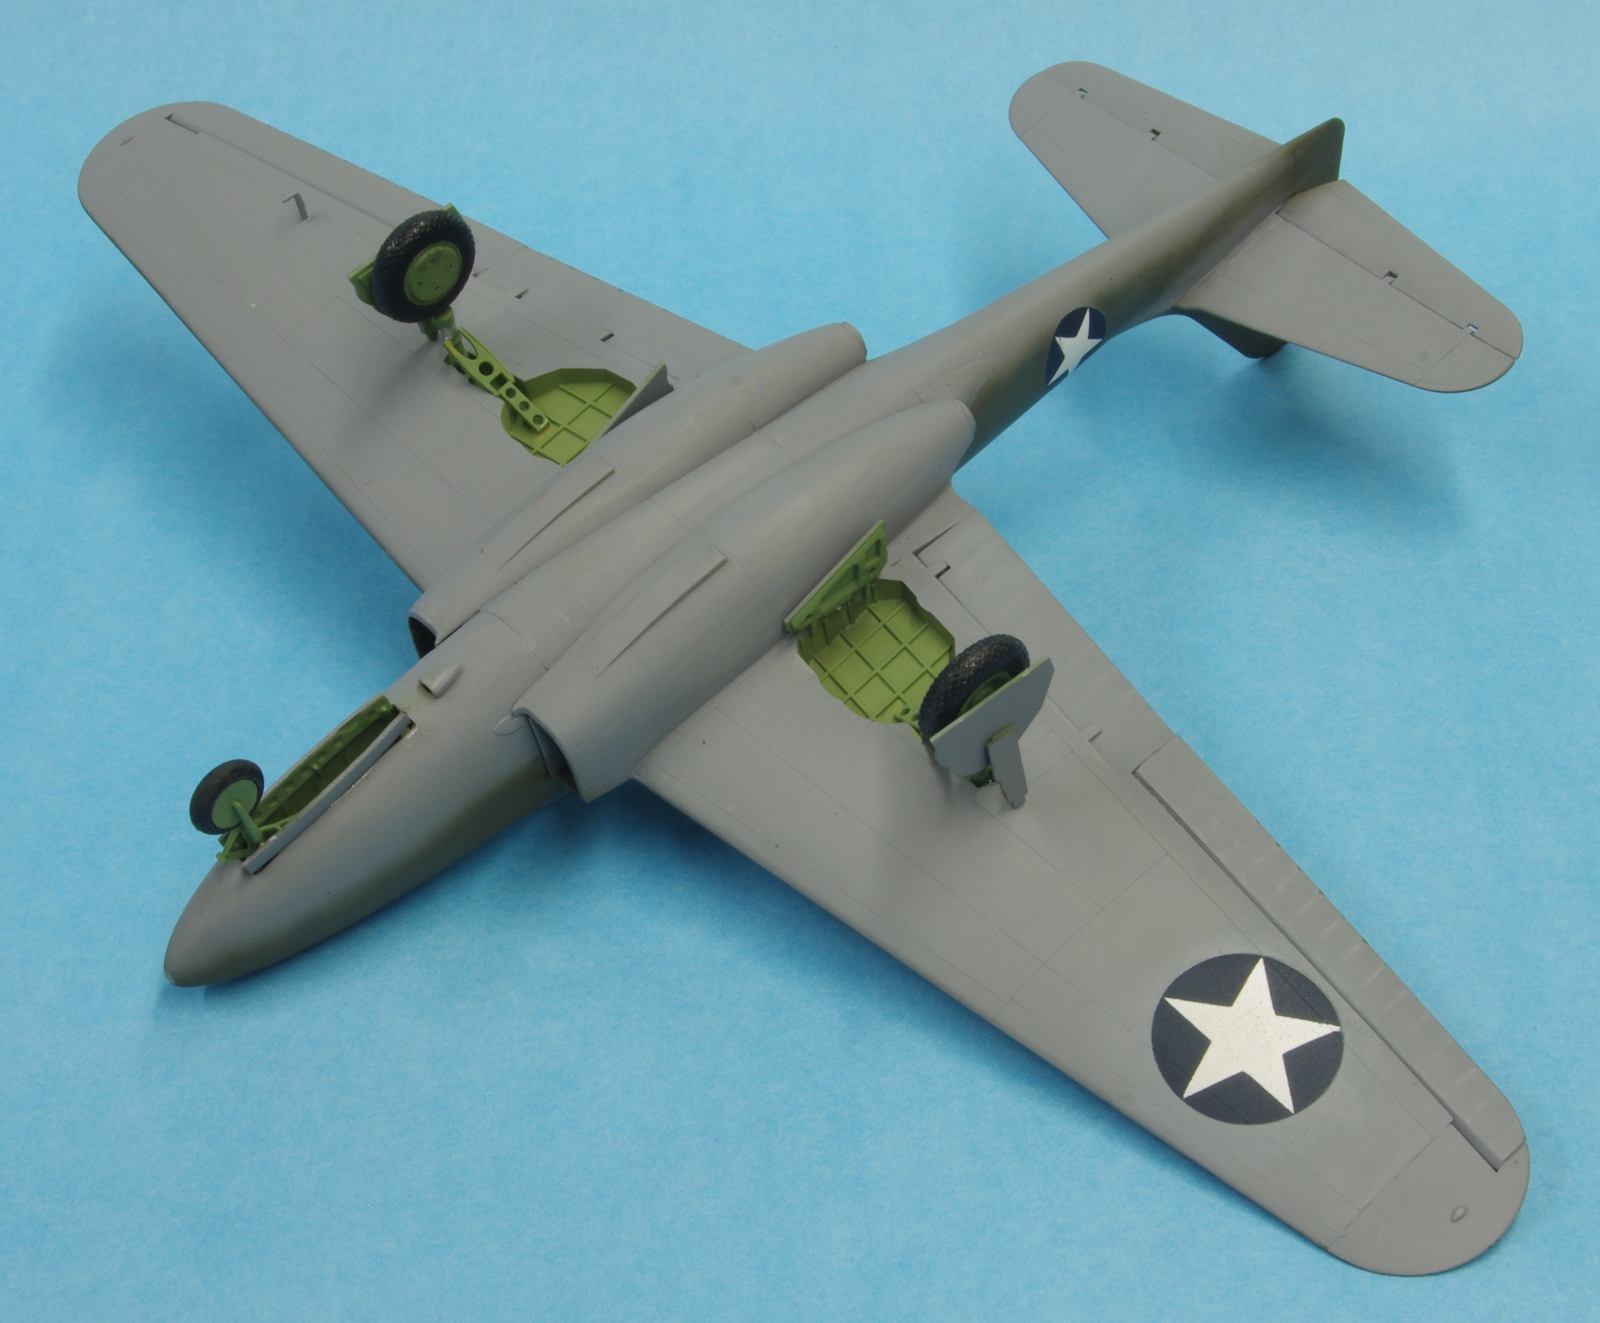
I started on this project way back in February but other projects have kept me away from it. The kit as it is will make a No. 3 or later XP-59 or a YP-59A, but I wanted to do the first one, as a companion to the first jets of other countries I have been doing. That required a modified canopy because the first few had hatch type side opening canopies which later were replaced with sliding canopies. Markings will be simple as the prototype had no serials or anything else except for the simple stars in circles in four positions, and the paint was OD and grey.
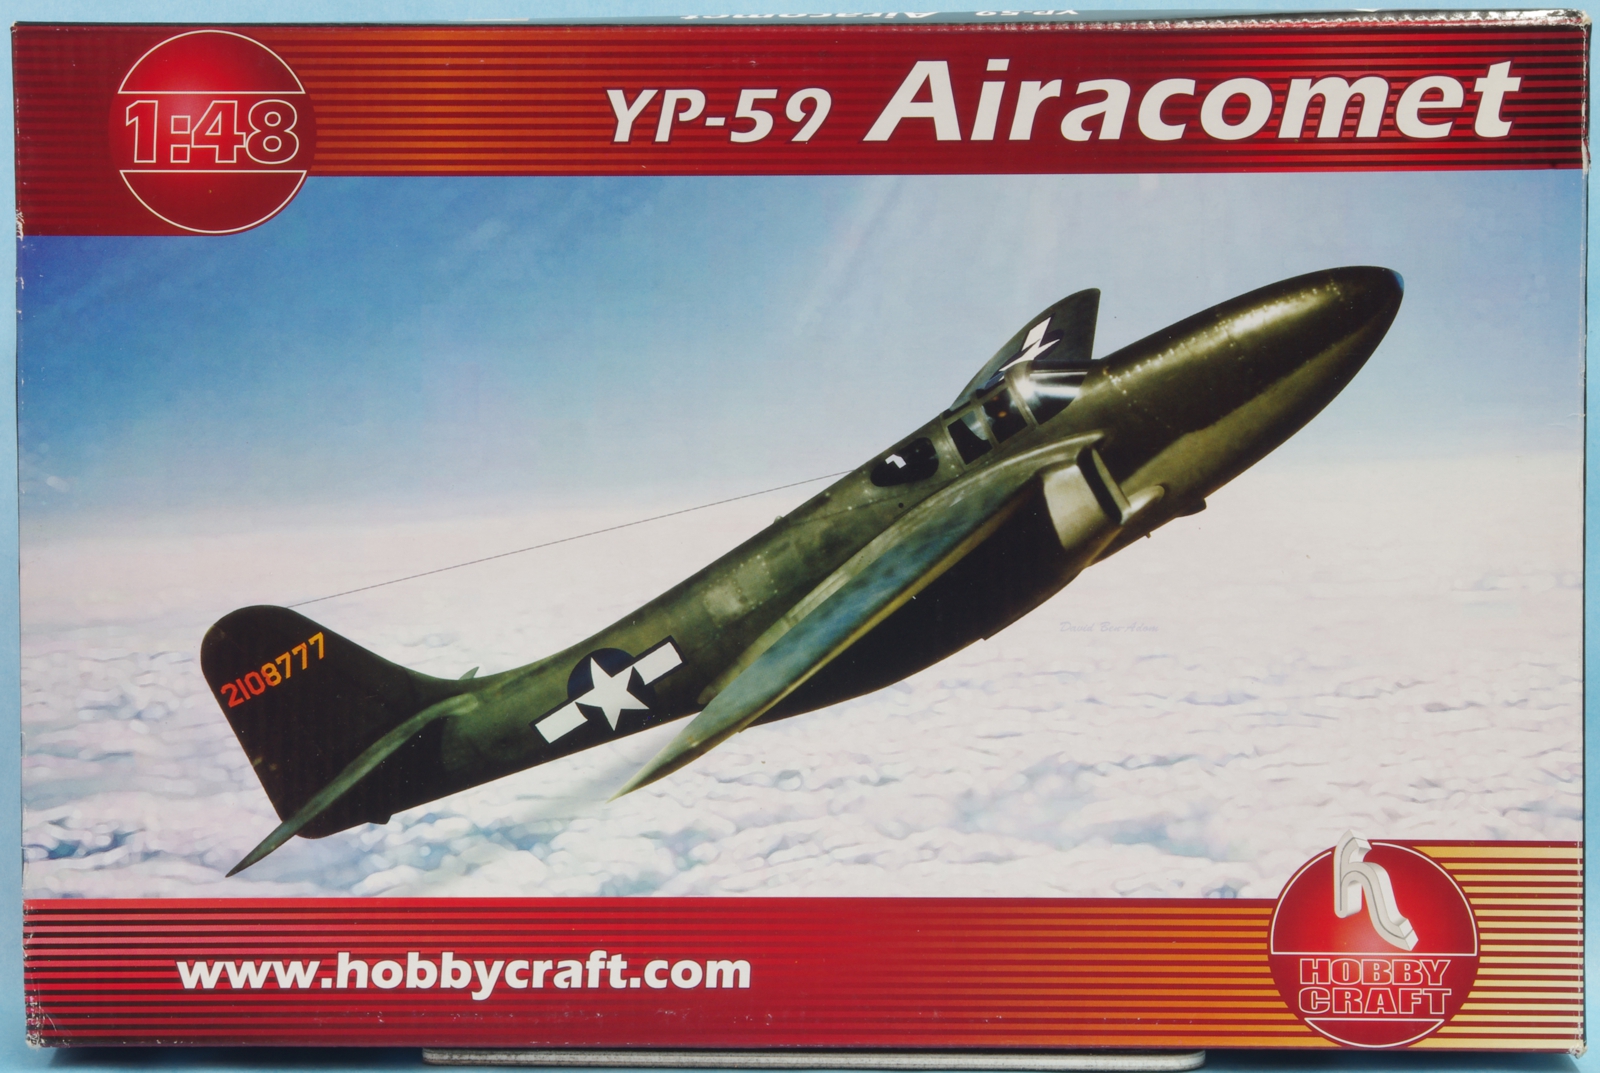
Here's the box art for the kit I am using. There is another available for the later versions with squared off flying surfaces.
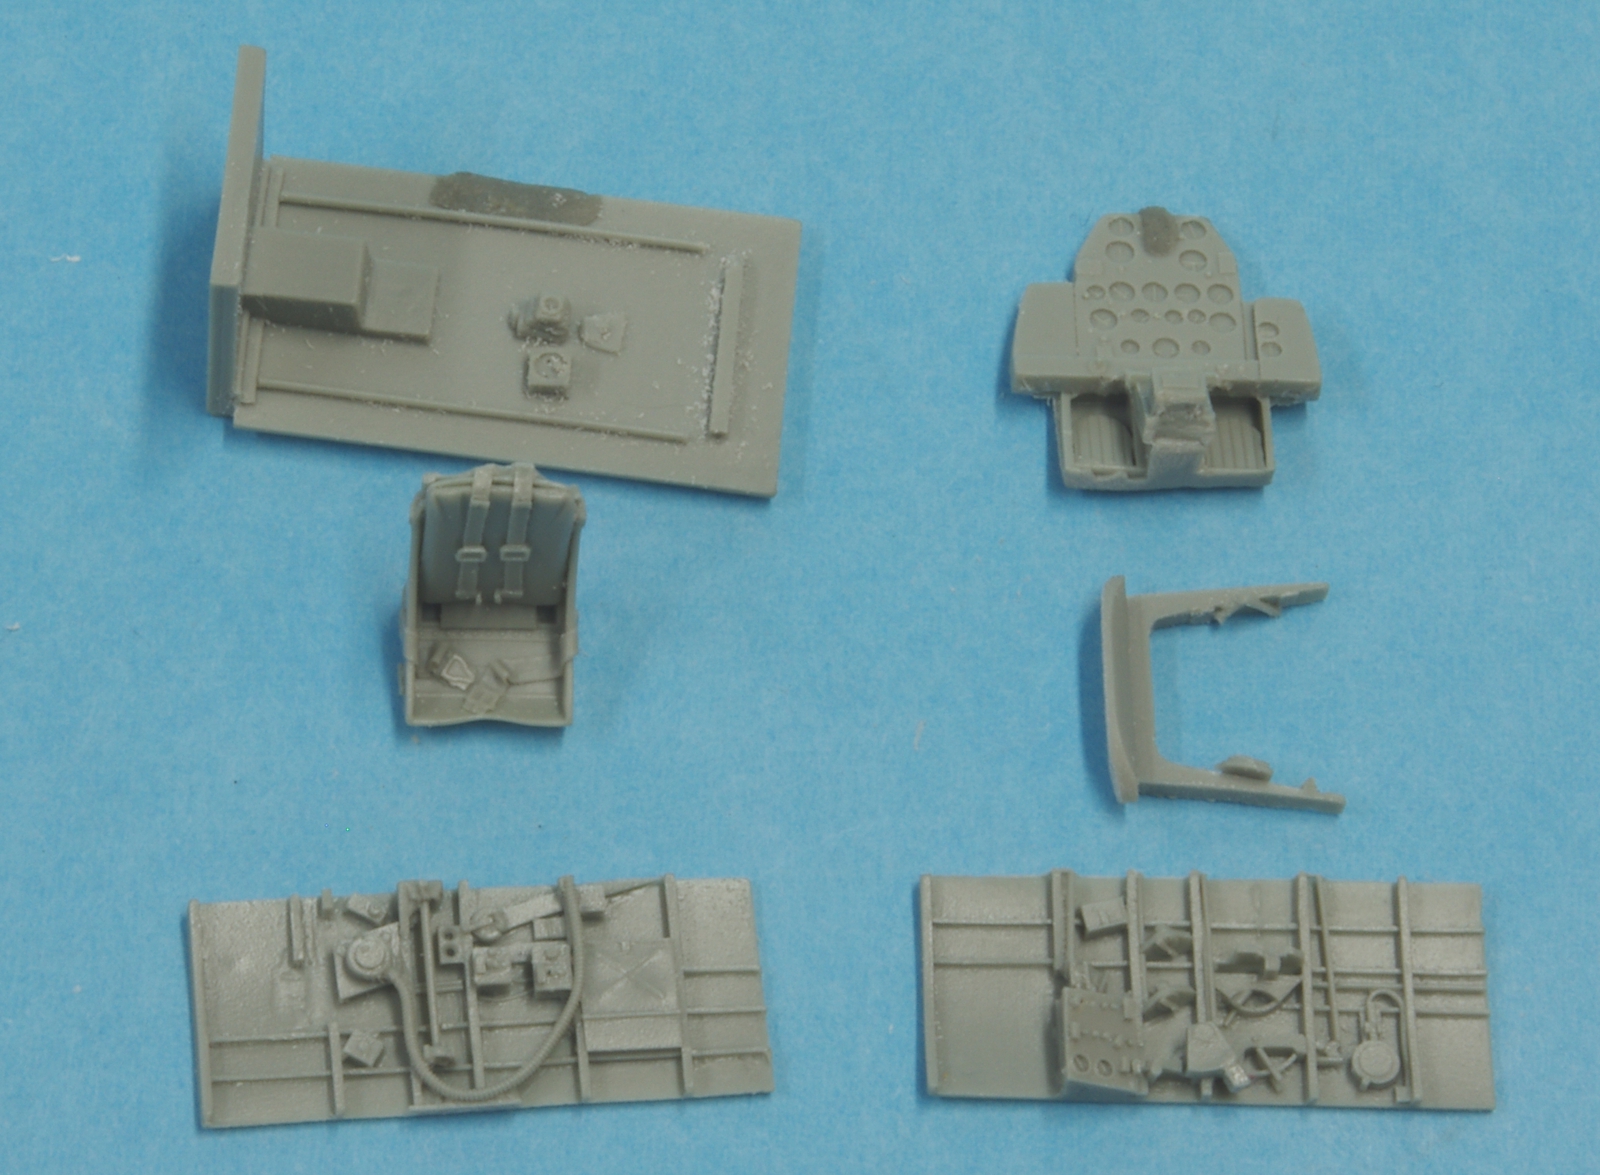
The True Details cockpit set to be used:
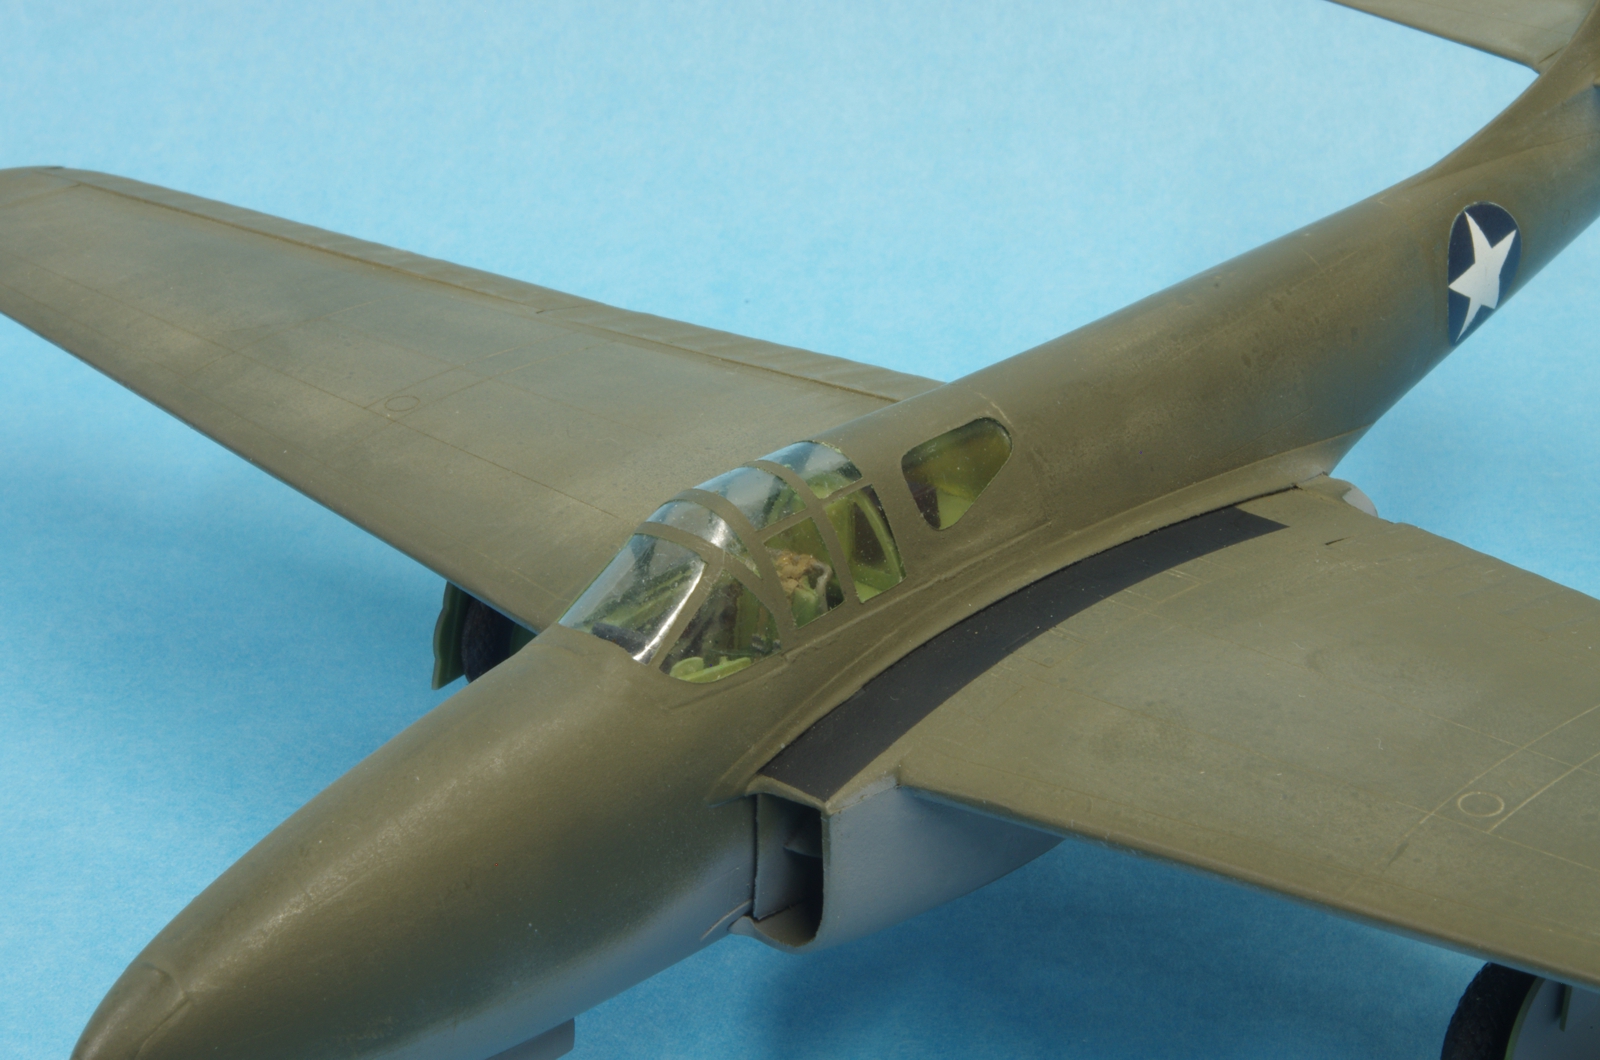
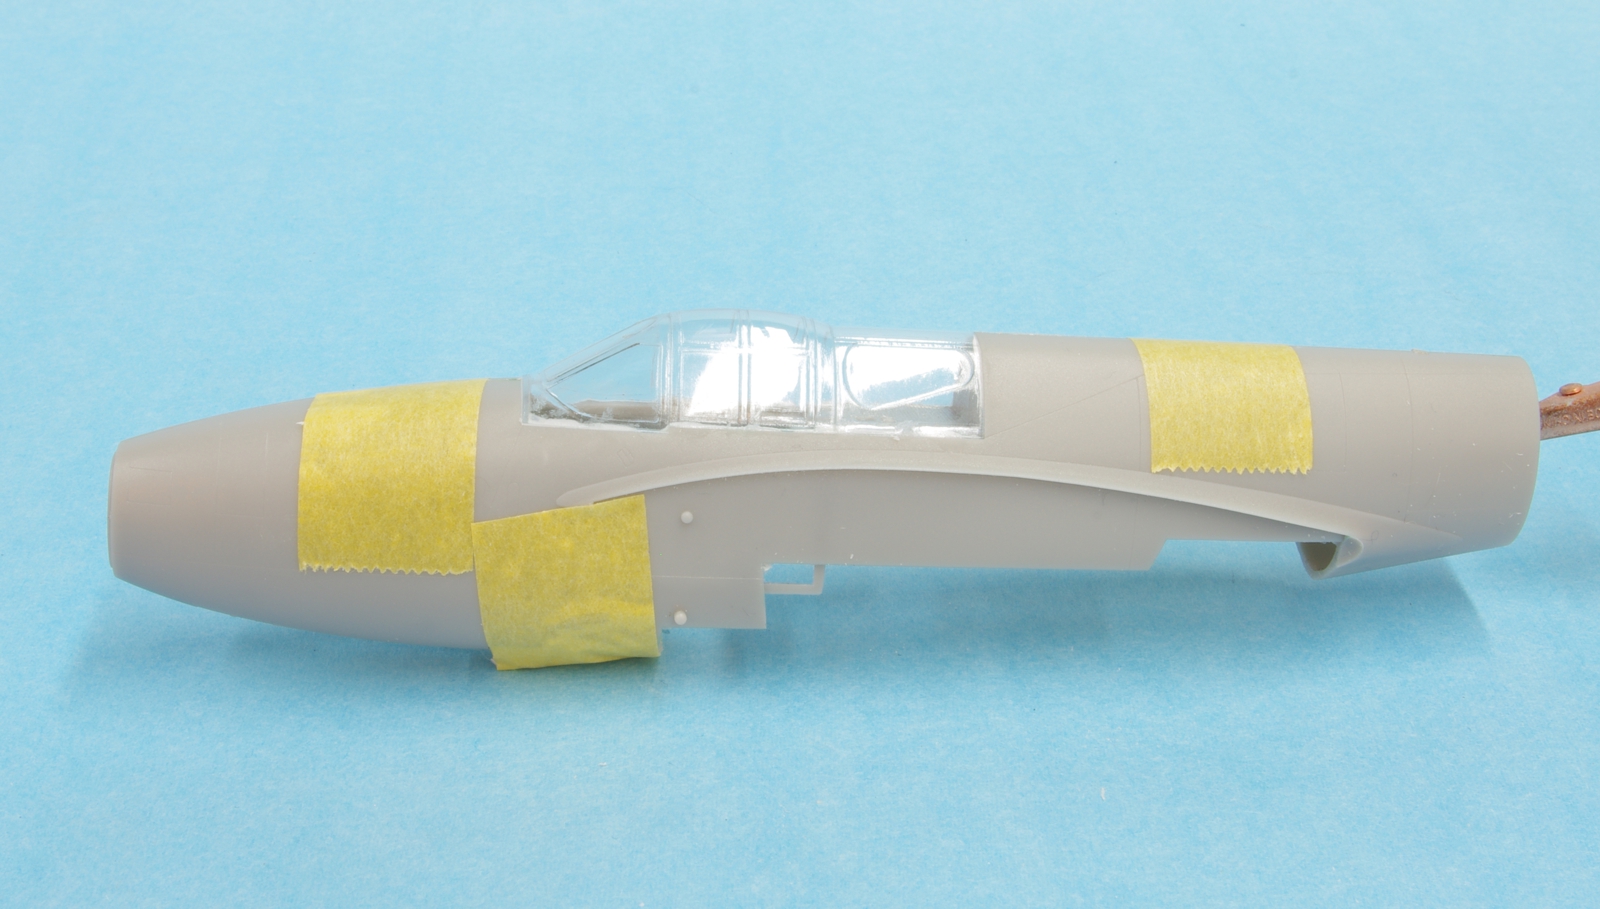
Here the kit canopy is white glued in place so a slicone rubber mold can be made of the shape, which will be sanded down to look like the earlier side opening affair.
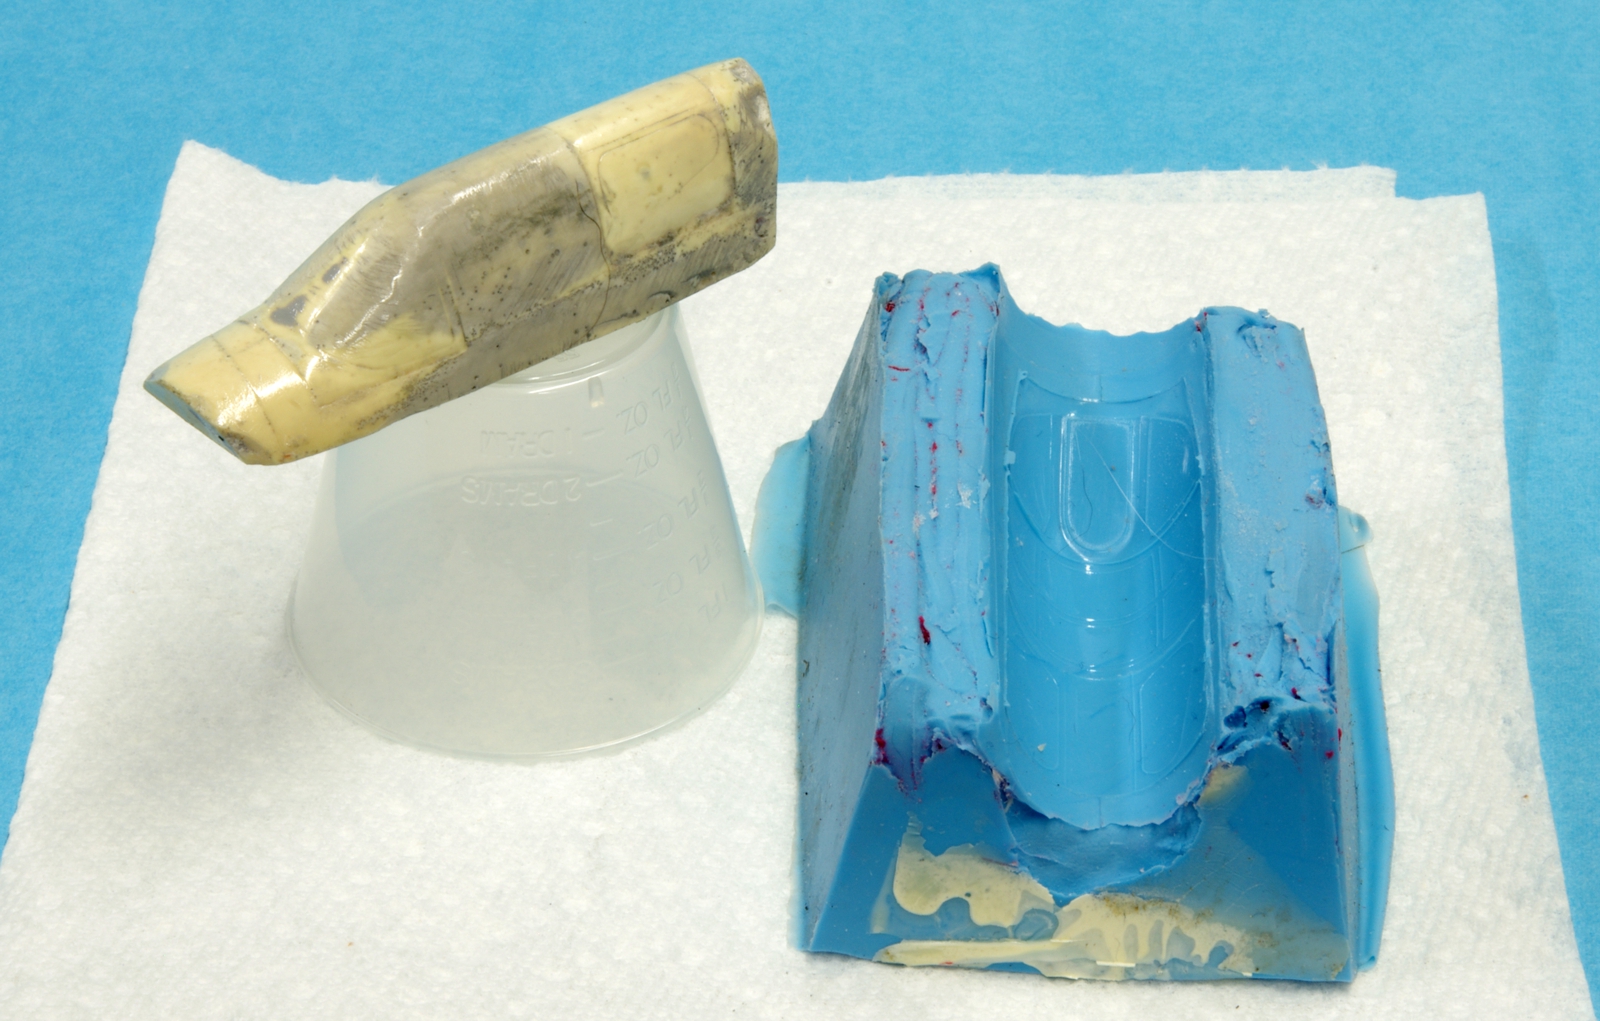
The silicone mold. Plastic card and clay were used to make a dam for the mold. Silicone gets every detail. Too bad I had to sand it all away. On the left the reshaped and sealed canopy buck to be used for vac forming a new canopy.
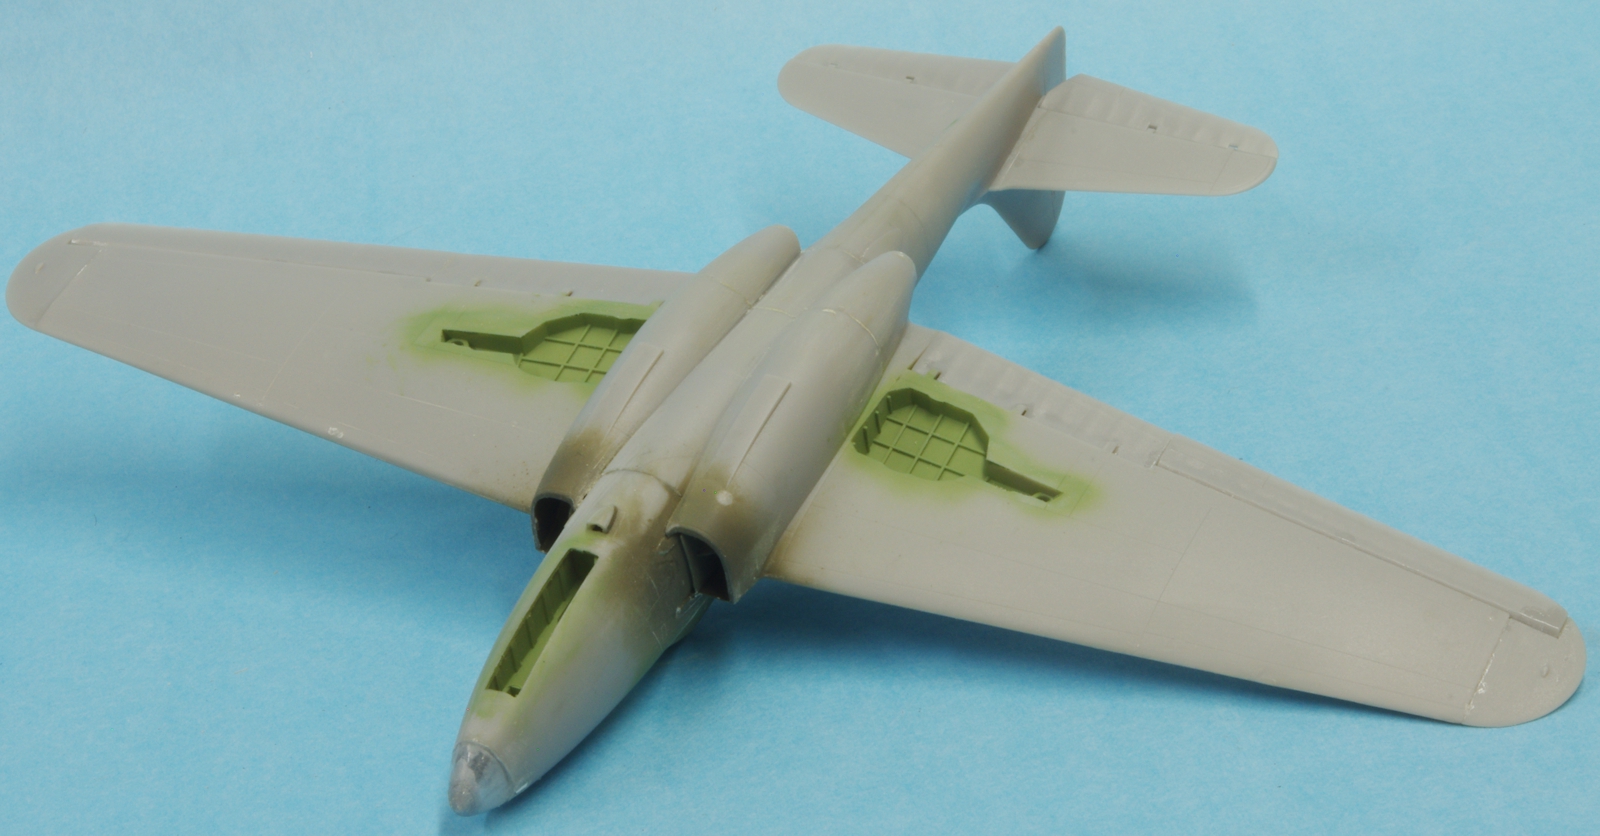
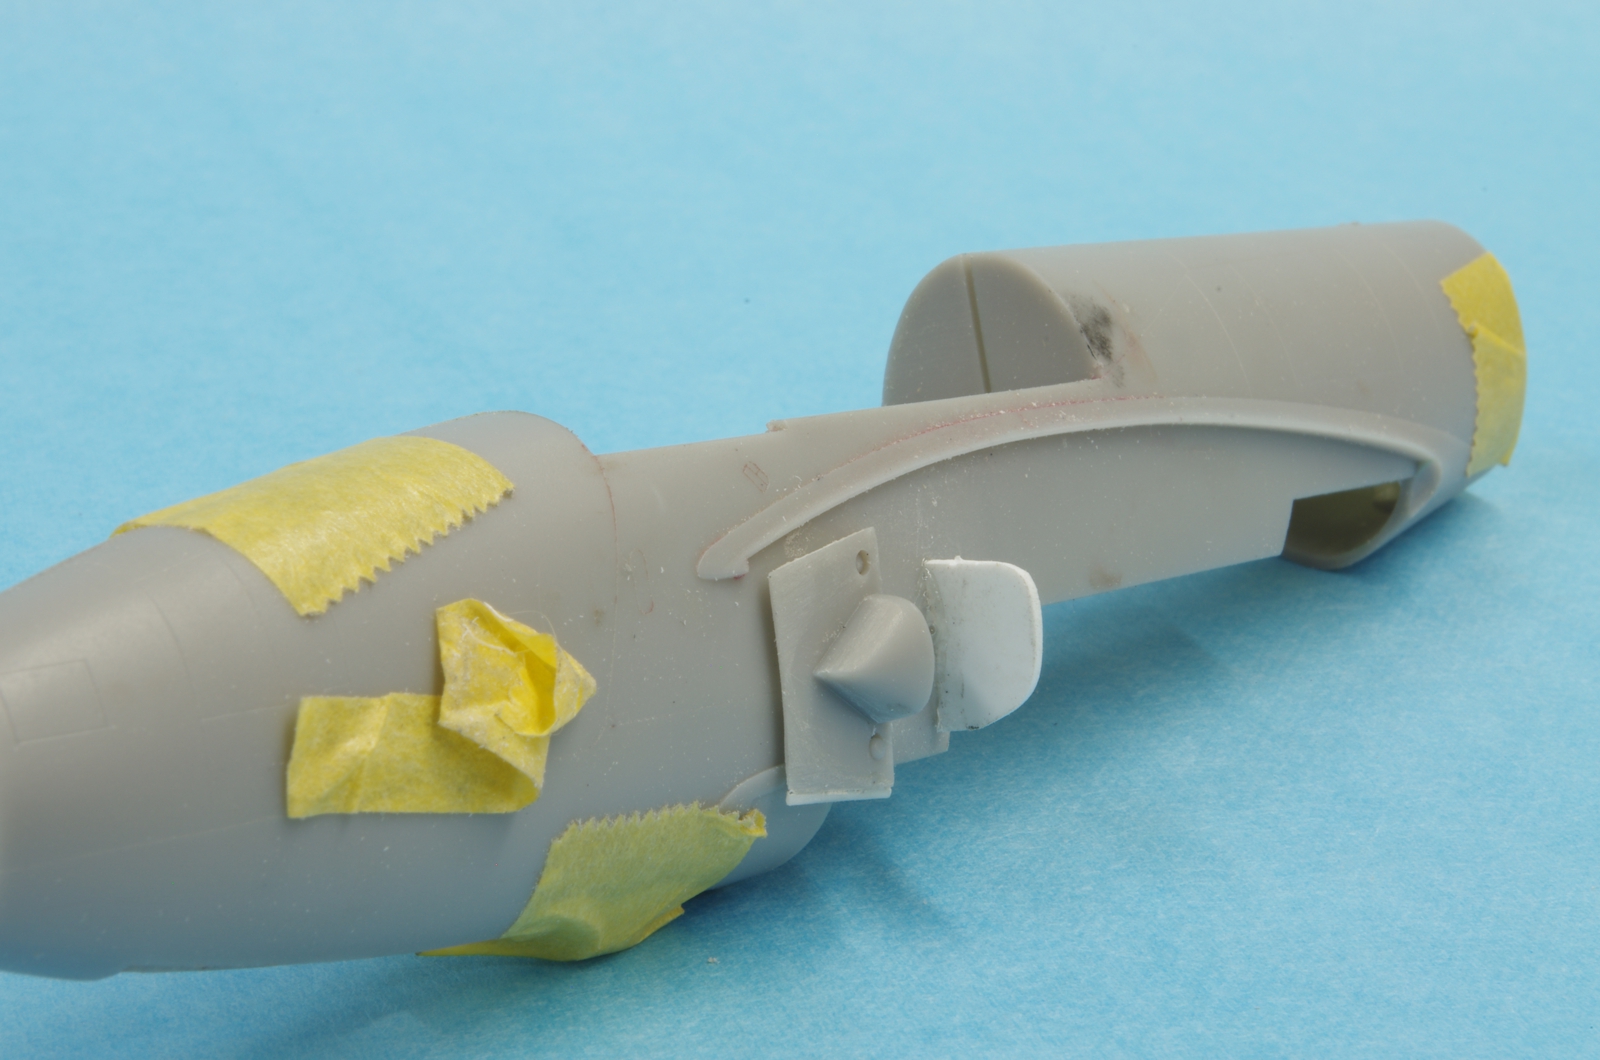
These are parts 14 and 18. They are shown installed in section 4 of the instructions. No reference is made to when they are installed. They disappear in section 5. 14 is the left splitter plate and inlet fairing, and 18 is the right.. I thinned the splitter plates quite a bit and added some plastic sheet on the bottom so they would match the inlet better. In this photo only the one on the left has the changes.

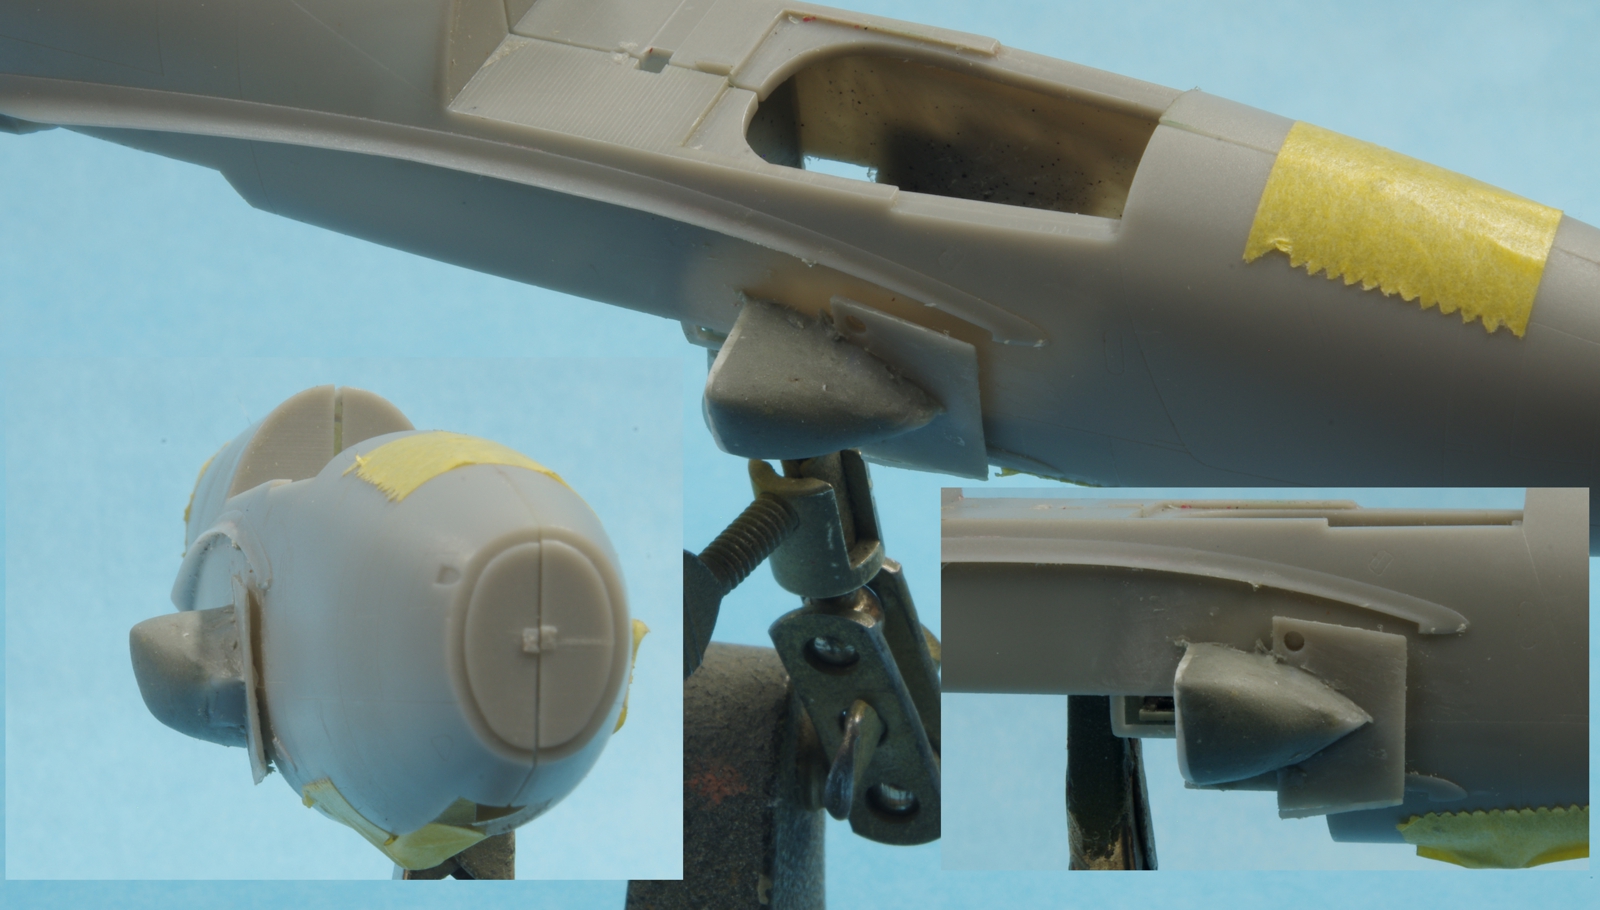
A plate was made to fit behind the splitter plate which will form the aft end of an enlarged inlet fairing. Photos in Steve Ginter's book on the P-59 were used as reference for this.
Aves Epoxysculpt was used to form the enlarged and reshaped engine inlet fairings. A little cleanup still required.
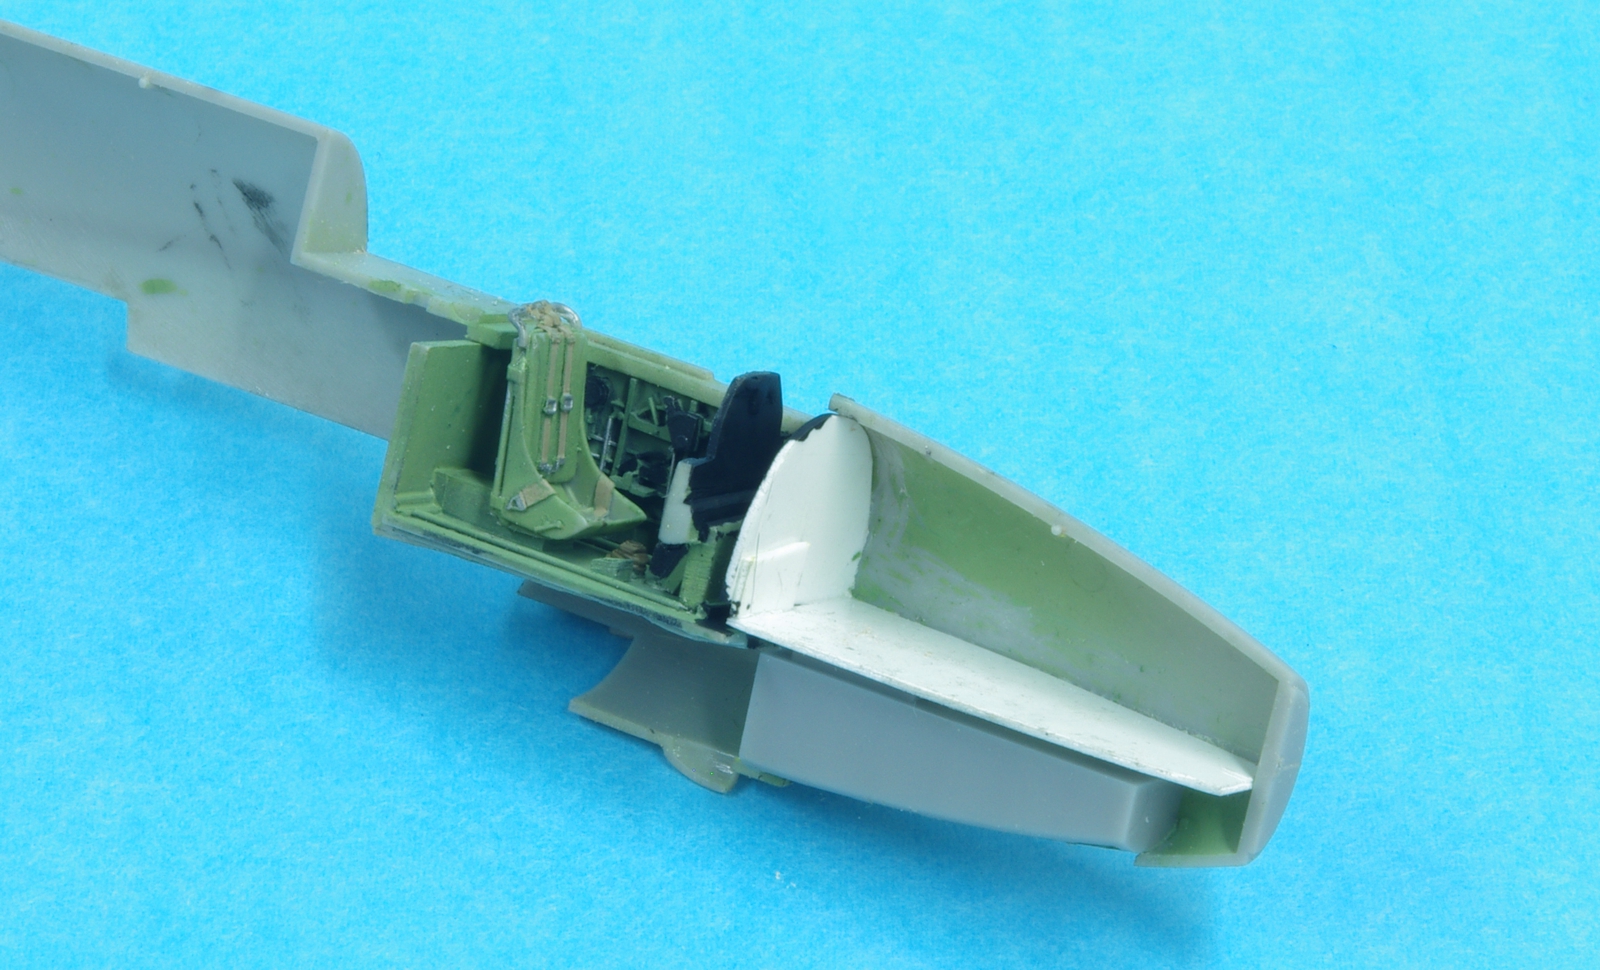
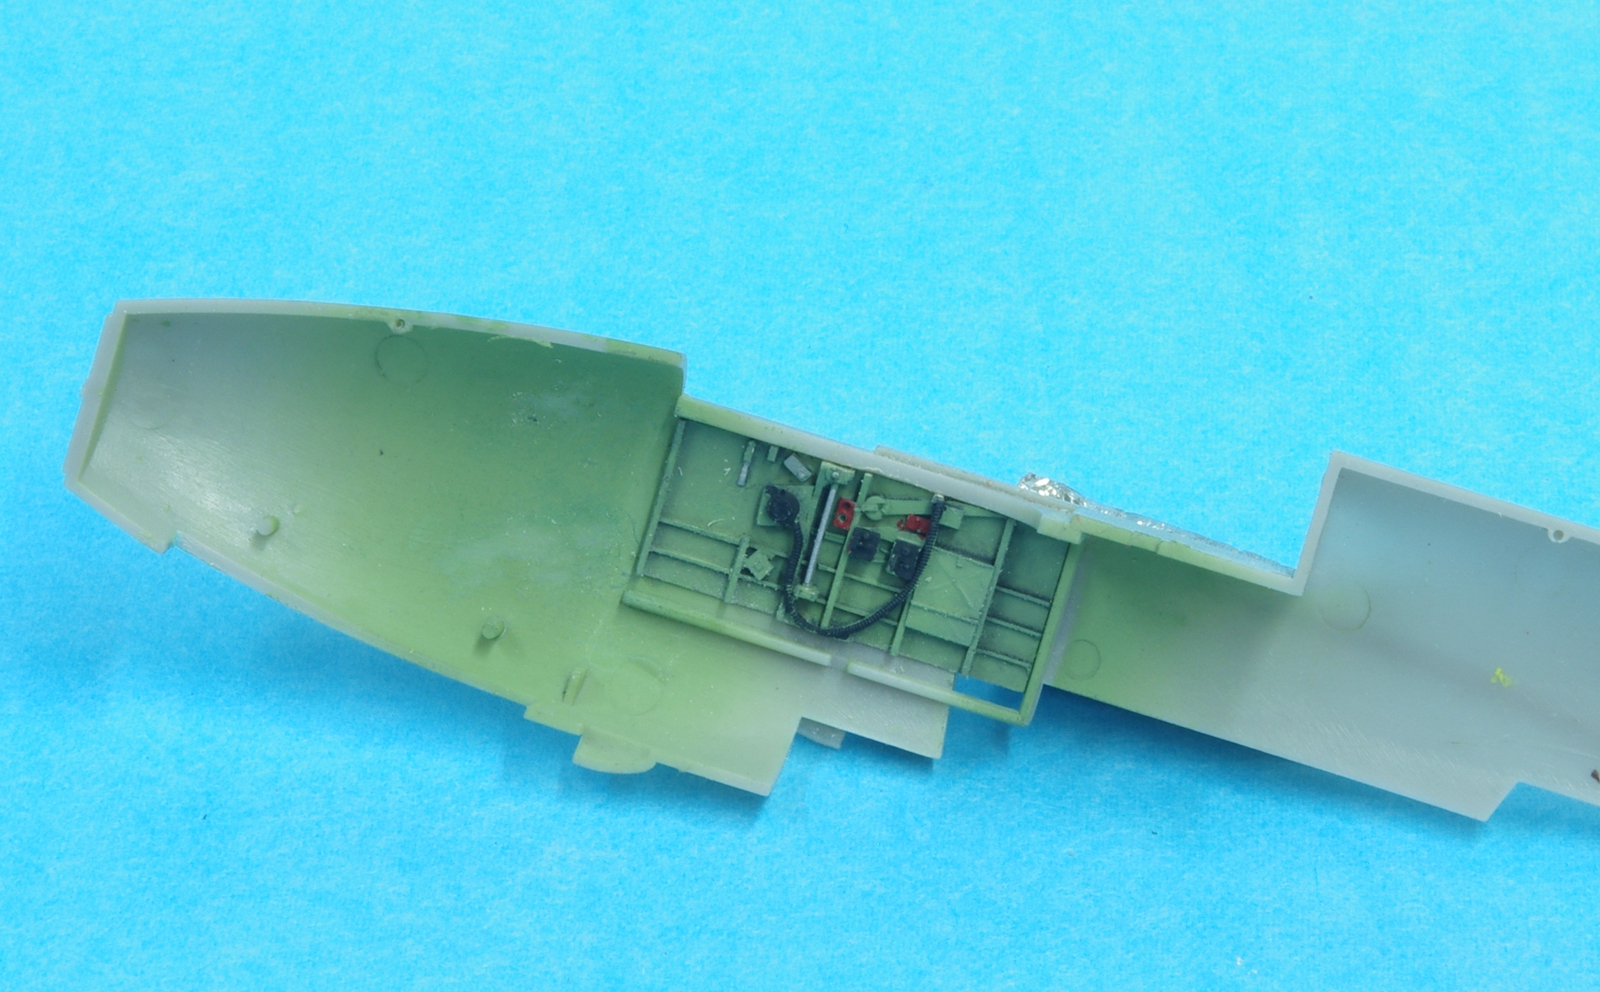
A plastic card shelf was made to form a cavity for a cast nose weight. This photo also shows some of the left cockpit which has been installed and painted using the Black Box set. 34227 was used for the cockpit base color, over black preshading.
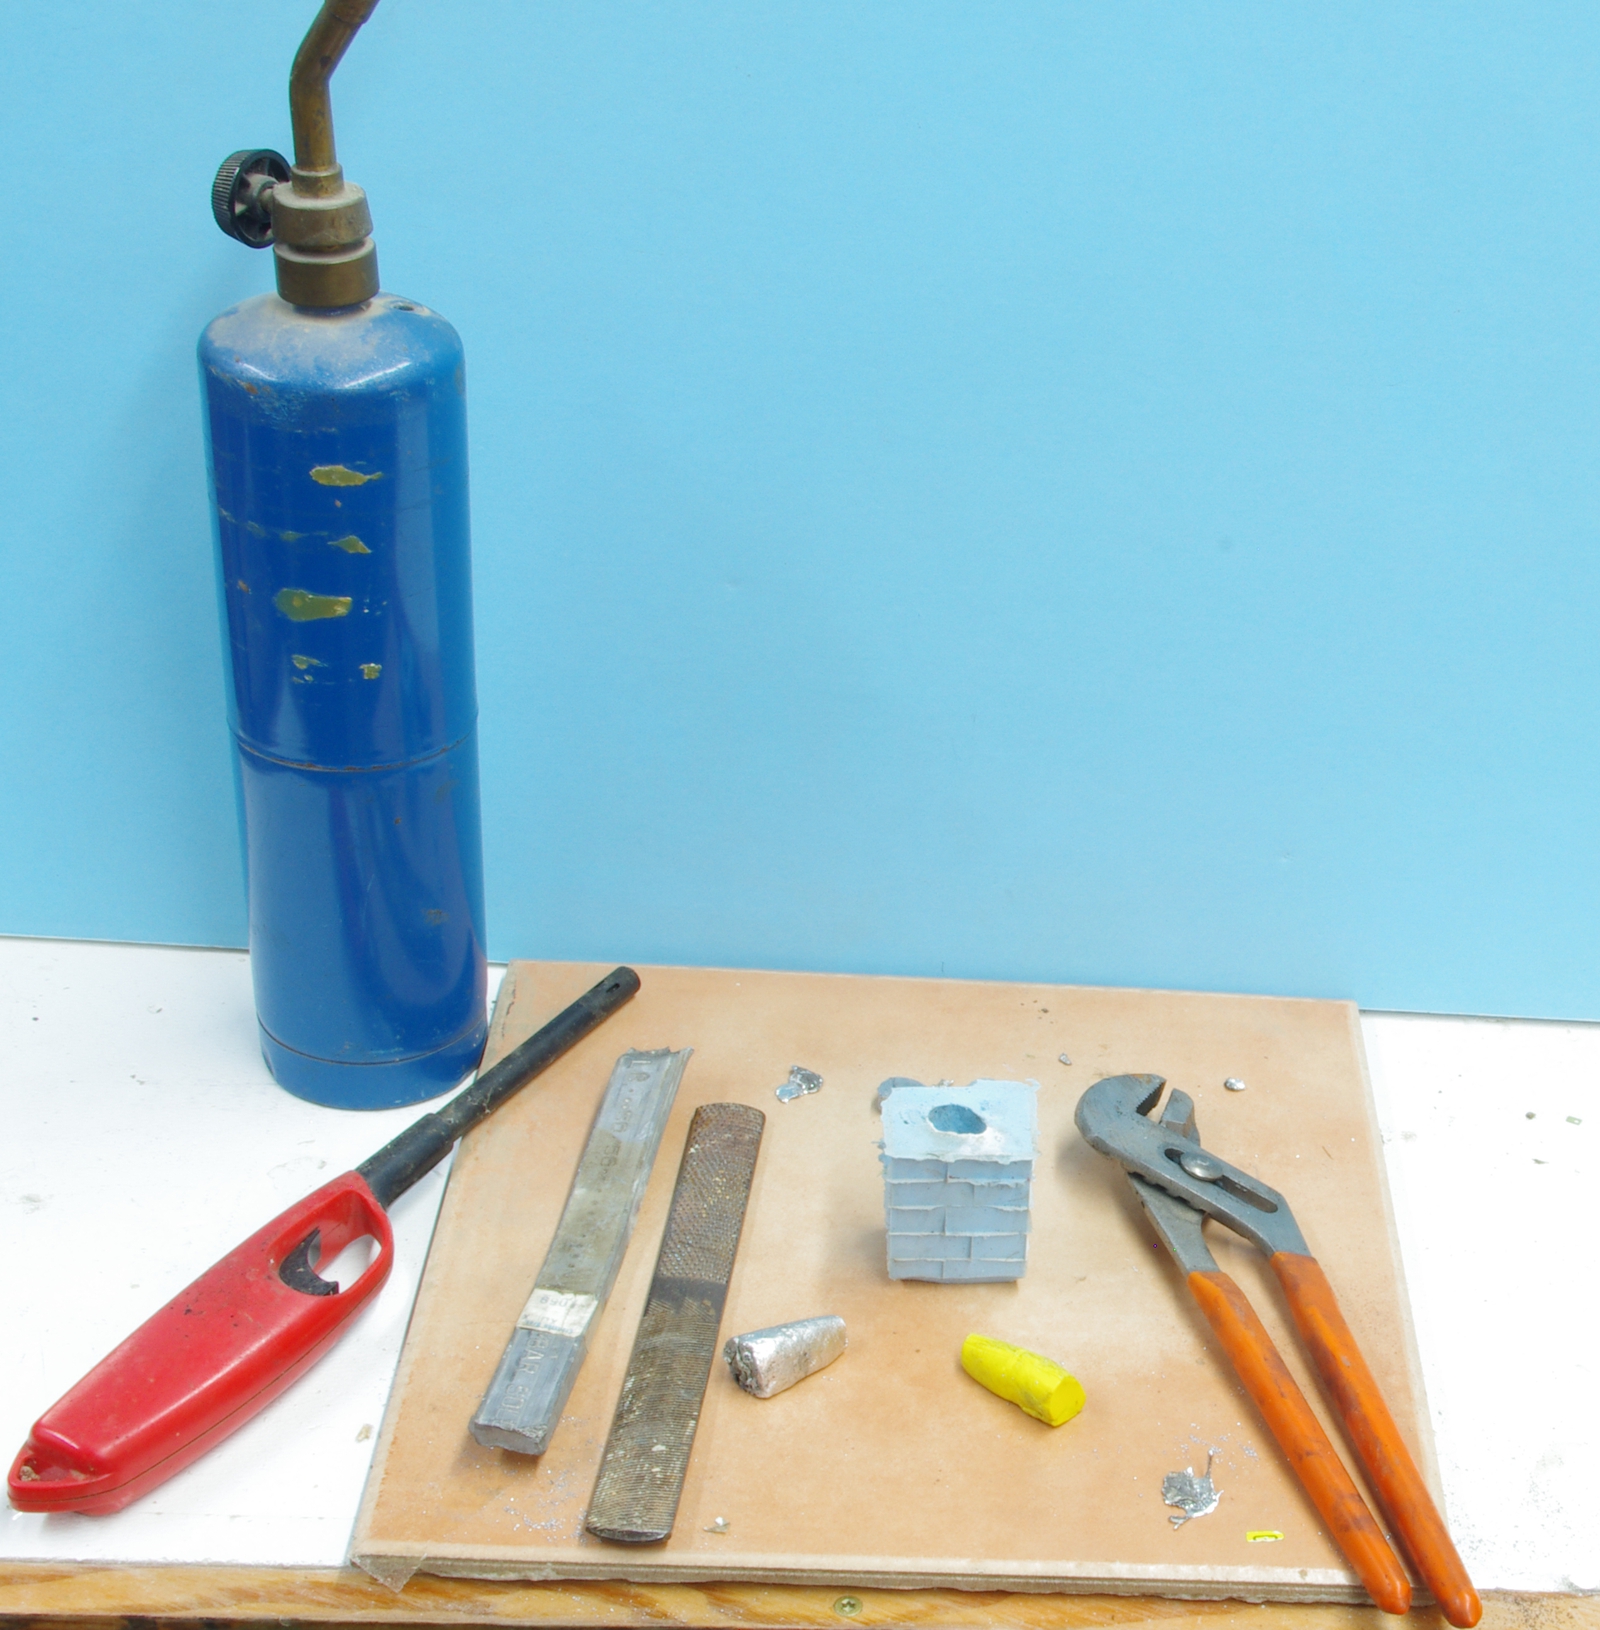
A clay buck was formed by pressing it into the left nose area, shaped some on the right and then the right fuselage half was pressed on to get a workable shape. A form was made with Lego blocks on a plastic base and the buck was stuck in the center. Silicone mold material was poured into the mold. Once cured, lead was melted into the mold from the bar shown using the propane torch. Some filing and sanding was needed to get it to fit but not bad. A second weight was cast as I intend to build a P-59B version later.
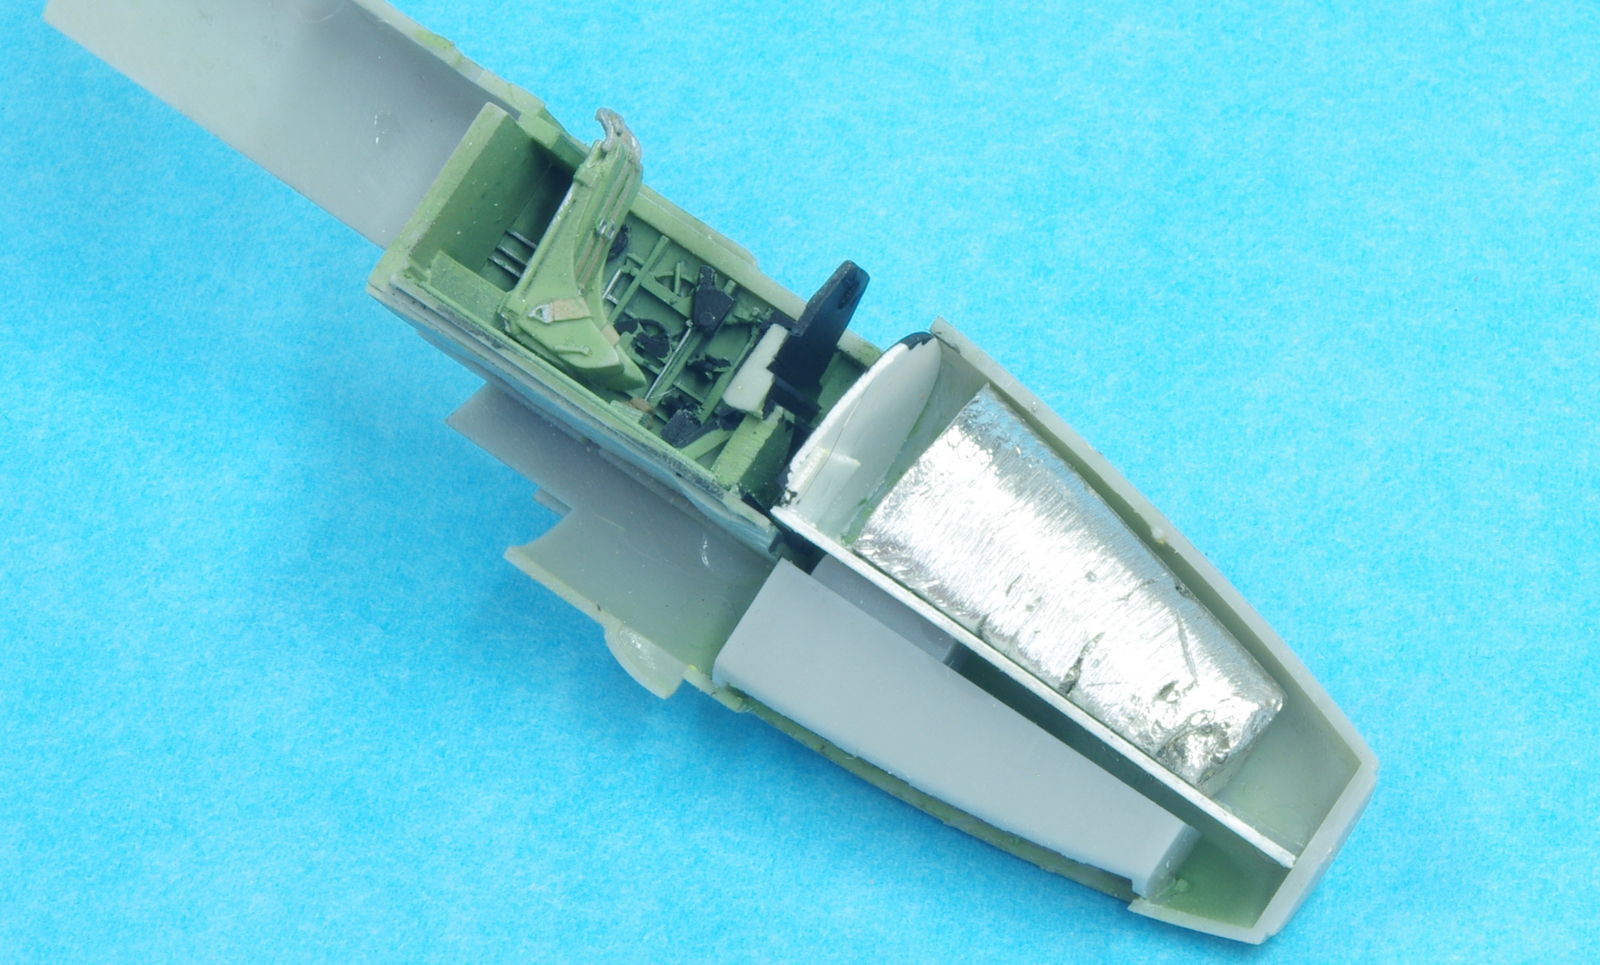
The right cockpit sidewall.
The finished weight. I don't think this one will be a tailsitter.
Here's the box art for the kit I am using. There is another available for the later versions with squared off flying surfaces.
The True Details cockpit set to be used:
Here the kit canopy is white glued in place so a slicone rubber mold can be made of the shape, which will be sanded down to look like the earlier side opening affair.
The silicone mold. Plastic card and clay were used to make a dam for the mold. Silicone gets every detail. Too bad I had to sand it all away. On the left the reshaped and sealed canopy buck to be used for vac forming a new canopy.
These are parts 14 and 18. They are shown installed in section 4 of the instructions. No reference is made to when they are installed. They disappear in section 5. 14 is the left splitter plate and inlet fairing, and 18 is the right.. I thinned the splitter plates quite a bit and added some plastic sheet on the bottom so they would match the inlet better. In this photo only the one on the left has the changes.
A plate was made to fit behind the splitter plate which will form the aft end of an enlarged inlet fairing. Photos in Steve Ginter's book on the P-59 were used as reference for this.
Aves Epoxysculpt was used to form the enlarged and reshaped engine inlet fairings. A little cleanup still required.
A plastic card shelf was made to form a cavity for a cast nose weight. This photo also shows some of the left cockpit which has been installed and painted using the Black Box set. 34227 was used for the cockpit base color, over black preshading.
A clay buck was formed by pressing it into the left nose area, shaped some on the right and then the right fuselage half was pressed on to get a workable shape. A form was made with Lego blocks on a plastic base and the buck was stuck in the center. Silicone mold material was poured into the mold. Once cured, lead was melted into the mold from the bar shown using the propane torch. Some filing and sanding was needed to get it to fit but not bad. A second weight was cast as I intend to build a P-59B version later.
The right cockpit sidewall.
The finished weight. I don't think this one will be a tailsitter.


") I used the Cutting Edge cockpit on mine but the True Details one looks just as nice. I also used a Terry Dean nose weight. I wish he was still doing them as they are real handy and save a lot of extra work. Mine has been on the shelf of doom since the end of 2008. It stalled out while I was working on reshaping the inlets. I need to go back and work on the splitter plates, I like how yours turned out. I have a photo some where that I took looking down the throat of the intake of the one at the Air Force Museum if you are interested. Looking forward to the completed project !
I used the Cutting Edge cockpit on mine but the True Details one looks just as nice. I also used a Terry Dean nose weight. I wish he was still doing them as they are real handy and save a lot of extra work. Mine has been on the shelf of doom since the end of 2008. It stalled out while I was working on reshaping the inlets. I need to go back and work on the splitter plates, I like how yours turned out. I have a photo some where that I took looking down the throat of the intake of the one at the Air Force Museum if you are interested. Looking forward to the completed project !