• Modelers Alliance has updated the forum software on our website. We have migrated all post, content and user accounts but we could not migrate the passwords.
    This requires that you manually reset your password.
    Please click here, http://modelersalliance.org/forums/login to go to logon page and use the "Forgot your Password" option.

He 115B

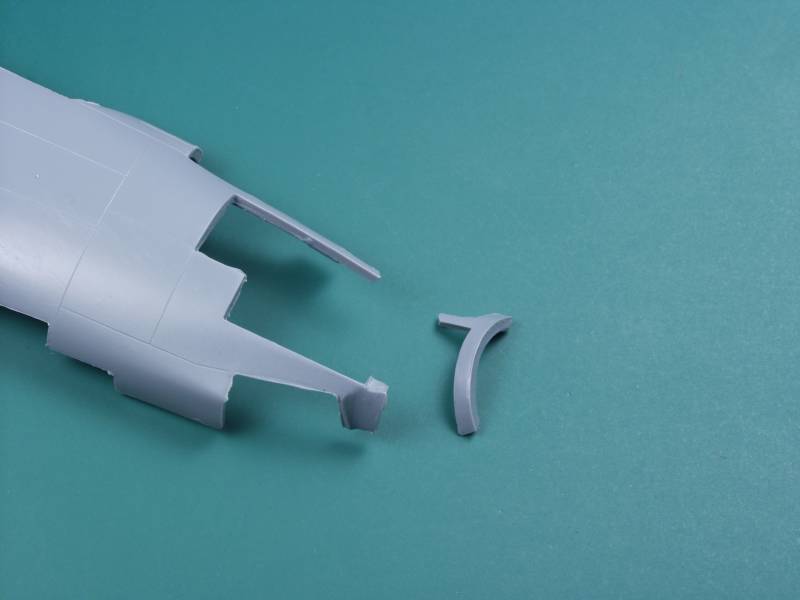
Well. one step forward and two back. The fuselage halves were joined and after a bit of sanding and filling was ready for the next step. While test fitting one of the lower clear parts I lost my grip and the fuselage plummeted to the floor. Naturally it landed on the most delicate part, the nose. The floor in my shop is carpeted but I have one of those protector things to keep the wheels on my chair from sinking into the carpet and that's where it hit. The worst of the damage was here...

115-b12.jpg


Fortunately all parts were found before being consumed by the carpet monster.

The pilots seat was broken loose from three of its four mounting points and the bottom seam popped open. That was not a big surprise as due to the warp in the fuselage halves there was some force working to open the seam anyway.

115-b13.jpg


Fortunately I was waiting till after making sure all the clear pieces fit before installing the bomb aimers lounge or it would have been knocked asunder as well. In the end there may be bonus from all of this. The kit was received with one of the nose pieces broken and I had reattached it before starting the kit...

115-48-01a.jpg


It's possible that the reason I had issues fitting the clear piece on that side was due to not getting the broken piece exactly where it needed to be so this may work for the better. I may fit the clear piece first and puzzle the other pieces around it for a better fit. All and all it could have been worse and is just another bump on the road to completion.
 
Ouch :facepalm Hope you can figure out that puzzle Gary :coolio I don't care for pre broken kits :sick:

Cheers, Christian B)
 
That's unfortunate Gary but it doesn't look like too much damage. I'm sure you can handle it.

the pit looks great!

:popcorn
 
Well, I spent a couple hours with this yesterday and realized why I set it aside months ago. Fixing the nose was no big deal but that took me back to what I was doing at the time and that was fitting the clear parts in the nose. Most of it doesn't fit and will require a lot of fiddling to make it fit. Then looking ahead I foresee nothing but trouble fitting the struts to the floats and struts to the wing and fuselage. Most likely a jig will need to be made to keep it all lined up. Some of the mounting points have holes for alignment pins but the mating parts don't have pins, the balance of the parts just have mounting locations indicated by a slightly raised pad at the mounting point. My experience with Special Hobby leads me to believe I will have issues in this area.

Be that as it may I haven't given up but it's getting more doubtful that this one will make the dead line. I should never sign up for campaigns that the major part of the time runs between April and October as I'm constantly drawn away by outdoor activities.

An example of a couiple of the things that has kept me away from plastic modeling this summer

trestle10.jpg


trestle11.jpg


For size reference both the trestle and bridge are 8' long.
 
Well, it looks like I'm going to take a fail on this one too ! Sort of bummed out as I have wanted to build this one for a long time but right now my mojo isn't there. Even if it was ready to paint the remaining time would be a push as I like to leave at least a day between coatings. Right now there are too many other distractions and I'm just not feeling the love ! So this one goes back into a work box for the time being and I'm going to take a crack at getting on with the Vigilante that is due at the end of next month wish me :zen
 
Sorry to hear this Gary, can't wait to see this one done though!

You might be in good company....I'm having the same trouble trying to complete anything this year!
 
Back
Top