• Modelers Alliance has updated the forum software on our website. We have migrated all post, content and user accounts but we could not migrate the passwords.
    This requires that you manually reset your password.
    Please click here, http://modelersalliance.org/forums/login to go to logon page and use the "Forgot your Password" option.

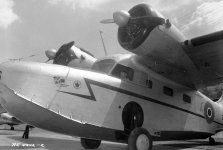
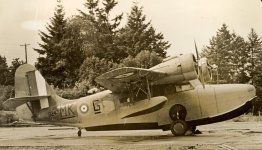
Grumman Goose Mk III, No. 13 Operational training Squadron, RCAF Station Sea Island, British Columbia

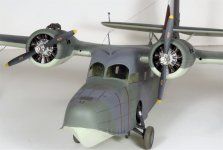
I thought I would share a recent build, the 1/48 Czech Models Grumman Goose. I have read that this kit was under development for Classic Airframes, but with the demise of CA, was released by Czech Models. It certainly has the look and feel of a CA short run kit. As a short run kit it, is a nice challenge, no locating pins, heavy trailing edges, many missing finer details, clubs for propellers, but an interesting aircraft none the less.
Image4.jpg


My first step was to decide what to do with the engines and props (very rough kit parts, and rough, incorrect resin engines) Eleven brass, aluminum and plastic parts went into one prop, which was then used as a master to resin cast replacements. I tried to correct the engines, but in the end replaced them with Vector R-985's with pushrods and wiring added.
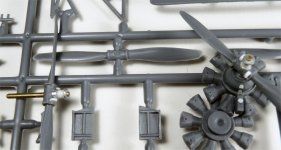
Image2.jpg P1262964.JPG Image17.jpg

From the engines, I went on to the wings and tail feathers. Trail edges had to be thinned considerably, and missing details such as cowl vents, leading edge cooling vents, panel hinges, aileron actuators added, incorrect trim tabs filled, and missing panel lines rescribed.
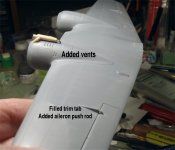

Image5.jpg

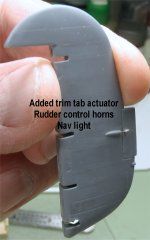
and the tail feathers had the controls separated, hinges fabricated, trim tab actuators added.
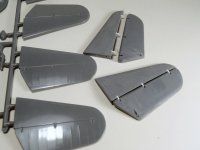
P1262962.jpgImage9.jpgImage10.jpg
more later ...
 
Last edited:
Awesome. Nice work on the engines and props. Love the scratch built bits and bobs. Watching with interest.
James
 
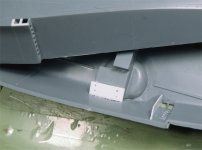
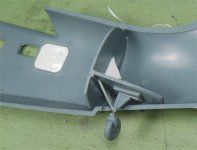
When I moved on to the fuselage (hull?) a few things became apparent. The wheel wells took a lot of cutting, scraping and fitting to go in, the opening for the lower gear doors had to be cut out (at a 45 degree angle), the lower gear links need this to go in, and for the lower door to fit, not mentioned in the instructions, the gear upper mount pin needs to be removed, the leg shortened, and a square mount pad added on top instead. As molded, the gear cannot go in properly, and the gear would have to installed on one side only, the second added when the first was dry, so it could be shimmed to get the plane level. The gear installation was the worst part of the whole build.
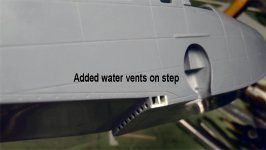
For the RCAF mark, the rear most windows had to be eliminated, the water vents at the step had to be opened up, a triangular brace added behind the step, a tie down at the rear fuselage added, numerous vents and an ADF loop added (made from brass wire wound around a paint brush handle and soldered).
The side windows were added early, filled, sanded smooth and polished, then masked.
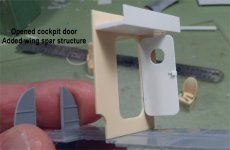
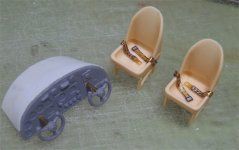
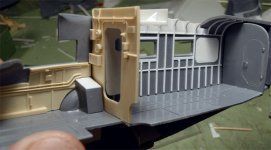
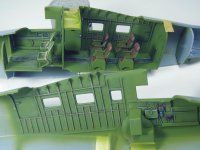
I opened up the cabin door, and made the wing carry through structure, added frames and stringers to the cabin, and belts and smaller details to the cockpit.
Image11 b.jpgImage11 c.jpgImage11.jpg
Image6.jpgImage7.jpgImage8.jpgImage12 b.jpgImage13.jpgImage24.jpg
 
Last edited:
Sometimes the hardest kits turn out to be your favorites. I built a CA F4B kit which is a favorite of mine. Great work so far!! Gary S.
 
Is this the same kind of airplane Jimmy Buffett donated to the USS Alabama museum following his death?
Your process is intriguing to see!
 
Is this the same kind of airplane Jimmy Buffett donated to the USS Alabama museum following his death?
Your process is intriguing to see!
I think the Hemisphere Dancer is an Albatross but I do believe he may have had a goose also. Reformed Parrothead here.

Lovely work Kevin!
 
Sorry it took so long to continue - short family trip followed by a case of Covid.

... to continue, after finishing the interior, I installed the side windows with gap filling zap-a-gap applied with a toothpick in dabs from the outside, sanded flush and then polished. This gives a seamless, flush fit after painting. Then I deviated from the instructions by trimming, fitting, (repeated several times) and installing one side of the canopy to the fuselage half. After filling, sanding the joints, I installed the other canopy half to the other fuselage half, making sure the center post would align and touch. Then I could join the fuselage together. A touch of Tamiya extra-thin cement above the windshield center joint allowed capillary action to bond the halves together with no mess. At that point I trimmed and shimmed the wing assembly to fit the windshield and fuselage.
Image16.jpg

It was so much easier than installing the wing first, then trying to align the window halves.
Then it just a matter of attaching the rudder and stabs and cleaning up the seams.
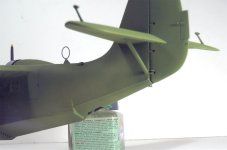
I added the small bits (radio mast, DF loop, extra vents, tie down etc) and trimmed down the spray rail and added braces as seen on the RCAF aircraft.
60fabd4823c2cf6fe234396b_Grumman-Goose-Mk--II--RCAF--Serial-No--3-----2-July-1948---MIKAN-No-...jpeg 06.jpg P2283001.JPG
Primed everything with interior green and fixed any flaws, missing panel lies etc.

... more later
 
On the wing floats, I pre-drilled #80 (.013") holes to accept .010" phosphor-bronze wires for the rigging, and .030" holes in the strut tops for brass pins to mount them to the wing.
I found, to install the gear leg, the mount pin had to be removed, and a flat, horizontal pad replaced it. The lower 'N' strut had the inner lugs removed, and brass pinned. That way, the pins could be bent to get correct alignment with the leg, and still be strong enough. With the leg and 'N' strut placed into position, the 'N' strut and leg were cemented to each other, and allowed to dry.
They could then be cemented into position and the upper struts trimmed and added. Time consuming, but it resulted in very strong gear.
As mentioned before, I mounted one gear leg completely, and, when dry, trimmed and shimmed the other leg to get the airframe wings level (took several tries).
Gear.jpg

complete 7.jpg
The doors and actuating rods were added, and it was painting time.

Windows and cowl openings were masked with Tamiya tape strips and disc's and primed.
Image28.jpg

(me, trying to avoid knocking off the floats while wrestling with the gear)
 
Back
Top