Steve Ski
Well-known member
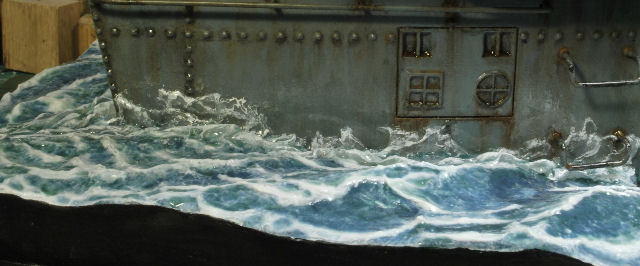
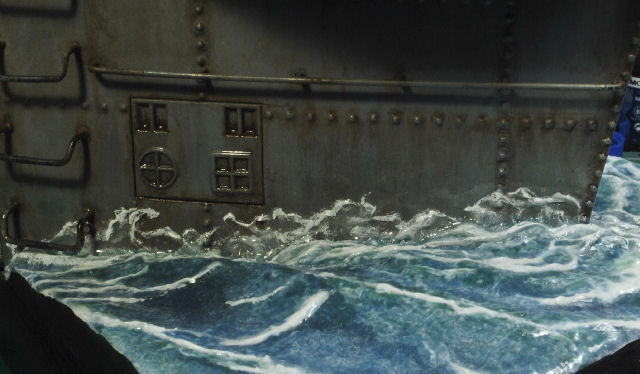
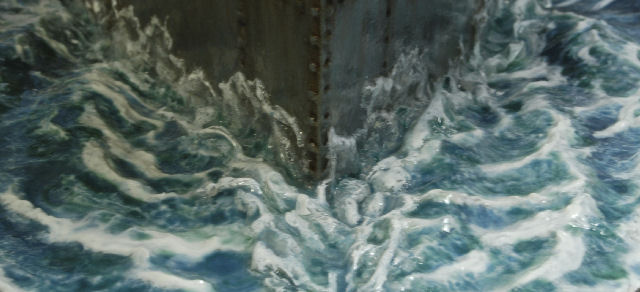
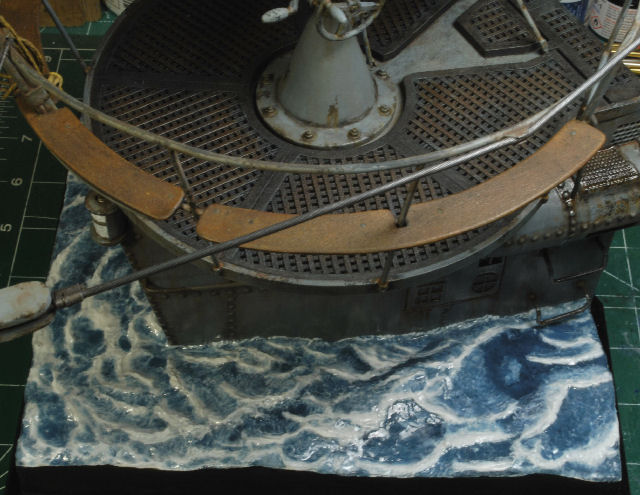
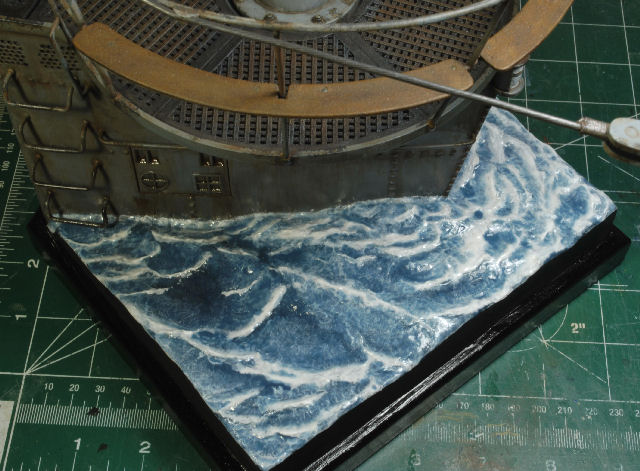
Water Works Finished
After countless attempts to get it right I will finally call this good. It was one of those, "Oops,that'll work", moments. So, Ruck On Bby!
I've watch numerous videos on the subject, even did several dry runs, but trying to get the waves correct for a scenario depicting the rear of a gun deck, and in this larger scale, it proved to be a bit more challenging than I had anticipated. Most of the boat pics and videos describing water effects are in a much smaller scale, so realism is a bit easier to come by. Not to mention I was rushing myself, something I try never to do, so let that be a lesson to me, HA!
Ok, after reshaping the foam to a configuration I felt comfortable with I covered it with heavy blue workshop paper towel using Mod Podge, white glue will work just fine as well. Then I painted the water tones, making sure to highlight the tops of the waves, with Vallejo acrylics in various shades of blue and green.
Once this was completely dry, using an old hair dryer, I added a coat of Vallejo's Water Effects and dried it completely as well. Now, here is the departure from all the videos I've seen so far, I immediately added a layer of toilet paper using Mod Podge (glue) and worked small areas at one time. Once the paper was in place I added a bit more "glue" to the surface and forced the paper into a wave shape following the natural direction desired for the effect I was attempting to duplicate. So far, so good.
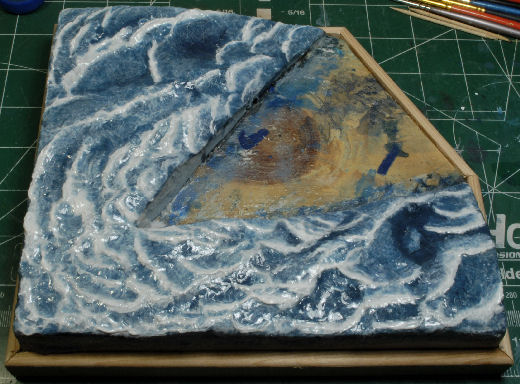
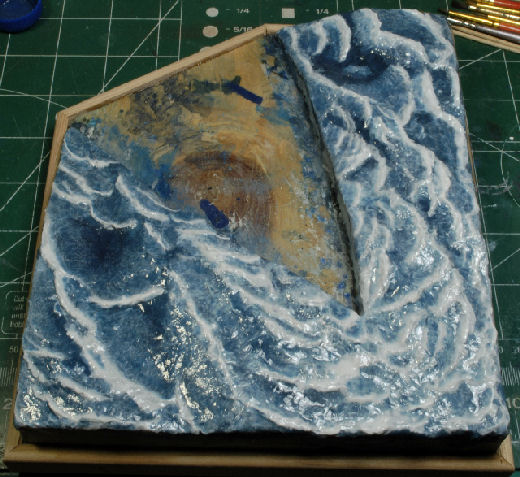
I continued this process all over the underlying waves and added a second and third layer of paper to the back portion of the deck where the most turbulence would occur. All good so far, and the depth of the water color from underneath was starting to come out nicely. The next step was to use heavy Medium Gel, from Liquitex, with a touch of white acrylic paint added. Taking the gel I worked the backs of the paper waves to smooth out the heavy ripples, giving it a much smother transition. I did this over the entire base making sure I didn't get carried away. So far so good, again.
Now, to lighten up the effect and knock down all that white action I used Vallejo's Water Effects with a touch of blue acrylic paint and dabbed all the recesses of each created wave and all throughout the larger areas making sure I did not touch the tips or the build up of each wave. Yes, this was time consuming, but it appears to have worked. Hence, "Oops, that'll work!"
Ok, lastly I dried everything completely, then touched up a few wave tips with white acrylic paint and gave the entire surface another coat of Water Effects to shine it all up. After all, it is all water, right?
The last step was to cut, mount and paint the trim. Then of course, I mounted the finished gun deck. Once the deck was in place I went along the edge of the deck with toilet paper and Mod Podge pushing the paper into a natural position along the base of the deck. I applied the same process as above, then shined it up with Water Effects. So, after all that frustration and one heck of a heavy learning curve I was pretty happy with the finish.
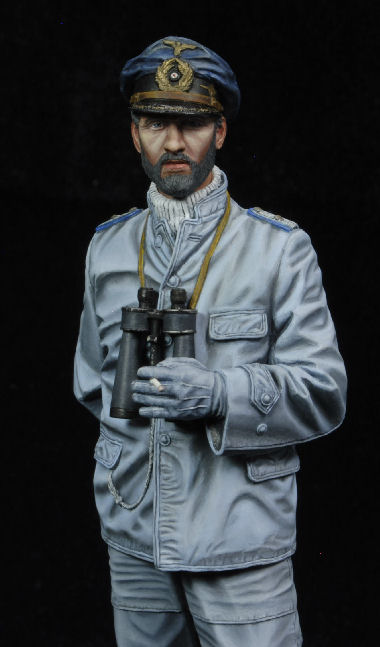
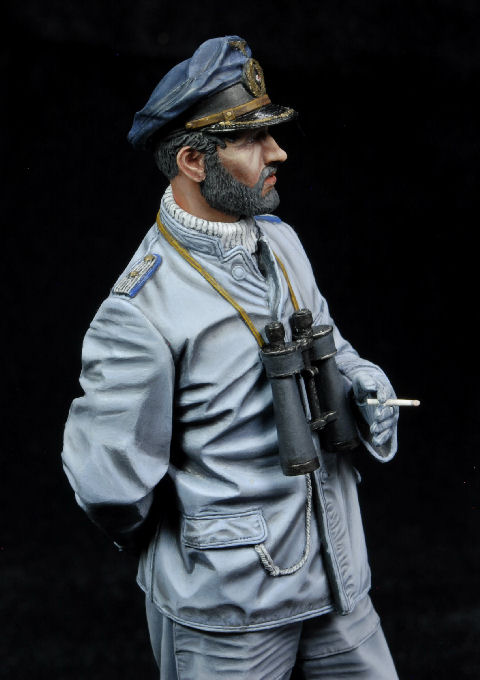
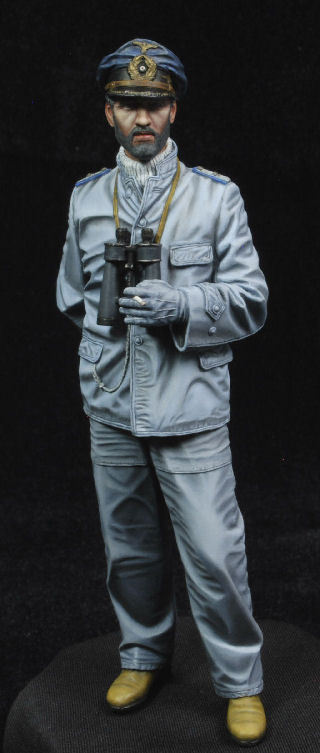
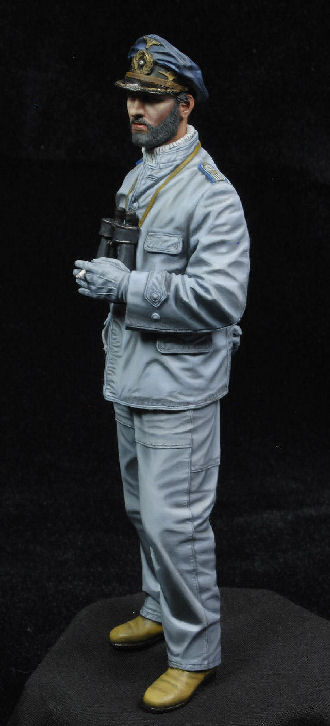
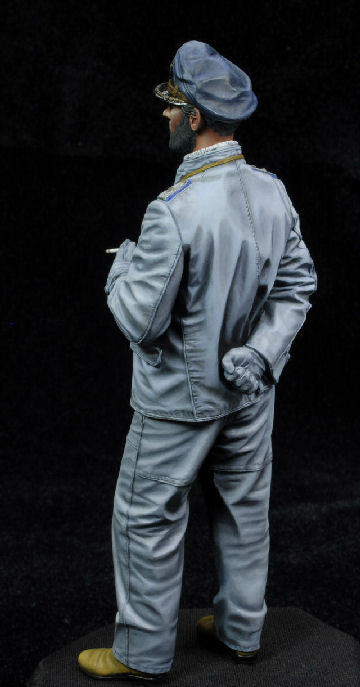
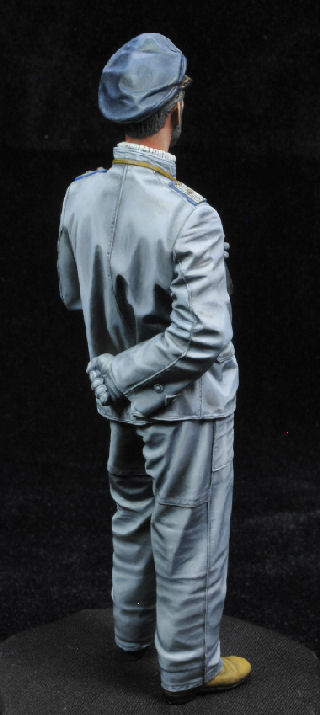
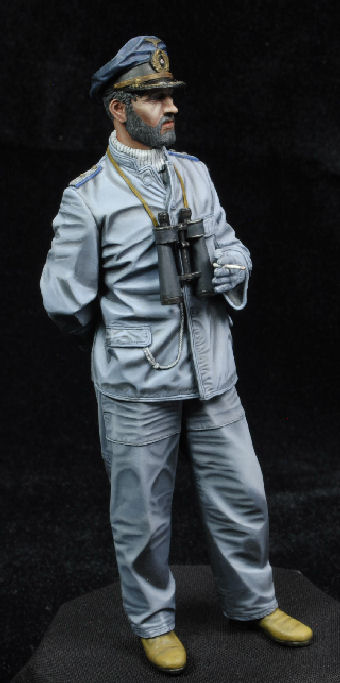
This won't be my last attempt at water works, I'm thinking it's going to be a bit more fun next time. Now, I have one more figure to finish and this dio will be complete. If you have questions or comments, holler.
Thanks for watchin. Cheers, Ski.
After countless attempts to get it right I will finally call this good. It was one of those, "Oops,that'll work", moments. So, Ruck On Bby!
I've watch numerous videos on the subject, even did several dry runs, but trying to get the waves correct for a scenario depicting the rear of a gun deck, and in this larger scale, it proved to be a bit more challenging than I had anticipated. Most of the boat pics and videos describing water effects are in a much smaller scale, so realism is a bit easier to come by. Not to mention I was rushing myself, something I try never to do, so let that be a lesson to me, HA!
Ok, after reshaping the foam to a configuration I felt comfortable with I covered it with heavy blue workshop paper towel using Mod Podge, white glue will work just fine as well. Then I painted the water tones, making sure to highlight the tops of the waves, with Vallejo acrylics in various shades of blue and green.
Once this was completely dry, using an old hair dryer, I added a coat of Vallejo's Water Effects and dried it completely as well. Now, here is the departure from all the videos I've seen so far, I immediately added a layer of toilet paper using Mod Podge (glue) and worked small areas at one time. Once the paper was in place I added a bit more "glue" to the surface and forced the paper into a wave shape following the natural direction desired for the effect I was attempting to duplicate. So far, so good.
I continued this process all over the underlying waves and added a second and third layer of paper to the back portion of the deck where the most turbulence would occur. All good so far, and the depth of the water color from underneath was starting to come out nicely. The next step was to use heavy Medium Gel, from Liquitex, with a touch of white acrylic paint added. Taking the gel I worked the backs of the paper waves to smooth out the heavy ripples, giving it a much smother transition. I did this over the entire base making sure I didn't get carried away. So far so good, again.
Now, to lighten up the effect and knock down all that white action I used Vallejo's Water Effects with a touch of blue acrylic paint and dabbed all the recesses of each created wave and all throughout the larger areas making sure I did not touch the tips or the build up of each wave. Yes, this was time consuming, but it appears to have worked. Hence, "Oops, that'll work!"
Ok, lastly I dried everything completely, then touched up a few wave tips with white acrylic paint and gave the entire surface another coat of Water Effects to shine it all up. After all, it is all water, right?
The last step was to cut, mount and paint the trim. Then of course, I mounted the finished gun deck. Once the deck was in place I went along the edge of the deck with toilet paper and Mod Podge pushing the paper into a natural position along the base of the deck. I applied the same process as above, then shined it up with Water Effects. So, after all that frustration and one heck of a heavy learning curve I was pretty happy with the finish.
This won't be my last attempt at water works, I'm thinking it's going to be a bit more fun next time. Now, I have one more figure to finish and this dio will be complete. If you have questions or comments, holler.
Thanks for watchin. Cheers, Ski.

")