• Modelers Alliance has updated the forum software on our website. We have migrated all post, content and user accounts but we could not migrate the passwords.
    This requires that you manually reset your password.
    Please click here, http://modelersalliance.org/forums/login to go to logon page and use the "Forgot your Password" option.

German U-boat Type VIIB Conning Tower Gun Deck

Steve Ski

Well-known member
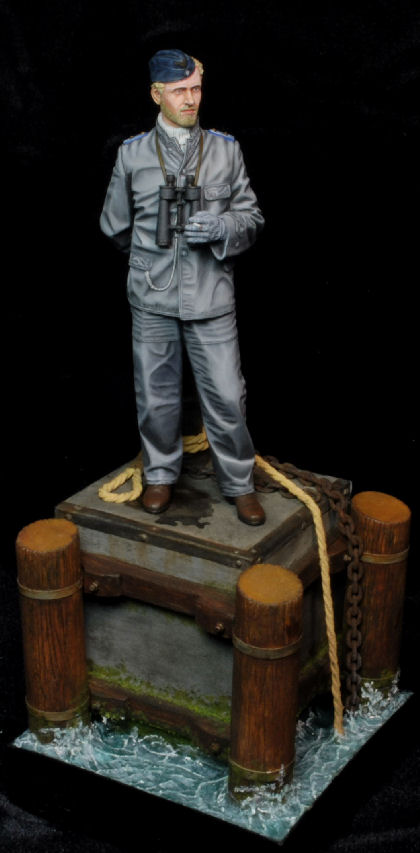
This will be an SBS on how to deal with nylon 3D printed parts and kits. This kit was not cheap by any stretch of the imagination, nor was it easy to work with. The figures are not included in this SBS, but are only there for scale reference. This is a 1/16th scale project.

There's a lot of prep work that is required before you ever touch a paint brush. So, strap in as we go inverted and kick in the after burners, Yehaaaaaaaaa!

TypeVIIBb-vi.jpg


TypeVIIBeb-vi.png


Getting Started

Talk about a big undertaking, this is it! Ya know, I heard it said many, many moons ago, " When yur hind quarters and elbow in alligators ya begin to wonder why ya came to drain the swamp." HA!

_DSC2519b-vi.jpg


_DSC2521b-vi.jpg


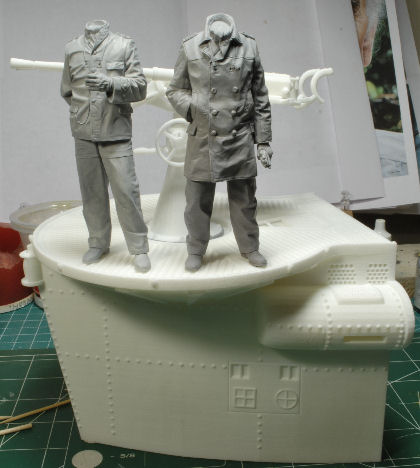
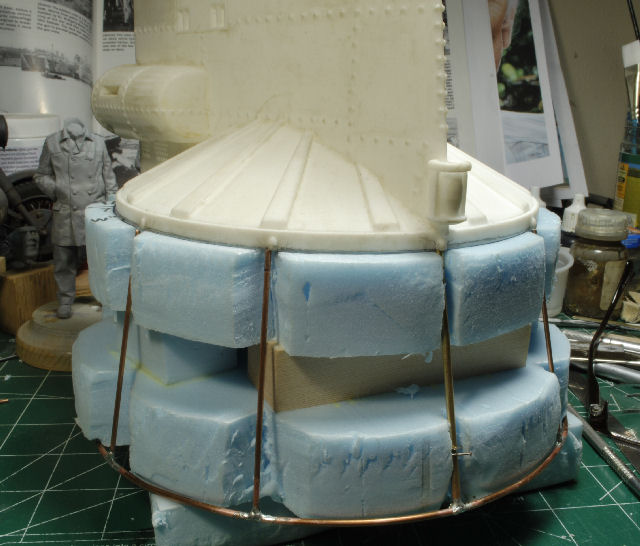
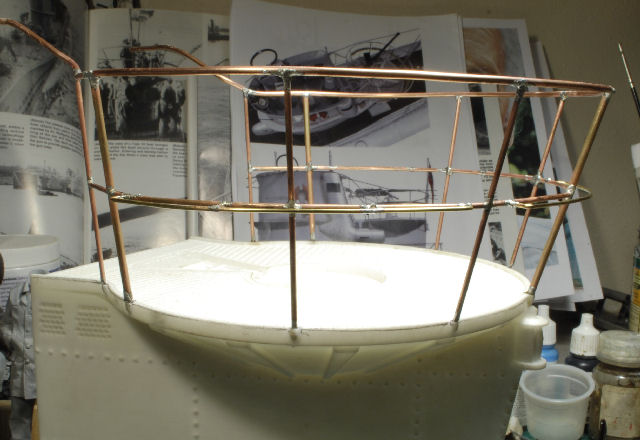
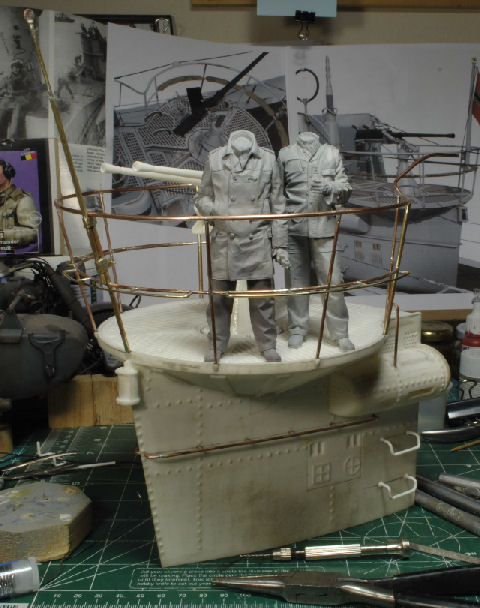
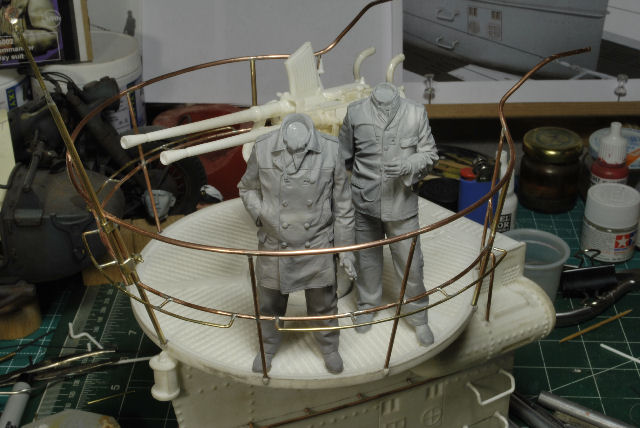
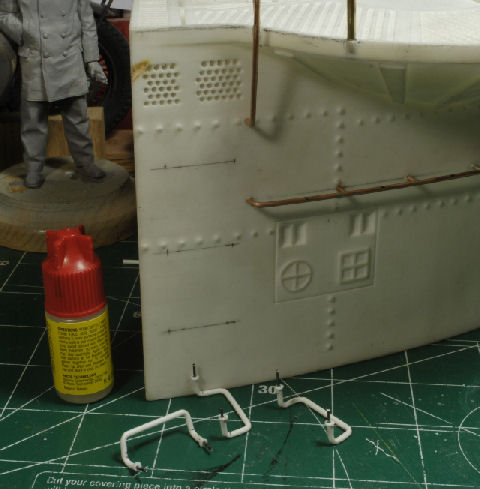
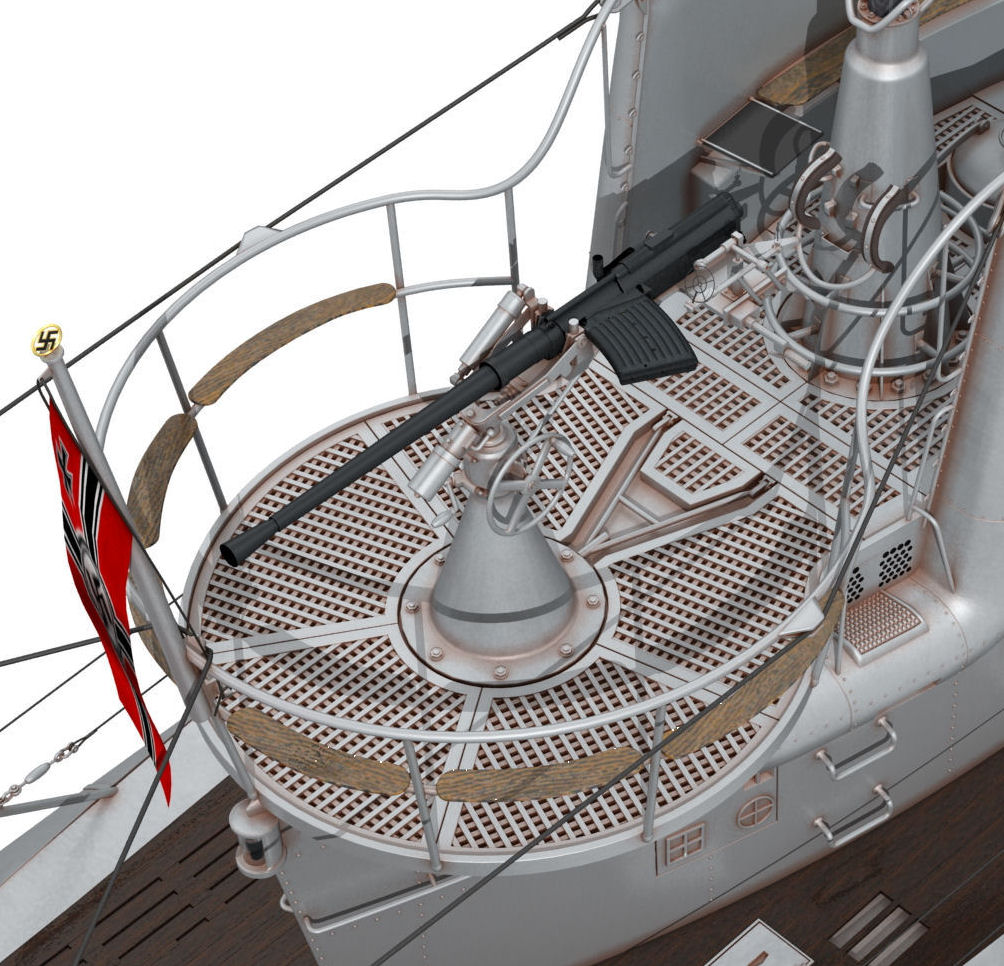
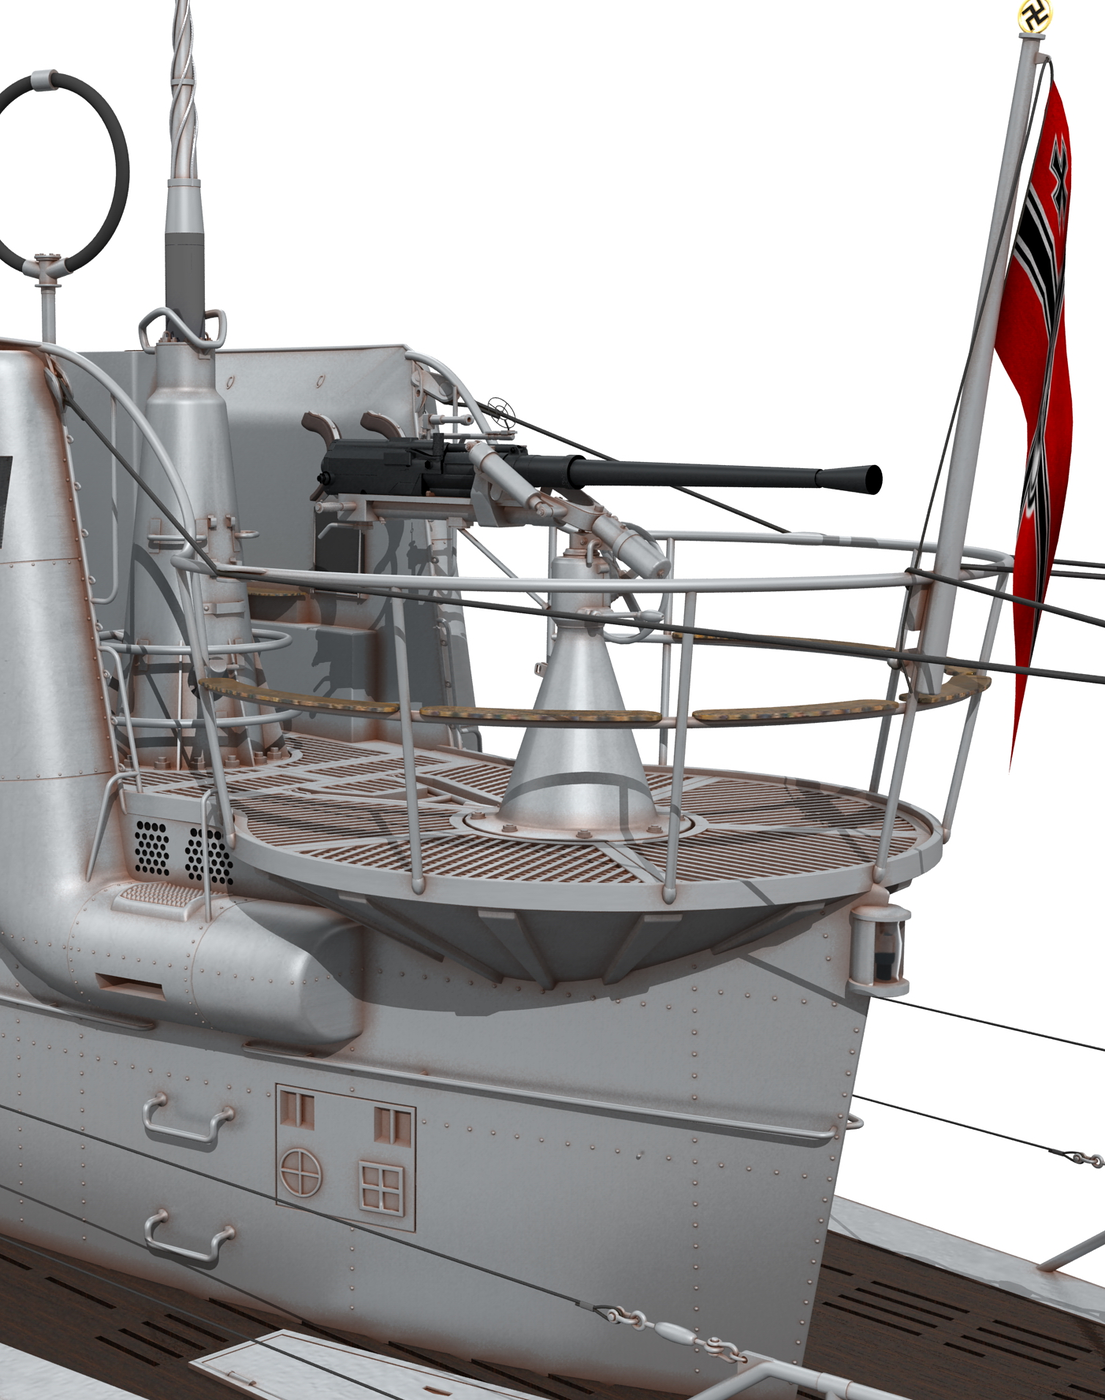
When this beauty arrived I realized this was not gonna be much fun getting it prepped for paint. This gun deck is a 3D print, 1/16th scale rendition, accurate and impressive from Shapeways, specifically designed by Sasa Drobac. Link is here: https://www.shapeways.com/shops/distefano_3dprint

Sasa has a pretty impressive line up for boat builders of all kinds and many scales, so this is a good source. However, back to my initial impression upon delivery, yikes! If you've never dealt with nylon printed 3D parts you're in for a surprise. It's a lot of work and I never did the intel search to find out otherwise, it never crossed my mind. My boof!


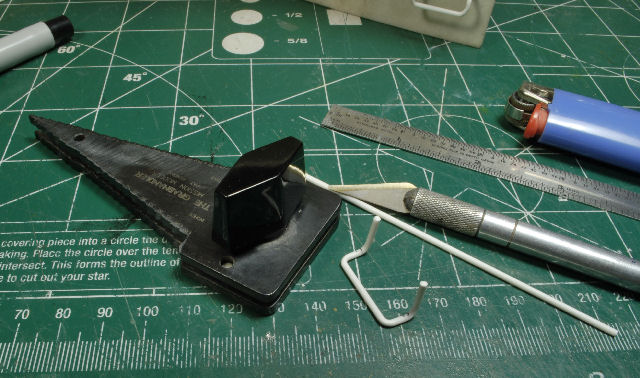
Prepping The Pieces For Sanding

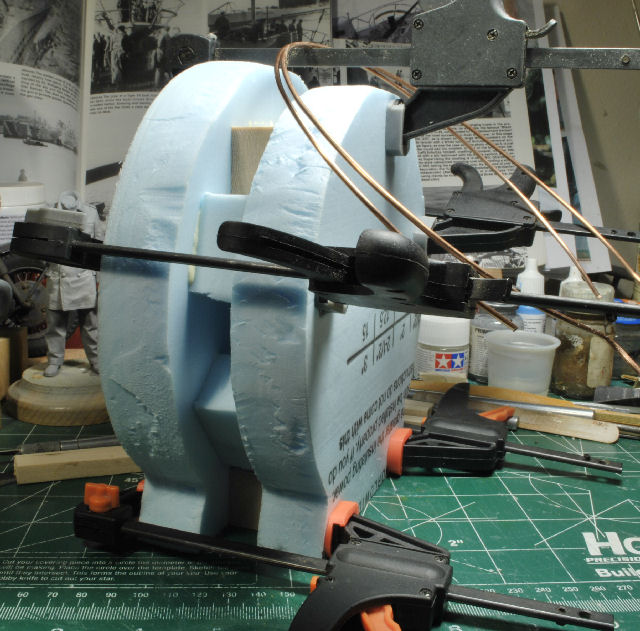
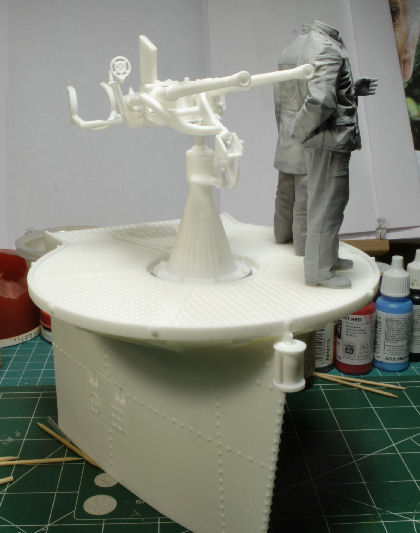
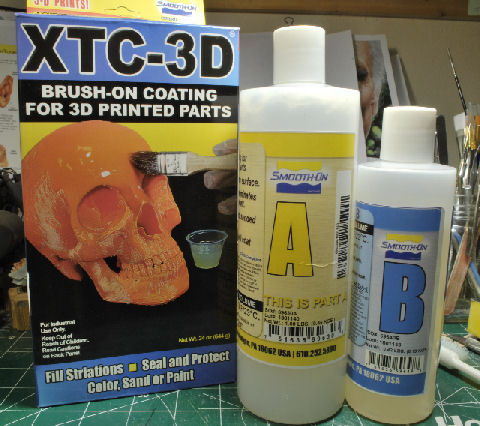
Not all is lost, won't get done lookin at it anyway, right? The nylon print actually is better for anything that is large or has delicate configurations. But, it does have a fuzzy, or grainy appearance and does not like to be sanded unless you give it a resin coat or hit it several times with a primer. After much research I went with the XTC-3D resin filler, worked like a charm. However, as with any resin, make sure your mixes are exact or they won't dry and that tacky coat is a real bugger to get rid of. Trust me on this, I ran the learning curve for you, lol.

_DSC2539b-vi.jpg


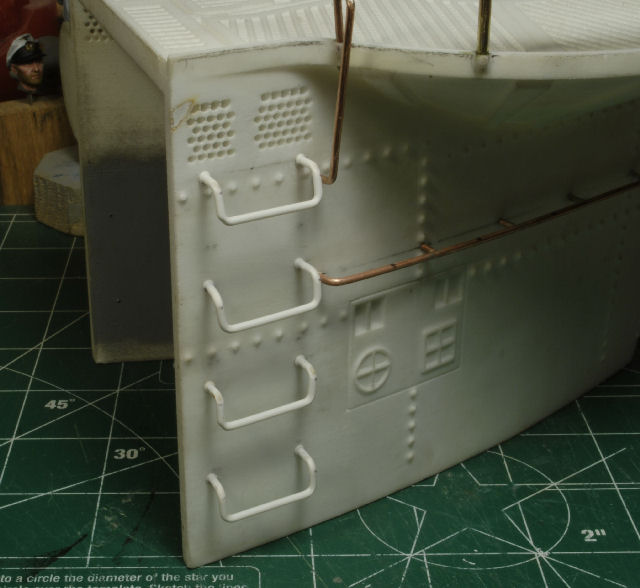
Once the resin had cured and was sanded with 200 grid paper the deck began to look much better. All kidding aside, this is a lot of work, so be prepared to spend days getting it to where you can paint it. In the end, it's all worth the grumbling because nobody makes anything coming close to what I needed and Sasa with Shapways was the only answer. Sasa will special design to your needs, which is what he did here. It took a bit of communication back and forth to get it right, but like I said, well worth the extra time to get what you are looking for.

More to follow and thx for watchin. Cheers, Ski.
 
Holy Smokes, you've got my attention.

Are those Alpine figs?

This was what I dreamed of doing when I first got my 3D printer but it got pressed into service for resin production and I haven't had the time to go deep (pun intended) like this.

It's great that theres a lively market on Shapeways for subjects like this. Years ago I started some 1/16 masters of figures in U boat leathers but geared it towards armor since there was no viable 1/16 U boat option.

Following this with much interest. B)
 
Thx Moon Puppy, Christian, Broken Eagle and Luiz. The encouragement is greatly appreciated Gents.

Ausf, yes Sir, these are Alpine figures. Taesung Hamms had sent me the Captain figure to paint for Track-link after I had already done the Deck Officer figure over the winter. I added another Deck Officer figure to this scene to complete the scenario. Taesung said these two figures were meant to go together, so I added it to the mix. This was the only way to make it worth a hoot and not repeat a dock scenario seen in my last vignette.

_DSC2414b-vi.jpg


I couldn't see doing another dock, pase', so I pondered scratch building the whole conning tower. After rummaging through the web I ran across Sasa's work and the rest is history. I had to scale it back to the gun deck only, the entire tower was listed close to $1k, no joke! I personally like being married, so I just whistled past that can of worms, if ya know what I mean, HA!

At any rate, get your 3D gear up and running in all kinds of directions, the market is wide open, Amigo.

Cheers, Ski.
 
Building The Railing

Making the railing was pretty much a piece of cake, except trying to figure out how to keep all rails in line and correctly placed. I made a jig out of blue construction foam as a template in the desired dimensions for this scale. No, it ain't exact, but it'll do, close enough, lol.

I used standard 12/3 Romex copper wire for the top rail, 1/16" copper tubing for the mid rail and 3/32nds brass tubing for the main rail posts. Once the pieces were in place I soldered the mains. The mid rails were cut using the copper tubing and then attached using steel pins through the verticals to keep them in place.

_DSC2555b-vi.jpg


_DSC2557b-vi.jpg


Caution: Remember to use "lead free" solder only. I'm not sure if you can still get the old stuff, but I found some in my stash. The fumes are not good to deal with. We got way too many kits to build to be using that old stuff anyway, right?


More Soldering On Deck

The seat supports were next in line for soldering. I used some smaller diameter copper tubing for the supports and soldered them in the appropriate locations along the mid railing. Clamping the pieces in place was a bit of a challenge, but once I got a system going it went quick.


_DSC2559b-vi.jpg


_DSC2562b-vi.jpg


_DSC2564b-vi.jpg


Next up, the flag, pole and hardware. Thanks for watching Gents, more to follow soon.


Cheers, Ski.

Very interesting. Any problems soldering copper to brass?
 
Hey Moon Puppy,

Soldering copper to brass can be a bit tricky. The brass really needs to be heated pretty high compared to the copper, hence the troubles on the flag pole, which will be posted soon. Stuff starts to move around on you if you're not careful. Clean up is a trick too, if you remove too much or bump it or torque the solder points in any way, you'll have to do it again.

Thx Brotha, Ski.
 
Hey Iron Mike, I missed your comment, thx for the kind words Amigo!


Thx Luiz. I always say, "There's more than one way to skin a bald cat", HA! This is the part of the hobby I enjoy, figuring out how to make it work.


Cheers, Ski.
 
Flag Pole And The Kriegsmarine Flag

Now, dealing with these tiny scratch built parts for the flag pole was a real "Baby Rump Kisser'! Pretty much every time I started to solder a piece anywhere close to something that had already been done the parts moved from the heat, Yikes! So, I had to work fast and I actually used the plumbers technique of brazing rather than having the solder already on my tip. I never claimed to be an expert at this, just tellin yall how it went, lol.

Note: Use caution when filing the slag away from your work, if you go too thin you'll be soldering again, thin joints won't hold under pressure or torque.

Once again, the rhythm was kickin and I got er done. The rope loop was a real hoot to get lined up just right and the disc up top for the swastika is made up of several copper discs soldered together for the appropriate thickness.

The flag was printed from an online photo and resized. The red color appears a bit faded, but that will actually work out just right. I made the rope to scale using three strands of heavy sewing thread by twisting them tightly, then I added a thin layer of good 'ol Elmer's glue all over it. I kept this new flag rope stretched out until it was completely dried. While waiting for this to dry I made small loops with the original heavy thread at the top and bottom of the flag portion that will be attached to the pole. Then, when the rope was completely dry, I ran it through the loops and mounted it on the pole. I will have to go back and paint this rope, maybe a medium tan tone, but it's pretty much complete for now.

_DSC2574b-vi.jpg


_DSC2576b-vi.jpg


_DSC2577b-vi.jpg


Ok, here is the results so far. Everything seems to be in place and ready for the steps and wood work. Sorry, the flag mounted photo will appear later.

_DSC2570b-vi.jpg


_DSC2572b-vi.jpg


Next chapter coming up. Cheers, Ski.
 
Adding The Tower Steps and Side Railing

This process was much easier than fighting the upper railing. I used the 1/16th copper tubing for the side rails and soldered in the supports, then added steel pins, drilled the holes and plugged them in. The steps, however, were a bit more involved.

I decided to go with Evergreen's styrene tubing simply because I had it in the appropriate scale and it was much easier to work with. Using the "Grab Handler" I heated the tubing at the joints and "slowly" bent them to the required angles. I then drilled the ends and inserted the steel pins and glued them in place on the sides of the gun deck.

Be careful when using any heat around this styrene tubing. Once all the deck work was done I washed the entire build down with mild soap to get rid of any residue from soldering and gluing, then used a hair dryer to quickly dry it off. Ooops, dopey me had it on high heat and you guessed it, I had to redo a complete side of steps! Ah, I needed the practice any way.

Also, before installing the support pins in each set of step I heated the ends quickly with the lighter, then smashed the tips against a block of steel to create the weld marks seen on the mounting locations for these steps. Simple and quick!

_DSC2580b-vi.jpg


_DSC2582b-vi.jpg


_DSC2584b-vi.jpg


_DSC2586b-vi.jpg


_DSC2594b-vi.jpg


Back to sanding we go............. Cheers, Ski.
 
Back
Top