
-
Modelers Alliance has updated the forum software on our website. We have migrated all post, content and user accounts but we could not migrate the passwords.
This requires that you manually reset your password.
Please click here, http://modelersalliance.org/forums/login to go to logon page and use the "Forgot your Password" option.
You are using an out of date browser. It may not display this or other websites correctly.
You should upgrade or use an alternative browser.
You should upgrade or use an alternative browser.
German U-boat Type VIIB Conning Tower Gun Deck
- Thread starter Steve Ski
- Start date
Heavens Eagle
Well-known member
Those look Excellent Steve! What scale are they?


Skinny_Mike
Well-known member
Steve Ski
Well-known member
A bit more progress has been accomplished. It should be noted here that I gave the head a shot of Dull Coat before starting any of the steps mentioned below so as not to disturb any prior work.
I spent about another four hours reworking the eyes, what a pain in the tuckus. I'm so use to the 200mm figures that just stepping down to 1/16th can be a bit challenging, especially after a long break from the paints. But, once in the groove it started to comply with my wishes, lol.
Ok, I was able to get the ever so slight glint in the eyes and definition around the pupils. I use acrylics for eye work because it dries faster and is easier to control in such a small area. I had to lighten the eye around the pupil a bit and redo the lower lid for definition as well. Touch up around the eyes will also be addressed, such as slight feathering of lighter tones under the eyes, crows feet, etc.
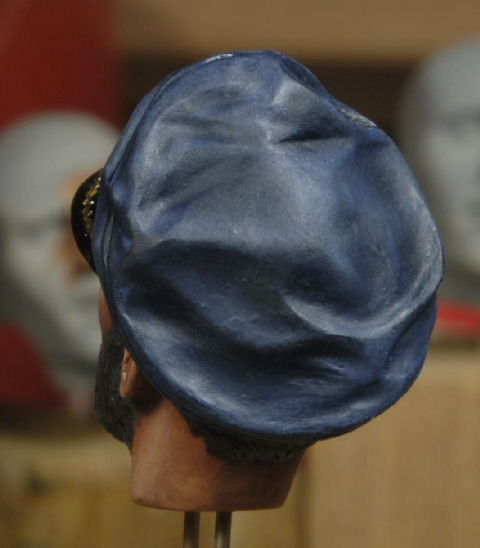
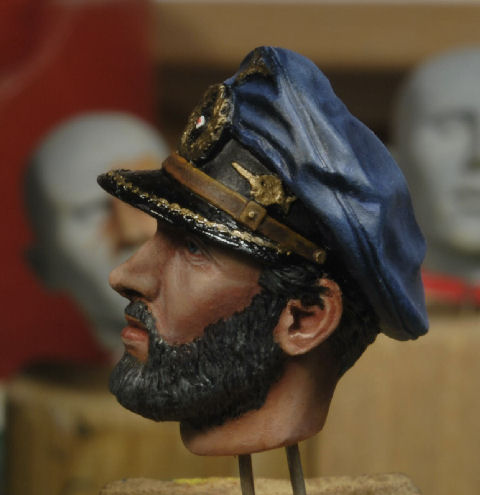
Next up I worked the cap using Ultra Marine Blue, Titanium White, and a touch of Paynes Gray. The recesses were feathered in before adding the highlights. Once the oils were in place I feathered them all together in the appropriate locations. So far so good.
I also added Paynes Gray, Titanium White, and a touch of Ivory Black to highlight the beard, which still has plenty of work needed. When the oils set in a day or so I'll make a filter pass with black and Dark Earth acrylics to work into the recesses of the beard, bring in more definition in that area.
Once these next few steps are completed and the head is in a satisfactory condition I'll move on to the uniforms of both figures. I'm really excited to finally be getting to the jackets and trousers.
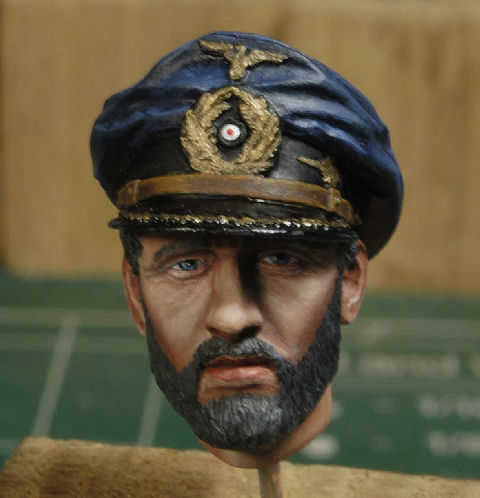

More to follow soon and thanks for watchin. Cheers, Ski.
I spent about another four hours reworking the eyes, what a pain in the tuckus. I'm so use to the 200mm figures that just stepping down to 1/16th can be a bit challenging, especially after a long break from the paints. But, once in the groove it started to comply with my wishes, lol.
Ok, I was able to get the ever so slight glint in the eyes and definition around the pupils. I use acrylics for eye work because it dries faster and is easier to control in such a small area. I had to lighten the eye around the pupil a bit and redo the lower lid for definition as well. Touch up around the eyes will also be addressed, such as slight feathering of lighter tones under the eyes, crows feet, etc.
Next up I worked the cap using Ultra Marine Blue, Titanium White, and a touch of Paynes Gray. The recesses were feathered in before adding the highlights. Once the oils were in place I feathered them all together in the appropriate locations. So far so good.
I also added Paynes Gray, Titanium White, and a touch of Ivory Black to highlight the beard, which still has plenty of work needed. When the oils set in a day or so I'll make a filter pass with black and Dark Earth acrylics to work into the recesses of the beard, bring in more definition in that area.
Once these next few steps are completed and the head is in a satisfactory condition I'll move on to the uniforms of both figures. I'm really excited to finally be getting to the jackets and trousers.
More to follow soon and thanks for watchin. Cheers, Ski.
Outstanding! 
Steve Ski
Well-known member
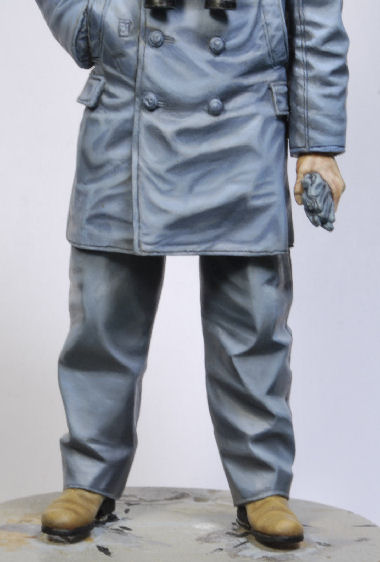
Alpine Miniatures 1/16th German U-Boat Captain #16021
Taesung Hamms has been so kind to send this U Boat figure for me to paint. The sculptor is Ju Won Jung. Floquil Gray Primer was brushed over the entire figure before using oils. I did not use an acrylic base this time, just oils blended throughout. This figure was painted for Track-Link. This figure will be part of the gun deck scenario.
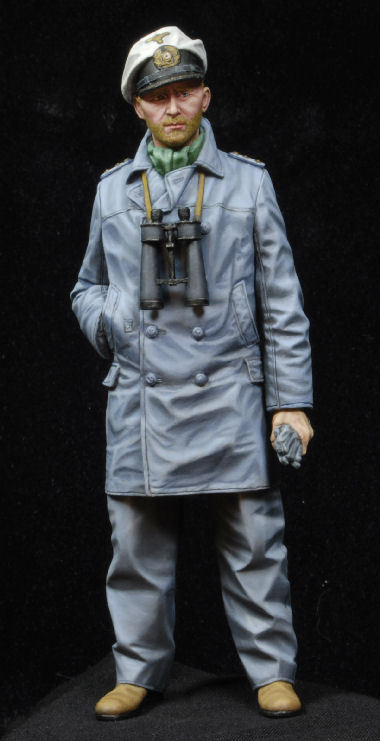
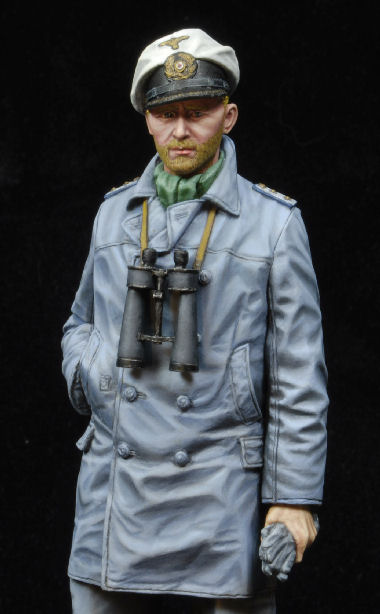
Cheers, Ski.
Taesung Hamms has been so kind to send this U Boat figure for me to paint. The sculptor is Ju Won Jung. Floquil Gray Primer was brushed over the entire figure before using oils. I did not use an acrylic base this time, just oils blended throughout. This figure was painted for Track-Link. This figure will be part of the gun deck scenario.
Cheers, Ski.

Outstanding, Steve you are more than welcome to post a link to Track-Link so we can see the progress photos if you have them.
phantom II
Master at Arms
Great looking figure ")
Cheers, Christian B)
Cheers, Christian B)
Steve Ski
Well-known member
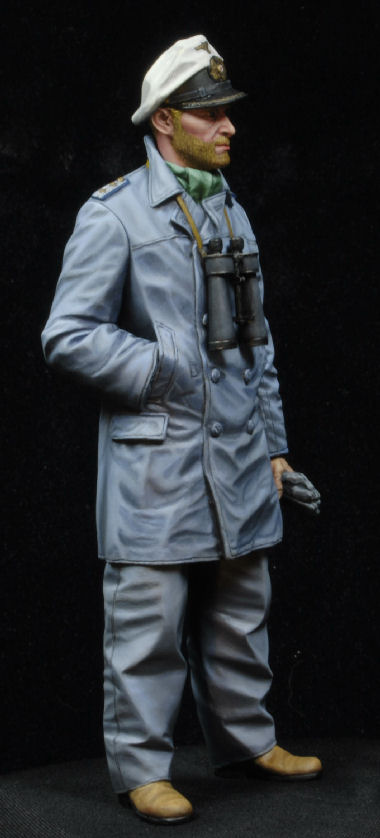
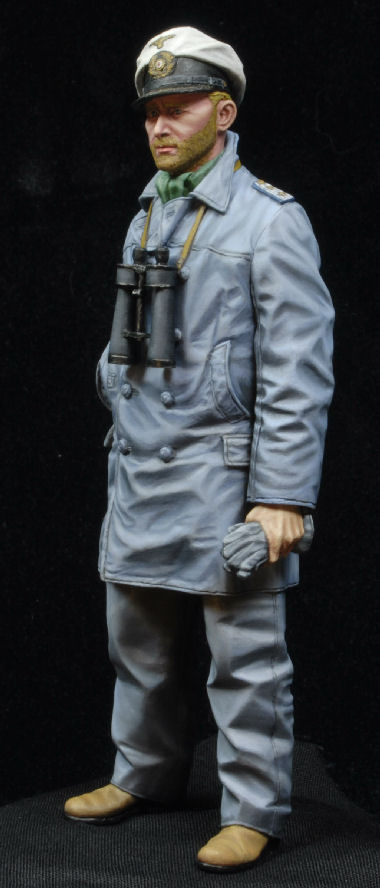
Back to Alpine's 1/16th scale German U-Boat Watch Officer, kit #16036
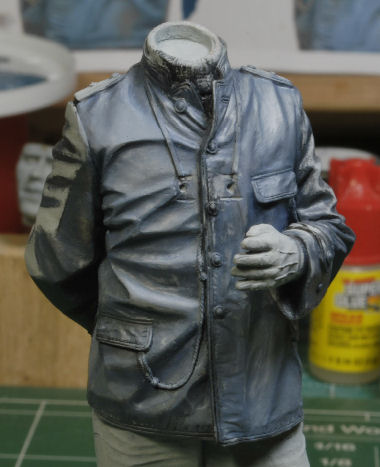
Keeping my method of madness going as before I applied the pre-shade on the upper torso. It may look a bit heavy in some areas, but the gray tones will feather in just fine when I start the process.
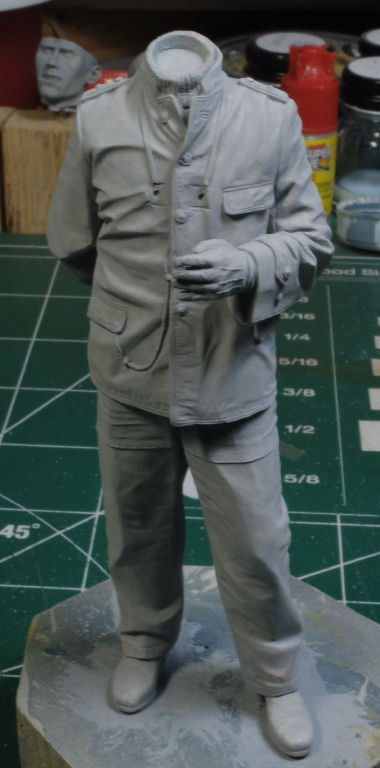
The key here is when the oils are applied I keep them within the same tonal range as the Captain figure. If the tones are too far off the figures won't mesh when it comes time to secure them to the gun deck. So, I'll complete the upper torso first, then move onto the legs just like our Captain figure.
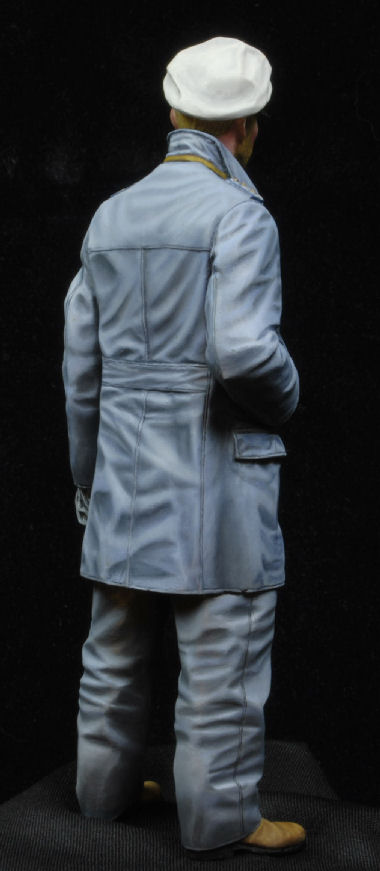
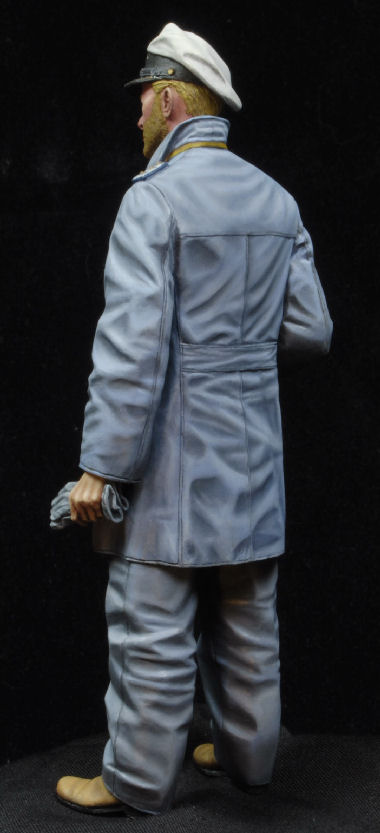
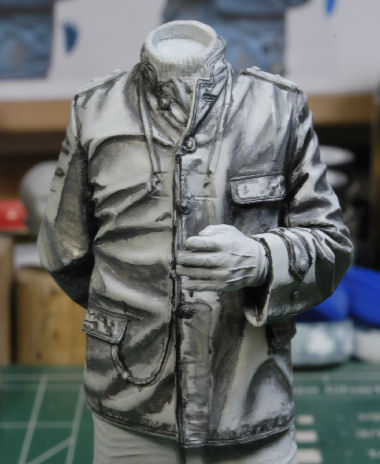
Blending the Coat
With the color tones laid out as before I began with the darkest shades first placing a small spread in the upper portion of the creases. Then, taking the wider brush I feathered and blended the oils out to the sides and downward. I will continue with this particular tone until the front of the coat has been treated, then do the same on the back of the coat.
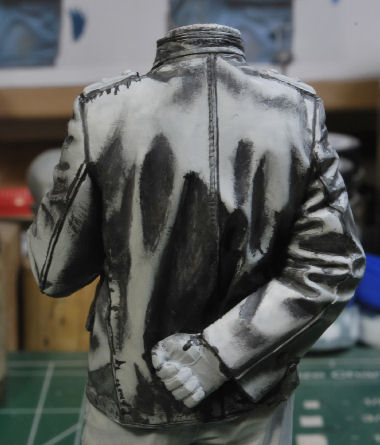
After the initial tone is in place I step up a shade lighter and spread just below the prior tone and feather and blend it. As I said, I will continue this same process on the back of the coat as well to insure uniformity with the gray tones. I noticed a slight variation from the front, back, and sleeves on the last figure, so proceeding in this manner will cut down on the variations. Slight variations are not a big deal, it's when you get tone differences that are obvious, then it becomes a problem.
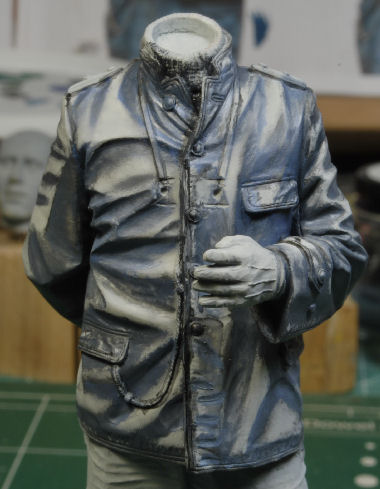

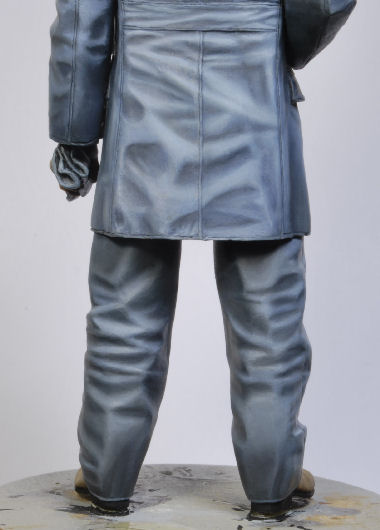
You may not have noticed it, but I did. The tonal difference on the jacket vs. the trousers is more towards the gray, on the trousers, rather than the more bluish tint of the jacket. See the pics below. this really isn't a big deal, they're two separate articles of clothing and should most often have a slight variation. I just don't want to get too far afield with the variations.
More to follow, and thanks for watchin. Cheers, Ski.
Keeping my method of madness going as before I applied the pre-shade on the upper torso. It may look a bit heavy in some areas, but the gray tones will feather in just fine when I start the process.
The key here is when the oils are applied I keep them within the same tonal range as the Captain figure. If the tones are too far off the figures won't mesh when it comes time to secure them to the gun deck. So, I'll complete the upper torso first, then move onto the legs just like our Captain figure.
Blending the Coat
With the color tones laid out as before I began with the darkest shades first placing a small spread in the upper portion of the creases. Then, taking the wider brush I feathered and blended the oils out to the sides and downward. I will continue with this particular tone until the front of the coat has been treated, then do the same on the back of the coat.
After the initial tone is in place I step up a shade lighter and spread just below the prior tone and feather and blend it. As I said, I will continue this same process on the back of the coat as well to insure uniformity with the gray tones. I noticed a slight variation from the front, back, and sleeves on the last figure, so proceeding in this manner will cut down on the variations. Slight variations are not a big deal, it's when you get tone differences that are obvious, then it becomes a problem.
You may not have noticed it, but I did. The tonal difference on the jacket vs. the trousers is more towards the gray, on the trousers, rather than the more bluish tint of the jacket. See the pics below. this really isn't a big deal, they're two separate articles of clothing and should most often have a slight variation. I just don't want to get too far afield with the variations.
More to follow, and thanks for watchin. Cheers, Ski.
Interesting...
Similar threads
- Replies
- 34
- Views
- 1K
- Replies
- 53
- Views
- 9K
- Replies
- 13
- Views
- 2K
- Replies
- 4
- Views
- 2K
- Replies
- 8
- Views
- 2K