
-
Modelers Alliance has updated the forum software on our website. We have migrated all post, content and user accounts but we could not migrate the passwords.
This requires that you manually reset your password.
Please click here, http://modelersalliance.org/forums/login to go to logon page and use the "Forgot your Password" option.
You are using an out of date browser. It may not display this or other websites correctly.
You should upgrade or use an alternative browser.
You should upgrade or use an alternative browser.
German U-boat Type VIIB Conning Tower Gun Deck
- Thread starter Steve Ski
- Start date
Steve Ski
Well-known member
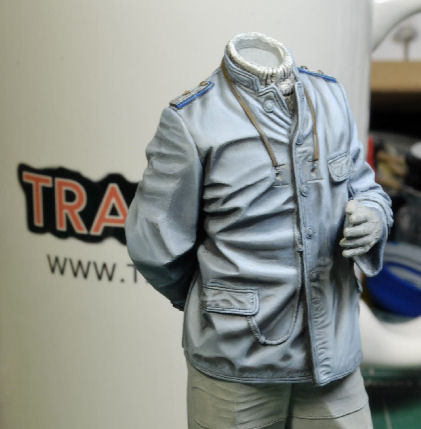
Highlighting the Coat
Ok, the fun part is upon us. Once the darker shades have been blended it's time to blend in the highlights. An initial medium bluish tone was added to the larger areas needing highlights. After this was blended and feathered a lighter tone was added on all the ridges and creases, slowly working my tones toward the lighter shade of blue/gray. The last highlight is pretty much a full gray tone, just a hint of blue has been added.
Since I'm working the entire upper portion of the torso before I move to the trousers I went ahead and painted the epilates, bino strap, and an initial working of the turtle neck sweater. They will be completed, as well as the white chord from his waist pocket and gloves, before I begin working the trousers. I'm handling this figure by the legs and base all day, so primer touch-up will be needed when the time comes.

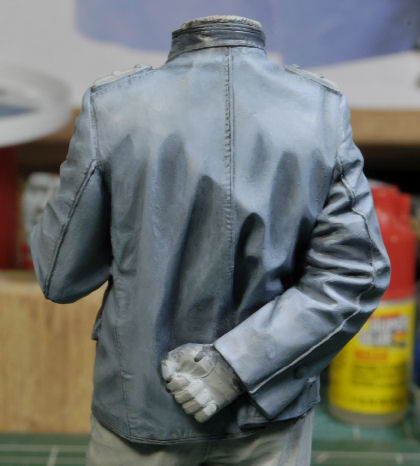
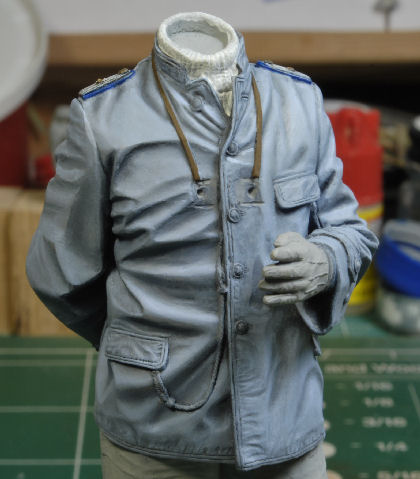
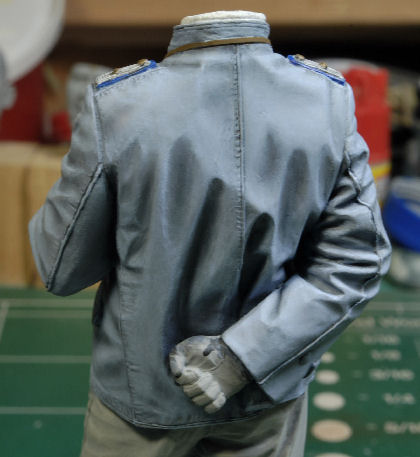
Re-shading the recesses
Now the shadows are starting to become accentuated, but we still need more definition added to bring them out. I add a very thin sliver of dark gray, almost a black tone, into the upper portions of all the creases and then feather the oils to blend into the prior shading. This needs to be done very lightly, small areas at a time. It's easy to get carried away and try to rush this portion of the shading. I have to stop and access the progress throughout the process to make sure this step is not over done. As you can see the right side of the coat is starting to take shape rather nicely.
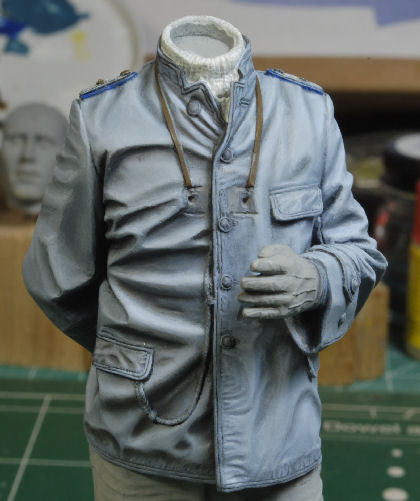
Before I move on to the trouser a final highlighting will be applied as needed to all the high points. Still a ways to go, but we're making progress.
More to follow and thanks for watching. Cheers, Ski.
Ok, the fun part is upon us. Once the darker shades have been blended it's time to blend in the highlights. An initial medium bluish tone was added to the larger areas needing highlights. After this was blended and feathered a lighter tone was added on all the ridges and creases, slowly working my tones toward the lighter shade of blue/gray. The last highlight is pretty much a full gray tone, just a hint of blue has been added.
Since I'm working the entire upper portion of the torso before I move to the trousers I went ahead and painted the epilates, bino strap, and an initial working of the turtle neck sweater. They will be completed, as well as the white chord from his waist pocket and gloves, before I begin working the trousers. I'm handling this figure by the legs and base all day, so primer touch-up will be needed when the time comes.
Re-shading the recesses
Now the shadows are starting to become accentuated, but we still need more definition added to bring them out. I add a very thin sliver of dark gray, almost a black tone, into the upper portions of all the creases and then feather the oils to blend into the prior shading. This needs to be done very lightly, small areas at a time. It's easy to get carried away and try to rush this portion of the shading. I have to stop and access the progress throughout the process to make sure this step is not over done. As you can see the right side of the coat is starting to take shape rather nicely.
Before I move on to the trouser a final highlighting will be applied as needed to all the high points. Still a ways to go, but we're making progress.
More to follow and thanks for watching. Cheers, Ski.

Iron Mike
Master At Arms And Resident Curmudgeon
Highlighting the Coat
Ok, the fun part is upon us. Once the darker shades have been blended it's time to blend in the highlights. An initial medium bluish tone was added to the larger areas needing highlights. After this was blended and feathered a lighter tone was added on all the ridges and creases, slowly working my tones toward the lighter shade of blue/gray. The last highlight is pretty much a full gray tone, just a hint of blue has been added.
Since I'm working the entire upper portion of the torso before I move to the trousers I went ahead and painted the epilates, bino strap, and an initial working of the turtle neck sweater. They will be completed, as well as the white chord from his waist pocket and gloves, before I begin working the trousers. I'm handling this figure by the legs and base all day, so primer touch-up will be needed when the time comes.
Re-shading the recesses
Now the shadows are starting to become accentuated, but we still need more definition added to bring them out. I add a very thin sliver of dark gray, almost a black tone, into the upper portions of all the creases and then feather the oils to blend into the prior shading. This needs to be done very lightly, small areas at a time. It's easy to get carried away and try to rush this portion of the shading. I have to stop and access the progress throughout the process to make sure this step is not over done. As you can see the right side of the coat is starting to take shape rather nicely.
Before I move on to the trouser a final highlighting will be applied as needed to all the high points. Still a ways to go, but we're making progress.
More to follow and thanks for watching. Cheers, Ski.
Mighty fine work!

Steve Ski
Well-known member
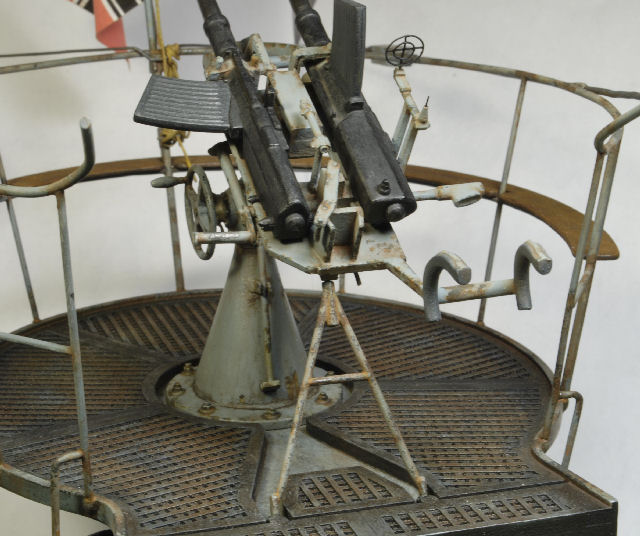
A Whale of an Update!
In an attempt to get this dio finished before the summer work hits I kept working without updates, only taking photos when I remembered to do so. I backed off the Watch officer figure due to immediate burn out and began to work the gun deck. Now that was a fun change of pace.
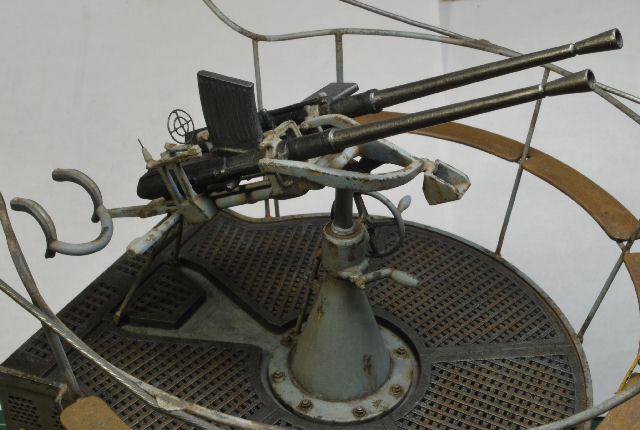
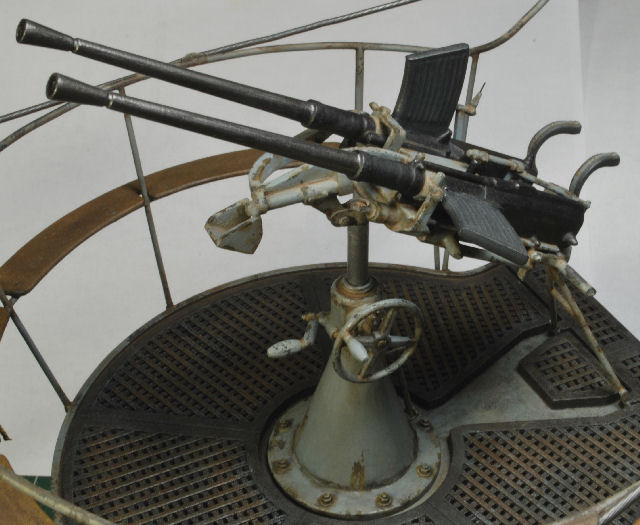
First I had to decide how I wanted to mount the gun, up down, or just plain locked down flat. I decided on
extending the elevation shaft to give the figures a bit more room on the deck.
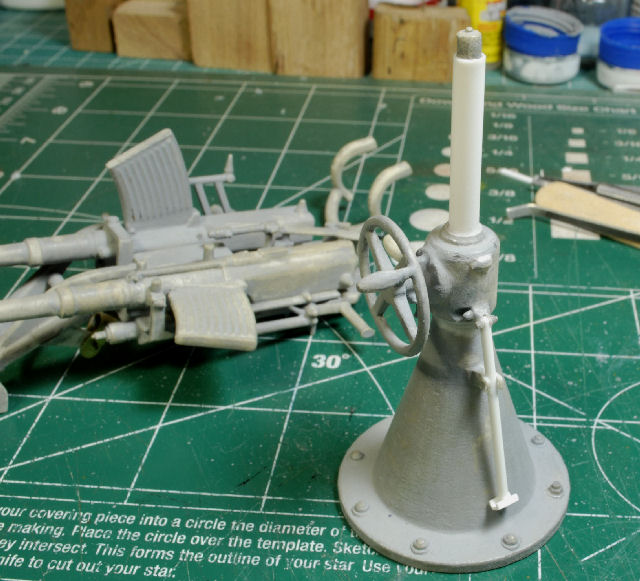
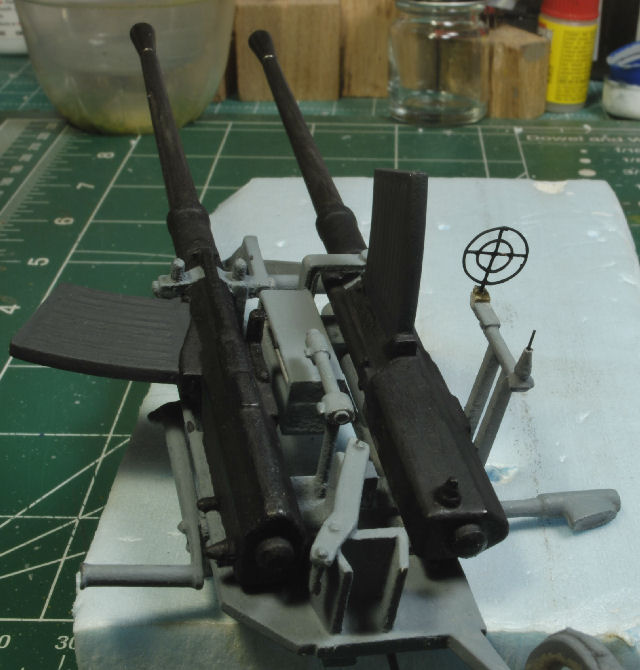
I needed to add details that had be lost during the resin process such as bolt heads, etc. Now it was time to paint both the gun and mount, constantly looking for any missed imperfections from the resin process.
Now it was time for the cables to be made and fitted to the deck. I had to scratch build turn buckles and solder the wire so it wouldn't become an issue later down the road. I don't remember the exact gage of wire, but it's close to 12 gage, braided. The thinner wire for stabilizing the main cable is close to an 8 gage, but I don't recall. At any rate, I've got plenty of wire in the scrap bin for just such an occasion.
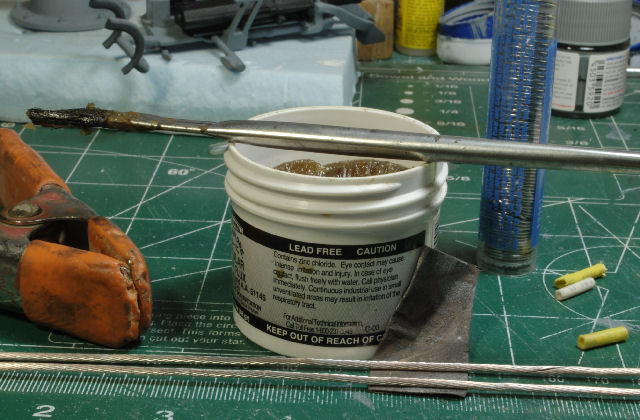
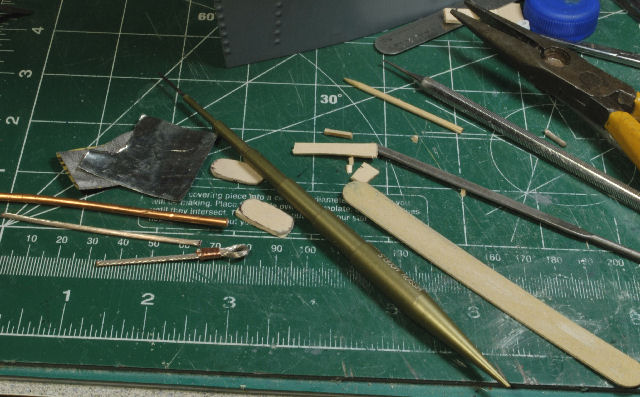
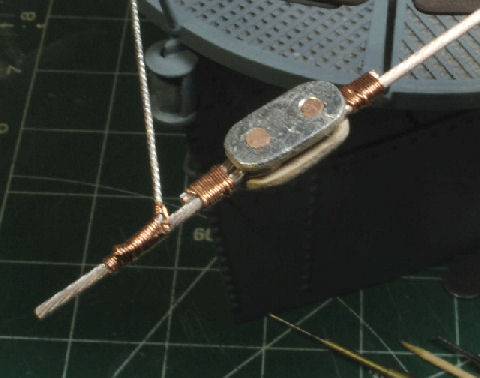
The turn buckle was made from scrap balsa wood and sheet pewter covering, simple enough. Once the cable were cut to fit the entire set up was installed and adjusted as needed.
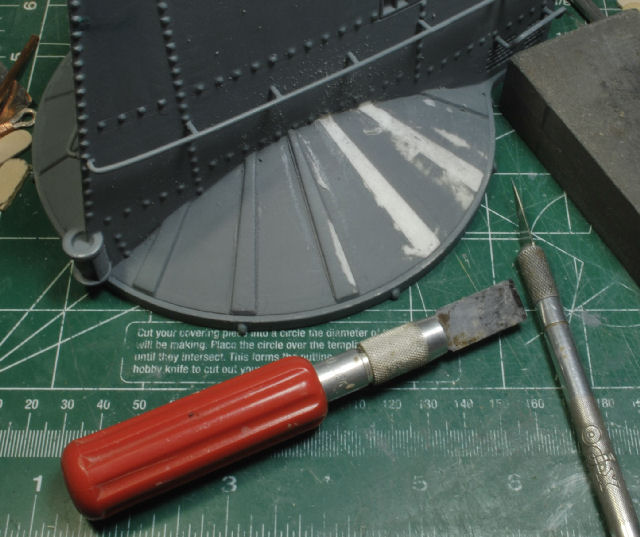
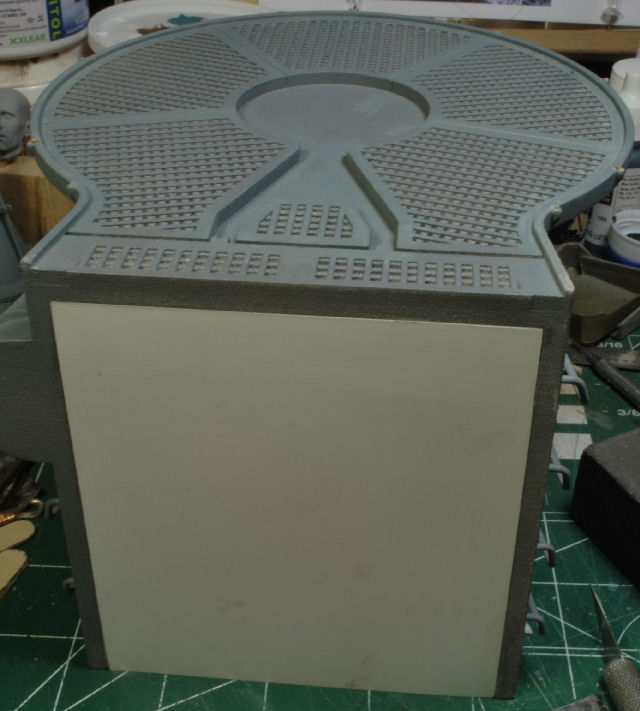
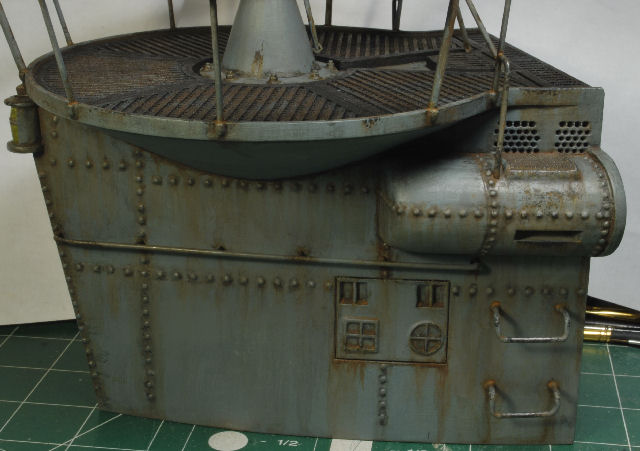
Next up, clean up those ribs from under that deck. I believe they were added for stability in the 3D process, but they aren't in any photos I've ever seen of any Type VIIB sub anywhere. So, I just did a simple, HA!, simple scrape with the flat Xacto knife and sanded, filled, sanded again, and painted. Ah, looks much better, eh? You may notice during this process I had to remove the railing to get into those tight spaces and to avoid destroying all that prior work, lol. That was a real hoot, leme tell yaz.
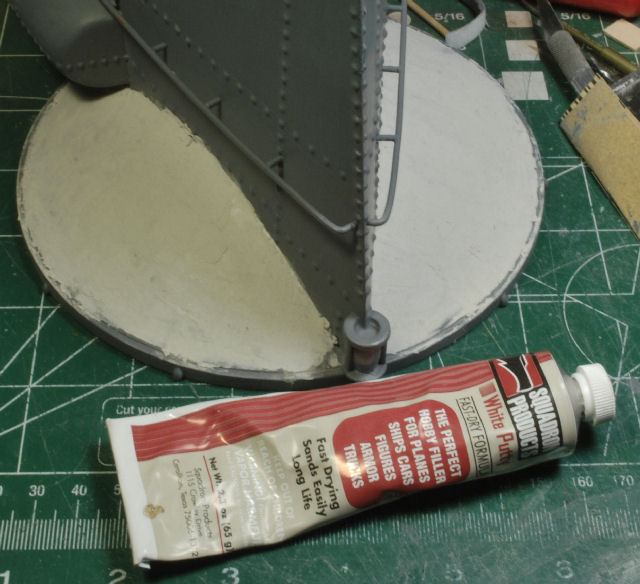
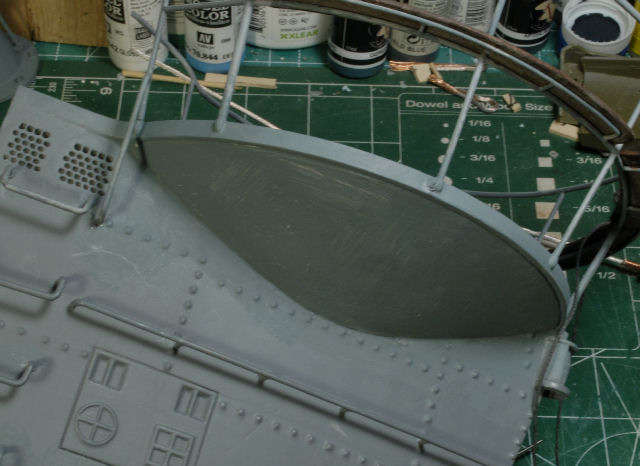
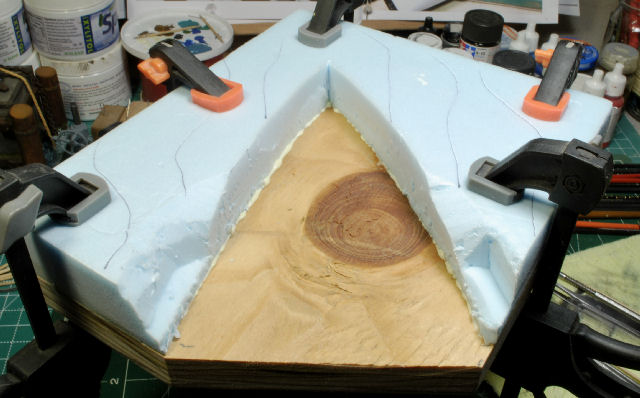
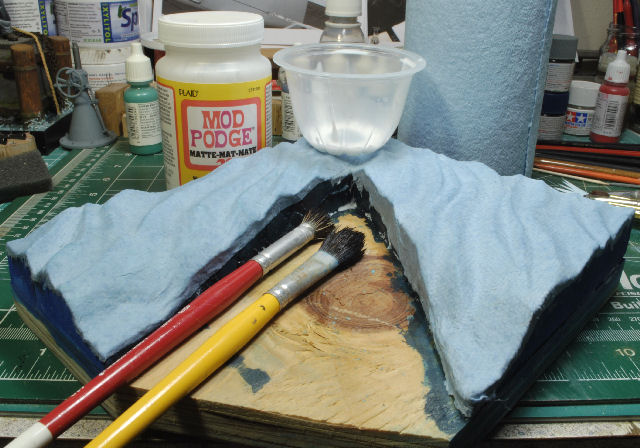
Since this mini-dio/vignette will have a cut off point in the rear I had to fill the void. I used blue construction foam for the edge of the void and placed a piece of sheet styrene on top trying to make it as flush as possible. The I primed it and painted it black. The cables and deck were painted and ready for theweathering process.
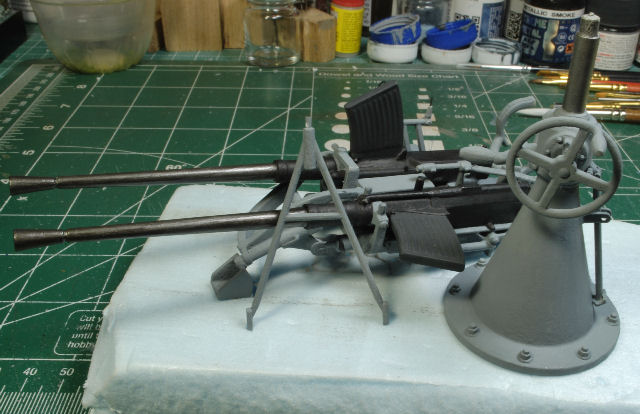
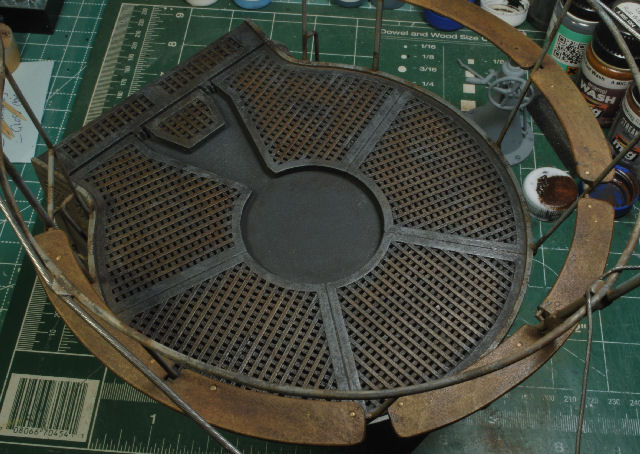
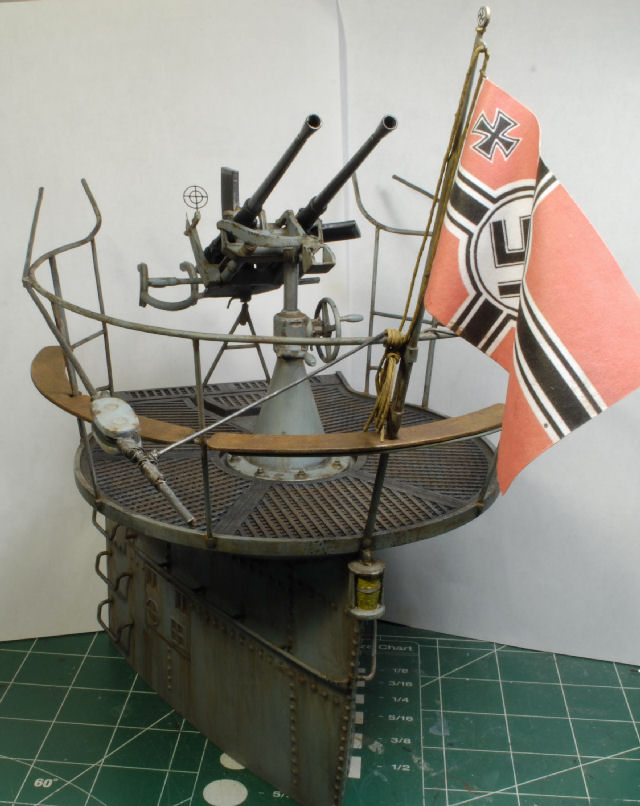
Time to get that deck and gun weathered for battle, right? I used the standard chipping method, sponge and brush, then went back over these areas and added a dark rust tone. Then, with a damp brush I drew that tone in a downward motion to create the streaks. After the entire deck was done I went back to key areas and added a lighter tone of rust and continued the process. The deck itself was said to be wood coated in a water proof type dark colored paint, so I did what other sub modelers have done and attempted to show ware on the deck due to foot traffic, etc.
When I was satified with the general overall weathering process I mounted the gun and mount in place using pins, as always.
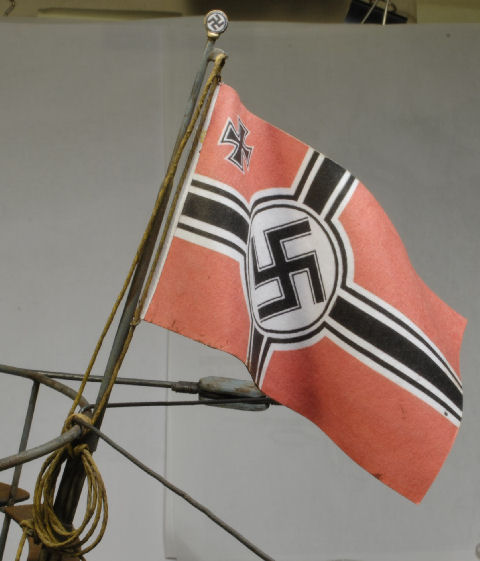
Lastly the flag and rope were added and touched up where needed. It was a bit of a pain to get the rope installed with my sausage fingers at hand, HA! I'm not sure I'll be rigging any sail ships any time soon.
Ok, now the really fun part, making waves. Since I've already done four trial runs I will only show the beginning stages so yall know where I am in the process. This ain't as easy as the videos make it out to be. Reason being, I have such a small area to work with and it's in such a large scale, so I can't get away with a half hearted effort or the whole shebang will look rather pathetic. I have already gone back to painting the Watch Officer to clear my head a bit. I credit these many mistakes to breaking my golden rule, never be in rush, and the Mrs. has made it clear I need to slow down, HA!
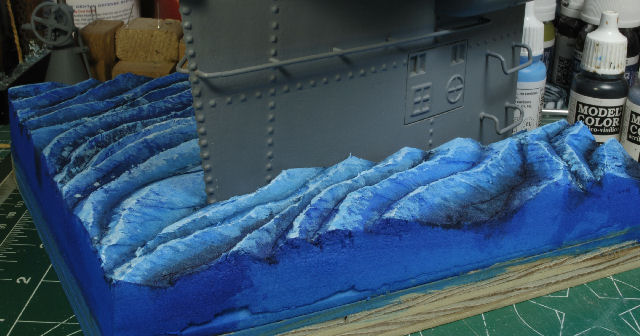

All the standard methods for making realistic waves can be found on the inet, so I won't go over them right now, but if I'm successful, I will, lol, later. It's been a challenge to get this just right, so I'll get back to this before it's all said and done. After all, this is all that is needed to complete this dio.
More to follow soon and thanks for watchin! Cheers, Ski.
P.S.
In an attempt to get this dio finished before the summer work hits I kept working without updates, only taking photos when I remembered to do so. I backed off the Watch officer figure due to immediate burn out and began to work the gun deck. Now that was a fun change of pace.
First I had to decide how I wanted to mount the gun, up down, or just plain locked down flat. I decided on
extending the elevation shaft to give the figures a bit more room on the deck.
I needed to add details that had be lost during the resin process such as bolt heads, etc. Now it was time to paint both the gun and mount, constantly looking for any missed imperfections from the resin process.
Now it was time for the cables to be made and fitted to the deck. I had to scratch build turn buckles and solder the wire so it wouldn't become an issue later down the road. I don't remember the exact gage of wire, but it's close to 12 gage, braided. The thinner wire for stabilizing the main cable is close to an 8 gage, but I don't recall. At any rate, I've got plenty of wire in the scrap bin for just such an occasion.
The turn buckle was made from scrap balsa wood and sheet pewter covering, simple enough. Once the cable were cut to fit the entire set up was installed and adjusted as needed.
Next up, clean up those ribs from under that deck. I believe they were added for stability in the 3D process, but they aren't in any photos I've ever seen of any Type VIIB sub anywhere. So, I just did a simple, HA!, simple scrape with the flat Xacto knife and sanded, filled, sanded again, and painted. Ah, looks much better, eh? You may notice during this process I had to remove the railing to get into those tight spaces and to avoid destroying all that prior work, lol. That was a real hoot, leme tell yaz.
Since this mini-dio/vignette will have a cut off point in the rear I had to fill the void. I used blue construction foam for the edge of the void and placed a piece of sheet styrene on top trying to make it as flush as possible. The I primed it and painted it black. The cables and deck were painted and ready for theweathering process.
Time to get that deck and gun weathered for battle, right? I used the standard chipping method, sponge and brush, then went back over these areas and added a dark rust tone. Then, with a damp brush I drew that tone in a downward motion to create the streaks. After the entire deck was done I went back to key areas and added a lighter tone of rust and continued the process. The deck itself was said to be wood coated in a water proof type dark colored paint, so I did what other sub modelers have done and attempted to show ware on the deck due to foot traffic, etc.
When I was satified with the general overall weathering process I mounted the gun and mount in place using pins, as always.
Lastly the flag and rope were added and touched up where needed. It was a bit of a pain to get the rope installed with my sausage fingers at hand, HA! I'm not sure I'll be rigging any sail ships any time soon.
Ok, now the really fun part, making waves. Since I've already done four trial runs I will only show the beginning stages so yall know where I am in the process. This ain't as easy as the videos make it out to be. Reason being, I have such a small area to work with and it's in such a large scale, so I can't get away with a half hearted effort or the whole shebang will look rather pathetic. I have already gone back to painting the Watch Officer to clear my head a bit. I credit these many mistakes to breaking my golden rule, never be in rush, and the Mrs. has made it clear I need to slow down, HA!
All the standard methods for making realistic waves can be found on the inet, so I won't go over them right now, but if I'm successful, I will, lol, later. It's been a challenge to get this just right, so I'll get back to this before it's all said and done. After all, this is all that is needed to complete this dio.
More to follow soon and thanks for watchin! Cheers, Ski.
P.S.
phantom II
Master at Arms
Wow, that's looking really nice ")
Cheers, Christian B)
Cheers, Christian B)
Lovin' it! Weathering on the tower and deck are just spot on. 
Sherman 18
Master at Arms
Just fantastic
Sherman 18
Master at Arms
Outstanding work!!!!!!!!!!!
:skipper
:skipper
Similar threads
- Replies
- 34
- Views
- 1K
- Replies
- 53
- Views
- 9K
- Replies
- 13
- Views
- 2K
- Replies
- 4
- Views
- 2K
- Replies
- 8
- Views
- 2K