You'd have to prune and water your model.this is how rich people do it

Superior Quality Chinese Elm Bonsai Trees - ALL THINGS BONSAI
Superior Quality Chinese Elm Bonsai Trees - allthingsbonsai.co.uk selection of bonsai trees, gift sets and kits for beginners and enthusiasts.www.allthingsbonsai.co.uk
-
Modelers Alliance has updated the forum software on our website. We have migrated all post, content and user accounts but we could not migrate the passwords.
This requires that you manually reset your password.
Please click here, http://modelersalliance.org/forums/login to go to logon page and use the "Forgot your Password" option.
You are using an out of date browser. It may not display this or other websites correctly.
You should upgrade or use an alternative browser.
You should upgrade or use an alternative browser.
"Easy Pickins"
- Thread starter Steve Ski
- Start date
Steve Ski
Well-known member
Thanks, man, thanks!I got nothing for ya big guy...watching what's next.
Good thing I'm not rich, I'd have to water the diothis is how rich people do it

Superior Quality Chinese Elm Bonsai Trees - ALL THINGS BONSAI
Superior Quality Chinese Elm Bonsai Trees - allthingsbonsai.co.uk selection of bonsai trees, gift sets and kits for beginners and enthusiasts.www.allthingsbonsai.co.uk
Hey, I just heard an echo, HA!You'd have to prune and water your model.


Thanks, Barney, and yes, we're coming on 11 yrs, woof. 200mm is 1/9th scale, so it's huuuuuge!Fantastic work on the Bike!
You've been working on this for a while. I don't feel so bad about my shelf of doom!
200mm is what scale... 1/24?
Steve Ski
Well-known member
Yes, yes,............... you are correct as always, sheesh! Hind-sight is crystal clear. So why didn't you tell me this 11yrs ago, Huh, huh?You do realize that if you put a dam acorn in dirt on your dio eleven years ago the dam thing would be the perfect size right now for your build ..................
Still love ya tho BroSki .................

Steve Ski
Well-known member
And I told you to keep your day job, HA! Sheesh,..............I did tell you eleven years ago , ............ but then again we're both Polish so it might not have taken root , ........
See what I did there , ........... " taken root " ...................
Steve Ski
Well-known member
It’s Taking Shape
This is working decent enough to continue building up the branches with the Caspia clusters. Before I get too carried away, I need to finish painting all the clusters in the base green tone, add highlights, and add a touch of yellow to the mix to magnify the upper highlights.
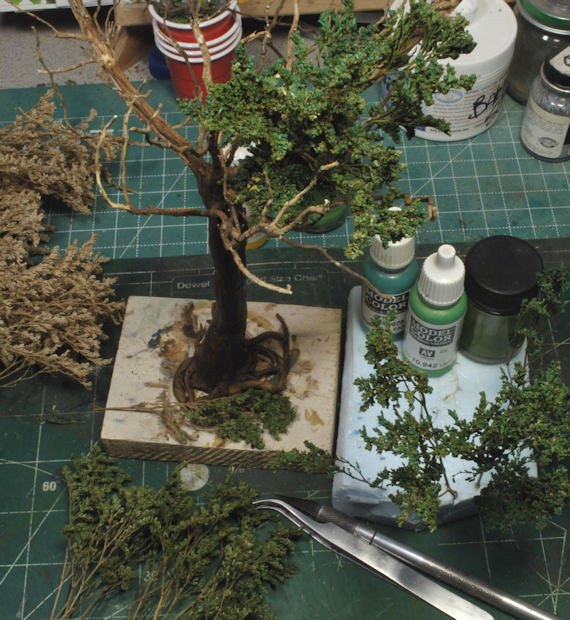
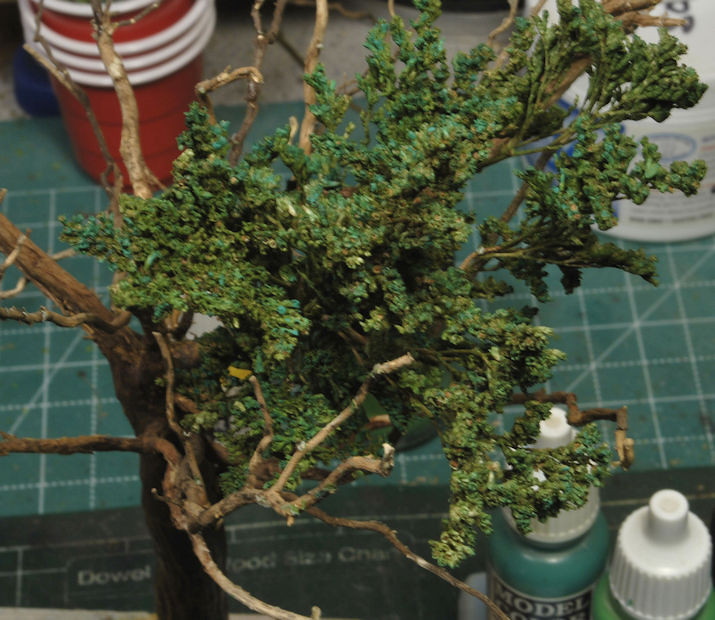
Working these clusters is so much more enjoyable than what I had going before. The comparison just isn’t there. What I am doing is making sure I don’t get carried away with any stems that are too long. This would blow the whole appearance out of whack.

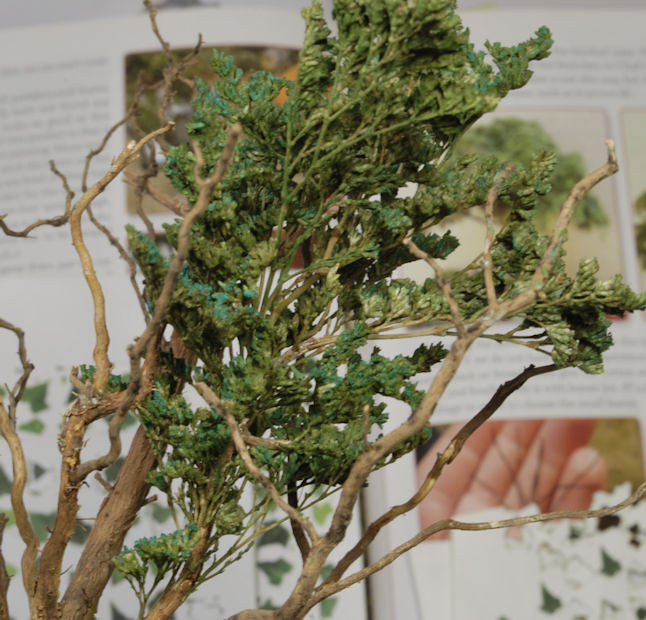
I’ve been using almost all of the little portions and even some tiny starter shoots to fill in at the branches where the stems start, the fixation points. So far this is working very well and I’m liking what I see. I’ll keep at it until I’ve reached the fullness I’m looking for. I’ll need to place this up against the shed a few times to make sure my growth directions are correct, but momentum is picking up, and that’s what I want to see.
More to follow soon and thanks for watchin. Cheers, Ski.
P.S. Simon, you are correct, the minor green tones landing on the stems help the new growth appearance very well. No need to brown them out at all.
This is working decent enough to continue building up the branches with the Caspia clusters. Before I get too carried away, I need to finish painting all the clusters in the base green tone, add highlights, and add a touch of yellow to the mix to magnify the upper highlights.


Working these clusters is so much more enjoyable than what I had going before. The comparison just isn’t there. What I am doing is making sure I don’t get carried away with any stems that are too long. This would blow the whole appearance out of whack.


I’ve been using almost all of the little portions and even some tiny starter shoots to fill in at the branches where the stems start, the fixation points. So far this is working very well and I’m liking what I see. I’ll keep at it until I’ve reached the fullness I’m looking for. I’ll need to place this up against the shed a few times to make sure my growth directions are correct, but momentum is picking up, and that’s what I want to see.
More to follow soon and thanks for watchin. Cheers, Ski.
P.S. Simon, you are correct, the minor green tones landing on the stems help the new growth appearance very well. No need to brown them out at all.
That's so cool looking!
Steve Ski
Well-known member
Tree Test Fit
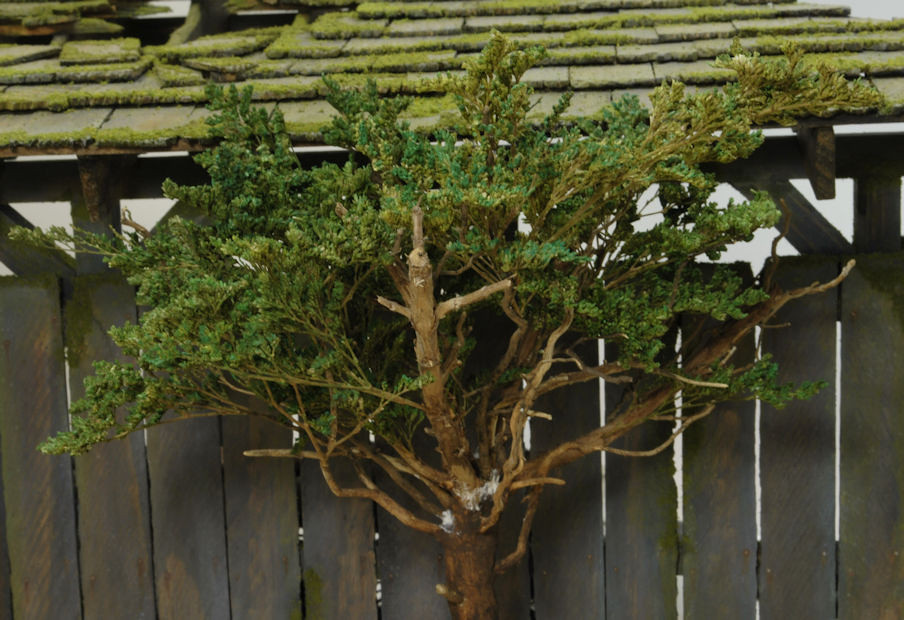
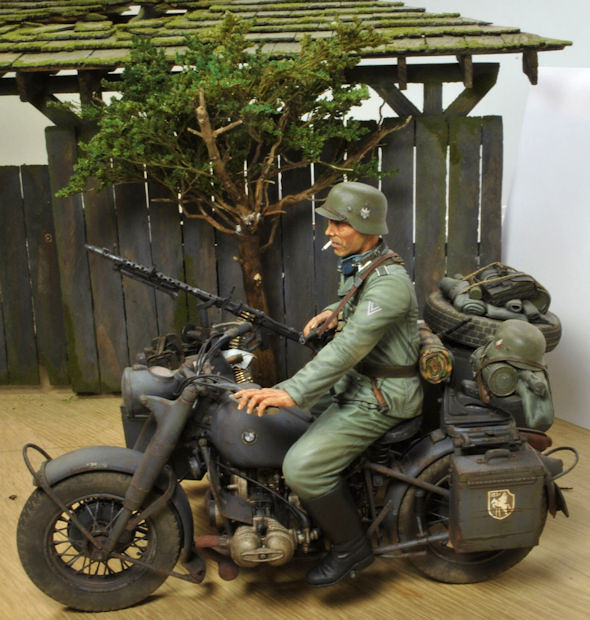
It’s a good thing I decided to do another test fit to verify where this tree will go, because some of the branch work was hindering the Ranger’s visibility of his targets and coming very close to some of the other figures in the scene.
As you can see there’s quite a bit more to add to make this tree fuller and I need to gain some altitude above the roof line. I put the R75 and driver in for perspective.
More to follow soon and thanks for watchin. Cheers, Ski.
It’s a good thing I decided to do another test fit to verify where this tree will go, because some of the branch work was hindering the Ranger’s visibility of his targets and coming very close to some of the other figures in the scene.
As you can see there’s quite a bit more to add to make this tree fuller and I need to gain some altitude above the roof line. I put the R75 and driver in for perspective.


More to follow soon and thanks for watchin. Cheers, Ski.
Heavens Eagle
Well-known member
Steve, the pictures seem to have broken links, so no pics.
Very realistic. 

I agree!!Very realistic.
Steve Ski
Well-known member
Speeding Up the Process
Painting these Caspia clusters has not been as difficult as you might think. Most everyone suggested airbrushing the clusters, but that would still mean going back in there with a brush and catching all the missed areas. So, I decided from the get-go that I’d be using a brush, and it’s worked well, but slow.
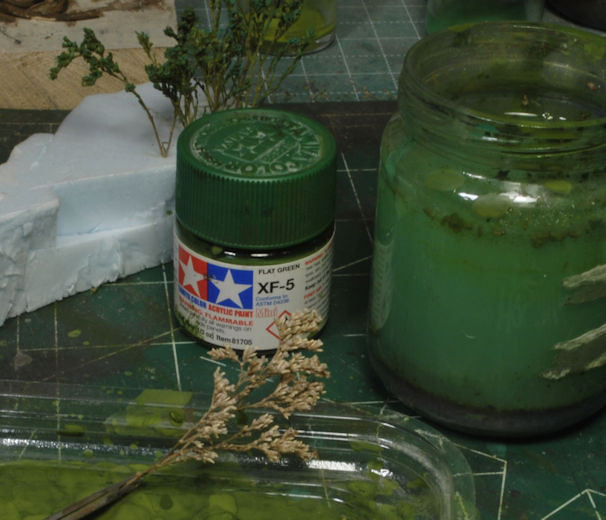
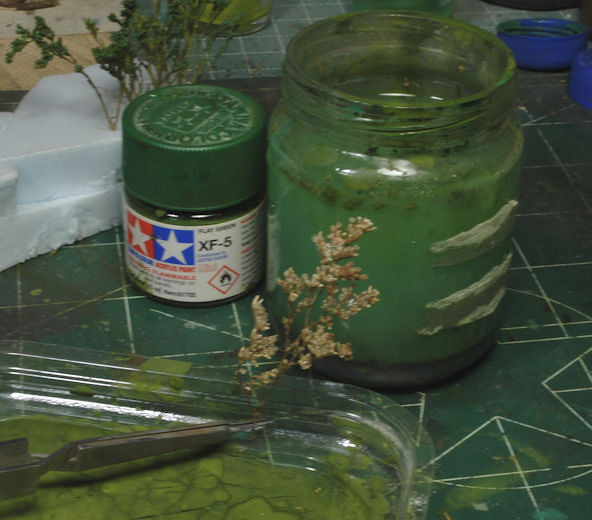
I finally got the idea to pre-wet the clusters, and as you can see from the first two pics, I pre-wet the clusters by dipping them in a jar of water. It just so happens this is my brush cleaning jar for the cluster work anyway, so why not, it’s got a green tone. Clipped to a set of spring tweezers I dip the cluster and drop onto the plastic lid. Dip the brush in some Tamiya XF-5 Flat Green and dab all over the clusters, top and bottom. Then wet the brush with water and spread that paint into all the visible brown areas. Once I’m satisfied I’ve got the clusters covered all over I hit it with a hair dryer on high to quick dry the paint. Peg that cluster on the foam and continue the process for the rest of them.
Once all the clusters have the initial green tone I go back and hit the highlights, then add the yellowish tone to mesh them all together. Now I’ve got enough to finish the tree to make it fuller and more realistic, I hope.

You can also see the plans for items to be added to the shed area where the Ranger will be hiding. I enjoy fabricating odds and ends; it adds character to the scene and helps tell the story a little better. However, once this tree is finished, I still need to work in a few bushes and prep the ivy vines and cut quite a few more leaves.
More to follow and thanks for watchin. Cheers, Ski.
Painting these Caspia clusters has not been as difficult as you might think. Most everyone suggested airbrushing the clusters, but that would still mean going back in there with a brush and catching all the missed areas. So, I decided from the get-go that I’d be using a brush, and it’s worked well, but slow.
I finally got the idea to pre-wet the clusters, and as you can see from the first two pics, I pre-wet the clusters by dipping them in a jar of water. It just so happens this is my brush cleaning jar for the cluster work anyway, so why not, it’s got a green tone. Clipped to a set of spring tweezers I dip the cluster and drop onto the plastic lid. Dip the brush in some Tamiya XF-5 Flat Green and dab all over the clusters, top and bottom. Then wet the brush with water and spread that paint into all the visible brown areas. Once I’m satisfied I’ve got the clusters covered all over I hit it with a hair dryer on high to quick dry the paint. Peg that cluster on the foam and continue the process for the rest of them.


Once all the clusters have the initial green tone I go back and hit the highlights, then add the yellowish tone to mesh them all together. Now I’ve got enough to finish the tree to make it fuller and more realistic, I hope.

You can also see the plans for items to be added to the shed area where the Ranger will be hiding. I enjoy fabricating odds and ends; it adds character to the scene and helps tell the story a little better. However, once this tree is finished, I still need to work in a few bushes and prep the ivy vines and cut quite a few more leaves.
More to follow and thanks for watchin. Cheers, Ski.
Similar threads
- Replies
- 5
- Views
- 1K
- Replies
- 95
- Views
- 8K
