-
Modelers Alliance has updated the forum software on our website. We have migrated all post, content and user accounts but we could not migrate the passwords.
This requires that you manually reset your password.
Please click here, http://modelersalliance.org/forums/login to go to logon page and use the "Forgot your Password" option.
You are using an out of date browser. It may not display this or other websites correctly.
You should upgrade or use an alternative browser.
You should upgrade or use an alternative browser.
Dragon King Tiger
- Thread starter Iron Mike
- Start date
panzerace007
Active member
:v 
 :drinks :drinks
:erik

 :drinks :drinks
 :erik
dukwhunter
Member
Great choice Mike !!!!! B)
Woo hoo!! :zen :zen :zen :coolio :coolio
Iron Mike
Master At Arms And Resident Curmudgeon
Iron Mike
Master At Arms And Resident Curmudgeon
Thank you Terry, Mats, Erik, Joey, Bob, James and Ron!! I had the day off today, so between what I did last night and today, I managed to get most of the construction done. It helps to have good references and having built a couple other KT kits, this one went together pretty easily.
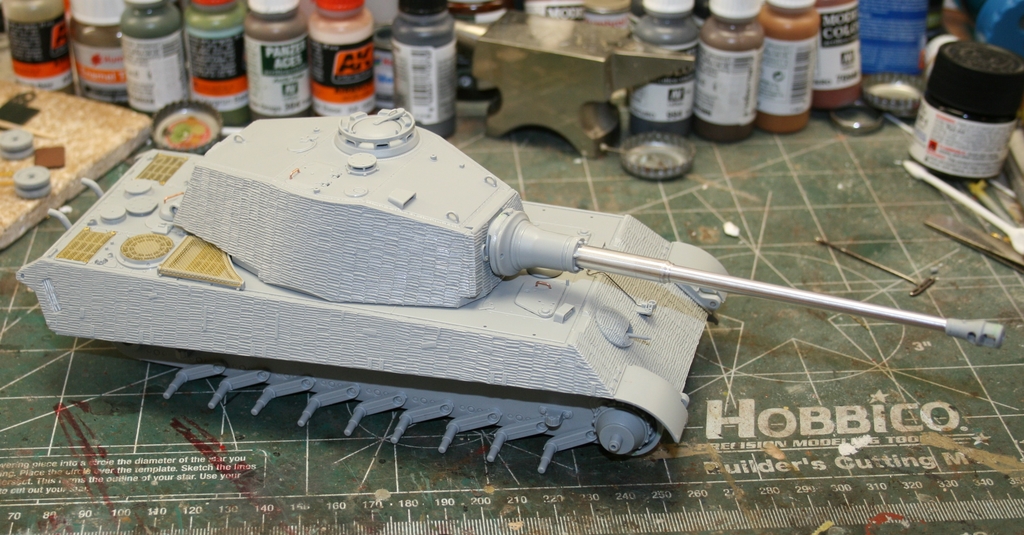
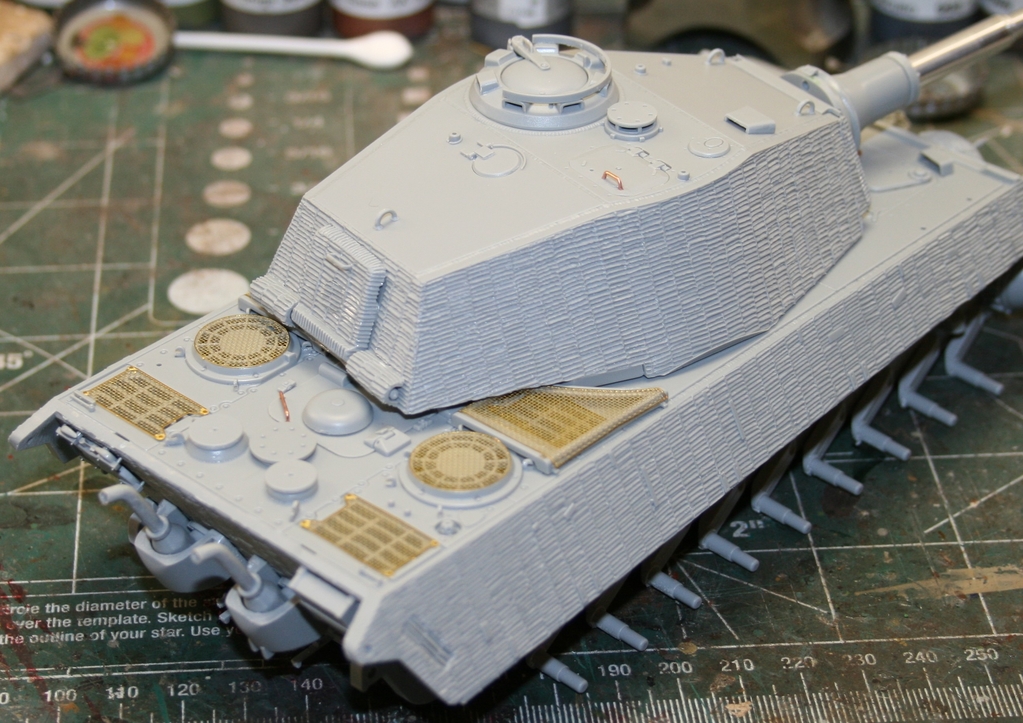
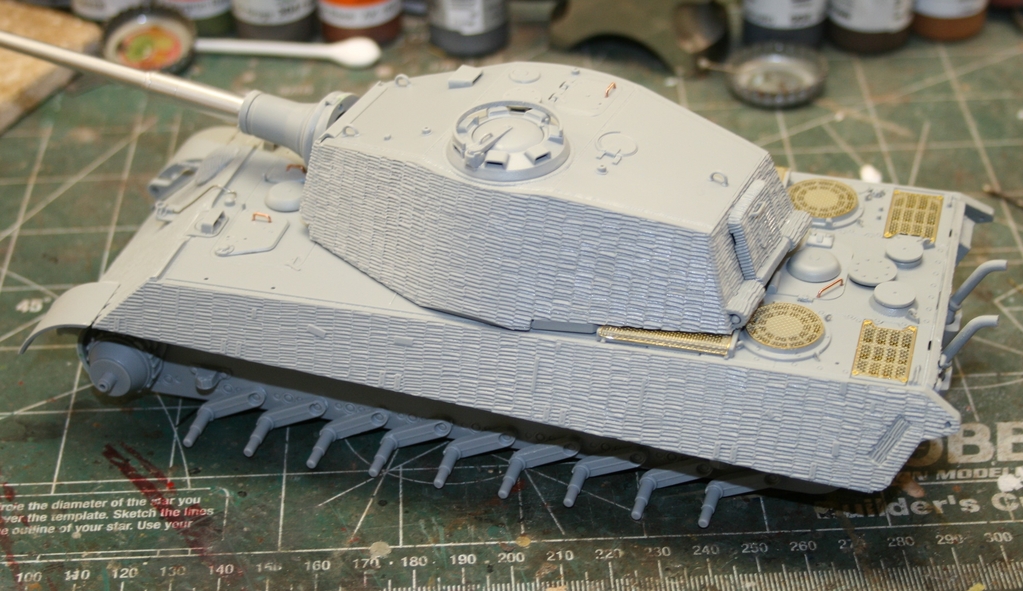
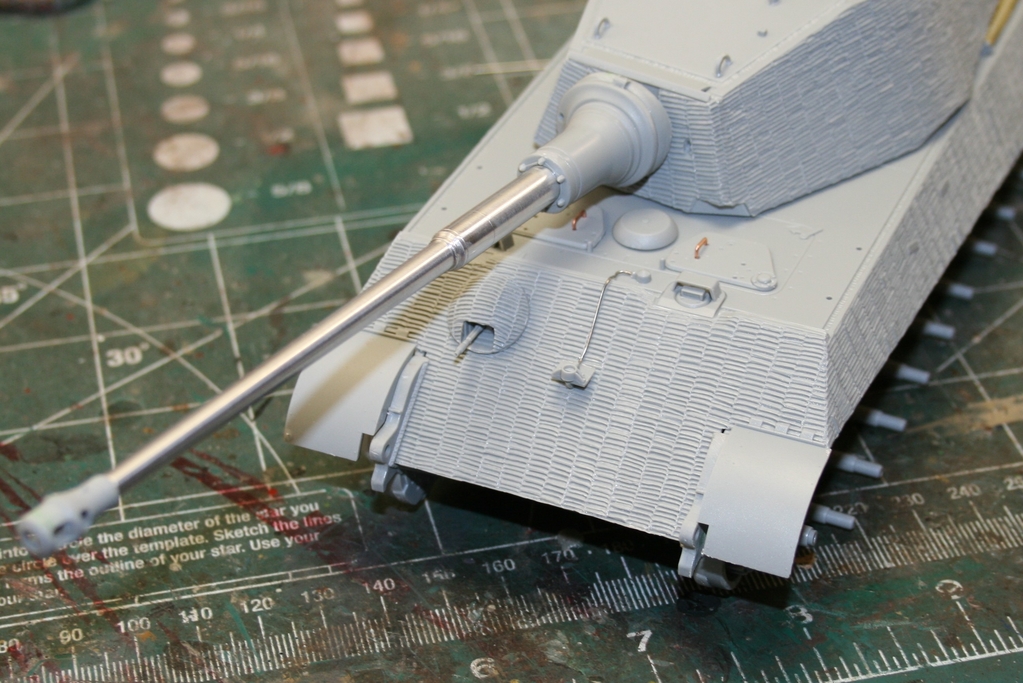
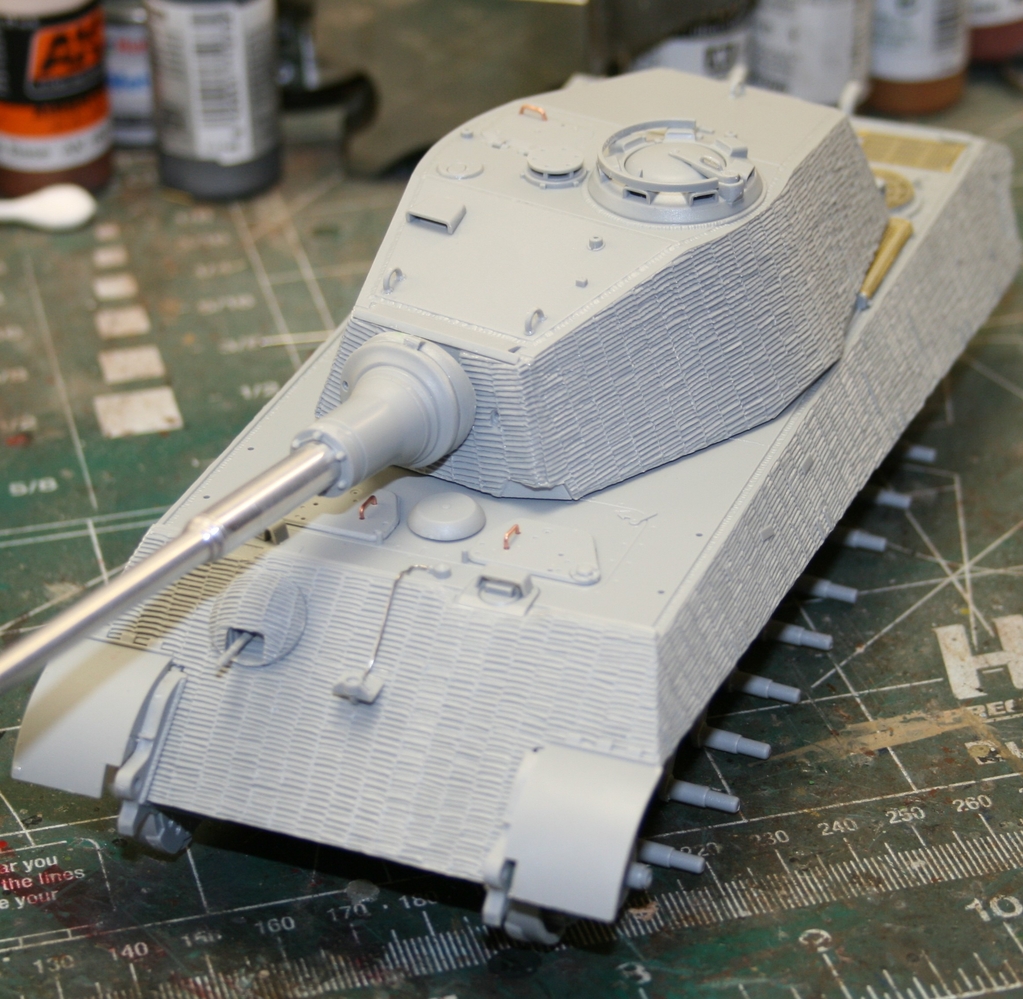
I made the conduit for the headlight, forgot that Dragon includes a pre-bent piece. Otherwise, this is straight from the box. I plan to add the fenders, but need to get the hull primed and base coated so I can install the tracks. Otherwise, if you put der fenders in place, you will have fun trying to install der tracks!!

Guess my next step is ROAD WHEELS! :pinch:
:drinks
I made the conduit for the headlight, forgot that Dragon includes a pre-bent piece. Otherwise, this is straight from the box. I plan to add the fenders, but need to get the hull primed and base coated so I can install the tracks. Otherwise, if you put der fenders in place, you will have fun trying to install der tracks!!

Guess my next step is ROAD WHEELS! :pinch:
:drinks
Gunfighter45
Member
I hate road wheels.
Another beer please.......
Mike B)
Another beer please.......
Mike B)
Here you go then :drinksI hate road wheels.
Another beer please.......
Mike B)
Looking great Mike :coolio

panzerace007
Active member
MIKE ,
Rock-On !!
 A very Clean Build ! This kit looks like it fell together ! I'm lookin forward to th Paint & weathering !
:drinks :drinks - German Roadwheels have to be hands down ... I least favorite part in a build !
Rock-On Brotha' !!
:erik
Rock-On !!

 A very Clean Build ! This kit looks like it fell together ! I'm lookin forward to th Paint & weathering !
 :drinks :drinks - German Roadwheels have to be hands down ... I least favorite part in a build !
Rock-On Brotha' !!
:erik
Iron Mike
Master At Arms And Resident Curmudgeon
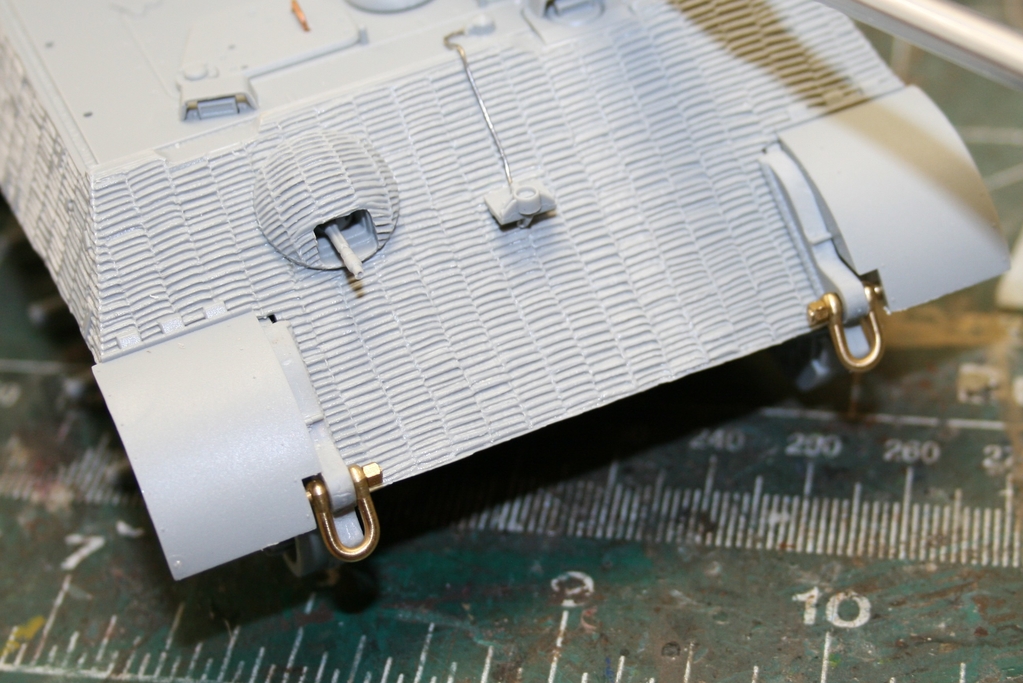
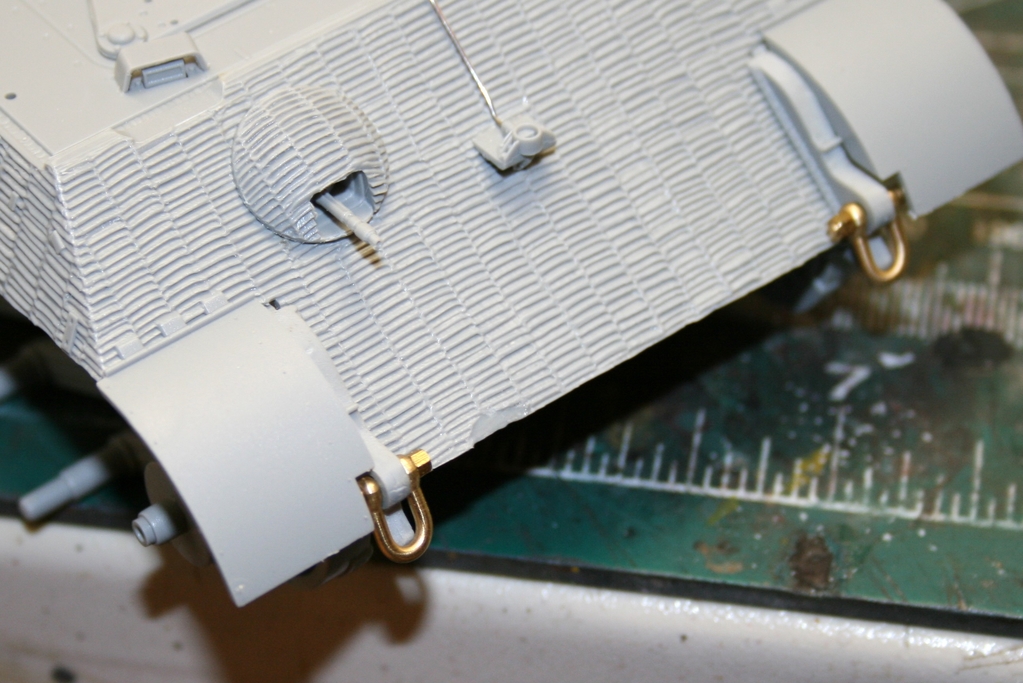
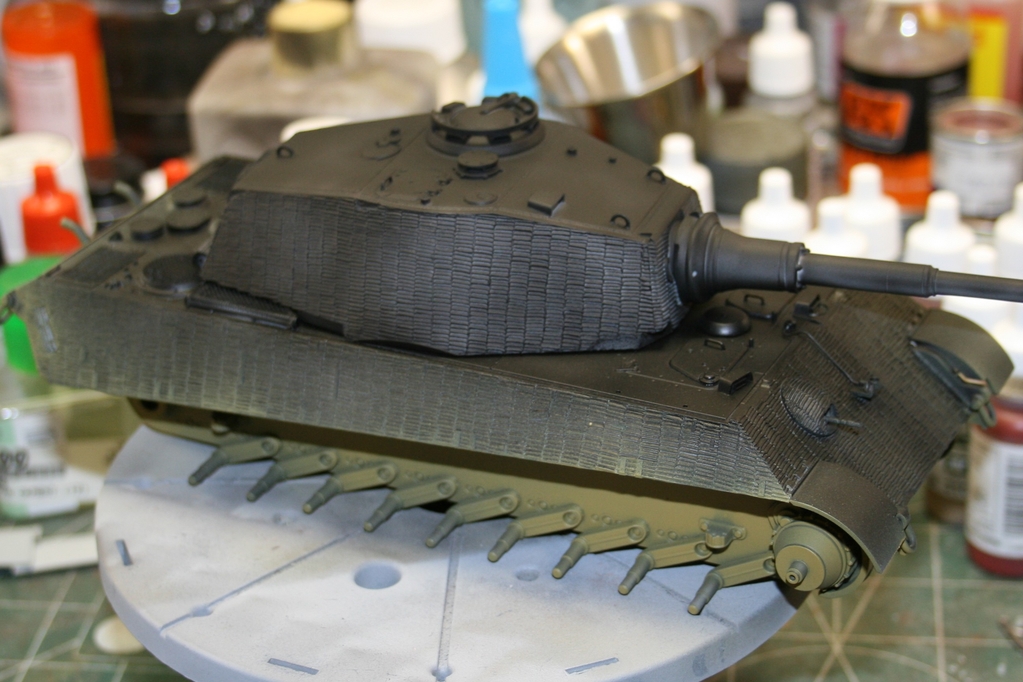
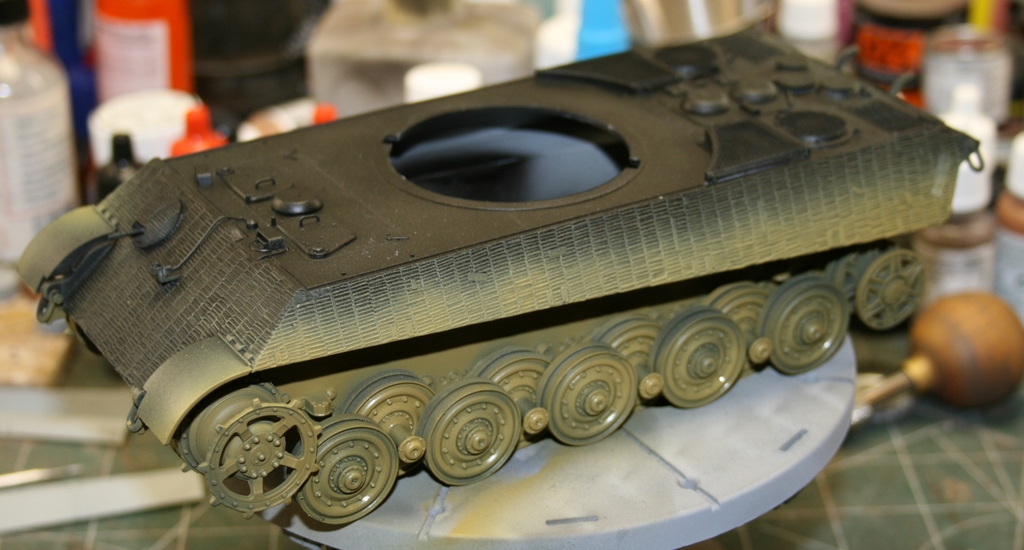
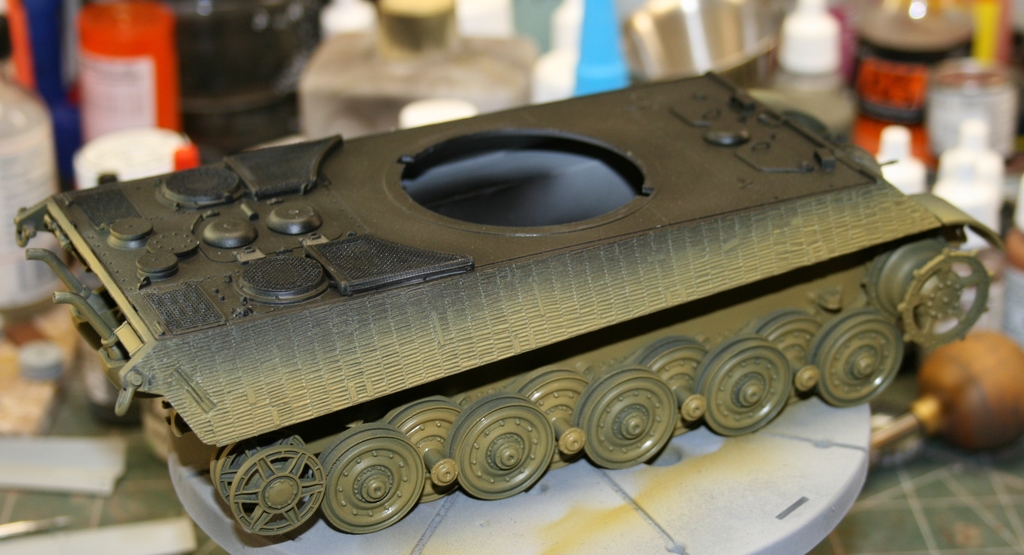
Thank you, friends!! I made some progress today, after I got over (not really) losing the sprockets for my Panzer IV for El Alamein! I felt the molded zimmerit was a bit too "fresh", so I added some damage at some of the edges.
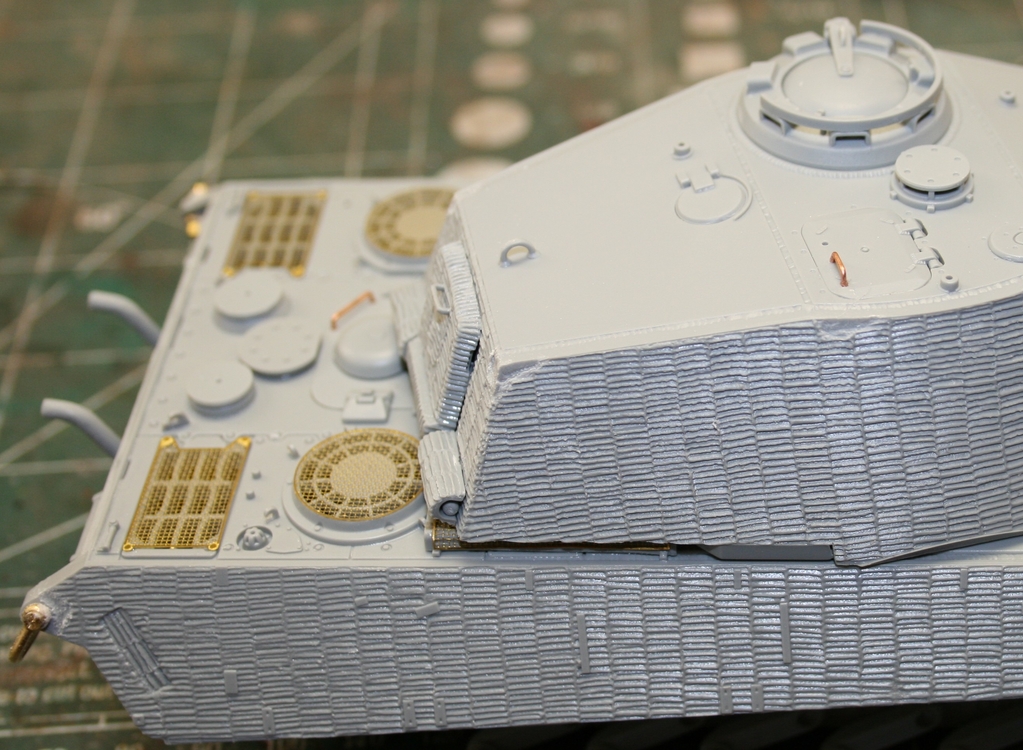
This was done with my micro chisel, trusty X-Acto and a burr in my Dremel.
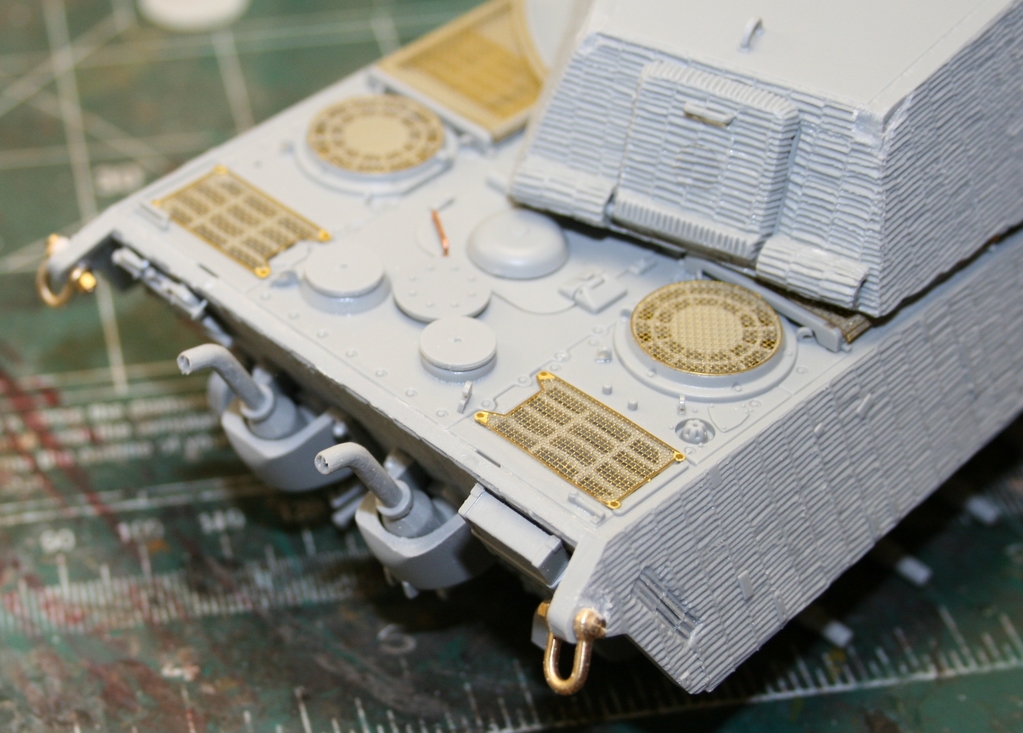
The kit come with a set of metal shackles, but no pins, so I dug in the AM box and found a set I had bought and forgotten.
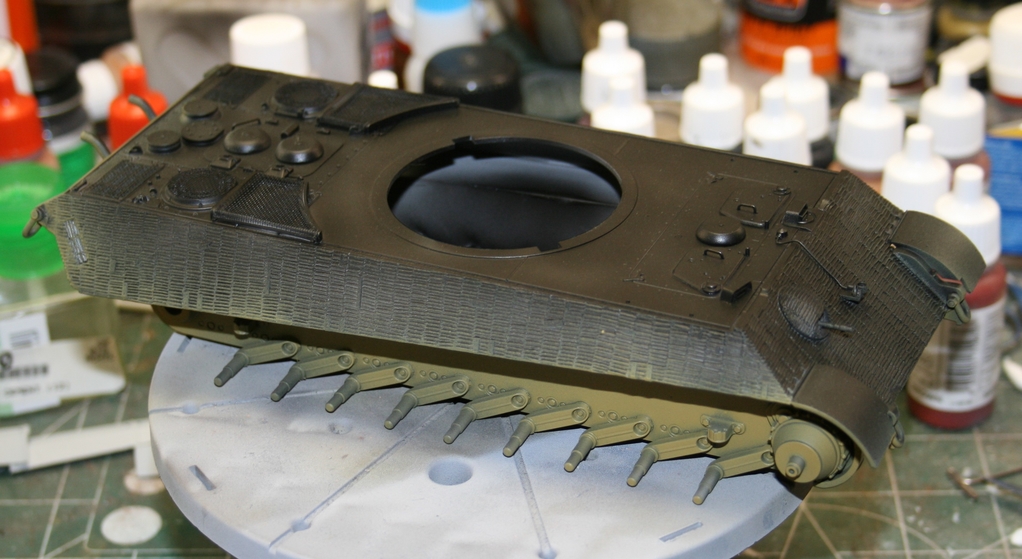
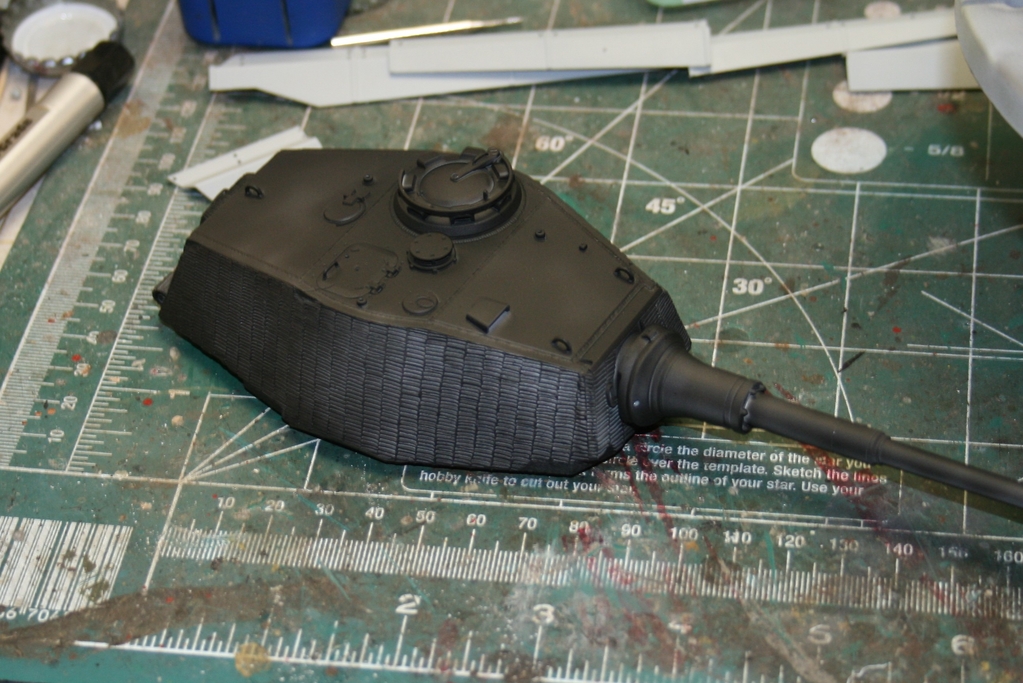
I find it hard to paint if the tracks are in place, so I primed everything with Tamiya Grey Primer and then a coat of Tamiya Semi Gloss Black. The lower hull is painted with AK Interactive's Dunkelgelb Base.
Since I am using the kit's Magic Tracks, I broke out the blue tape and did my buddy Greg's method of determining track length.
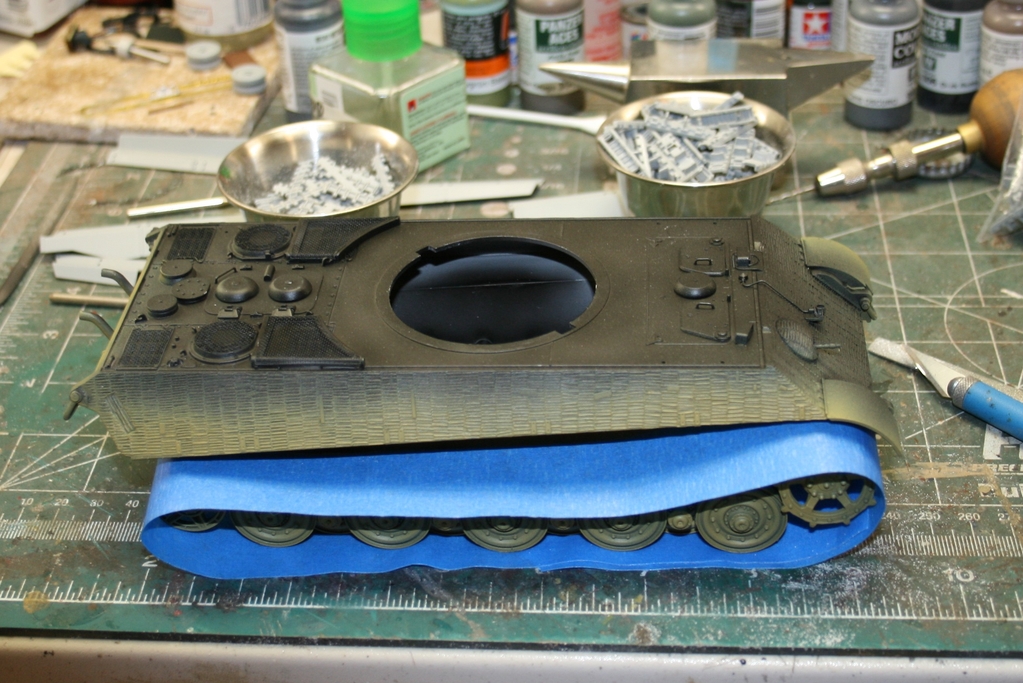
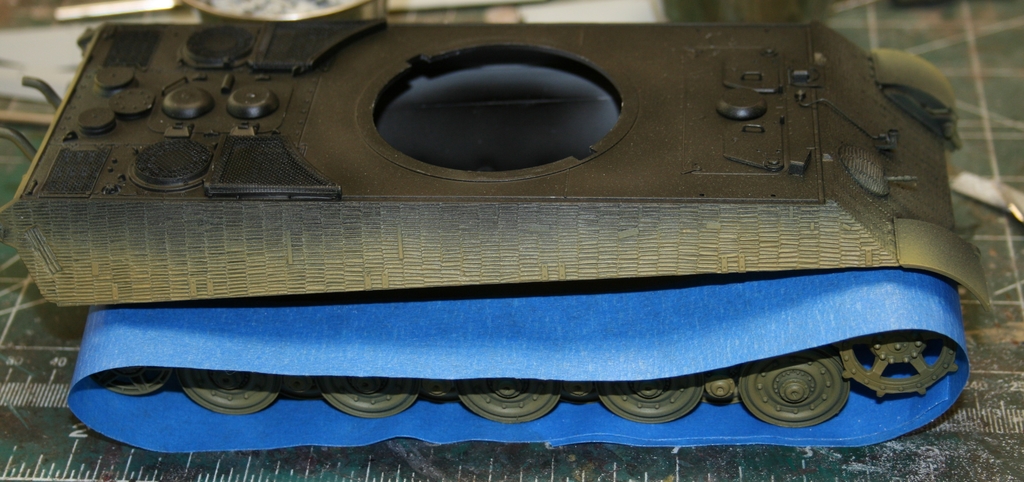
You just wrap the tape around the sprockets, idlers and wheels, stick the tape together, then cut it in two. Unwrap the tape from the assembly and lay on your track assembly board. I marked the length with a Sharpie right on the board for use on the next run. Lay blue tape sticky side up and secure the ends with more tape. The already cleaned links can be assembled right on the tape. The King Tiger had two different links, alternating like some Soviet stuff. I found it easier to put two links together, then add them to the first link.
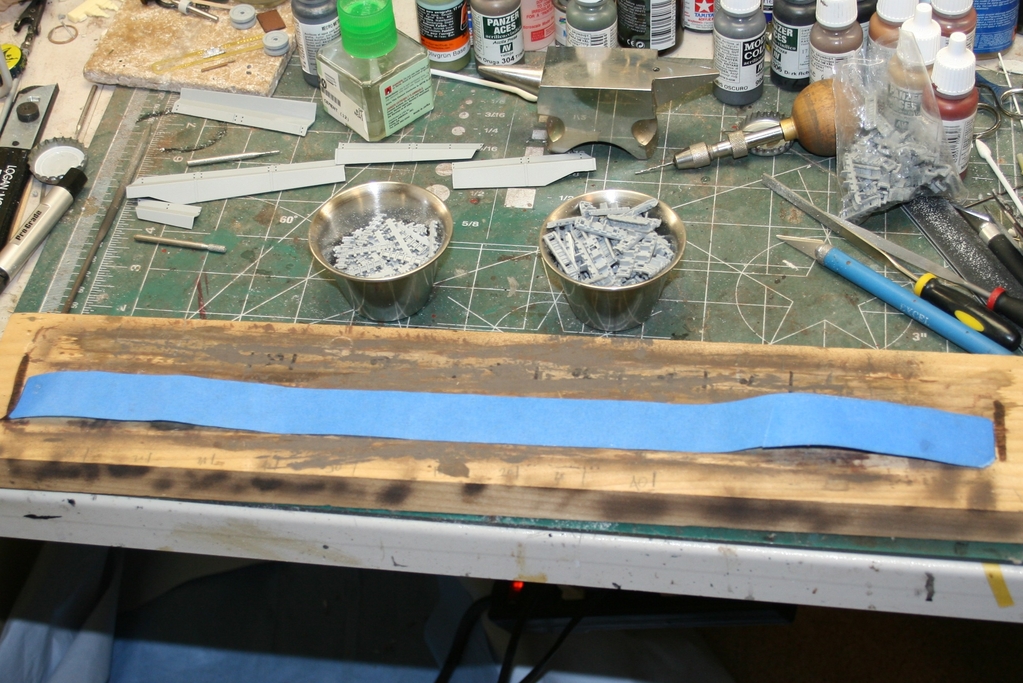
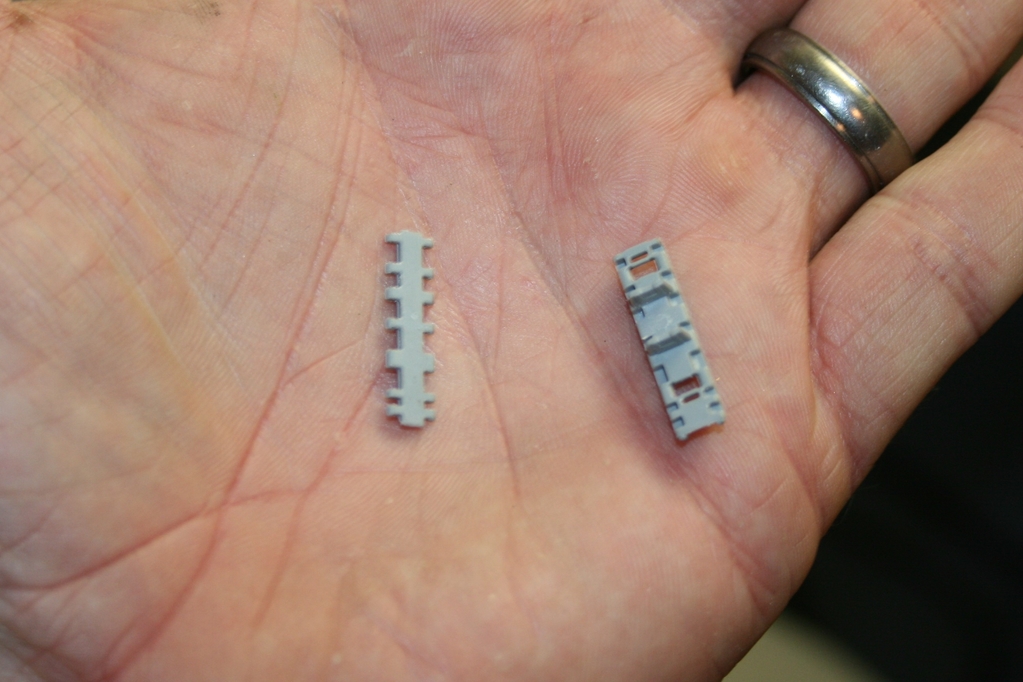
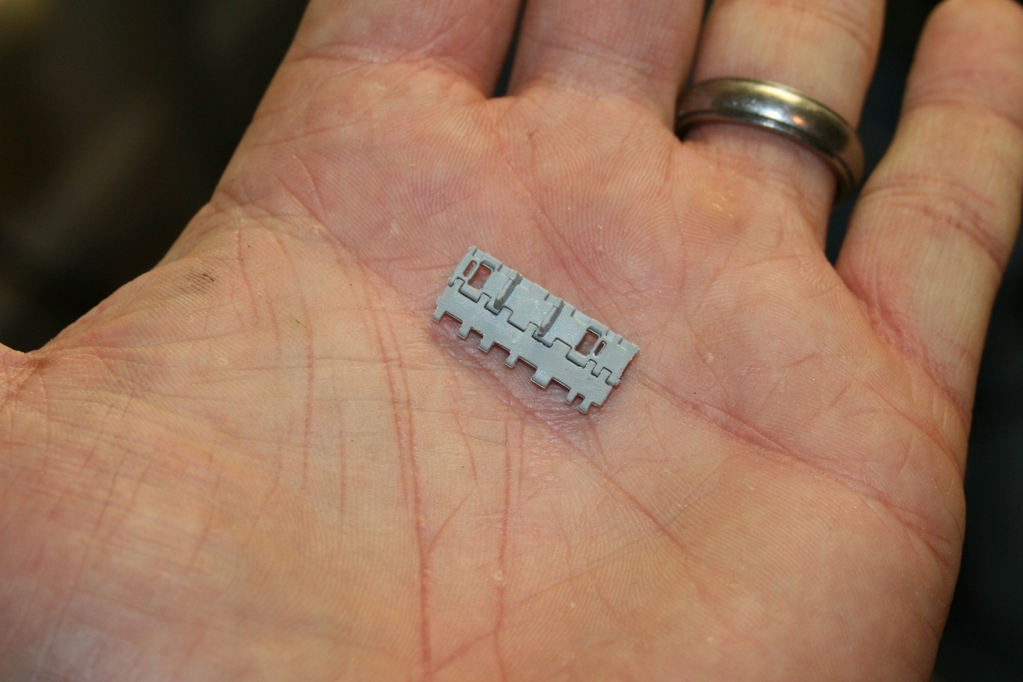
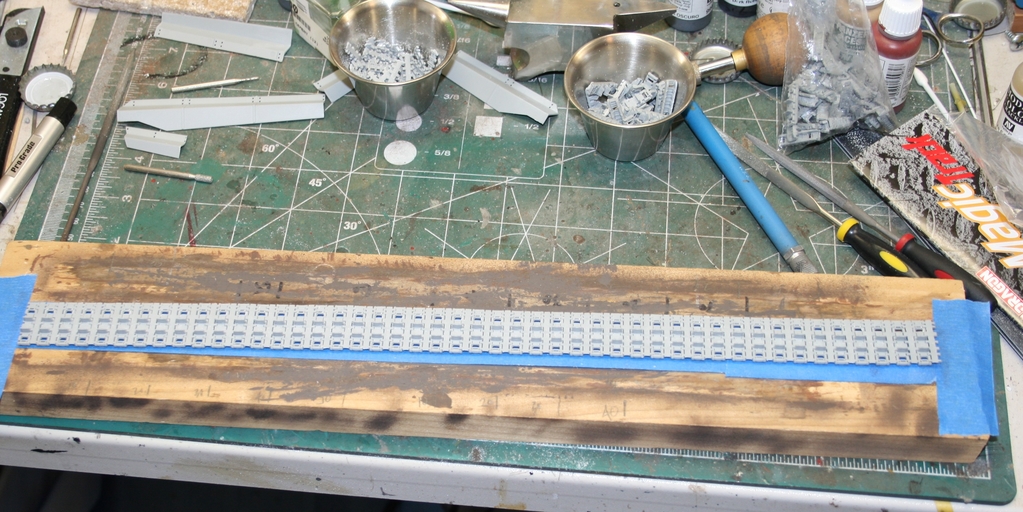
I liberally coat the inside of the track with Testor's Liquid Cement, let it dry about 10 minutes, then painted the run with cheap flat black spray paint. Waited about 10 more minutes and carefully removed the run from the tape and painted the other side. The whole run is then wrapped around the idlers and such, just like the real deal.
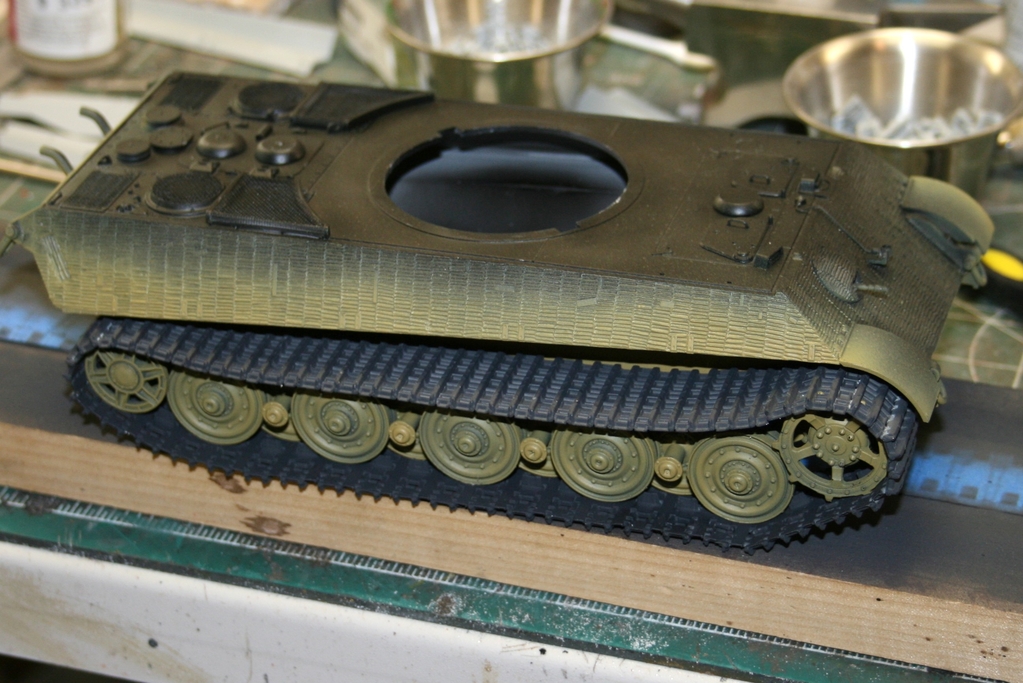
That's how I do it. Thanks for looking! :drinks
This was done with my micro chisel, trusty X-Acto and a burr in my Dremel.
The kit come with a set of metal shackles, but no pins, so I dug in the AM box and found a set I had bought and forgotten.

I find it hard to paint if the tracks are in place, so I primed everything with Tamiya Grey Primer and then a coat of Tamiya Semi Gloss Black. The lower hull is painted with AK Interactive's Dunkelgelb Base.
Since I am using the kit's Magic Tracks, I broke out the blue tape and did my buddy Greg's method of determining track length.
You just wrap the tape around the sprockets, idlers and wheels, stick the tape together, then cut it in two. Unwrap the tape from the assembly and lay on your track assembly board. I marked the length with a Sharpie right on the board for use on the next run. Lay blue tape sticky side up and secure the ends with more tape. The already cleaned links can be assembled right on the tape. The King Tiger had two different links, alternating like some Soviet stuff. I found it easier to put two links together, then add them to the first link.
I liberally coat the inside of the track with Testor's Liquid Cement, let it dry about 10 minutes, then painted the run with cheap flat black spray paint. Waited about 10 more minutes and carefully removed the run from the tape and painted the other side. The whole run is then wrapped around the idlers and such, just like the real deal.
That's how I do it. Thanks for looking! :drinks
Gunfighter45
Member
I guess I'm gonna try that tape system.
Looks great Mike.
Mike B)
Looks great Mike.
Mike B)

