
-
Modelers Alliance has updated the forum software on our website. We have migrated all post, content and user accounts but we could not migrate the passwords.
This requires that you manually reset your password.
Please click here, http://modelersalliance.org/forums/login to go to logon page and use the "Forgot your Password" option.
You are using an out of date browser. It may not display this or other websites correctly.
You should upgrade or use an alternative browser.
You should upgrade or use an alternative browser.
DAK with Doc - Next installment
- Thread starter JSteinman
- Start date

JSteinman
Master at Arms
DML Panzer 1 ausf. B ( DAK with Doc)
Next step is an easy one. Take your lightest post shade and add a wee bit more white to it. Then with a brush hit the highest details. Rivets, hinges, top of armored visor flaps, etc.

Now its time for some fun!
Get a cup of warm water and an old short bristle brush. Then very carefully start to rub the areas that would see the most wear with the damp brush. BE CAREFUL it is very easy to take off way too much paint!

Next step is an easy one. Take your lightest post shade and add a wee bit more white to it. Then with a brush hit the highest details. Rivets, hinges, top of armored visor flaps, etc.
Now its time for some fun!
Get a cup of warm water and an old short bristle brush. Then very carefully start to rub the areas that would see the most wear with the damp brush. BE CAREFUL it is very easy to take off way too much paint!
DML Panzer 1 ausf. B ( DAK with Doc)

JSteinman
Master at Arms
DML Panzer 1 ausf. B ( DAK with Doc)
J’habit au Vermont! It’s all about the layers...
Toto, I don't think we're in France anymore. Very cool technique!")
J’habit au Vermont! It’s all about the layers...
Iron Mike
Master At Arms And Resident Curmudgeon
DML Panzer 1 ausf. B ( DAK with Doc)
Some of us have to work for a living.
Getting lonely here in class... :v
Some of us have to work for a living.
DML Panzer 1 ausf. B ( DAK with Doc)
I'm making progress.
I'm making progress.
JSteinman
Master at Arms
DML Panzer 1 ausf. B ( DAK with Doc)
Yeah, me too, and I serve as a city councilor, and Rotary VP, and I took the time to put this together...
Getting lonely here in class... :v
Some of us have to work for a living.
Yeah, me too, and I serve as a city councilor, and Rotary VP, and I took the time to put this together...
Plastik Smurff
Well-known member
DML Panzer 1 ausf. B ( DAK with Doc)
12 hour dog watch shift's are not conductive to good modeling :java
To far behind to start an catch up now I think.
12 hour dog watch shift's are not conductive to good modeling :java
To far behind to start an catch up now I think.
Sherman 18
Master at Arms
DML Panzer 1 ausf. B ( DAK with Doc)
I was smoking in the boys room
:coolio
I'm just slow
I was smoking in the boys room
:coolio
I'm just slow
JSteinman
Master at Arms
DML Panzer 1 ausf. B ( DAK with Doc)
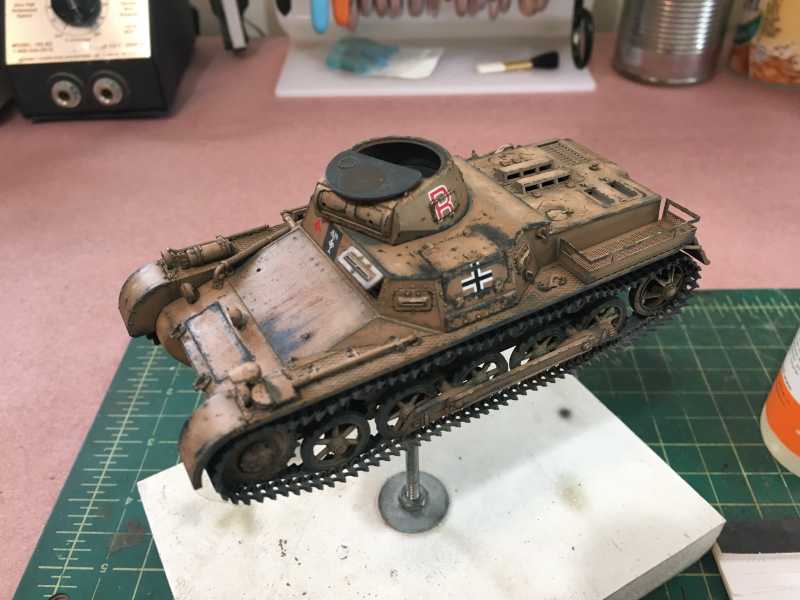
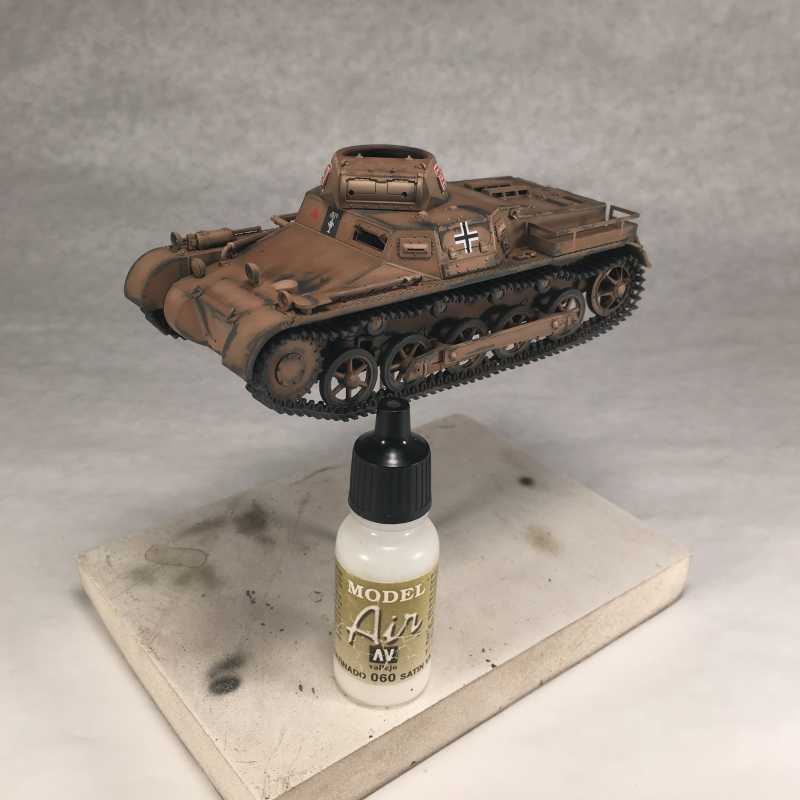
Okay next up for me was a spot gloss coat where I was going to apply some more decals:
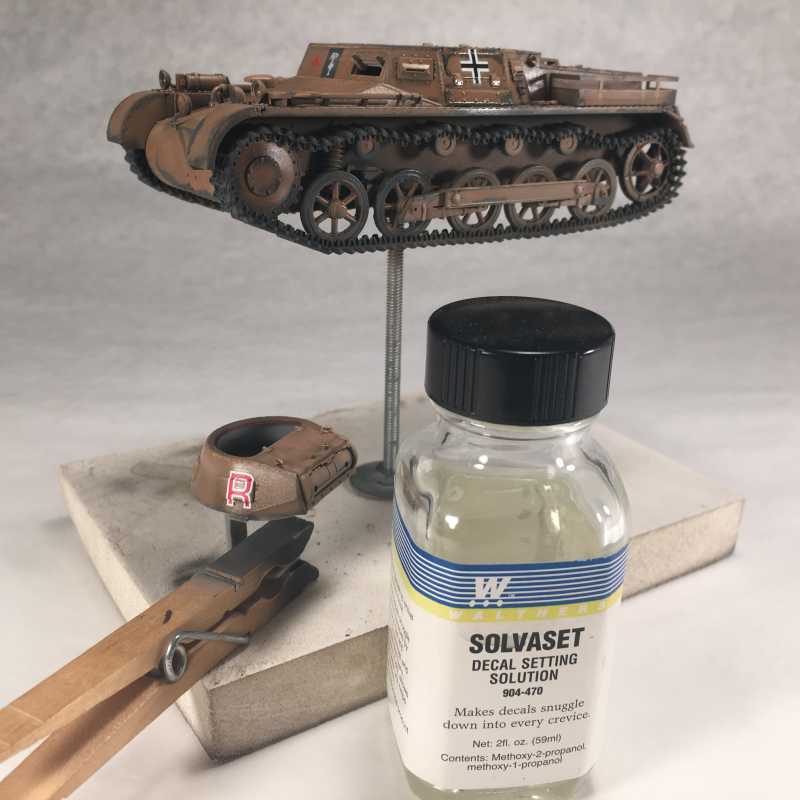
This was followed by a satin coat:

I did a quick enamel pin was here as well.
And then some fun, we enhance the HS chipping with both a fine brush and sponge.
https://youtu.be/LFKspYp3e1U
Final Cheeps!
Okay next up for me was a spot gloss coat where I was going to apply some more decals:
This was followed by a satin coat:
I did a quick enamel pin was here as well.
And then some fun, we enhance the HS chipping with both a fine brush and sponge.
https://youtu.be/LFKspYp3e1U
Final Cheeps!
Looking swell Doc, that levitation trick was messin' with my head for a minute. :java
DML Panzer 1 ausf. B ( DAK with Doc)
I"m going to attempt this this evening. Not sure I got Deck Tan, would Buff be ok?It’s June 1 so...
Everyone should be in primer at this stage. Next step is to apply a base coat of German grey. I am using Tamiya XF-63 diluted with 50% X-20A and a few drops of Tamiya retarder. Take the time to make sure this coat covers well. Generally, I have the psi set to 15 for this type of work.

This can be followed immediately with a post shade layer of the XF-63 mixed with XF-55 Deck tan. Generally, I turn the psi on the line down to 10 for this stage. Good airbrush control is important in this stage. Make sure you stay away from panel lines! Also, hit flat surfaces more than vertical ones. You want to apply color slowly, building up the effect and feathering the edges. A test line sprayed on a piece of paper should be at most 1.5mm wide.
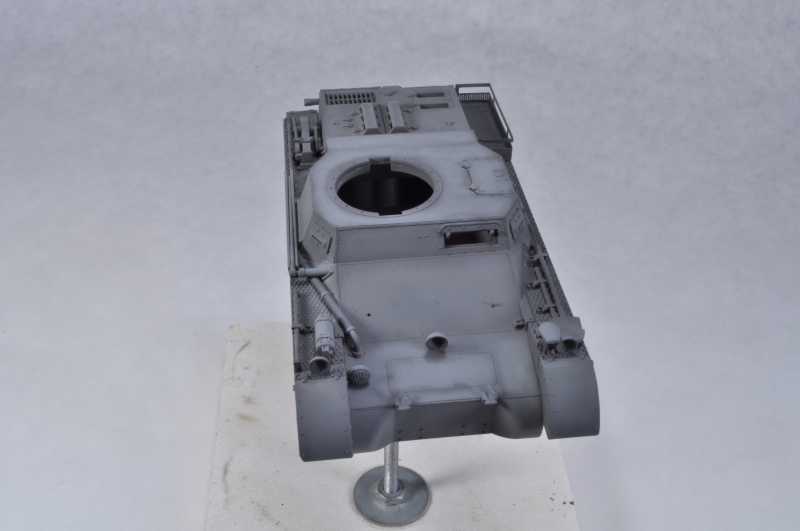
This step is immediatly followed by a final post shade by adding XF-2 white to the mix. Psi stays at 10, and maximum spray with is 1mm. Again hit flat surfaces more and feather inside previous post shading.


As a note I predilute all my Tamiya paints with X-20A 50% when I first open them, by mixing well and then decanting 50% of the volume into a spare bottle, then adding X-20A to restore full volume. So when I say to add XF-55 and XF-2 it is assumed they have already been diluted.
Good luck!
Looking at this, think I used too much buff, not enough white.
Similar threads
- Replies
- 18
- Views
- 2K