-
Modelers Alliance has updated the forum software on our website. We have migrated all post, content and user accounts but we could not migrate the passwords.
This requires that you manually reset your password.
Please click here, http://modelersalliance.org/forums/login to go to logon page and use the "Forgot your Password" option.
You are using an out of date browser. It may not display this or other websites correctly.
You should upgrade or use an alternative browser.
You should upgrade or use an alternative browser.
All Righty ... What's on the bench today?
- Thread starter panzerace007
- Start date
ausf
Master at Arms
lots of pictures of oddball on the internet Google him ?
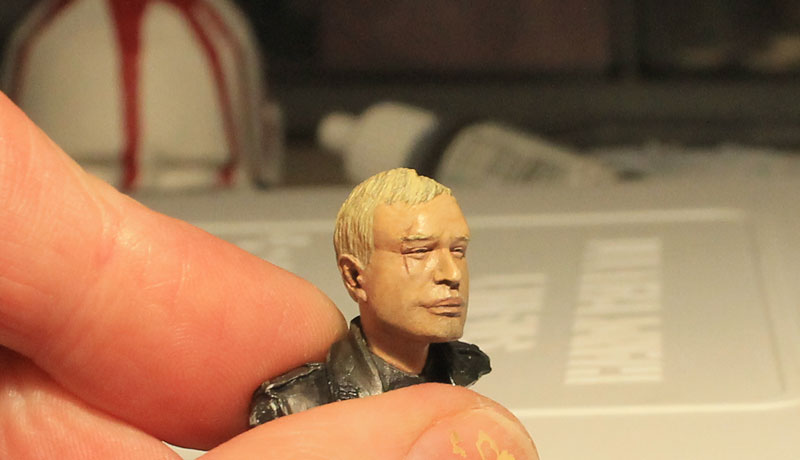
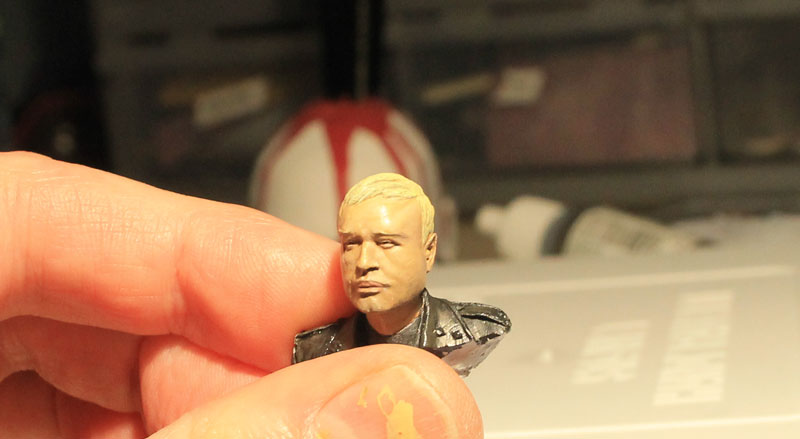
Sorry, I meant I'm having a hard time taking good photos of the head. I need to play around with lighting and settings. There's a lot of tonal variety and shadows that are getting washed out.
You're right, there's no shortage of Oddball photos online, I used many when I sculpted it.
That's amazing...

Duke Maddog
Well-known member
Here's another short update showing the last five to six hours of work. I managed to get some progress done on a few of my Shelf Queens so this will be seen in the Resolutions Thread as well.
To start with, I masked off the C-118 Cargo plane so I could start the white flowing:

Next, I got some Wal-Mart 96-cent can of white and shot it over the top of this model. This is the first coat; I think I'll be adding a few more coats. It's a little hard to see in this pic, but I assure you it is there:

The white came out grainy; probably because I was trying to 'mist' it on and shot from a bit too far away. I'll polish it down before adding further coats.
Next up, I masked off the Hampden to prepare it for the camouflage pattern:


I'll try to shoot that tomorrow as it got too late to fire up the compressor to airbrush it. We'll see, but at least it's ready to move on.
Finally, while I was trying to get a great coat on the Liftmaster, I figured I'd also try to get a better coat on the B-377. I sanded down all the blemishes and filler, sometimes even getting back down to the bare plastic:

Next I shot a Mr. Surfacer 1000 primer on the bare areas and buffed it smooth:

Afterward, I shot the bare metal finish on this again. In this pic; it is still wet so it is really shiny here. Because of that, some of the reflections look like blemishes, but this turned out fairly smooth this time:

Later on I went back to look at this and I did see a few very minor blemishes, but not nearly as many as I found before. I should be able to buff them out well enough to shoot a clearcoat on this later and then start decaling. By then, hopefully the C-118 will also be ready for a clearcoat and I can decal both of these at the same time. I might even get the Hampden ready for a clearcoat as well.
That's all for now. Hopefully tomorrow I'll be able to get further along on these yet again. Until then, thanks for looking in, comments are welcome.
To start with, I masked off the C-118 Cargo plane so I could start the white flowing:

Next, I got some Wal-Mart 96-cent can of white and shot it over the top of this model. This is the first coat; I think I'll be adding a few more coats. It's a little hard to see in this pic, but I assure you it is there:

The white came out grainy; probably because I was trying to 'mist' it on and shot from a bit too far away. I'll polish it down before adding further coats.
Next up, I masked off the Hampden to prepare it for the camouflage pattern:


I'll try to shoot that tomorrow as it got too late to fire up the compressor to airbrush it. We'll see, but at least it's ready to move on.
Finally, while I was trying to get a great coat on the Liftmaster, I figured I'd also try to get a better coat on the B-377. I sanded down all the blemishes and filler, sometimes even getting back down to the bare plastic:

Next I shot a Mr. Surfacer 1000 primer on the bare areas and buffed it smooth:

Afterward, I shot the bare metal finish on this again. In this pic; it is still wet so it is really shiny here. Because of that, some of the reflections look like blemishes, but this turned out fairly smooth this time:

Later on I went back to look at this and I did see a few very minor blemishes, but not nearly as many as I found before. I should be able to buff them out well enough to shoot a clearcoat on this later and then start decaling. By then, hopefully the C-118 will also be ready for a clearcoat and I can decal both of these at the same time. I might even get the Hampden ready for a clearcoat as well.
That's all for now. Hopefully tomorrow I'll be able to get further along on these yet again. Until then, thanks for looking in, comments are welcome.
Duke Maddog
Well-known member
Thanks Ausf! This is a bit beyond my skill set too, but I'm bulling through this as much as I can. Still won't be as masterful as many I know, but I'm happy with what I got done so far.
Nice work on the flesh tones. Karl is coming to life!
Nice work on the flesh tones. Karl is coming to life!
Gorgeous!
JSteinman
Master at Arms
Figure painting practice continues on my bench...
[attachment=23046]ha0231be.jpg[/attachment]
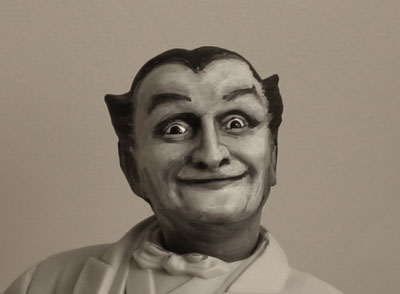
He gives me the creeps! Which means you are doing a good job!
Duke Maddog
Well-known member
Here's my latest progress on some more of my shelf queens I'm working on. I took some time to remove the masking from the C-118 to see how things look. I was very pleased with the white cover, but a mite disappointed at the slight setback of lifted paint. Some of the Tamiya peeled off with the tape, so I'll have to re-mask this again to get the silver/aluminum coat re-shot.
It's a bit hard to see, but a close look will will show where things peeled:


While I was airbrushing, I finally shot a coat of light tan on the Hampden for the first color:

I saw the seam above and got it fixed. Later on I masked off the tan with Silly Putty to prepare for the second color:

Finally, I got the dark green shot on this:

Afterward I peeled off all the Silly Putty to see how well things look. I'm fairly pleased at how this looks now:

Now to clearcoat this and apply the decals. I did coat them with a liquid decal film before hand to prepare them for the application.
Finally while everything was drying and setting up, I pulled out the Mach 5. I painted the engine with Oily Black first:

Later on when that dried, I dry-brushed it with Steel to bring out a metallic look to this:

Now I assembled the whole interior into the body and closed it up inside with the chassis. That way, I can fix the seams on the front of this model and make it smooth and white:

The engine looks pretty good in there now:

That's all I have for now on these. Not sure when I can get back to these, but at least there's some progress done so far. Thanks all for looking in, comments are welcome.
It's a bit hard to see, but a close look will will show where things peeled:


While I was airbrushing, I finally shot a coat of light tan on the Hampden for the first color:

I saw the seam above and got it fixed. Later on I masked off the tan with Silly Putty to prepare for the second color:

Finally, I got the dark green shot on this:

Afterward I peeled off all the Silly Putty to see how well things look. I'm fairly pleased at how this looks now:

Now to clearcoat this and apply the decals. I did coat them with a liquid decal film before hand to prepare them for the application.
Finally while everything was drying and setting up, I pulled out the Mach 5. I painted the engine with Oily Black first:

Later on when that dried, I dry-brushed it with Steel to bring out a metallic look to this:

Now I assembled the whole interior into the body and closed it up inside with the chassis. That way, I can fix the seams on the front of this model and make it smooth and white:

The engine looks pretty good in there now:

That's all I have for now on these. Not sure when I can get back to these, but at least there's some progress done so far. Thanks all for looking in, comments are welcome.
They both look like a DC6. :gogo :v
paddy
Well-known member
Well what can i say about this Corsair.
The fit of parts is beyond belief. I worked in engineering for 35 years working to fractions of a thousandth of an inch down to about 3 microns. I know about accurate fits and for Tamiya to get this sort of accuracy from a non rigid substance like plastic and direct from a moulding is nothing short of geneious !
Its also a clever design which has done away with fuselage top and bottom seams by moving the joins onto various panel lines but never in a row.

The wing root fit is spot on in fact its so good the wing spar and inner wing assembly clips in to place perfectly without any glue

Again only a very short section of seam along the bottom of the fuselage

And 2 short sections on the top at the front

The fit of parts is beyond belief. I worked in engineering for 35 years working to fractions of a thousandth of an inch down to about 3 microns. I know about accurate fits and for Tamiya to get this sort of accuracy from a non rigid substance like plastic and direct from a moulding is nothing short of geneious !
Its also a clever design which has done away with fuselage top and bottom seams by moving the joins onto various panel lines but never in a row.

The wing root fit is spot on in fact its so good the wing spar and inner wing assembly clips in to place perfectly without any glue

Again only a very short section of seam along the bottom of the fuselage

And 2 short sections on the top at the front

Heavens Eagle
Well-known member
Your making me want to get out my Tamiya birdcage version Paddy. It really is looking quite good!
Really wish you would start a separate thread on this so it would be easier to follow the steps of your build.
Really wish you would start a separate thread on this so it would be easier to follow the steps of your build.
Similar threads
- Replies
- 39
- Views
- 9K
- Replies
- 60
- Views
- 18K


