• Modelers Alliance has updated the forum software on our website. We have migrated all post, content and user accounts but we could not migrate the passwords.
    This requires that you manually reset your password.
    Please click here, http://modelersalliance.org/forums/login to go to logon page and use the "Forgot your Password" option.

All Righty ... What's on the bench today?

It's alright...but not all that good. I improved a bit even with the Mirage. I'll probably try adding a little wash though for a some contrast in the grey details.
 
...Something completely different B)

hd168064.JPG


h5943c8b.JPG


h6af74b9.JPG


And here something nice to put ontop of it :)

he4be775.JPG


Done some more detailwork on since these photos so it will come more pics

Greetings Mats
 
I'm not sure why, but I thought I posted this a couple weeks ago. For some reason it didn't stick so here's my second attempt...


Okay, here is what I've been working on over the past few weeks.

Most of this is armor. The exception being a few shots of some progress I made on two of the cars I'm working on, as well as two more aircraft I started for the Canvas Eagles game and another aircraft for a commission build. I'll start with them.

I finally got an acceptable enough coat of red on my Monkeemobile so now I'll buff it a little more smoothly and then apply a gloss coat to this, I hope:

WIP_MonkeeMobile_VII.JPG


I also got a good enough coat on the Corvette Rebel Racer I'm also doing. I do still need to buff out a few blemished on this before I move on, but it's closer to what I deem acceptable:

WIP_Rebel_Racer_Corvette_IV.JPG


I also went ahead and shot a tan color inside the interior to improve the look of the interior of this car. I will re-paint the leather seats soon:

WIP_Rebel_Racer_Corvette_V.JPG


It will feel good to be able to move ahead on these cars...


Here are the two starting pics for two new aircraft I picked up for a song at a local contest. I'm building these for the Canvas Eagles game again. The first one is the Revell 1/72 scale SE-5A, one of my favorite WWI biplanes:

WIP_SE5A_I.jpg


The next one is the Fokker DVII, also from Revell:

WIP_Fokker_DVII_a.jpg


Finally, here is the commission build; the Airfix 1/72 scale Hampden. I started out, naturally; with the interior, such as it is. I had to paint the pilot and crew and then add them to the interior after painting it:

WIP_HP_Hampden_I.jpg


That was the closest color I had to British interior green so I just went with it. This will be almost impossible to see once this is closed up and the glass is installed.

I then assembled the tail section of this plane:

WIP_HP_Hampden_II.jpg


Finally, after awhile, I closed this aircraft up. Here it is with the tail assembly positioned aft of the plane:

WIP_HP_Hampden_III.jpg


Oh, one more thing... Here's a small update on the Revell Chris Craft fishing boat I've been working on. It has two long rods I needed to rig. Here is a shot of one of them rigged next to the other:

WIP_ChrisCraft_III.JPG


The other will be rigged later and then I'll paint both sets of threads in black. After that, all I really need to do is add the decals and then I can install these rods and call this boat done.


Okay, that takes care of those, now to move on to my armor and vehicles....

I guess I'll start out with two more modern German vehicles that I started so that I could paint the three-tone camouflage patterns at the same time. I'd already started the troop carrying Boxer for the APC Campaign on the Modeler's Alliance, so naturally, I got the other Boxer started. This is the command vehicle version of the Boxer. Just like the first one, I started by assembling the interior of the lower hull:

WIP_Boxer_Command_I.jpg


Then I assembled the command module that fits in back:

WIP_Boxer_Command_II.jpg


Here they are fit together. For some reason, it doesn't seem to fit as well as the first one:

WIP_Boxer_Command_III.jpg


Later on, after I assembled the suspension underneath, I closed off the front of the hull and manhandled the nose into place. Due to the previously mentioned fit issues, this was a real bear to get fixed. I even had to resort to filling a few gaps with styrene rod:

WIP_Boxer_Command_VI.jpg


You can see that most of it was painted. That was because I had some leftover paint after shooting a basecoat on this next model....

This next model is the German Fuchs that I started. It was an easy model to assemble at first, except for the extremely tiny headlights:

WIP_Fuchs_I.jpg


Then I got to the suspension underneath. Holy crap! That was when I remembered why I'd waited so long to build this model!

WIP_Fuchs_II.jpg


After that was dry, I installed many of the additional detail parts and shot the basecoat on it:

WIP_Fuchs_III.jpg


WIP_Fuchs_IV.jpg


Since I had the paint booth going, I then pulled out my two Russian tanks and shot basecoats on them too so I could get them all ready for their camouflage patterns. I started by applying grey over the T-64BV. It's hard to tell, but yes, I did shoot the color on this:

WIP_T_64_BV_Tank_XII.jpg


I then shot the tan base color on the Russian T-90MS:

WIP_T_90_MS_III.jpg


While all that was drying, I figured it was time to work on my two buses.

I started out on the Ludwig Areo bus, sanding down the puttied joints and then added the windows to the body:

WIP_Ludwig_Areo_Bus_VIII.jpg


While that was drying, I painted up the interior of the bus, doing all the chairs and benches:

WIP_Ludwig_Areo_Bus_VI.jpg


Next I painted the dashboard for this bus, trying to make it look like natural wood with a chrome plate where the dials are:

WIP_Ludwig_Areo_Bus_V.jpg


It probably won't be able to be seen once it's all closed up, but I do like doing this to make this a little better.

Here is the interior fully painted and ready to close up inside the body:

WIP_Ludwig_Areo_Bus_VII.jpg


Finally, I dry fit the body onto the chassis and interior and then added the fin. I have to say; of all the buses I've assembled so far, this one was the easiest and best fitting bus to assemble!

WIP_Ludwig_Areo_Bus_IX.jpg


Once I get the wheels installed, I'll glue down the body. What a sweet looking ride!

Okay, that's one bus down, one more to go to get ready for paint.

The Vomag, was a bit of a challenge. I started out painting the dashboard, the steering wheel and the front panel, trying to make it look like natural wood again:

WIP_VOMAG_7_Bus_X.jpg


I took my time making sure the lower deck was firmly seated on the chassis below when I glued it in place:

WIP_VOMAG_7_Bus_XI.jpg


This made it a bit easier to close up the front of this bus when I finally got the main body on the chassis. I still had a pretty good gap to deal with:

WIP_VOMAG_7_Bus_XII.jpg


I used some more styrene strips inside the gaps; melting them in place with the Tamiya Extra Thin cement. Then I sanded everything as smooth as I could. Later on, I added some Mr. Surfacer 500 to the seams that I will sand down later to smooth things out more:

WIP_VOMAG_7_Bus_XIII.jpg


Here is the whole bus fully assembled (sans wheels yet) and ready for more sanding and finally paint:

WIP_VOMAG_7_Bus_XIV.jpg


The blue mess you see on the windows is my liquid masking agent.


Well, that completes my latest couple weeks worth of work. I've been slowing down due to the heat increasing around here; makes it hard to get any painting done since I have to open my window. I do have a few more models I can get more assembly done on. Hopefully I'll be able to find some time to get something more done this week.


I actually did get a little done in the past couple weeks, so I'll get it posted next. Meanwhile, thanks for looking in, comments are welcome.
 
A lot going on Mark. Keep at it.

What's on my bench? ME, 3 day weekend and only a couple of chores to do. I'm gonna get some bench time in! :soldier
 
Will do Bob! I do want to finish a few of these. Hopefully soon. Have fun on your workbench as well!

Okay, now my small update from the past couple weeks. I had slowed down due to having no air conditioning in my house for five days; making it tough to find the energy to do anything. So, this will be a small update.


I'll start with the aircraft I had been working on.

I started an F-8 Crusader for the last Summer Break Group Build on the LEM before it shuts down. I thought I'd taken pics of the cockpit and all before I closed it up inside the fuselage, but I didn't. Oh well. Here's the fuselage all closed up and clamped together:

WIP_SummerBreak_I.jpg


Later on, I added the wings, tail and engine exhaust:

WIP_SummerBreak_II.jpg


I also fixed the gap below the Fokker DVII by adding a small plate of styrene and sanding everything smooth:

WIP_Fokker_DVII_b.jpg


Later on, I masked off the cockpit and engine areas to prepare this for painting:

WIP_Fokker_DVII_c.jpg


While I was at it, I also added Silly Putty to the SE-5 cockpit, machine gun and engine areas:

WIP_SE5A_II.jpg


Moving on, I placed tape next to the seams in the Hampden that needed some filler and added the Mr. Surfacer 500. I wanted to preserve as much of the riveted detail as possible on this plane. Now I just need to sand it:

WIP_HP_Hampden_IV.jpg


That's it on the aircraft so far, except for a lot of polishing and sanding on the C-118 again in an attempt to make it smooth enough for paint. Nothing to see so no pics yet.

Next I decided it was time to get the decals on my sport fishing boat. I had a devil of a time with these decals falling apart and taking forever to come off the paper backing. I finally managed to get them looking okay:

WIP_ChrisCraft_IV.JPG


WIP_ChrisCraft_V.JPG


This won't be a contest-worthy model but I do hope to make it at least a five footer...


Onward to the Armor I was working on.

On the Missing Lynx Braille Scale Forums, they started a Shturmartillerie Group Build. Since I had this little kit sitting in my stash forever...:

WIP_BS_GB_Shturmtiger_I.jpg


...I figured this was a golden opportunity to get it built and out of my stash. I started by assembling the main hull and then adding the top hull to it before starting on the roadwheels. It's a good thing I did given how rough this short-run kit is:

WIP_BS_GB_Shturmtiger_II.jpg


I had to clamp it seven ways to Sunday to try and close up so many of the gaps and seams on this. I was not always successful:

WIP_BS_GB_Shturmtiger_III.jpg


After awhile, I managed to get it close enough:

WIP_BS_GB_Shturmtiger_IV.jpg


WIP_BS_GB_Shturmtiger_V.jpg


By this time I was so fed up with this I tossed it back in the box and moved on.

I went back to something easy. I l pulled out my Silly Putty again and masked off the first of the three colors for the T-64B:

WIP_T_64_BV_Tank_XIII.jpg


I also masked off the T-90MS I'm doing. However, this tank will be reversed in color arrangement. It was supposed to be mostly tan with brown, but I applied the wrong basecoat color to it. Instead of stripping and repainting, this is going to be brown with tan splotches:

WIP_T_90_MS_IV.jpg


Last but not least I moved forward on my Vomag bus. I re-textured the roof here it was supposed to be rough, and smoothed out the rest of it:

WIP_VOMAG_7_Bus_XV.jpg


Later on, I added the front fender and then installed the photo-etch roof rack:

WIP_VOMAG_7_Bus_XVI.jpg


WIP_VOMAG_7_Bus_XVII.jpg


This just needs a few more fiddly bits added to it. I wanted the roof rack to dry and set up more before adding them. After that, this one will be ready for paint and I'll be able to paint it with my other bus.


Well, that's all I have for this week. Like I said, small update. Hopefully after the Fourth of July weekend, I'll be able to move even further forward on some of these. Until then, thanks for looking in, comments are welcome.
 
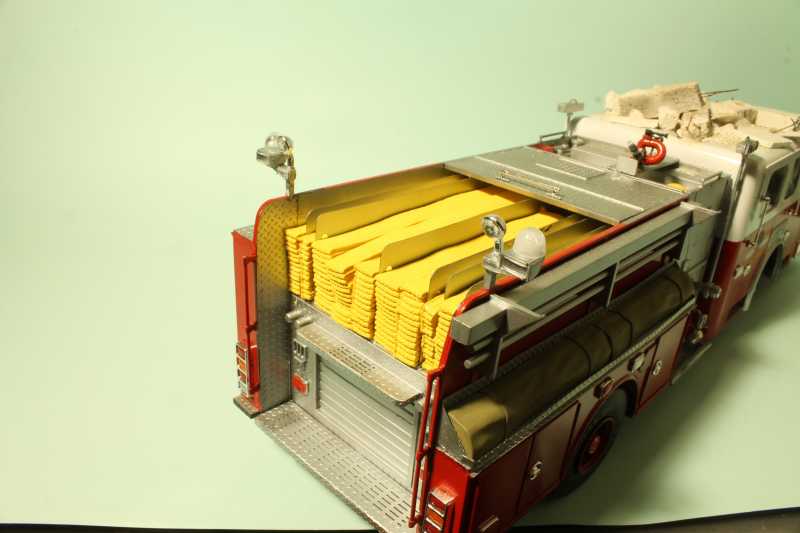
The Fire Truck is waiting for some dust - this should be fun :blink The photo shows all the hoses done, which was NOT my favourite part so far.

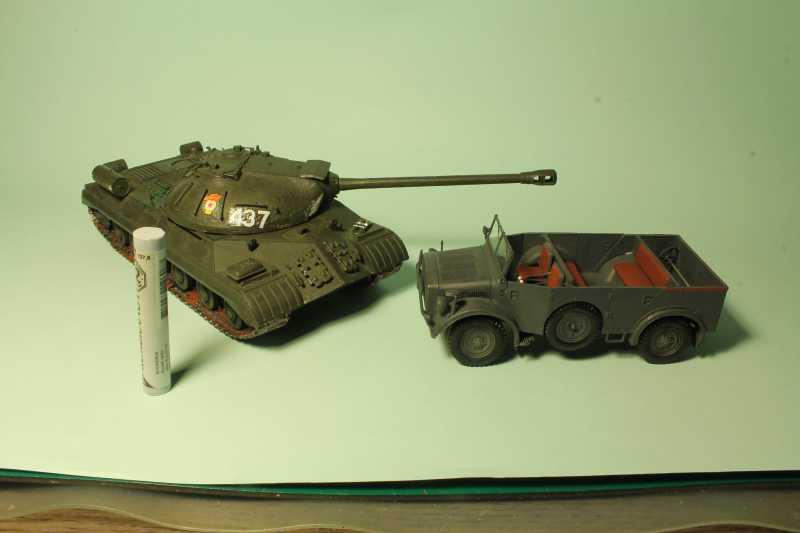
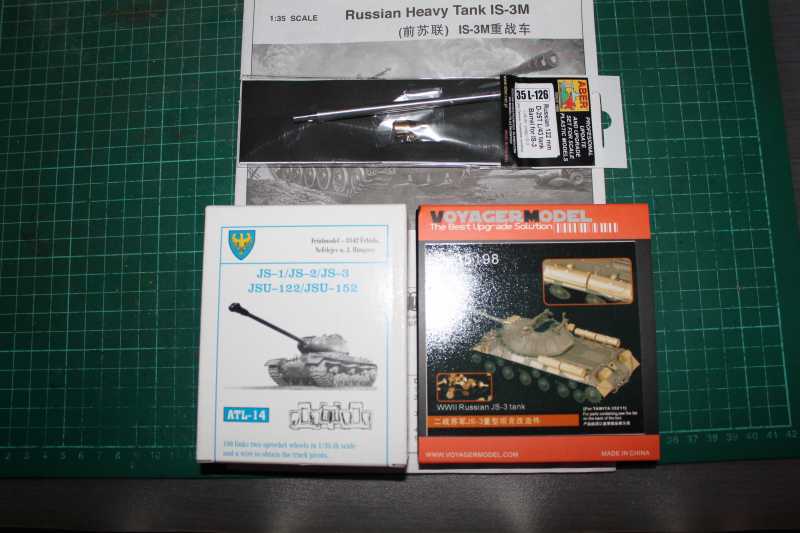
Parcel with one of my son's models. Now, the thing is the tracks on that one are horrendous to paint (Trumpeter kit). So, I went all out for some improvements. Initially this was going to be a model entered under his name, but I guess it will have to be a "father and son" job. The Horsch will be at the upcoming expos under his name only, just a few things that broke or snapped during transportation.

I went all out on the extras, that PE is for the Tamiya kit, not Trumpeter, but it will have to do.


h390a0db.JPG


h45570f7.JPG


hf0b2847.JPG


Laurence
 
Been busy installing grab bars on the stairs and shower, de-cluttering the house, and generally preparing for "The Crip's" homecoming. Carol had both knees replaced 2 weeks ago with some really beautiful titanium inlays. She is doing amazing in PT/OT and hopefully I can find some time to do something beside house work and yard work (I truly HATE yard work).
 
Crying out loud Duke. I'd love to get your benchtime! I had every intention of hitting the bench tonight until I get a text from the wife while on my way home from work saying the grandkids are spending the night.
Their little, so they sleep in our bedroom with us.
Grandkids ( No benchtime)--1
Me 0. :frantic
Nuff said. :bang head
I'll try again tomorrow night I guess.

Tim
 
Been busy installing grab bars on the stairs and shower, de-cluttering the house, and generally preparing for "The Crip's" homecoming. Carol had both knees replaced 2 weeks ago with some really beautiful titanium inlays. She is doing amazing in PT/OT and hopefully I can find some time to do something beside house work and yard work (I truly HATE yard work).

Good luck Barney!! Especially on avoiding the yard work. :frantic
 
I don't mind doing yard work, but as hot as it has been down here in Satan's armpit, I'm only doing it every other week. We're in the stretch where heat indices are 100° plus. I didn't get any bench time in but I am well on my way to getting my studio cleaned up. Sunday evening the wife and I went to see "No Greater Love". It is a documentary about the 101st Airborne unit, "No Slack" battalion, that saw some pretty rough combat in the Kunar province of Afghanistan. The film was made by the chaplain of the outfit and the problems they had with PTSD upon coming home. Did you know that the number 1 cause of death in the US armed forces is suicide? If you are looking for a worthwhile organization to donate to, find your local veteran's service organization.
 
Kenny, I don't blame you for trying to avoid the heat. I was trying that for five days when my A/C went out a couple weeks back.

Well, it's 2:00AM right now and I can't sleep; so here I am showing another small update of work I got done earlier today, or yesterday as it were. Most of this is armor/vehicles, but it all was done in the spray booth.

I'll start with the SE-5A aircraft that I shot a coat of brown drab over. It does look a bit dark in these pics but it will be lightened up later on with some drybrushing:

WIP_SE5A_III.jpg


I had also shot a bit of white on the Fokker, but I didn't shoot pics because the plastic is almost white anyway so there's not much to see. Later I have to mask off the white and shoot the red and blue on it, but that will be for another day.


Now for the armor/vehicles. I'll start with the two buses. I shot a Tamiya primer over the two of them to see any flaws that might still be on them. I saw plenty. The Ludwig had these flaws that you can see which got filled with Mr. Surfacer 500:

WIP_Ludwig_Areo_Bus_X.jpg


The Vomag was also filled and sanded down. In the process, I broke off the entire luggage rack on the roof, and of course, I sanded away all the texture on the roof as well. So, before replacing the roof rack, I reapplied some Mr. Surfacer 500 and stippled it a bit to replace the texture:

WIP_VOMAG_7_Bus_XVIII.jpg


Later on I'll sand that to knock it down a bit and then replace the rack.

On my tanks, I shot the second, darker color on the T-90MS:

WIP_T_90_MS_V.jpg


There's still a few nooks and crannies that got missed so I'll be shooting this again. After that, I can unmask this and move on.

I had also shot the second color on the T-64BV alongside the masking:

WIP_T_64_BV_Tank_XIV.jpg


After that, I was able to either cover the black strips with some additional Silly Putty or
press the Silly Putty over them, using the spatula thing in the pic. I only shot a pic of the hull here since it showed this more effectively:

WIP_T_64_BV_Tank_XV.jpg


Later on, I shot the dark green over this tank:

WIP_T_64_BV_Tank_XVI.jpg


After this, I let it dry for a few hours before I removed the Silly Putty from the model. While I did that, the side fenders came off; they were only dry fit in place for painting after all. This gave me an opportunity to paint the inside hull sides as well as the tracks where they would be visible. You can see I didn't paint the top runs that will be hidden under the skirts. Here she is with all three colors done:

WIP_T_64_BV_Tank_XVII.jpg


Along with all this, I also had shot some clear gloss over my Monkeemobile and my VW bus. There wasn't anything worth seeing so I didn't shoot pics of them.

That's everything I was able to get done yesterday. Maybe today I'll be able to get some more done if all goes well. Until then, stay tuned and remember; comments are welcome. Thanks for looking in.
 
Wish I could work that well in the early morning Mark ;)

So I learned a valuable lesson-- don't leave loose parts in the instruction booklet and then leave for a week vacation and expect to remember the parts are there when you go grab the kit again later- lost half of the piece for my small spotlight for the AMX-30B :(. Why can't I ever lose a piece that no one would notice missing :(
 
Thanks Mike and Kenny! I appreciate the compliments. Mike, I ask myself that same question every time I lose something. Good luck finding the pieces.
 
Back
Top