-
Modelers Alliance has updated the forum software on our website. We have migrated all post, content and user accounts but we could not migrate the passwords.
This requires that you manually reset your password.
Please click here, http://modelersalliance.org/forums/login to go to logon page and use the "Forgot your Password" option.
You are using an out of date browser. It may not display this or other websites correctly.
You should upgrade or use an alternative browser.
You should upgrade or use an alternative browser.
All Righty ... What's on the bench today?
- Thread starter panzerace007
- Start date
Swordsman
Active member
That stand looks like in was store bought Kenney, your a man of many talents & carpentry is one of them ...

For You Hawkwrench .... Ask & you shall receive ...

I hope I get a new one for Christmas ... Have a Merry one Feller's
Prop Duster
Member
Just been catching up on the happ's . Busy bunch you guys are.
I'm still working on the " White truck is Red" just at a slow spot (that means I changed my mind about using some scratched built details and remade them, better. Also trying to figure the construction/painting order to get the cab done.
Switched over to Windows 10 ('cause I are a cuttin' edge kinda guy :gogo ) and have been trying to find my way around. No, its not all that hard, but the differences from Win7 with my old settings have been an adjustment. So I'm in the where-the-heck-is-it? mode. :S Followed closely by the "I-know-I-hit-that-icon-before-and-it-worked?!?" phase :facepalm . So much fun. :smack
Also not forgetting to make my Christmas list so when my Santa
 goes to the hobby shop she'll know what to get, I hope, I hope, I hope
I'm still working on the " White truck is Red" just at a slow spot (that means I changed my mind about using some scratched built details and remade them, better. Also trying to figure the construction/painting order to get the cab done.
Switched over to Windows 10 ('cause I are a cuttin' edge kinda guy :gogo ) and have been trying to find my way around. No, its not all that hard, but the differences from Win7 with my old settings have been an adjustment. So I'm in the where-the-heck-is-it? mode. :S Followed closely by the "I-know-I-hit-that-icon-before-and-it-worked?!?" phase :facepalm . So much fun. :smack
Also not forgetting to make my Christmas list so when my Santa

Duke Maddog
Well-known member
Steve I know what you're going through. I also have Windows 10 but I've been on it for awhile; I'm used to it now. As for your Christmas list; the guys at Military Hobbies here in Southern California have a "gift registry". You fill out what you want; they guys put it into an E-mail that is sent to the SO or wife, so all she has to do is print the list, bring it in and point to what she wants to buy. No muss, no fuss... except the attempt to get the wife or SO to even step into the store..... :facepalm
This week, due to a heavy schedule; I could only work on my models on Friday and Saturday for half of each day, so this is going to be a short update. Almost all this progress was done on Hobby Day Friday and Saturday; the rest was done during the hour or so I had today.
I'll start with my Aircraft.
This first one..... *sigh* It just does not want to be finished. I sealed the underside with three coats of clear before masking and the paint still peeled off. On top of that, the horizontal stabilizer broke again:

One step forward; two steps backward with that one....
On to something better. On my Madge, I managed to get the interior done. I added the instrument panel decal and dry-brushed the rest of the instrumentation inside the compartments. None of this will be seen once it's closed up but it sure looks great here:


I also did the center compartment of this interior:

After all that was done, I decided to test-fit this inside one side of the fuselage. I was pleasantly surprised to see how well it snapped right into place:

I've already painted the interior of the fuselage halves so this beastie is almost ready to close up. All I need to do is add the windows to the sides of the fuselage halves and put in some last little detail parts. That being said, I went ahead and assembled the empennage assembly:

This thing lined up so perfectly; I was really pleased at how easy Trumpeter has made this so far!
I also got decals on my Huey, but apparently didn't get pics of it. Oh well, next update...
Now for my armor.
I started out applying decals to those models that were ready for them. First off was the Diamond T truck:


Next I applied the decals to the T-54B tank as well:

That was quick and easy, so I painted the tracks and added them to the lower hull:

This beastie will be finished and weathered very soon; provided I get the time.
Also, someone asked if my Tiger Models Abrams SEP TUSK had photo-etch. Yes it does; it is added to the bottom of the stowage racks. Here's a shot of it already installed:

The brass color sure blends with the bare color of this model.
Moving along, I decided to get further along on my Russian Armored trains. I had wanted to get started on the photo-etch for them, but was too short of time. So I pulled out the little BT-7 tank and added the last pieces:

Since there were only a few photo-etch parts for this tank, I added them to it to finish this little tank:


Now I've seen a few different pictures of how they stack the tracks on the fender when they remove them. I need to research a little more to determine how I want to add the tracks to the tops of the fenders on this model after I paint it. Meanwhile, I also finished the last of the long flatcars I had still to do. I finally found all the parts so now this last one is done except for the bumpers and photo-etch:

Just for fun, here's how these two will look on the train:

My final project I was able to make progress on was my two SCUDS. I moved on and assembled the driver's cab in the front. I left off the sides of each cab so I could paint the interior and add the windows later:

Here's how the cabs look all together:

Of course, I made two for both of these SCUDS:

Next I moved on and assembled the sections behind the driver's cabs:

Now for the fun part; putting everything together to see how these look so far. I had added some final parts and sanded the rear boxes that had been filled before and now here is where these stand:


I had wanted to get the launcher cradles started, but ran out of time. Oh well, this gives me something to do the next time I have time for the bench.
That's all I got done so far; not bad for only a day and a half's work. I do hope I can get a few of these done soon.
Meanwhile, thanks all for looking in, comments are welcome.
This week, due to a heavy schedule; I could only work on my models on Friday and Saturday for half of each day, so this is going to be a short update. Almost all this progress was done on Hobby Day Friday and Saturday; the rest was done during the hour or so I had today.
I'll start with my Aircraft.
This first one..... *sigh* It just does not want to be finished. I sealed the underside with three coats of clear before masking and the paint still peeled off. On top of that, the horizontal stabilizer broke again:

One step forward; two steps backward with that one....
On to something better. On my Madge, I managed to get the interior done. I added the instrument panel decal and dry-brushed the rest of the instrumentation inside the compartments. None of this will be seen once it's closed up but it sure looks great here:


I also did the center compartment of this interior:

After all that was done, I decided to test-fit this inside one side of the fuselage. I was pleasantly surprised to see how well it snapped right into place:

I've already painted the interior of the fuselage halves so this beastie is almost ready to close up. All I need to do is add the windows to the sides of the fuselage halves and put in some last little detail parts. That being said, I went ahead and assembled the empennage assembly:

This thing lined up so perfectly; I was really pleased at how easy Trumpeter has made this so far!
I also got decals on my Huey, but apparently didn't get pics of it. Oh well, next update...
Now for my armor.
I started out applying decals to those models that were ready for them. First off was the Diamond T truck:


Next I applied the decals to the T-54B tank as well:

That was quick and easy, so I painted the tracks and added them to the lower hull:

This beastie will be finished and weathered very soon; provided I get the time.
Also, someone asked if my Tiger Models Abrams SEP TUSK had photo-etch. Yes it does; it is added to the bottom of the stowage racks. Here's a shot of it already installed:

The brass color sure blends with the bare color of this model.
Moving along, I decided to get further along on my Russian Armored trains. I had wanted to get started on the photo-etch for them, but was too short of time. So I pulled out the little BT-7 tank and added the last pieces:

Since there were only a few photo-etch parts for this tank, I added them to it to finish this little tank:


Now I've seen a few different pictures of how they stack the tracks on the fender when they remove them. I need to research a little more to determine how I want to add the tracks to the tops of the fenders on this model after I paint it. Meanwhile, I also finished the last of the long flatcars I had still to do. I finally found all the parts so now this last one is done except for the bumpers and photo-etch:

Just for fun, here's how these two will look on the train:

My final project I was able to make progress on was my two SCUDS. I moved on and assembled the driver's cab in the front. I left off the sides of each cab so I could paint the interior and add the windows later:

Here's how the cabs look all together:

Of course, I made two for both of these SCUDS:

Next I moved on and assembled the sections behind the driver's cabs:

Now for the fun part; putting everything together to see how these look so far. I had added some final parts and sanded the rear boxes that had been filled before and now here is where these stand:


I had wanted to get the launcher cradles started, but ran out of time. Oh well, this gives me something to do the next time I have time for the bench.
That's all I got done so far; not bad for only a day and a half's work. I do hope I can get a few of these done soon.
Meanwhile, thanks all for looking in, comments are welcome.
Heavens Eagle
Well-known member
Looks like most of your projects are coming along real nice Mark. Looks like your luck with that fighter jet is becoming a test.
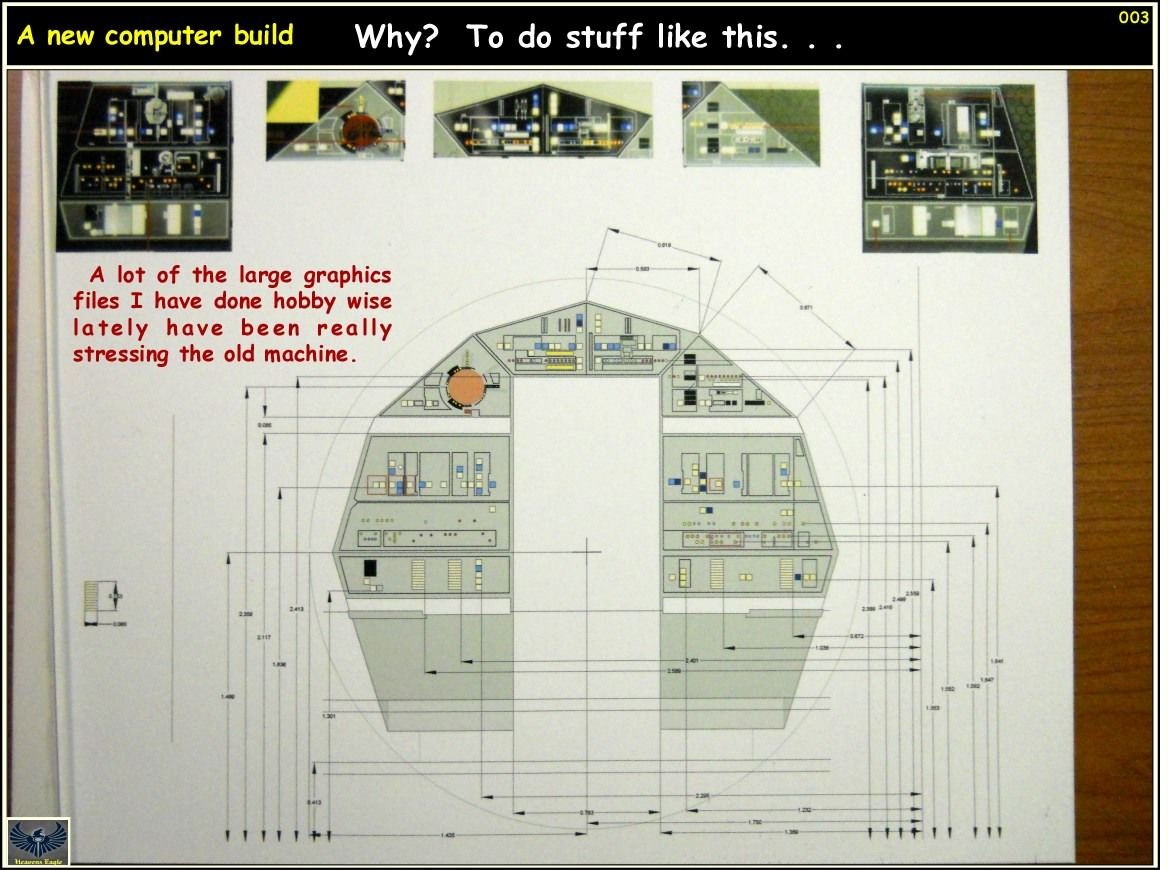
My puter build has been going in a similar way. Have been breaking how software works on it right and left then fixing it again. Called crash course in Win 8.1.
Biggest dissappointment is the new version of Canvas that I bought a while back. Some moron at ACD decided to redo the very colorful and intuitive interface into a Goth version complete with heavy handed blue-grey icons for everything. Looks like something from a Munsters/Adams Family horror movie. Lucky for me I can install my older version on the new machine and it works. Loads up in like 2 seconds as compared to 30+ on the old machine.
Also have everything pretty much running at room temp on it while doing all the graphics stuff. Going to try out a heavy duty game on it over the weekend to see if I can make it warm up a little.
Pics in the morning, too tired right now. It's late.
Duke Maddog
Well-known member
Very nice Eagle! I'm hoping that game gets it going. Looks like you're finally beating this thing into submission. Thanks also for the compliments on my work. So far, most of them are coming along. That jet is an issue though; I may just hand paint the touch-ups and move on instead of masking and re-spraying. I'm tired of dealing with it; it's time to move on. 

Heavens Eagle
Well-known member
Cold is good when it comes to computers running. One of the utilities on this beast takes temperature readings from all over the place. Everything so far seems to really run cold which is excellent. All my picture stuff doesn't even heat up the video card enough to turn the fans on. Quiet is nice too! 
Will have to test it to see if I can make it run hotter than luke warm.
As a side note I have been working on the Friul tracks for my King Tiger build. (lots easier than the ones I am modding for the Jagdtiger)
Now for some pics as promised.
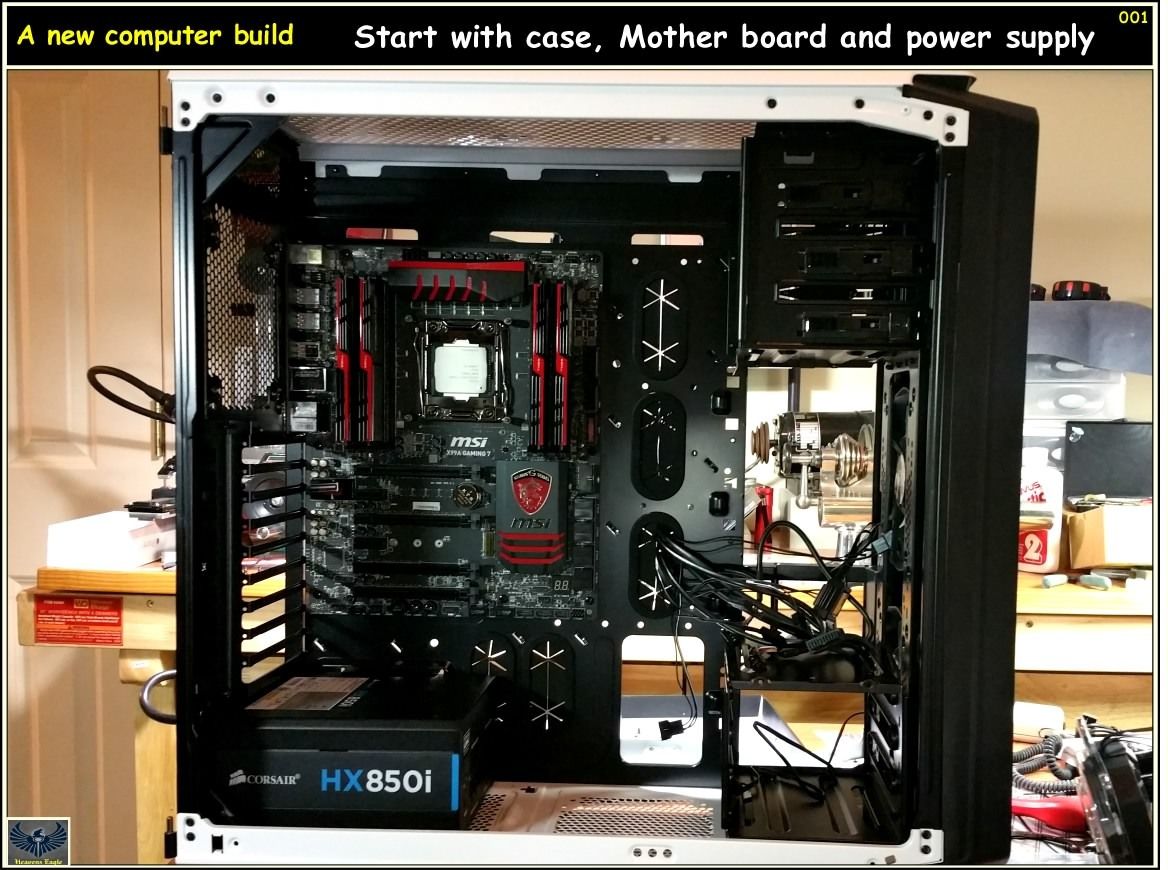
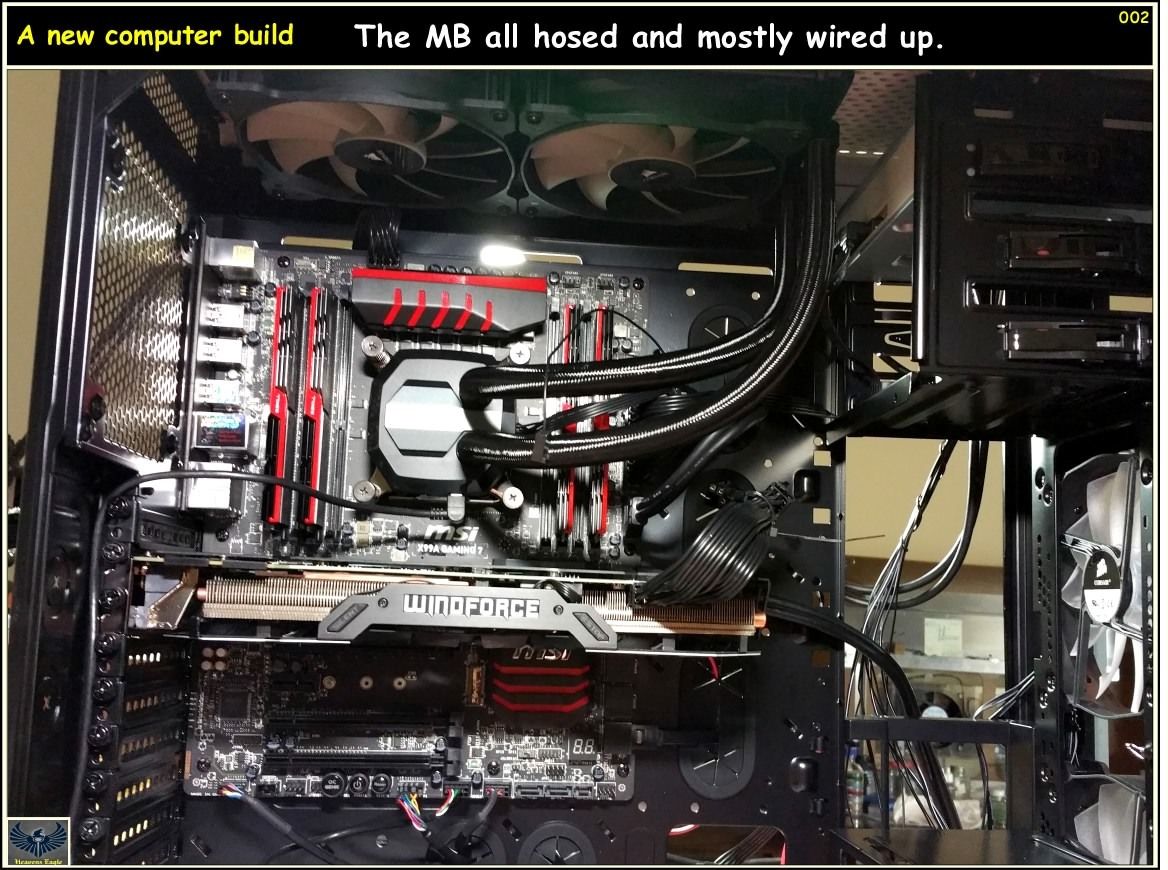
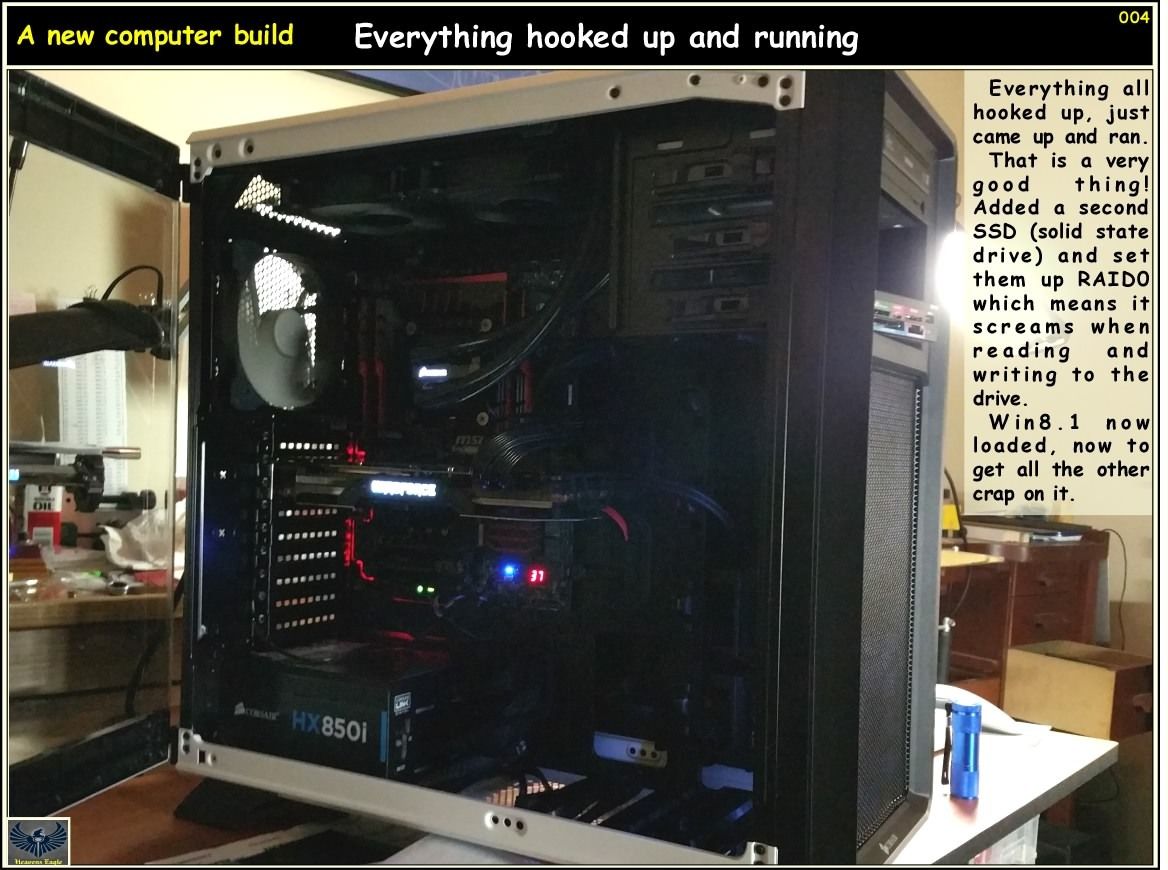
Will have to test it to see if I can make it run hotter than luke warm.
As a side note I have been working on the Friul tracks for my King Tiger build. (lots easier than the ones I am modding for the Jagdtiger)

Now for some pics as promised.


Duke Maddog
Well-known member
Nice update Mark! Madge is definitely coming to life!! B) As for the other bird, have ya considered a battle damaged dio for it? :hmmm
Tanks & flatcar look real good tooI really like the Diamond T truck :drinks
Thanks Ed. No, I don't want to do a damaged dio with the Hornet; I don't even know how to properly battle damage armor yet. I have a tank on the Shelf of Shame that I will try practicing on later.
Thanks again.
Eagle beastie is looking suitably clean and hi-tech! I like it. It sure feels great to have a fast new computer doesn't it?
No problem Mark,just an idea :drinks
Nice puter Paul, is that the power supply on the bottom?
Heavens Eagle
Well-known member
Nice puter Paul, is that the power supply on the bottom?
Yup, 850 watt Corsair Platinum series. So far everything seems to just plug along nice and sweet. Am getting a handle on 8.1. You end up with that when you totally bugger the mouse driver. Getting around the OS with just keyboard speeds up the learning curve a bit. :facepalm
Going to load some games this weekend to push it a bit. Doing graphics doesn't seem to hardly get it going at all.
Lots of room in the case. All painted inside and out and no burrs to cut ya.
What's on my bench?
A bulldozer, Lee Tank, A Karl Morser and some other things I'm sure.
What's on my agenda? Christmas shopping for my Bride, I got 5 days to do that and I'm off work until the 4th of January, 2016!
I think I might be able to get some stuff accomplished!
A bulldozer, Lee Tank, A Karl Morser and some other things I'm sure.
What's on my agenda? Christmas shopping for my Bride, I got 5 days to do that and I'm off work until the 4th of January, 2016!
I think I might be able to get some stuff accomplished!

What's on my bench?
A bulldozer, Lee Tank, A Karl Morser and some other things I'm sure.
What's on my agenda? Christmas shopping for my Bride, I got 5 days to do that and I'm off work until the 4th of January, 2016!
I think I might be able to get some stuff accomplished!
Chop-Chop! Git 'er DUN!!

Let's see, the Vigi needs a few more decals, KFIR waitin' on paint, A Tiger-I got a bath, The KW's sleeper needs ta be stripped again
 It's cold & wet outside. Yes folks, it's a rainin' in Sunny Calif!! :dance :dance
Similar threads
- Replies
- 39
- Views
- 10K
- Replies
- 60
- Views
- 19K

