• Modelers Alliance has updated the forum software on our website. We have migrated all post, content and user accounts but we could not migrate the passwords.
    This requires that you manually reset your password.
    Please click here, http://modelersalliance.org/forums/login to go to logon page and use the "Forgot your Password" option.

All Righty ... What's on the bench today?

Post an image of the breather and I'll look and see if any of my kits have the same type.

Cheers

Really appreciate that, matey, but honestly there's no need for this project. It was always going to be a 'middle of the pack' model not one for the front row of the grid if you know what I mean.

sincerely, thanks for the offer though.

Ian.
 
Okay, now for my latest update. I didn't get anything done on Annie so much; I was trying instead to get caught up on other models that I had started before I got her. Here is what I was able to do so far this week...

I started out by filling some gaps and seams and adding the canopy to my little Czech plane:

WIP_Czech_Plane_III.jpg


Then I moved on to my armor. I started by shooting a basecoat over the three trucks and the Type 10 tank:

WIP_Radar_Truck_V.jpg


WIP_Missile_Truck_VIII.jpg


WIP__Three_ton_Heavy_Truck_VI~0.jpg


WIP_Type_10_wDozer_V.jpg


After they were dry, I painted the canvas roof on each one of the truck cabs:

WIP__Three_ton_Heavy_Truck_VII.jpg


While they were drying, I painted the chassis of the three trucks. I started with a flat black. When they were dry, I followed that with a dry-brush of steel and then a wash of Oily Black to get this result:

WIP__Three_ton_Heavy_Truck_VIII.jpg


It's tough to see in this pic, but the result is quite impressive in person if I do say so myself.

Now I have at least one truck ready for clearcoat and decals. The other two need to be masked for their camouflage patterns.

Next I shot a basecoat on the Type 60 self-propelled gun carriage:

WIP_Type60_RR_XII.jpg


Later on I pulled out my Silly Putty to do the masking in preparation for the second camo color. Now she's ready for the next coat of paint:

WIP_Type60_RR_XIII.jpg


Finally, I pulled out my Type 10 tank and completed the turret with almost all the detail parts. I left off the ones that would constantly break with handling:

WIP_Type_10_wDozer_VI.jpg


Here it is sitting on the painted hull:

WIP_Type_10_wDozer_VII.jpg


I also painted and dry-brushed the tracks for this so I could get them installed:

WIP_Type_10_wDozer_IX.jpg


By then, the turret was dry enough for a shot of basecoat so I shot that too:

WIP_Type_10_wDozer_VIII.jpg


Once the tracks were dry, I added them to the main hull of the tank and then installed the outer roadwheels:

WIP_Type_10_wDozer_X.jpg


WIP_Type_10_wDozer_XI.jpg


Later on I added the sides of the tank to complete the main body of it. Here it is all assembled and ready for masking for the second camo color:

WIP_Type_10_wDozer_XII.jpg


Now all I have to do is mask off the tracks and wheels with some aluminum foil and apply the Silly Putty to this to paint the second color on it.

In between all that, I fiddled around with my Sleepy Hollow figure, sanding and filling and sanding and shaping and sanding and filling and.... you get the idea. Finally I felt that I'd gotten all the gaps and seams properly taken care of so I did some more detail work on this model.

First off I painted the base with a dark brown color; a Burnt Sienna if I recall. I also had to paint the pumpkins in a tan color or the orange I will use will not show up properly on the black primer color I shot earlier:

WIP_CTA_MyChoice_XIV~0.jpg


I had also painted the large tree that goes on the base but I didn't take a pic of it. I also shot a red over the inside of the Horseman's cape as directed in the instructions. I tried to make sure some of the black undercoat could still be made out as shadow:

WIP_CTA_MyChoice_XV.jpg


I may try dry-brushing that with some lighter red later; as well as wash it with a dark brown color.

Speaking of painting red, I shot red on the vest of the Horseman since I couldn't find any acceptable maroon color. Afterward, I washed this with a dark brown wash to see if it darkens down the red while bringing out the shadows. Since I also had the tan out for the pumpkins, I added it to the face of the head as a basecoat. I think it is slowly coming along, but I may still fiddle with the colors some more:

WIP_CTA_MyChoice_XVI.jpg


Well, that is about all I did so far. This next week is going to be a long, busy one so I don't know when I'll get back to the bench. Until then, enjoy this tour and remember that comments are always welcome. Also, I just found out that the LEM where I host all these pics will be closing in a year and a half or so. Some of you were on there and because you haven't returned, it was felt that it was time to turn out the lights once the domain name comes due for renewal. I don't know what I'll do for a photo hosting gallery like that once it's gone. Photobucket can't handle all the pics I can put up; at least not for free. I cannot afford to pay for it. Anyway, I'm going to keep on going for a year until I run out of options and then maybe the Maddog Manufacturing tours will close down too. Anyway, enough of the depressing news. Thanks all for looking in everyone.
 
Looking good Mike. Bob, slow down.

We spent the weekend in Houston with good friends. Model contest on Saturday and crawfish boil on Sunday.

Easy thar Kenny... Save us any crawfish? :hmmm
Nope. :D

Actually, the wife peeled some for me while I helped cook the crawfish. Saturday morning I had an unfortunate run in with my razor. Renee put it in our duffle bag instead of her makeup case. Lucky for me I saved the tip and got it to reattach.

finger_zps9vmznnli.jpg
 
She keeps a razor in her makeup case? I know it can get rough on the bayou but dang, best not mess with them Cajun Queens. :rotf

Kenny did you close that up with Gator Glue? :rotf
 
OUCH Kenny! :eek:hmy:

Builds are looking good Mark! (y)


This lat weekend I started on my Geek project with the "When Worlds Collide" Space Ark. With under 30 parts it is a fairly simple build. Always liked the movie and back in my teen days I made a so-so model out of wood. One of my favorite movies back in the day, the kit isn't too bad though it does have some issues.

Started off I had to carefully fill some sink marks and sand smooth the body once it was assembled. The base of the wings and lower tail fins fit into slots and there are small gaps that need to be filled. Also the lower tail fins were slightly curved (warped) so I spent about a half hour with some 170F hot water and got them straight. Not sure how sensitive the Pegasus plastic is to heat the experience someone on here had with a heat lamp was on my mind. :eek:hmy: I did get them straight though and it is now just assembled dry waiting for me to get some building Zen back. :S

Unfortunately it has a smooth silver finish and isn't supposed to have any panel lines. (though the kit has a couple) Since that is the case it will have to be fully assembled and smoothed before paint. :bang head

I am already thinking about making a jig to hold it while painting so that it will get a full smooth finish. Simple to build, :smack to paint. :bang head

Photos and a new thread soon. (Bob) :D
 
She keeps a razor in her makeup case? I know it can get rough on the bayou but dang, best not mess with them Cajun Queens. :rotf

Kenny did you close that up with Gator Glue? :rotf
Renee is very good with a blade. B)

It wouldn't have worked if I tried! Bled like a stuck pig. I have done the superglue technique though. Just skip the accelerator. That is a whole level of pain you do not want to experience! :bang head
 
Looks great Terry!


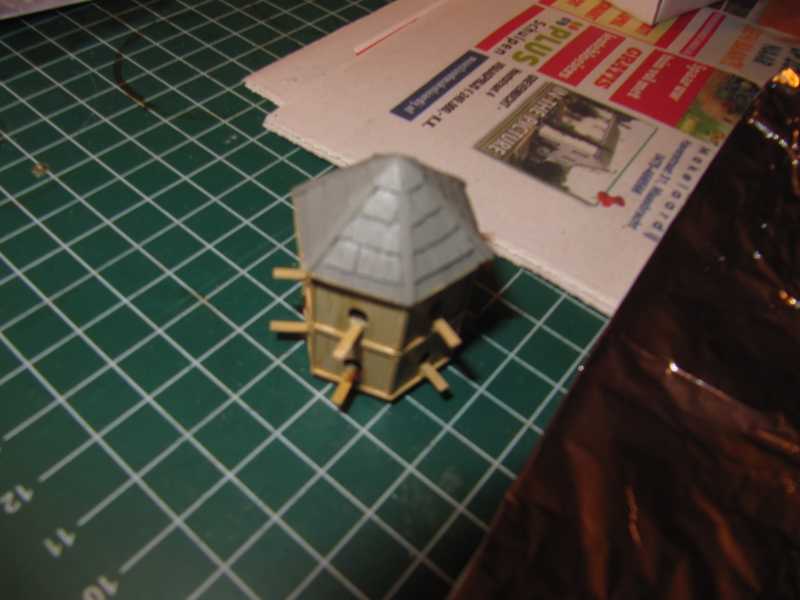
I'm busy with something completely else,nothing for one of our many Campaigns around here but
something indirectly Iron Mike and Cheyenne gave me the idea for.
Still needs a lot of paint work tho.


h92f5640.JPG


ha34f40c.JPG


Gr,Ron.
 
Looks great Terry!


I'm busy with something completely else,nothing for one of our many Campaigns around here but
something indirectly Iron Mike and Cheyenne gave me the idea for.
Still needs a lot of paint work tho.


h92f5640.JPG


ha34f40c.JPG


Gr,Ron.

Very nice. Are you going to use some Mantis pigeons with it?

Cheers from Peter
 
She keeps a razor in her makeup case? I know it can get rough on the bayou but dang, best not mess with them Cajun Queens. :rotf

Kenny did you close that up with Gator Glue? :rotf
Renee is very good with a blade. B)

It wouldn't have worked if I tried! Bled like a stuck pig. I have done the superglue technique though. Just skip the accelerator. That is a whole level of pain you do not want to experience! :bang head

I can imagine. I also found out from a nurse that used CA to close up one of my cuts: the CA we use or modeling is actually more damaging to use and that's why it hurts so much more. The stuff she used on me was medical grade, which is different from our usual CA in that it hasn't got a number of the ingredients that burn in our CA.

Terry, I love the look of that ground crew. They already look done to me, but I know you'll still find a way to improve on them. The girl is quite cute too. I think she'd be cuter if her nose wasn't so long though! LOL! Not your fault of course.... :blush: :woohoo:

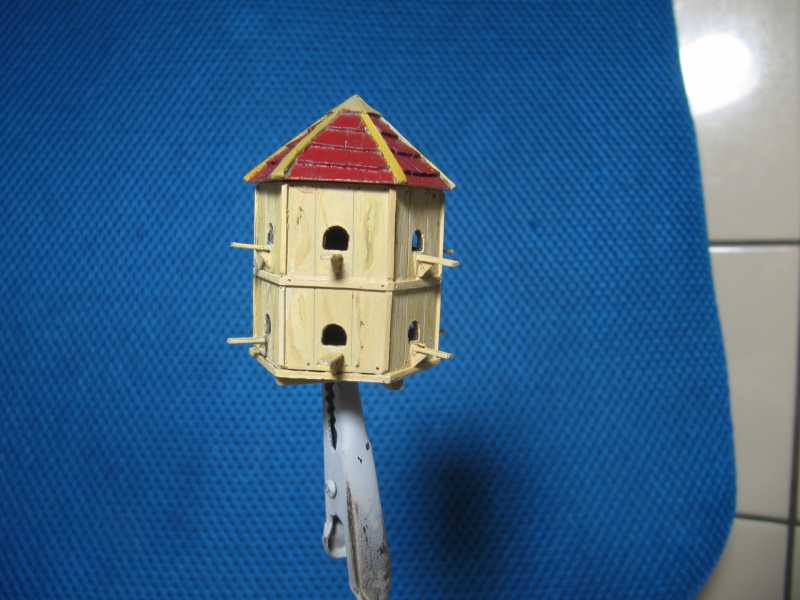
Ron, that is a cool looking birdhouse. I'd love on in my scale, but I'm thinking that would be very tiny indeed.
 
Ron, that is a cool looking birdhouse. I'd love on in my scale, but I'm thinking that would be very tiny indeed.

I can imagine that Mark,I think there is nothing in 1/72 or 1/76 scale to be found like that....and scratchbuilding a pigeonry in that scale seems like a total PITA to me. ;)

Anyhow,this is what I've done with it: https://www.modelersalliance.com/forum/just-like-the-real-thing/150389-pigeonry

Gr,Ron.
 
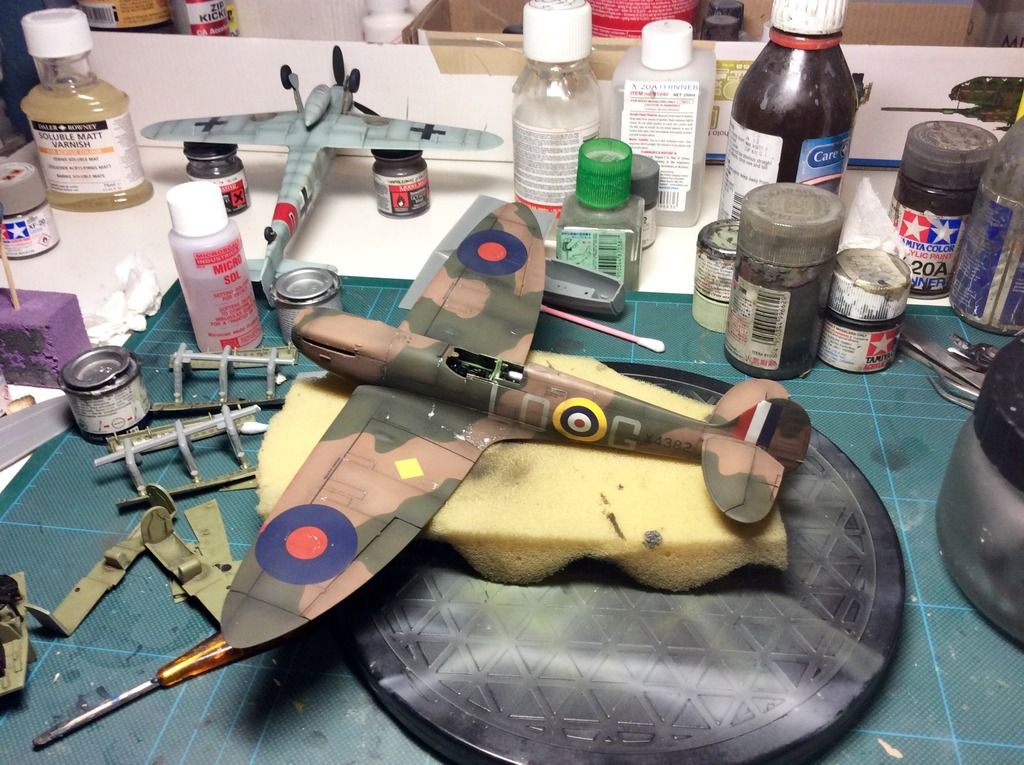
Just for SA Dave who thinks I should have finished the P-38 by now - I am working on a couple of builds I started about a week ago :facepalm :laugh:
5320616A-D406-4904-9520-F3529C4E765E_zpskgcrhka1.jpg

:frantic


PS Dave which way round do the gear doors go again??
 
Back
Top