• Modelers Alliance has updated the forum software on our website. We have migrated all post, content and user accounts but we could not migrate the passwords.
    This requires that you manually reset your password.
    Please click here, http://modelersalliance.org/forums/login to go to logon page and use the "Forgot your Password" option.

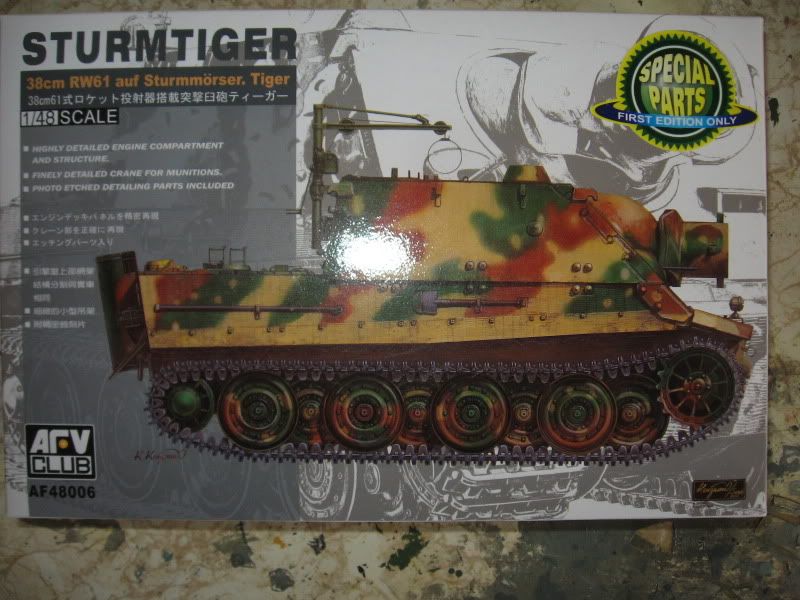
AFV 1/48 Sturmtiger

nsmekanik

Member
Copyof04-18-09011.jpg


I've got 2 kits I'm playing around with at the moment, this being one of them. It is one kit that is really crying out for an interior, and well there is such a thing for the 1/35 scale version, unfortunately there is only an engine set for the Tiger, which this is based on. As it is in this scale the openings in the cooling vents are large enough to see right in there and it would appear to be almost worth getting that for the radiators.
IMG_0401.jpg


But then agian with the screen covers in place the view might be restricted enough that it won't be a big deal, have to wait and see. The kit comes with these as an etch set which are very nice and look the part with the weaving being well defined.
IMG_0403.jpg


I also have the Hauler etch for it which also has good definition of the weave as well as the hinges for the covers, but I think the hinges are quit adequate in the moulding and the AFV screens do have a better appearance to my eye so I think I'll use those ones.

Because so much of the crew area is exposed with the open hatch that it is such a shame there is nothing out there to put in there, and as much as I'd like to do one, even though there is a Tiger interior available I think for the Tamiya kit, I'm just not up to the challenge of creating one, so the lid will have to be closed.

The fit is pretty good, I have glued the back piece on, even though the Zimmeritt is moulded on both the back and lower hull I did manage to get a seamless joint with very little effort. but for some reason there is nothing there to butt the rear decking up to the fighting compartment so I'll have to add a strip of plastic to get a secure joint with when the time comes.

IMG_0404.jpg


I'm not going to be moving on this one very fast, but I thought I'd start this so I can add to it as I go.
 
Thanks guys :D . The one thing I'm on the fence about is the rubber tracks, they look ok....but.....the fruils cost more then the kit and I'm not so sure they would be worth it, all though I'm sure they are sweet, is there anything a bit cheaper out there? All the wheels are held in place with screws so I'm sure they can turn, which is ok but I wonder how the paint will hold up on those rubber bands.
 
It depends how far you want to go with the build. The rubber tracks should be OK, little sag to Tiger tracks, so you can glue in the right hang to them. :drinks
 
Well we'll see, I might just spring for those Fruils if these don't look to good and I can't find anything cheaper.
Got some paint on the innards so there is some progress in the works.
IMG_0407.jpg

IMG_0408.jpg
 
And the answer is 2. Fruils and the question is what would my post count be if I posted one picture for every link I did and how long would it take :D :D :D
 
If you get the Friuls, you might want to look into some of the burnishing products too. AK Interactive's product is one I haven't used yet, but is highly recommended by some folks I trust.

Post count? :idonno
 
UHhmmm......yes I do :evil:

Post counts.....now that I think about it :hmmm , this would be the wrong forum for those kind of silly antics :silly:

I will definitely look into that, thanks Mike :drinks


How about multiple shots of paint drying just to pass the time :D
 
Built this one a while back and really loved it...as well as their Tiger tank in 1/48...even sprung for the mortar shells for it! Looking forward to seeing yours come together!
 
OK, I was naughty and you can spank me now......sorry I just couldn't resist.
img.gif


K, SA Dave and photo etch :D
Here is my method for some of it. I have my trusty mini anvil, and my all purpose chopper/putty knife/weld seem maker that I use sanding stick to keep somewhat sharp, it works well enough on the thin etch

IMG_0422.jpg


For the thinner etch it's not a good idea to use to coarse of a file/sanding stick to sand off the little nibs left by the attachment points as it can grab and bend the etch, so I use a medium grit sanding stick and usually hold the etch in a flat ended set of tweezers.
IMG_0423.jpg


next for a test fit
IMG_0424.jpg


then out comes the future pool (sized to fit most canopies) and the paint brush
IMG_0425.jpg


a liberal caoting of the contact surfaces and then place and hold the part(if it's slightly warped) on the plastic piece for a minute or so and presto,
IMG_0426.jpg

IMG_0427.jpg


The advantage of future as a bonding agent is that you can get it all over your fingers and not permanently attach yourself to anything, it gives as strong a bond as you need to keep the parts in place. It does not leave any excessive amounts of goo that can be difficult to clean up after ward, and if you need to de-bond it, a bit of a soaking in alcohol will release it with out damaging anything.
The down side is that it doesn't immediately attach things and requires a bit of patience.
 
Back
Top