• Modelers Alliance has updated the forum software on our website. We have migrated all post, content and user accounts but we could not migrate the passwords.
    This requires that you manually reset your password.
    Please click here, http://modelersalliance.org/forums/login to go to logon page and use the "Forgot your Password" option.

Maddog Manufacturing 2020 Production

Thanks for understanding Bob. Looking forward to something being normal for once.

Thanks Paul. I usually play Skyrim since my graphics card has become outdated after the latest Elder Scrolls Online update. Still, I have so much cleanup and laundry to do, as well as mail to catch up on that I find it hard to get into the hobby room often enough. Still, I hope for more progress soon.

Stay tuned guys!
 
Great Job Mark. You have decided on small models apparently - the Grizzly and the An-124! I wish you luck as you Progress.

I have recently seen a Luftwaffe Grizzly flying Overhead - they are noisy buggers.

Cheers

Alex
 
Now for an another update. Here's my latest progress over the course of this past week of self isolation.

Starting with my aircraft, you can see that I added the closed doors to the outer fuselage of the C-54:


Next I painted the cockpit and instrument panel. They aren't the best but this will hardly be seen through the windows once this is closed up:


Finally, I closed everything up inside the interior tube:


After that I went to work on the Airbus A-400. They give you the interior of the engine intakes to build first:


They fit inside the engine nacelles like so:


Then I closed them up inside:


Afterward I had to add the front part after assembling them around the propeller shafts. Here are the finished engines:


Since they were done, I decided to add these all to the wing:


This beastie is about ready to finish up and prepare for painting:


The next model I made progress on was my German Gotha Go-243. I painted the dark grey color first:


I then masked off the dark grey for the second, lighter grey:


I shot the lighter grey and then let this dry for a bit:


After this dried, I removed the tape and then added some additional tape to the areas that I didn't want overspray on when I shot the mottles onto the sides of this plane:


I then loaded my Sotar 20/20 with the lighter grey again and finished mottling the sides of this plane. Not bad if I do say so myself:


Here it is with all masking removed and sitting on her three feet. Next up for this is to mask and paint the main canopy and then clear coat this for decals. Speaking of masking the canopy, I did manage to get that done but gave up working on this further:


While I had the paint booth going for this Gotha; I figured I'd find a few other models that needed some paint. The only ones I found were rockets so I pulled them out to paint. First was my German V-2 rocket that got a basecoat of dark brown; the first of the three color camouflage I'm doing on this:


Then I shot a white primer color on the Mercury Redstone:


Followed by the same white primer on the Convair Atlas:


I'd been sanding and polishing the Atlas and Redstone for what seems like forever now; this primer should help me see if the finish is smooth enough now for final painting. I doubt it but at least I'll know how much further I have to go.

That is all I have so far on my aircraft... and spacecraft too. Now on to my armor in the next post below...
 
I made a small amount of progress on my armor. Here's what I did starting with the M-1 Abrams SEP. I built the racks that go on the sides and in the back of the turret. These were extremely fiddly to assemble:


While the turret racks were drying, I assembled the main TC's hatch and cupola:


I then added most of the rest of the detail parts to the turret:


Here it is all dry fit together before I added the turret baskets:


Later when the turret baskets were dry enough, I added them on to the turret. Here it is all together:


Most of it is still dry fit. I have much more to do including adding the P/E to this tank. Speaking of P/E. I added some of it to the Abrams SEP TUSK I when I installed the turret racks on that one:


Those baskets were a lot easier to assemble. Next I added all the TUSK shielding around the TC's and gunner's cupolas, along with additional detail parts on the turret. Here it is sitting on the main hull:


That one is getting close to paint soon.

The last one I got any real progress on was my tank transporter. For this model I assembled the linkages and added them beneath the trailer. You can see that somehow one of the linkages got broken. I didn't do that amazing enough; that happened before I got to this step. Anyway, it's built and won't be seen once this is complete:


After that I added the neck to the front of this. The trailer is now done except for the half-million wheels that go below it:


When that got done, I decided to start with the cab. When I unpacked it, I found this break where the X-acto blade is pointing:


The other side was also damaged, but only bent. I'd been trying to get it straight but it will have to be forced into the proper position with glue when I'm ready. You can see it where the X-acto is pointing again:


I moved on and added the interior. This is as far as I got before painting:


Later I added the P/E screen to the upper roof when I added the top. I then dry it this to the cab to see how it is going to look:


Well, that's all I have to show for this week. Hopefully I'll have something done soon.

Stay tuned, and thanks for looking in. Comments are welcome.
 
After another week worth of work, here's another update. It's kinda small compared to many I've done, but I do feel that I got a lot done. It feels great to see progress.

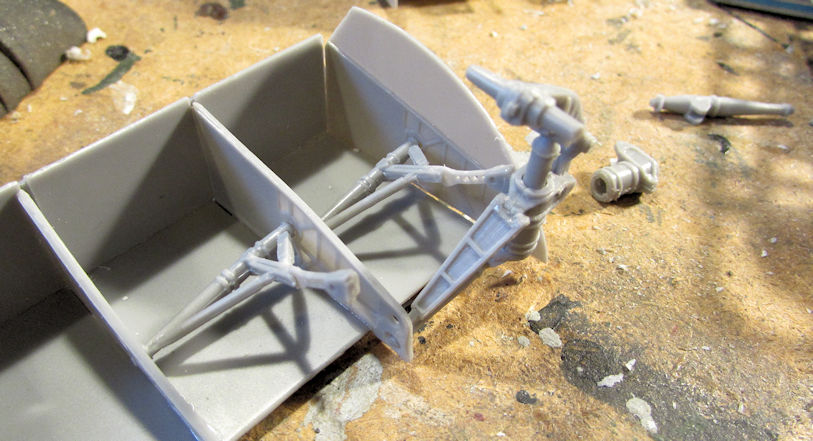
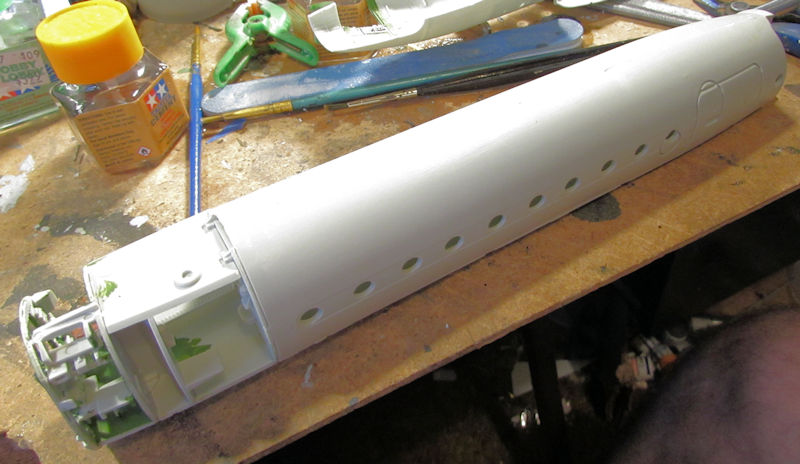
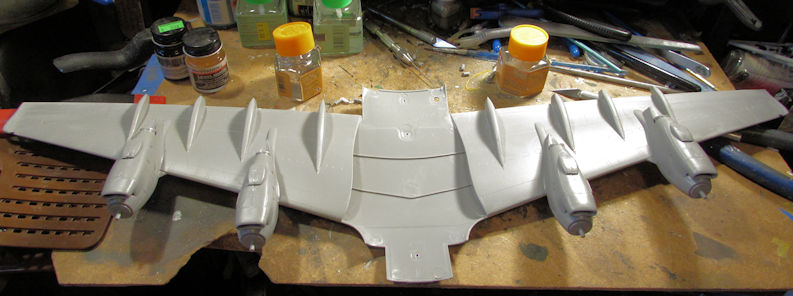
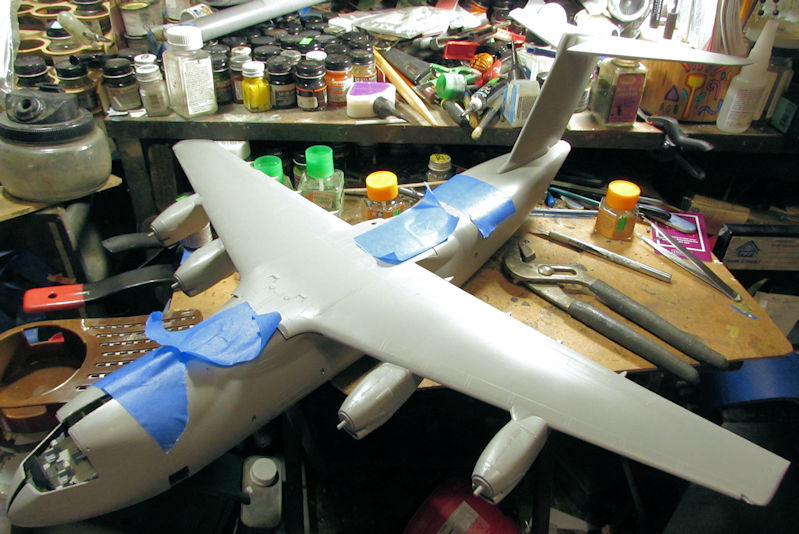
First off, here is a preview of the main landing gear for the AN-124 Condor. I did one complete one without wheels, and started a second on. The finished one contains 10 parts, not including the wheels. I have to make ten of these:


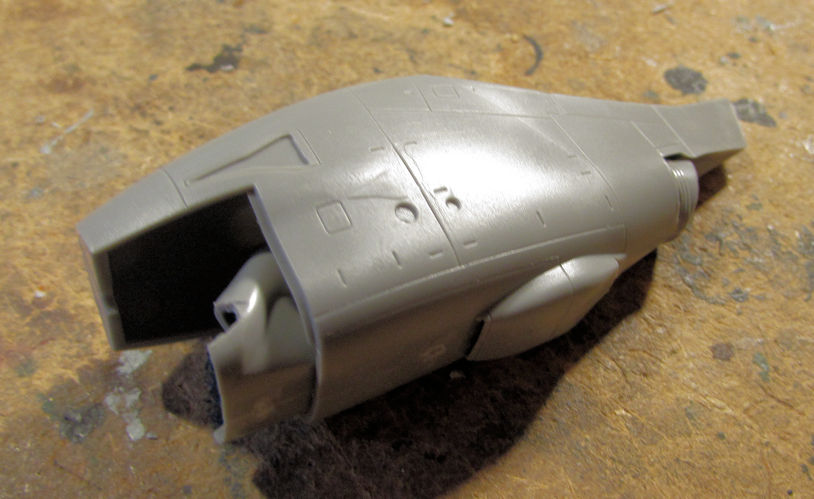
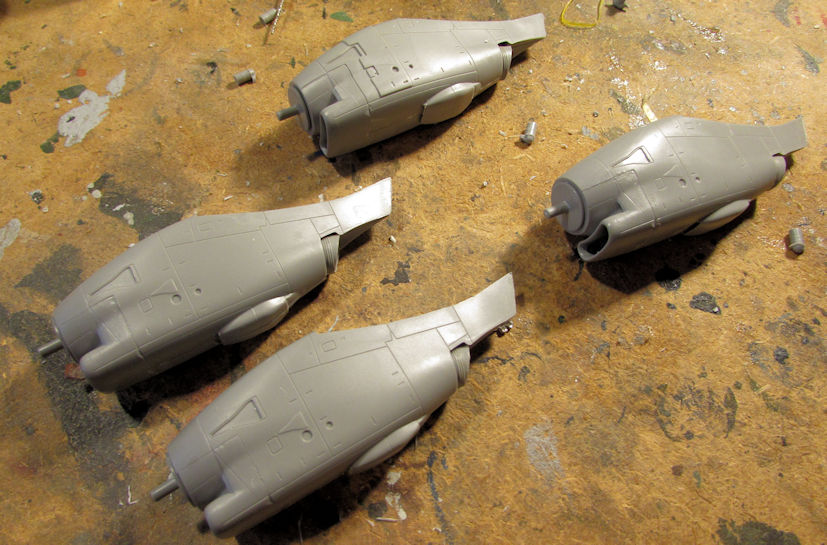
I also completed a third engine, but I think I mentioned that before. Okay, enough of that....

Next up, I'll show the progress on my three aircraft that are so close to the finish line right now.

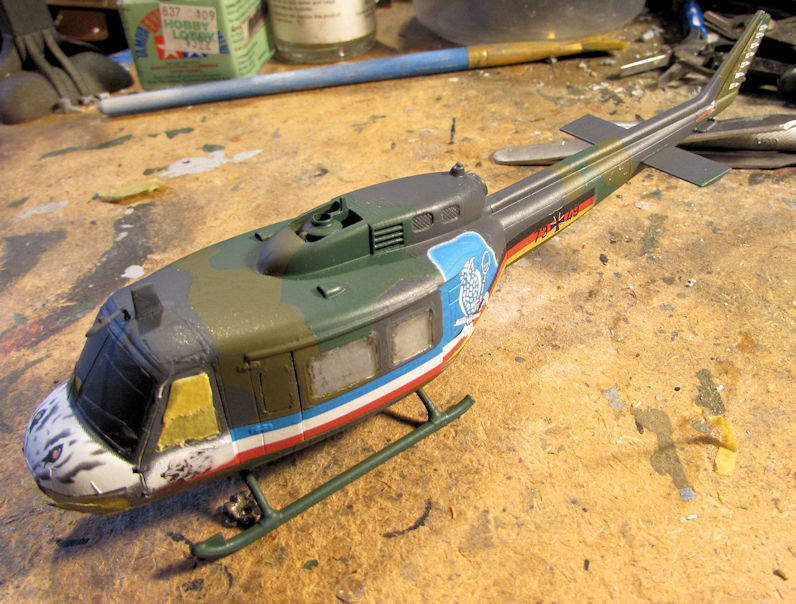
To start; I got the decals on the German Huey. These were tough as they had to conform to many curves and recesses. I think I managed to get them looking good enough:


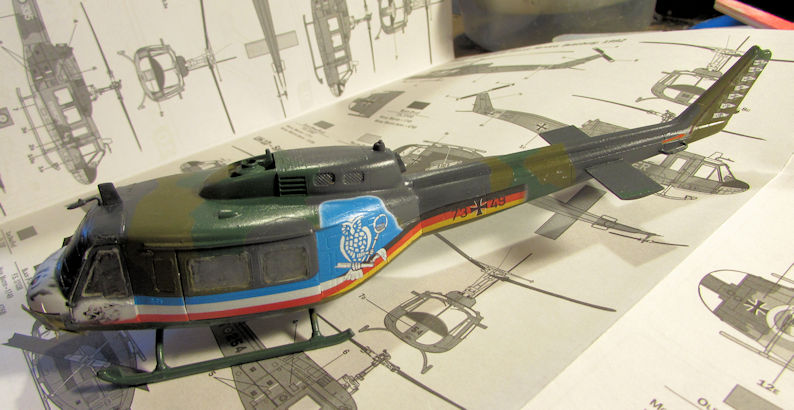
Yes, the tail ones silvered. I fixed that later after taking these pics.

Yes, for some reason my gloss spray fogged the side windows. Fortunately, I still have the set from the kit I've been cannibalizing to complete this one. The nose decal gave me the most difficulty; but then again, I might have put it on over some masking tape:


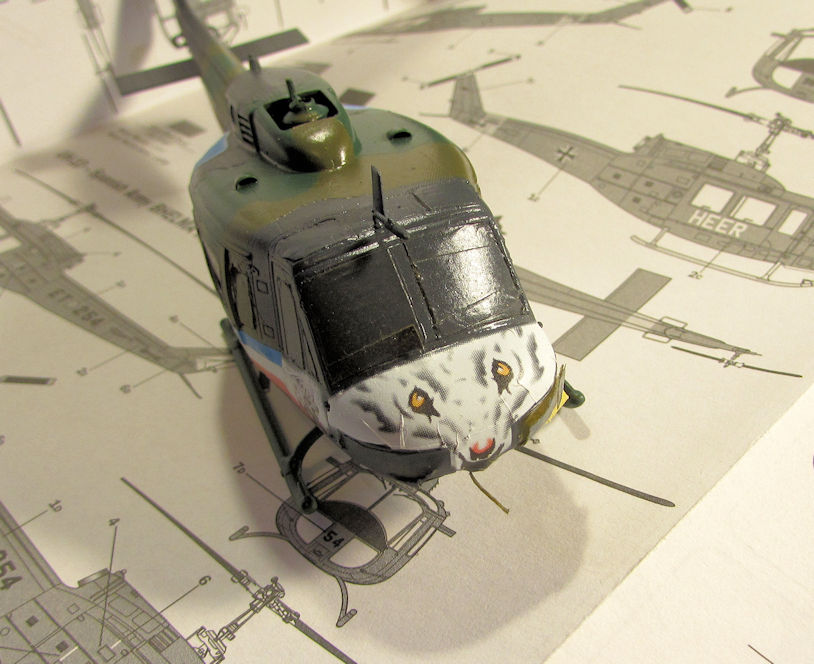
Later on I masked the pilot's door window hoping it would not be fogged, but I couldn't save it. Despite that, the dullcoat went on well. I was even surprised that the decals sucked down so well over the detail underneath:


Next, I added the last decals onto the Israeli Sufa:


...and then shot the dullcoat over it:


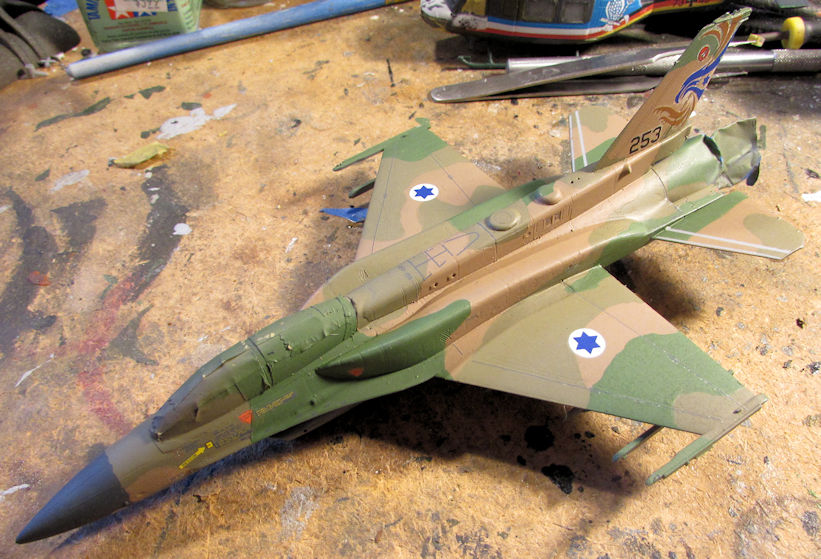
I then removed the masking from the tail feathers and the canopy. Now all I need to do is add the final details, the landing gear, the underwing stores, and then detail paint the last parts to finish this off.

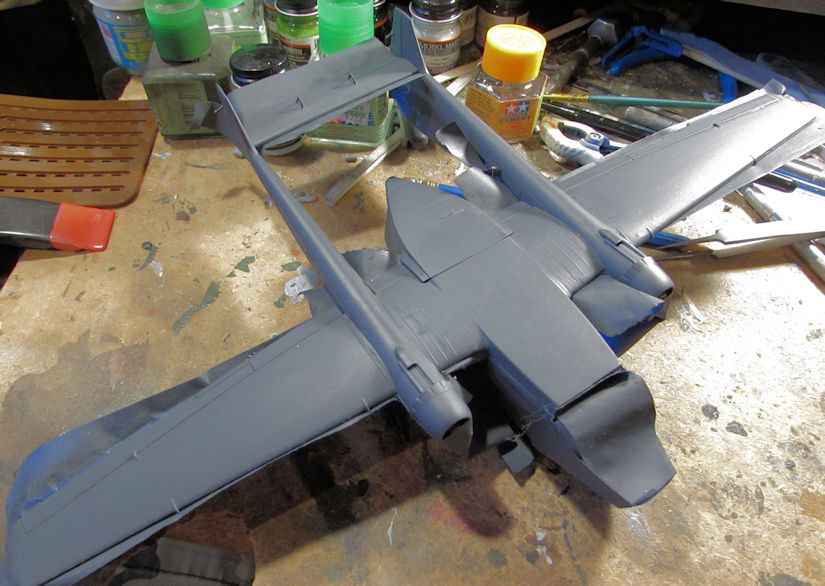
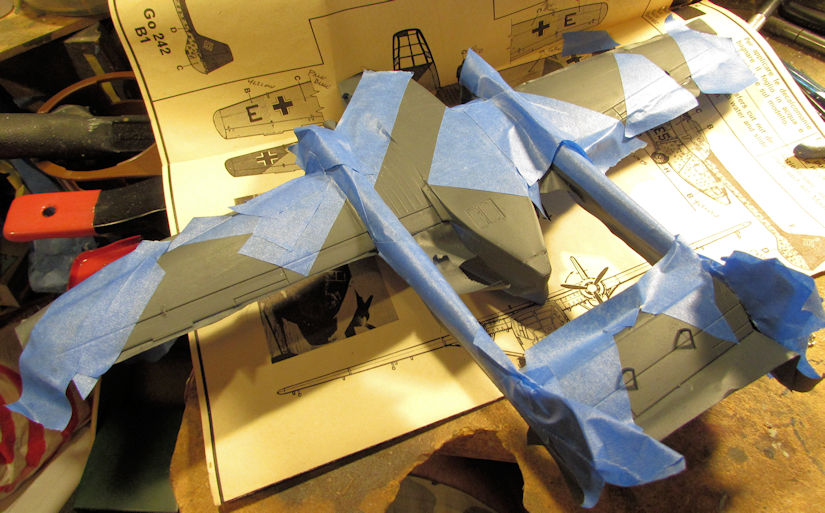
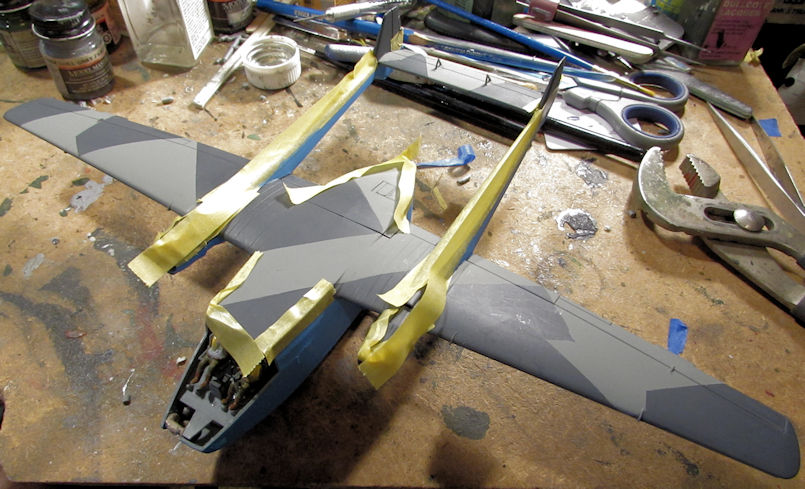
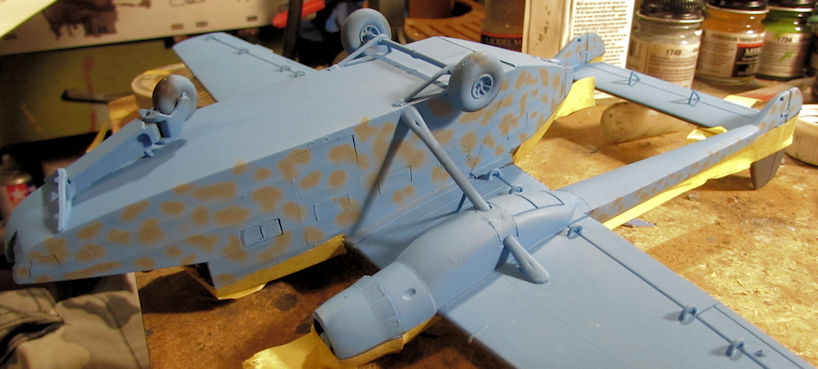
Finally, I added the decals to the German Gotha Go-244:


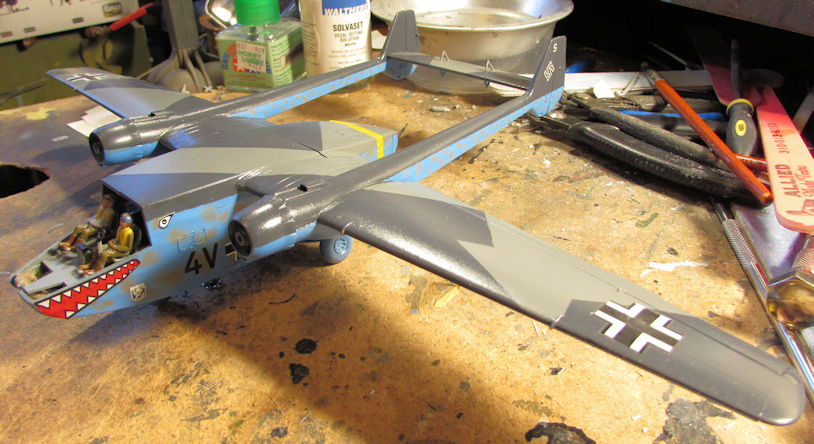
They curled, despite using both Micro-sol and Solvaset. This one eye was so bad I had to paint it on. Not very well; but then I was contending with an engine nacelle in the way:


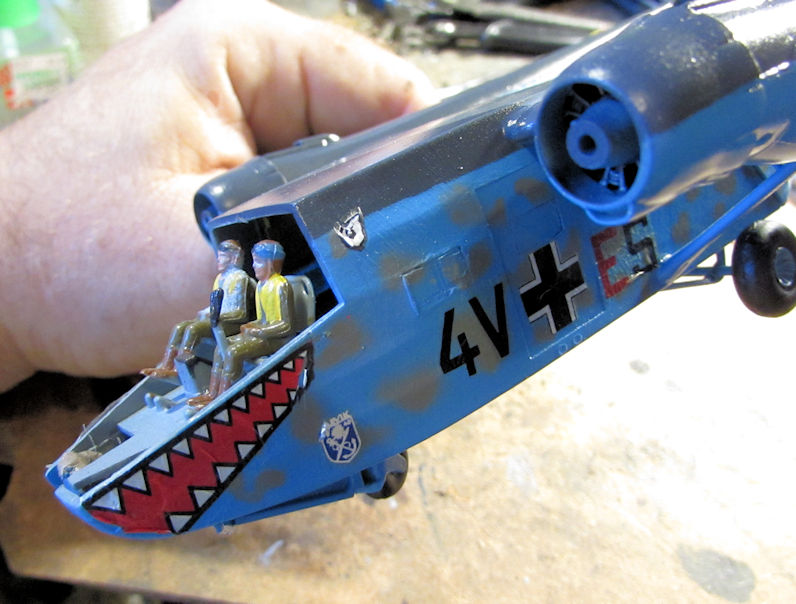
You can also see I painted the wheels on this.

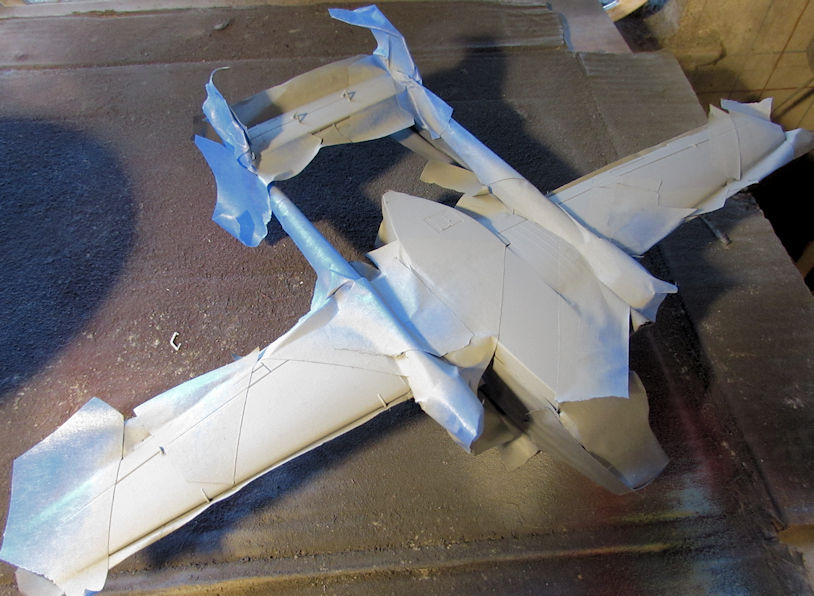
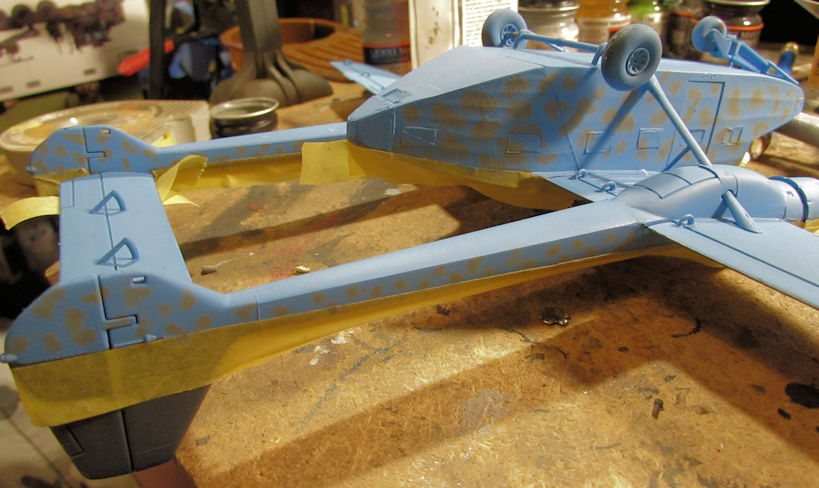
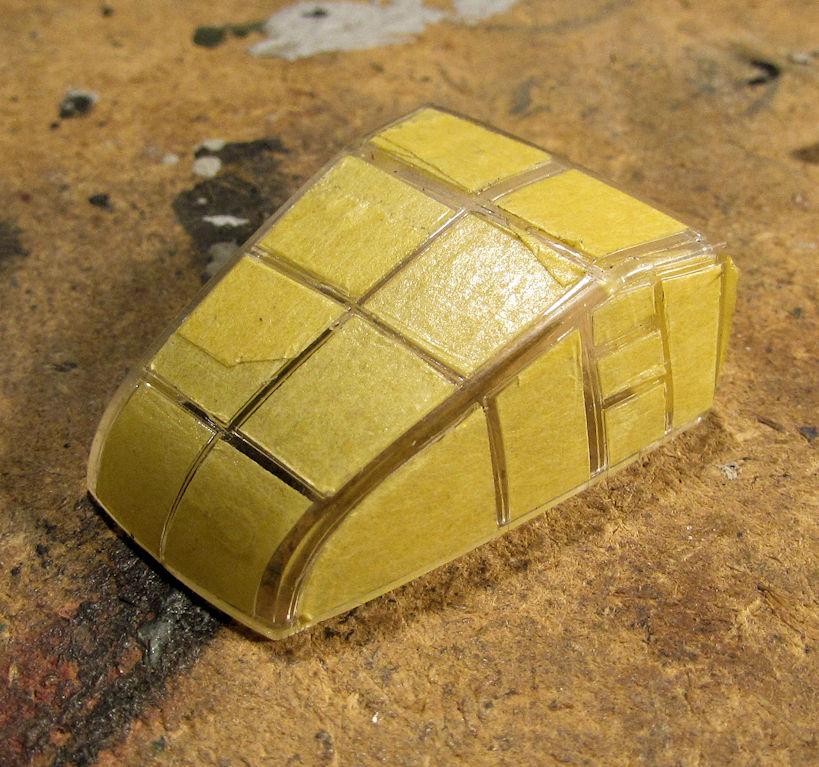
Later I shot the dark gray over the masked canopy:


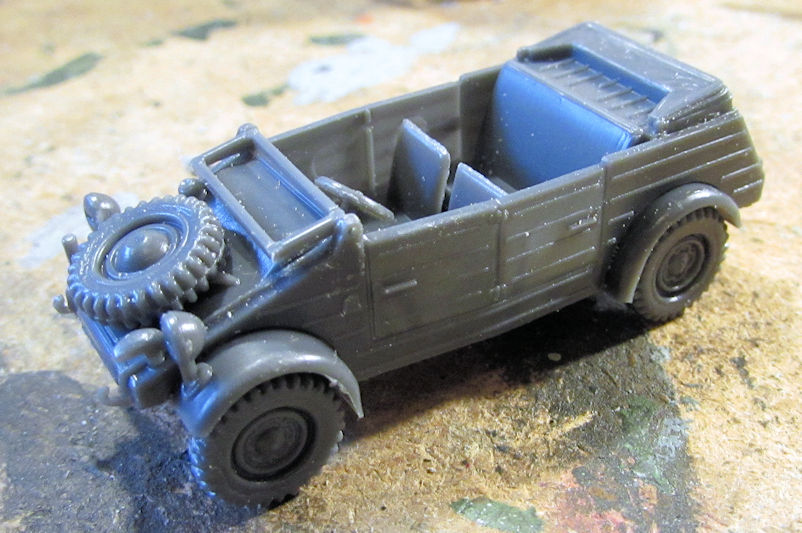
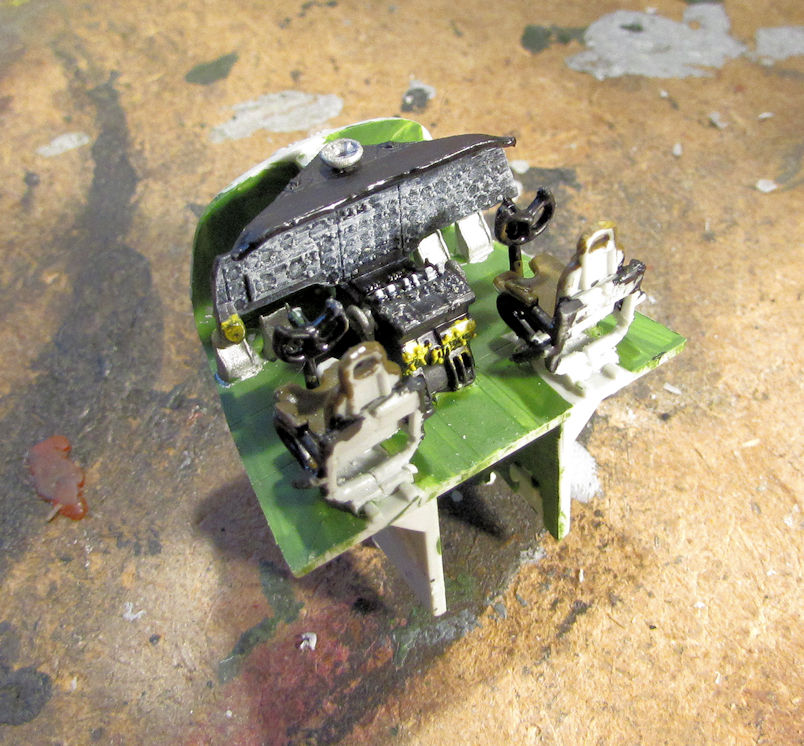
Now all I have to do is add that canopy and one other small window to this and it's finished. I'll even have the little Kubel that goes with this completed as well:


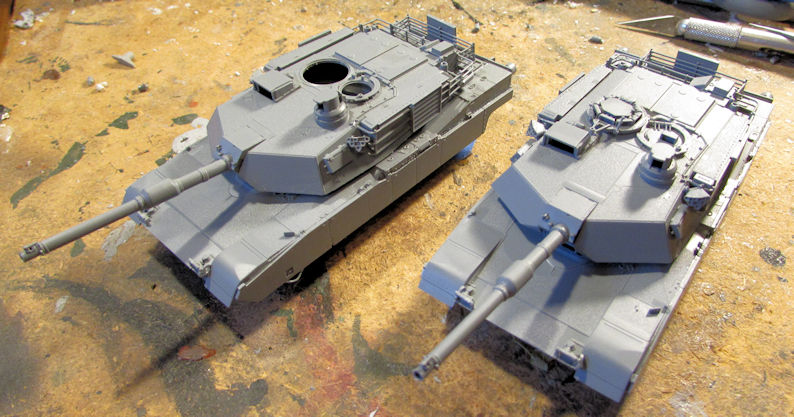
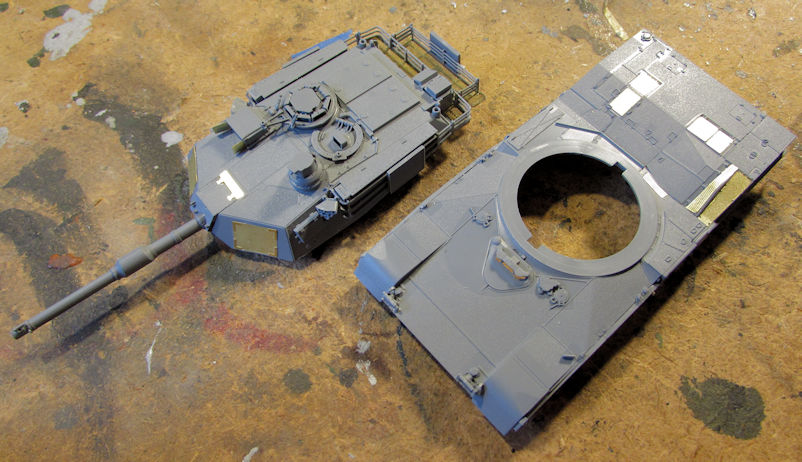
Speaking of vehicles, here is the latest on my armor I've been doing this week along with my aircraft.

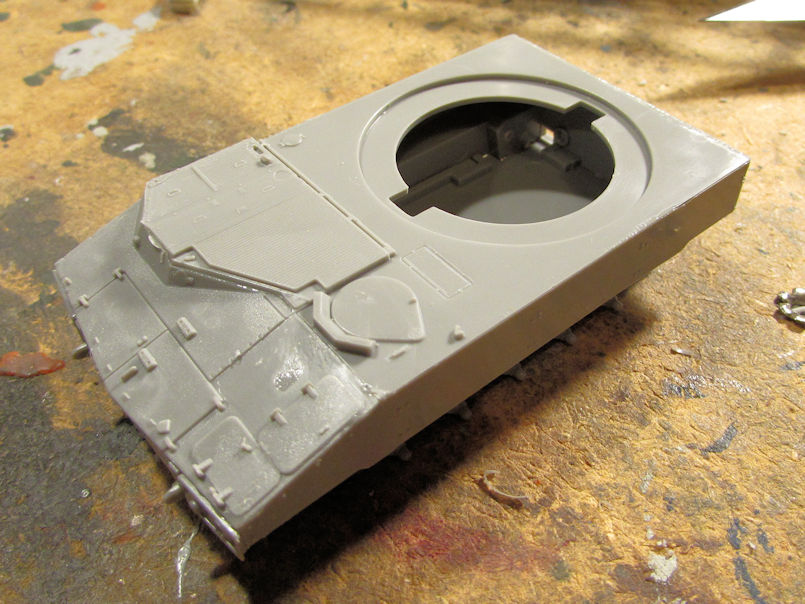
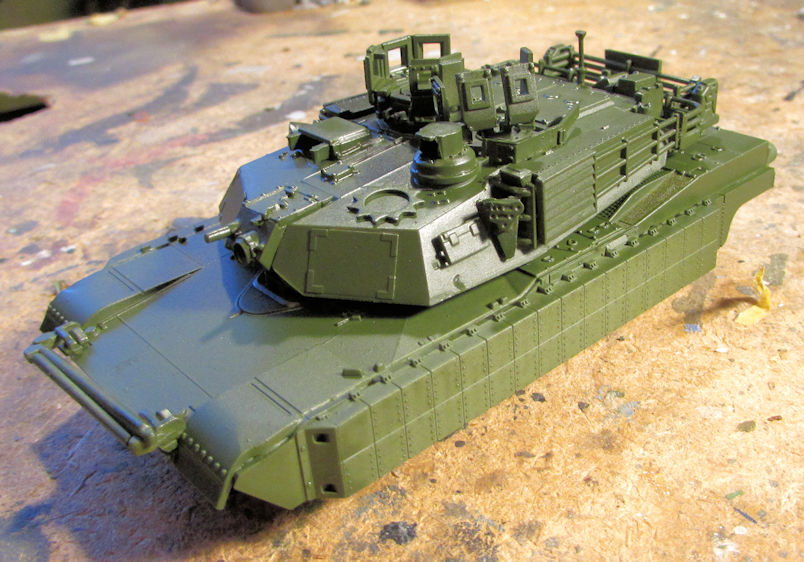
I'll start with the 1/35th scale M-48 Patton. I don't remember what I'd posted before so here's the most recent work I did.

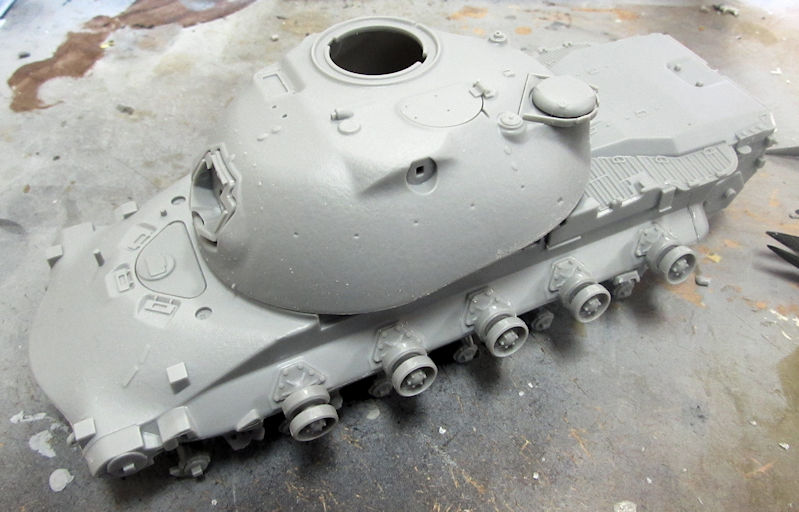
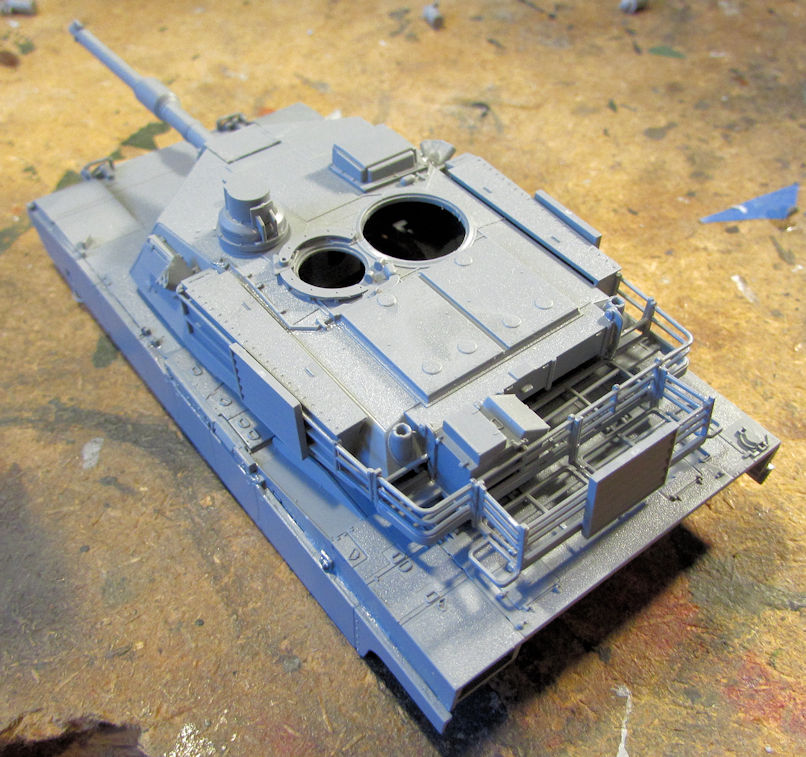
I think I left off with this pic of the Patton where the main hull and turrets were built up:


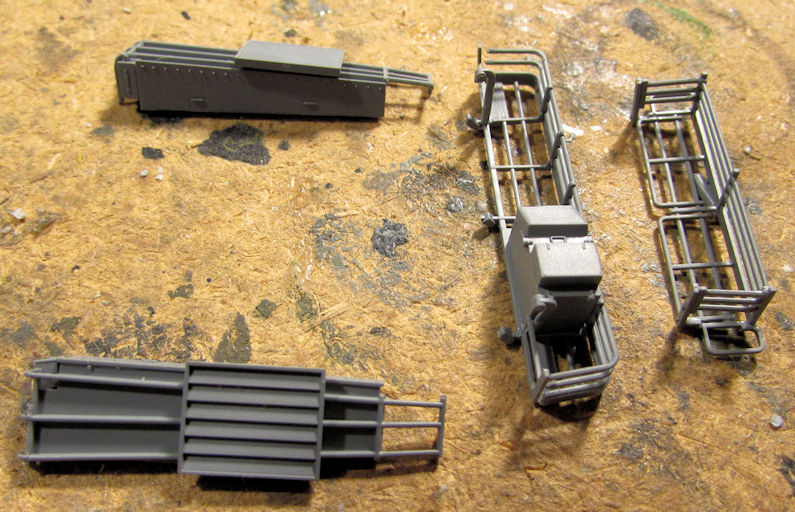
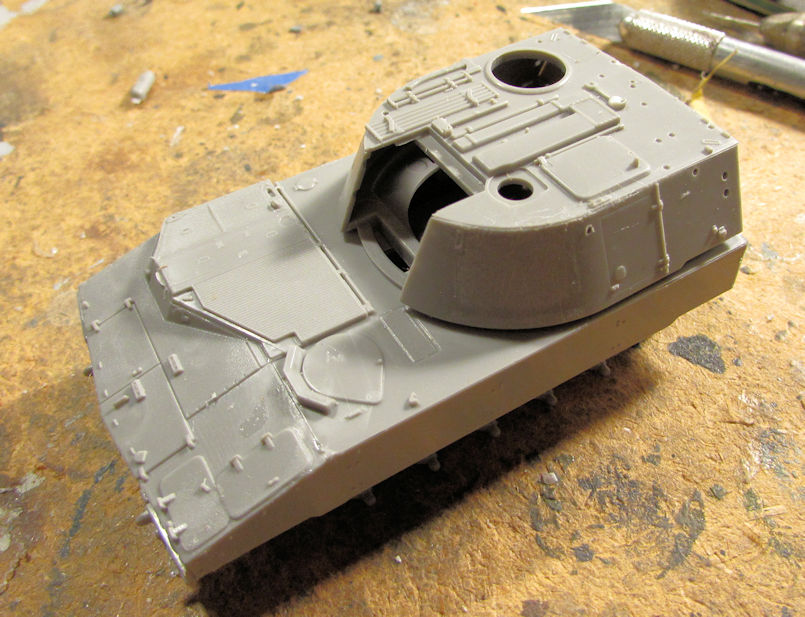
Next I added the fenders and the turret bustle rack:


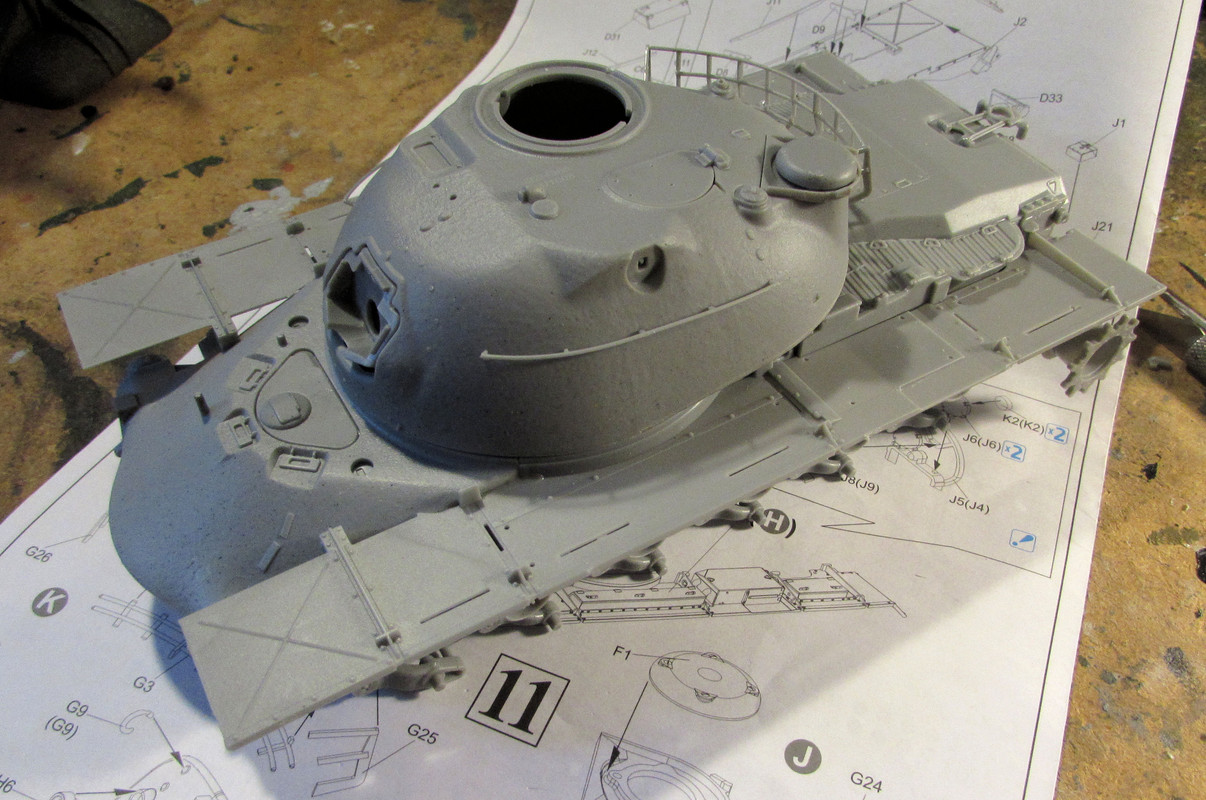
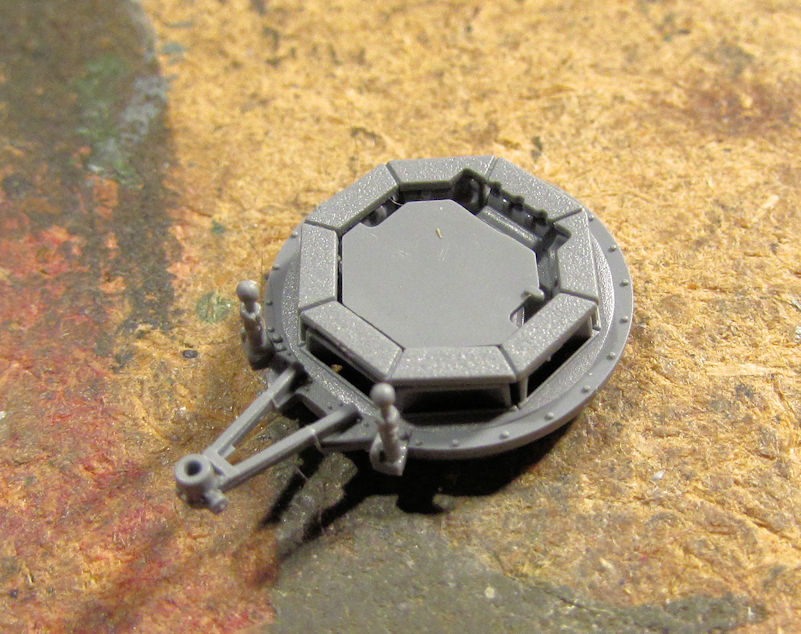
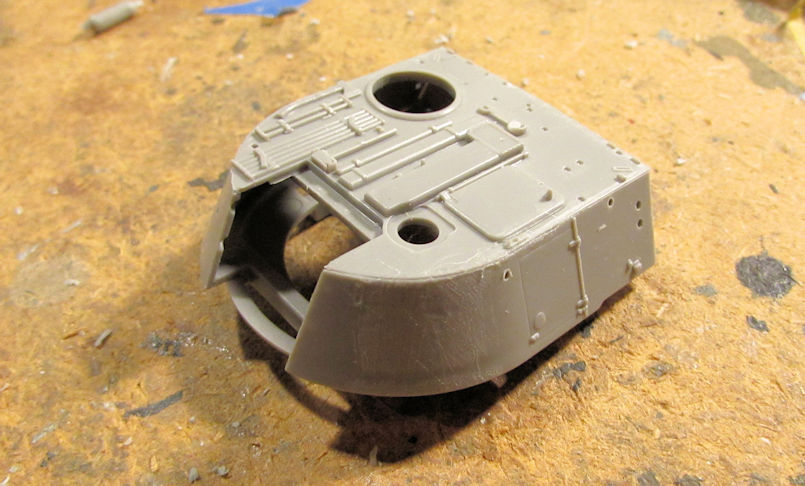
Next I built the TC's cupola shown here dry-fit to the turret:


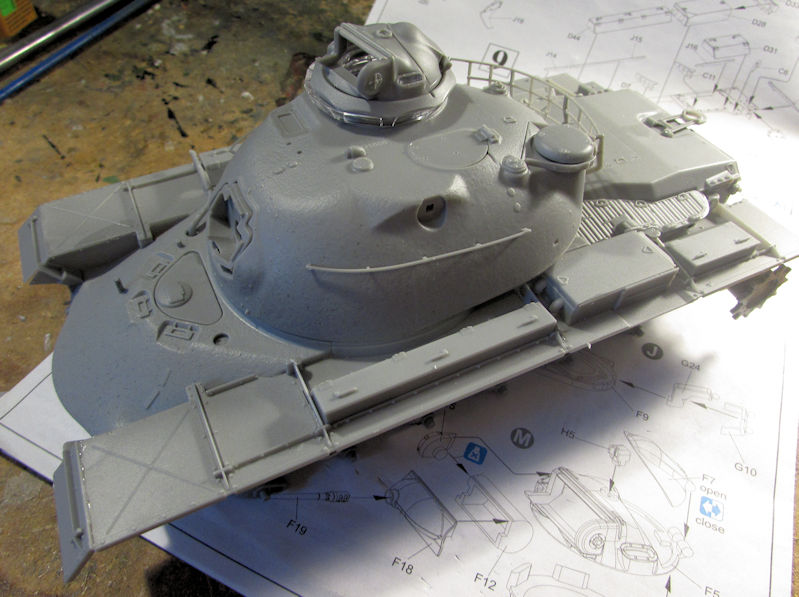
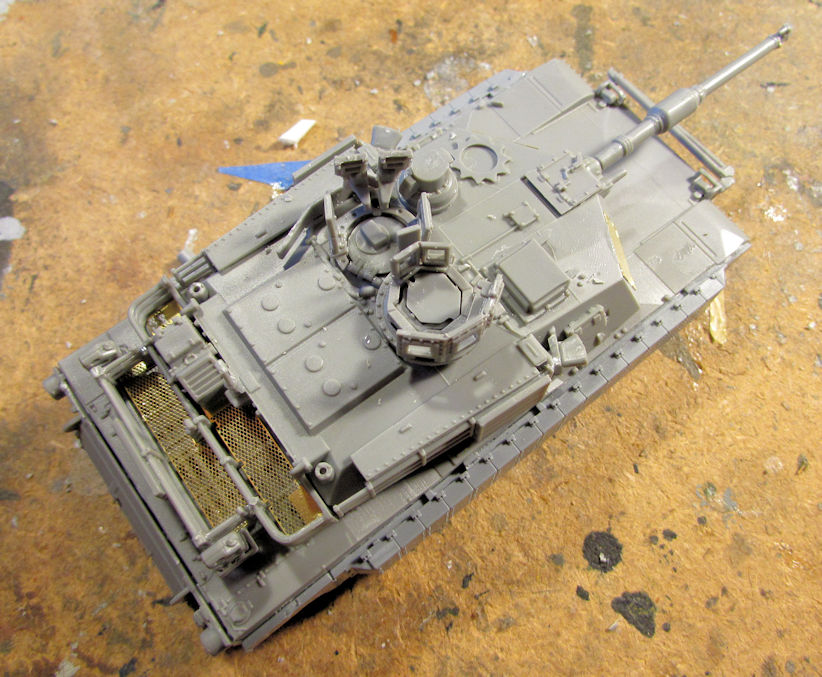
Finally, I added the mantlet cover and the main gun to this. The mantlet is made from the DS Styrene so it is flexible, allowing the gun to move:


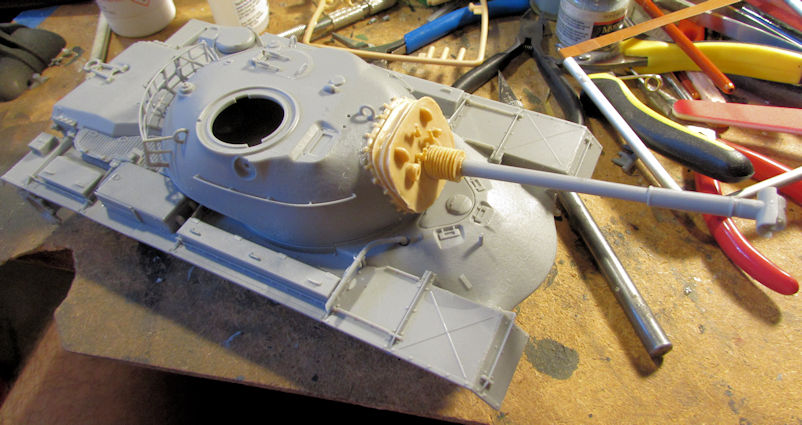
I'm calling this puppy ready for paint.

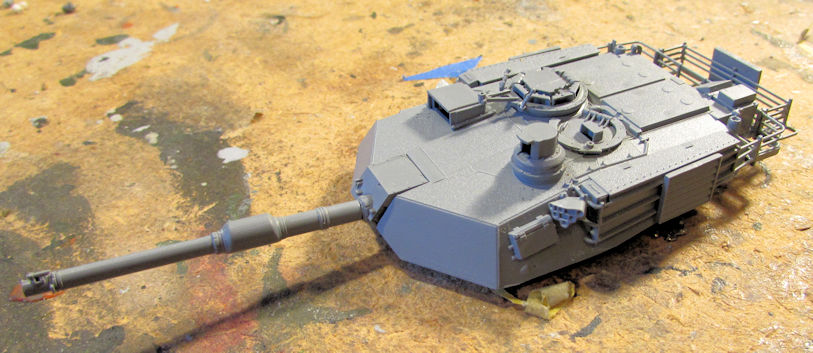
Now on to my smaller stuff on the next post....
 
And continued from above we have my latest progress on my 1/72 scale armor.

On the Modeler's Haven Forums they are running a 1/72 scale Group Build. I decided to go with the M-109 A-nothing for my 1/72 scale Group Build subject. You can follow that in it's own thread as well. Here though, is the shot of the main hull all assembled:


I then assembled the turret sans gun and mantlet:


Here they are all together so far:


I will later on be doing some carving and modifying the mantlet, frame and gun so that it will elevate. That is one of the more frustrating things about this Revell kit: they make you fix the gun in place. Hopefully I'll do a better job than I did on the German Paladin; live and learn.

Moving on, I started assembling the other M-1 Abrams SEP with the mine plow. Here's the upper and lower hull dry-fit together:


Next came the turret:


And to show that I'm not recycling pics of the first SEP Abrams, here they are side by side:


I then started on the mine plow for this Abrams. Here are the main blades:


There are 18 parts in that pic above, nine per side. Flyhawk really did these right!

Moving on, here's more of the mine plow:


Those skids are fully poseable too!

Here is the full mine plow almost done:


That thing is a model unto itself, and fully articulate as well! All I need to do is add the chain to it.

Next I had to make these ready for paint. That meant adding all the P/E screens and other parts to these. First the regular SEP Abrams:


Then the mine plow Abrams next to it:


BTW, the 'white' squares on the engine decks of these tanks are the P/E screens reflecting my bench worklight.

I then finished the P/E on the SEP TUSK I Abrams too:


Then came the basecoats of dark green on all three of these. The M-1A2 Abrams SEP:


... The M-1 A2 Abrams SEP with mine plow:


And the M-1A2 Abrams SEP TUSK I:


And that is where I left off so far this week. More to come soon I hope. Stay tuned and thanks for looking in on this latest tour. Comments are always welcome.
 
Nice work Mark! I really like the markings on the German Huey.

Ah, you slipped this in before I could post Part II! :vgood:LOL!

Yeah, I do too! They do look so cool. What a bear to put them on though! I'm glad they turned out as well as they did, even with the few issues I couldn't fix.
 
Ah, you slipped this in before I could post Part II! :vgood:LOL!

Yeah, I do too! They do look so cool. What a bear to put them on though! I'm glad they turned out as well as they did, even with the few issues I couldn't fix.


Oops, sorry if I messed up your rhythm... :)
 
No worries Sharkman! I'm glad to see your replies.

Thanks Bob! I sometimes have that problem too.

Thanks Eric! I do hope to make more progress this coming week; I might even finish a few.
 
Well, I'm a bit late for this week's update, but then again I haven't gotten that much done in the Hobby Room given all that I had to do this past couple weeks and the drop in mojo it caused. This will be a small update, just so I can show that I'm still doing something in my Hobby Room besides staring at the walls when I'm in there...

I'll start my aircraft, of which there are two I worked on. One is the Japanese Val; an aircraft that I never had in my collection before. It's high time I rectified that and since one was in the huge box I was sent; I got started right away. This is the Fujimi kit that is very basic in detail, but still looks good when built. I started with the cockpit.... such as it is! Most basic:

full


Next I did the spatted landing gear... even more basic: it was too halves without a separate wheel in the spats. Hopefully I can make it look good enough with paint:

full


Next up was the engine and cowling. This was surprisingly more difficult than expected, but I got it done:

full


After that I did the propeller:

full


Finally, the wing tops were glued to the bottom wing half:

full


Now all I have to do is paint these little subassemblies and then I can get it built. Hopefully next week.

The only other aircraft I worked on was the Israeli F-16I Sufa. I just added all the final greeblies and touched up the paint. I also painted the burner can too. Now all I need to do is add the landing gear and the ordinance and this bird will be done:

full


While I was at it; I started the capsule on my Mercury Redstone rocket since the main body of it was all painted and clearcoated for decals. Here is the capsule with the escape system:

full


Later I added the lattice parts that hold the escape system to the capsule:

full


The ring at the bottom of the escape tower is just dry fit on the capsule making it removable for ease of painting. I might be able to shoot these soon.


Moving on to my armor; I only worked on a couple little kits. This first one is the little Kubelwagen that comes with the German Gotha G-244 transport. I simply clearcoated it and added the decals:

full


full


Now I just need to dullcoat this and then weather it a bit. I don't know that I'll weather this much as it's supposed to be a staff car being transported in an aircraft, but I will dust it up a little. Meanwhile I went to work on another kit that I had been putting off working on.

I pulled out my M-109, knowing I had a lot of effort to put into that model to make the gun elevate, so it was time to stop putting it off. I made the necessary cuts, and then fashioned a couple braces to trap the gun mantlet so it would elevate. Trap it how? I added a piece of sprue to the back of the mantlet as you can see:

full


Here it is all assembled, minus the mantlet. I was able to bend that enough to get the mantlet in place:

full


Success! I was able to get that mantlet to elevate. Of course, I ran into another issue, the top of the mantlet cover doesn't look right at full elevation as you can see in the following two pics:

full


full


Oh well, I'm not going to worry about it now. I may change it later but for now I'm happy with how this elevates.

Later on I added the roadwheels and assorted other detail parts to the hull. Here is the whole model all assembled to that point:

full


Well that completes this short update for this week at least. I'm hoping I can get more done this weekend if possible.

Stay tuned, more to come. And for those who did stop in to comment, I thank you very much, comments are always welcome.
 
Do tell!
I saw one years ago on the ramp at GSP, probably delivering stuff to the BMW plant just across the road.
1989, Oshkosh, AN-124 = party.
Dinner and drinks on the upper deck.
Never drink with the Russians or the Australians.
I barely made it back to the motor home.
Frank
 
Back
Top