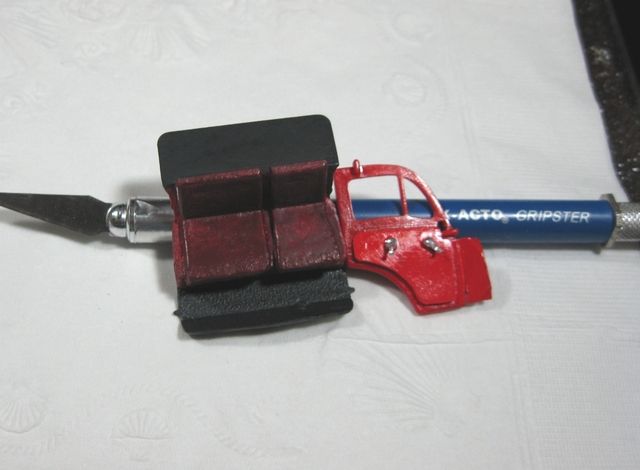
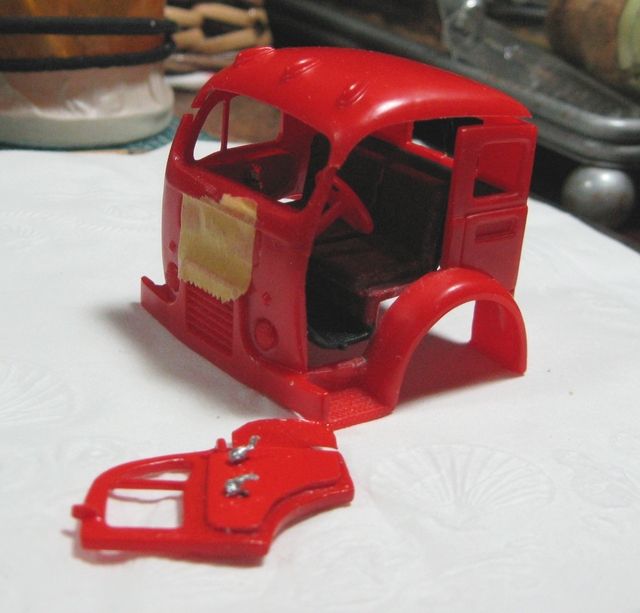
• Modelers Alliance has updated the forum software on our website. We have migrated all post, content and user accounts but we could not migrate the passwords.
    This requires that you manually reset your password.
    Please click here, http://modelersalliance.org/forums/login to go to logon page and use the "Forgot your Password" option.

The White truck is Red

Thank you gentlemen. (y) I have to say this build is going together slowly. But I'm trying to get all the interior done before I close it up and move on to the rest. So far I have kept my head :frantic and not overstretched....So far :blink
 
Once again in to the breech.... :snoopy I worked on the seat color and the floor mats and have settled on the following-subject to detail painting later...maybe :idonno
trying for a burgundy vinyl sort of thing

IMG_6546PLUSs_zps0qldqu3j.jpg

In place
IMG_6555PLUSS_zpsfjto9t0l.jpg

view #2
IMG_6554PLUSS_zpsgyfsh7ha.jpg

Showing the heater (scratched)
IMG_6553PLUSS_zpsemwugf1n.jpg


Finally a quick test of the roof - may be some small fit issues ahead :facepalm :pp
IMG_6548%20PLUSS_zps8cdbfcna.jpg

:Hiay
Thanks for your support and any constructive critiques are appreciated
 
Thanks guys :Hiay just in the middle of ..... uh...I mean I'm.....Heck I don't know exactly what I'm doing but I am getting some stuff done.
Report to follow soon :silly:
 
That is looking good man! The burgundy is working. That is a great looking interior. Are the cab pieces only dry-fit together? I was wondering because of the seam at the back of the cab as well as the roof issues.

I'm really enjoying watching this as much as you appear to enjoy building it! Way to go!

Ed -thanks the popcorn is great on these winter nights

James- your thumb ups are a tonic for these "Say WHATTT?" days.

Mark - Doh :facepalm , didn't mention that did I? YES it is dry fit (well with a bit of rubber cement- I so old school :eek:ldguy ). Did it to see how the different parts would look together and what colors would be needed to work with the cab color

Back to more dry "fitting" ( meaning it doesn't without lots of uh Persuasion an' skill [strike]less[/strike] er- full modeling :Hiay
 
Thanks! That';s what I thought; your skills are far too good to let such a blatant gap remain on the back. I'm looking forward to seeing more.
 
Well All righty! Back with a update of what been done (and redone, sometimes more than once :frantic )

When we last left the little red white he was just getting the beginnings of his interior.
The current additions:


1- the cab sides, back and front glued together (roof there only to keep parts aligned-to be attached later)
IMG_6571_zpsaxkrmrzp.jpg

instrument panel #1
IMG_6562X%20PLUS_zpshiy76qdn.jpg

Revised/corrected/just plane better IP #2
IMG_6567%203PLUS_zpsmf3eiejt.jpg

Test fit painted steering wheel and installed scratched gear shift
IMG_6582%202_zpsr3saugno.jpg

added the scratched accelerator peddle
IMG_6586%20PLUS_zpsfv89grqg.jpg

Scratched a needed emergency brake handle
IMG_6597PLUS_zpsp6pj7ghb.jpg

gave it some color- I really like how it came out
IMG_6599PLUS_zps0isilaos.jpg


Filled some gaps between the sides and the interior part letting that dry. Also fill very small gap a seam line at the back of the cab.
So that brings you up to date.
If I don't have an update before next Friday let me wish you all Happy Holidays and a Merry Christmas
merrymoosemas.jpg

Great job Steve :popcorn
 
5d245db7.gif
Thank You Gentlemen for your kind comments

Question of the day :hmmm
.
Should I scratch and insert the windows now? Then mask them to paint the exterior?
OR
Tape shut the openings now and paint the exterior, Then scratch the the windows and put them in place?

Any thoughts, suggestions, great ideas?
p.s. No, they will Not be operational; On that I've made my final decision. :yipee
christmas%20ani-lights-bar-650x38_zps13hzkffv.gif
 
Steve I think that you should tape the window openings spray the exterior and then install the glass ... nice scratch work on your interior ... (y)
 
I was going to suggest adding the windows and then masking with a liquid mask or tape to seal them before painting. That way, any glue that seeps out before the painting can be fixed and/or covered. But hey, whatever feels right to you is the best way to do it. No matter how you do it, I'm really anticipating seeing the incredible job you're doing on this. Rock on dude!
 
As I sit by the fire sipping me Tullamore D.E.W. 15 Year Old Trilogy, munching on ginger cookies -the heck with Santa he can bring his own- and thinkin' of all my modeling friends. I decided to do a quick update to spread the cheer.
Thanks to Mark and Gerry for their fine suggestions on how to proceed with the windows. (y)
the back seam
IMG_6556_zpsetswsgka.jpg

repair of seam
d7adcfd6-ce88-4f38-8e5e-d4f784d98862_zpseu9vejoj.jpg

then the window mock ups
IMG_6609PLUS_zpskmgfddv6.jpg

Well that it for now "milk" and cookies are gone so I'm off to bed to let sugar plumbs dance in me head.

Merry Christmas to all
Christmascooke_zps35bfcc37.gif
 
Back
Top