• Modelers Alliance has updated the forum software on our website. We have migrated all post, content and user accounts but we could not migrate the passwords.
    This requires that you manually reset your password.
    Please click here, http://modelersalliance.org/forums/login to go to logon page and use the "Forgot your Password" option.

The White truck is Red

Love the cab overs. I used to drive one for Pepsi. Yep, I'm that old.
They basically defined the term "hot seat." There was no air-conditioning and you sat right on top of the engine.

Yeah, I have a soft spot for the old COEs myself. My uncle Rich drove an old CORNbinder (International) & I snuck into it when I was 9 yrs old since I wanted to go for a ride... Did too!! :drinks
 
Many Thanks Guys for the support and kind words. :good:

I have decided to cease from my efforts to reinvent the wheel and only making kindling out of it. :bang head
I shall now go back to a great idea (thanks Swordsman) and use metal tape (HVAC/duct tape-whatever)

The size of this hinge is too small and my fingers too big the make wire and tube hinges practical.
So the metal tape is the best way to go.
IMG_6465plus_zps4h3euq7d.jpg

Picture 1 = proof of concept 1-test shot=fail
IMG_6496_zps8vdlucmk.jpg


Picture 2= proof of concept 2-test shot=fail note: the metal tape waiting in the wings for tomorrow
734e0591-9f8e-4cbb-ace3-c9e500329044_zps2ovkvxje.jpg

So again thanks for the support and for those that drove these or any big trucks -you make me jealous
 
Wow, what a great old Classic Model! Sweet! I'll be watching this one intently!


As a sub note: All this added detail is all you guys fault. I wouldn't be doin' it 'sept you-al do it, so now I gotta try and try.
speechless-smiley-005_zps1e713b39.gif


Was hoping to have an update for today. But I'm stuck on the door hinge thing and the cab details needing to be created and then trashed, recreated, modified, then just giving in and gluing some version in and moven' on. :blink

So Part 3 in on hold for the moment

:S [under my breath]
Bet none of them have these kind of problems on their builds. Oh well the life of an old newbe is never easy
:coolio

Hey, don't lump me in with all these Masters! I don't add any extra details to my work... except on rare occasions when it screams at me that it needs it. Those are rare days indeed.

As for not having problems on my builds? Dude! You need to go through my Maddog Manufacturing Thread from beginning to end: It is FILLED with problems! :facepalm LOL! So many days were one step forward three steps back! :drunk :bang head


I can't wait to see more. Keep plugging man, you are already surpassing me in skills! :notworthy (y)
 
Just a quick update on the progress. I now have a Hinge! Ta-Da! :yipee :dance :v (y)

Picture 1: measurement for size needed (Only took 4 times to get it pert-in-near correct)

IMG_649820plus_zpsh8qwjrqh.jpg


Picture 2: Its ALIVE!- er- A Hinge ! and it works!

IMG_6504plus_zps9bn5xcdh.jpg


Also thanks again for your encouragement :good: :good: and one persons "Corn-sideration" (wonder who that could be? :hmmm ) :rotf
Well off to the bench again to see what else I can do--I'm on a roll now :salute
 
Well short Non-update :facepalm -again.
Looking at the pictures of the interior of the cab I realized the dashboard is not as I intended. In fact it looks more like what I clean up after my dog goes outside :bang head :vmad
So I am now attempting the improbable, a revamp of the dash. So it should end up looking more like its supposed to. :sick:
Stay tuned fellow modelers, I'll do somethin' and post pictures soon :frantic
 
HI Guys! back again, finally. :dude
Had some rather difficult work to do ( I was thinking :unsure: 
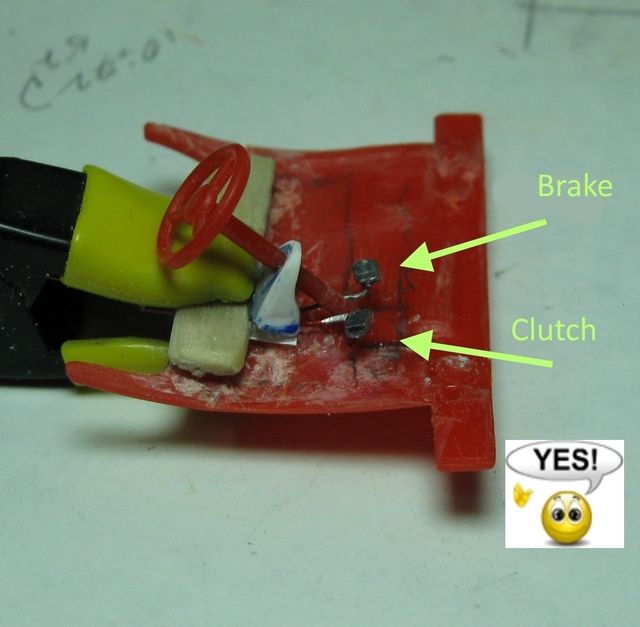
) on how to create the brake and clutch pedals what size, made out of what, should I even DO them?
The answer is ...
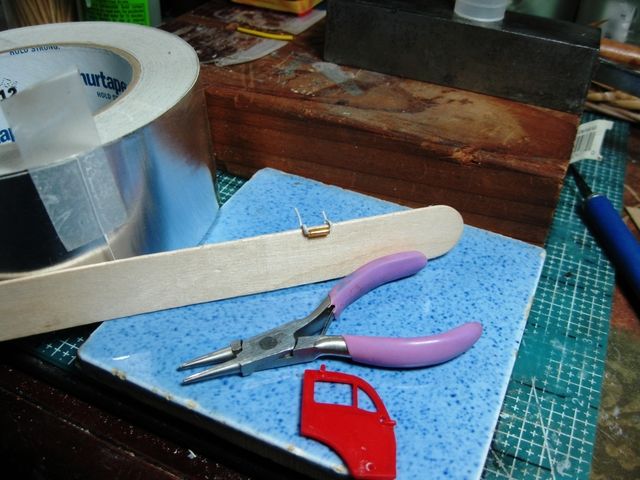
Of Course, I'll do them. Scrounged up some very thin wire from the [strike]junk drawer[/strike] I mean Supply Container :silly:. Added a bit of solder, bent, pounded and snipped and 
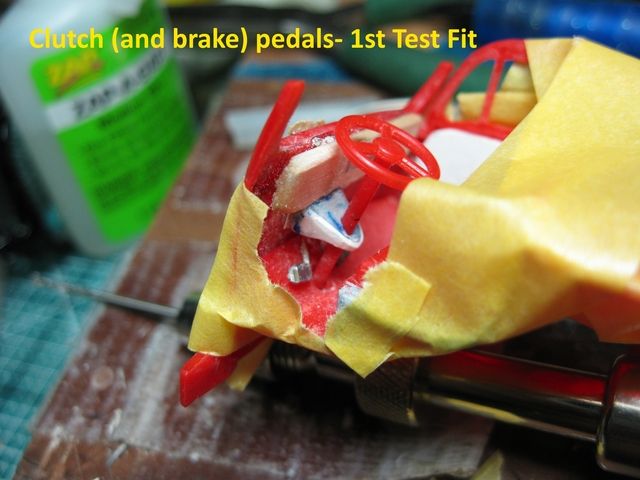
wal-ler! :v a set of petals.
IMG_6509plus_zps5fg2hjxf.jpg

IMG_6511plus_zpsubuxqpoe.jpg


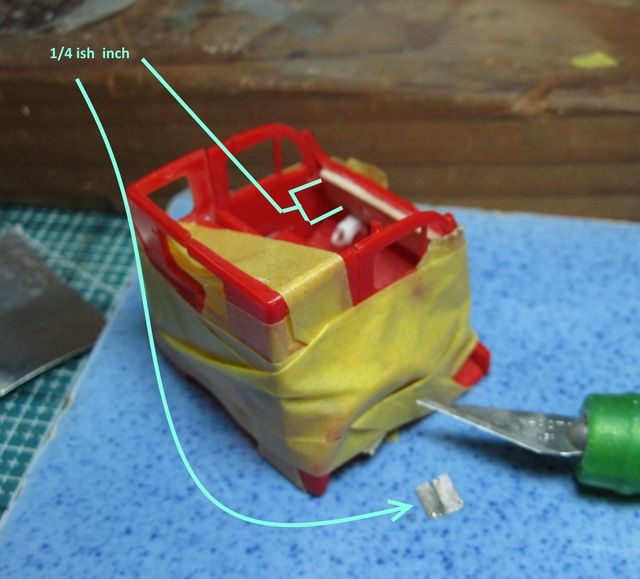
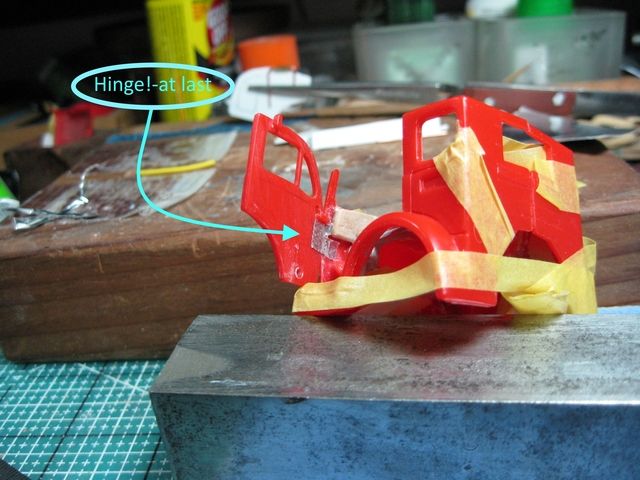
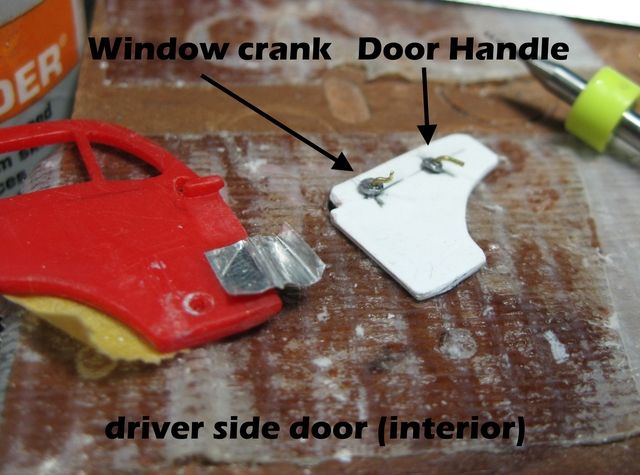
Felling empowered by this triumph, I moved on to the door and window cranks-How could I miss?
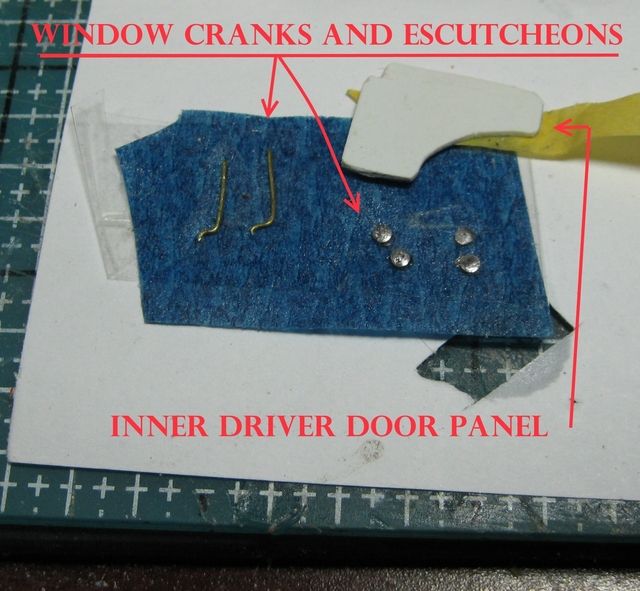
First the individual parts were created...
IMG_6513plus_zps97tbmpdc.jpg


Drilled the "escutcheons" and the interior door panel compiled the parts into ...
IMG_6516plus_zpspgdacsyn.jpg


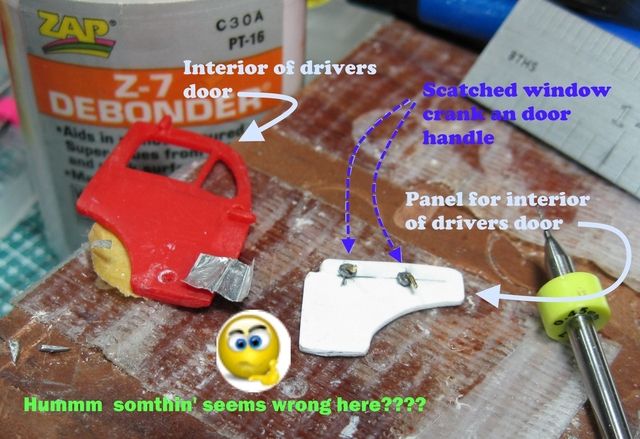
SUCESS! :yipee ....well, Almost​
IMG_6514plus_zpsyin4hynp.jpg


Other than the cranks being on the wrong side of the door panel, it looks OK :blush:
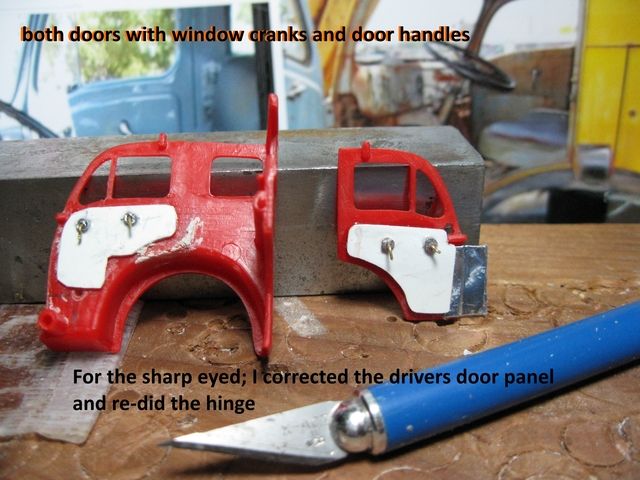
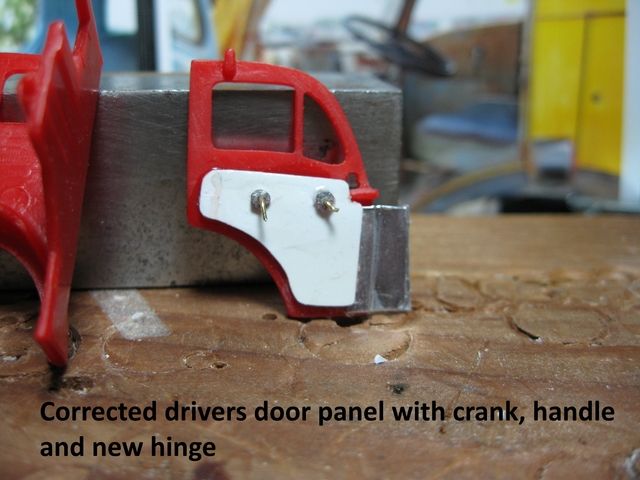
Well now I will go into Salvage and Rescue mode.
Updates to follow, fellow modelers, as soon as I dig out of this hole I'm in
13c952b1.gif
 
Open up the passenger door, you have the inside covered already. The pedals look swell, the handle escutcheons look a little large to me. Maybe slicing a section of silver solder (like a baloney) would be closer to the correct size? Looking forward to the next update. :good:
 
I would say that while your sense of direction was a little off, your scratch work is outstanding! This is coming along very nicely and your interior really is starting to come alive. Now to fix that door issue and move on! I love what I'm seeing here, I can't wait to see more.
 
Ta-Da (me tooting my own trumpet) I have an update at last. It really didn't take that long to do the following. But you can bet I was "verrry verrry car-ful" as Elmer Fudd would say.

Seriously Thank You all very much for your interest and support thus far. :good:
IronMike The go pedal is going to be attached on the floor, so patience my friend. :v
Hawkwrench, you are correct it is old, but so am I, so its ok. :eek:ldguy :cheer:


The work to date
IMG_6521Plus_zpsc2plufqx.jpg

And gilding the lily
IMG_6520PLUS_zpsjjfp67is.jpg


That's all for this report; looking forward to the next steps. but first :beer & :drinks "Prost"
 
Back
Top