-
Modelers Alliance has updated the forum software on our website. We have migrated all post, content and user accounts but we could not migrate the passwords.
This requires that you manually reset your password.
Please click here, http://modelersalliance.org/forums/login to go to logon page and use the "Forgot your Password" option.
You are using an out of date browser. It may not display this or other websites correctly.
You should upgrade or use an alternative browser.
You should upgrade or use an alternative browser.
Tamiya Challenger2 -Finished / Thanks!
- Thread starter wds
- Start date
Skinny_Mike
Well-known member
Tamiya Challenger2
go man go!

go man go!

wds
Active member
Tamiya Challenger2
Thanks, Bob (or whoever walks the corridors and ensures that the ship is in shape, you know who you are) for fixing my dbl. post Erf.

Thanks, T.
Thanks, Mike. I'm go'n.
Thanks, Tom.
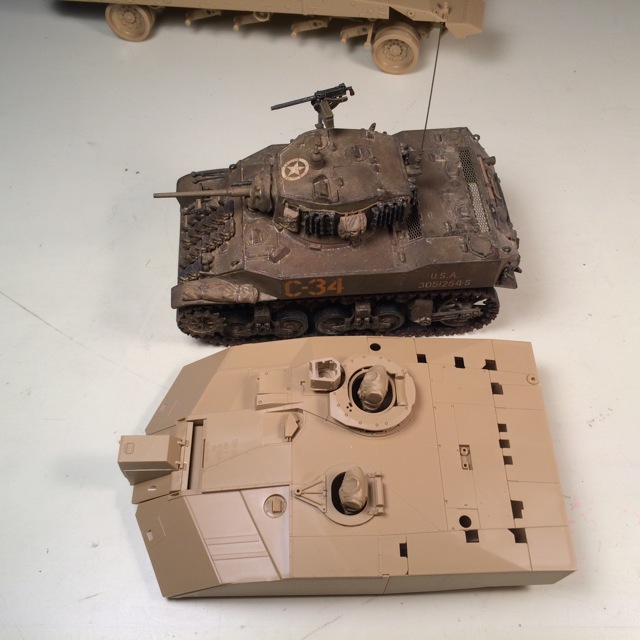
One aspect of this hobby that I enjoy is knowledge that I gain from building different models from different eras. It’s noteworthy (in my tiny mind) that the turret of the C2 is the size of a M3 Stuart from WW2. ... Just things that I trip on.
Thanks for looking,
Bill
Thanks, Bob (or whoever walks the corridors and ensures that the ship is in shape, you know who you are) for fixing my dbl. post Erf.

Thanks, T.
Thanks, Mike. I'm go'n.
Thanks, Tom.
One aspect of this hobby that I enjoy is knowledge that I gain from building different models from different eras. It’s noteworthy (in my tiny mind) that the turret of the C2 is the size of a M3 Stuart from WW2. ... Just things that I trip on.
Thanks for looking,
Bill

Tamiya Challenger2
I know right, that's why I posted up the hull of the Bradley next to the Lee.
One aspect of this hobby that I enjoy is knowledge that I gain from building different models from different eras. It’s noteworthy (in my tiny mind) that the turret of the C2 is the size of a M3 Stuart from WW2. ... Just things that I trip on.
Thanks for looking,
Bill
I know right, that's why I posted up the hull of the Bradley next to the Lee.
Tamiya Challenger2
There's a lot of truth to that. I know a gent here who was a commander of a tank platoon in the 3rd Army, toured Europe with Patton. He stands about 5,4 maybe, I doubt he's been more than 150lbs his entire life.
Those guys from WW2 must have been small
There's a lot of truth to that. I know a gent here who was a commander of a tank platoon in the 3rd Army, toured Europe with Patton. He stands about 5,4 maybe, I doubt he's been more than 150lbs his entire life.
wds
Active member
Tamiya Challenger2
Thanks, Luis.
Thanks, Bob, Dave, and James!


_____________
"There were prizes?"
No.
No prog rock fans from the way-back? That was "Dance on a Volcano" from the album A Trick of the tail by Genesis. circa ....wait for it ....1976.
Who is the old man? ldguy
ldguy 
"Don't care, we are here for the models, and you are losing us"
OK, sorry ...
_________________
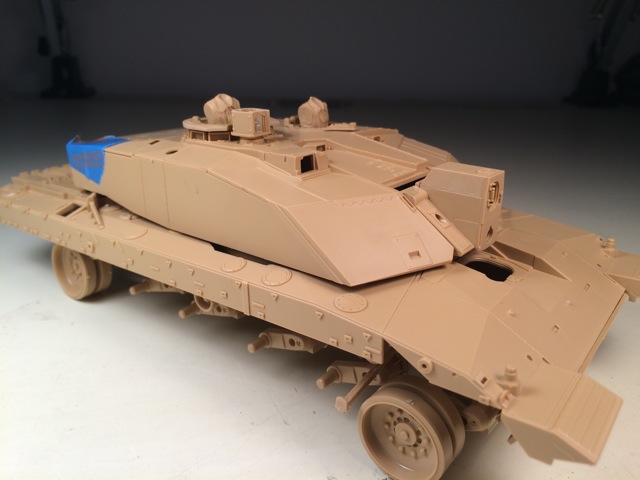
Some progress.
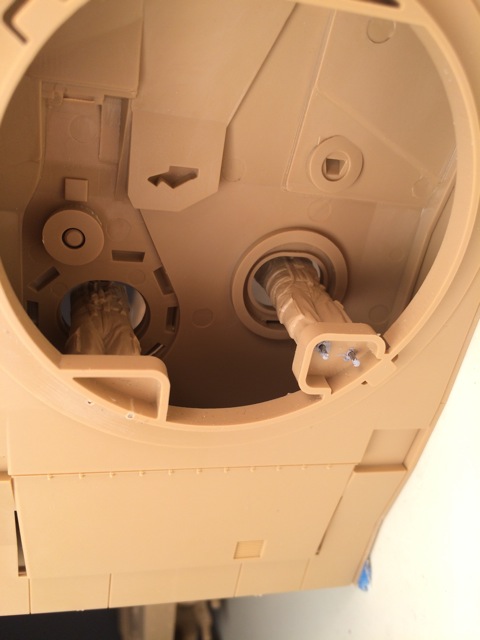
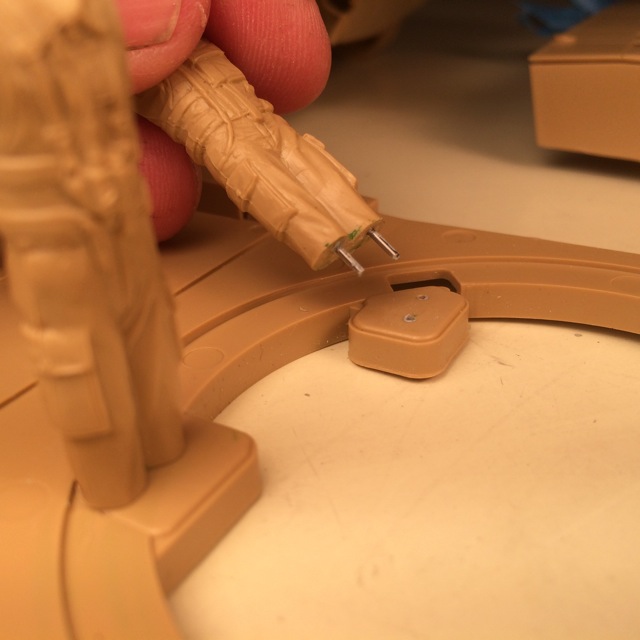
I would like to get the figure mounting squared away at this early stage (when everything is open and accessible), so that I can get them mounted on a pedestal for painting. Then its just a matter plugging them in at the end.
I figure out where I wand them posed, mark where there feet (legs) land, and then drill holes in the turret. I then temporarily re-pose them and (lightly) glue them in place. Then it's drill back up through the turret bottom to locate the holes for the pins in the legs. You get it. Once the torso is locked in place, the arms can be (hopefully) posed realistically, and glued on.
Thanks for checking in.
Cheers,
Bill
Thanks, Luis.
Thanks, Bob, Dave, and James!


_____________
"OK, So we didn't have a winner! The prizes will be rolled over to the next round".Name that tune. (Sorry about the clipping video and poor sound)
"There were prizes?"
No.
No prog rock fans from the way-back? That was "Dance on a Volcano" from the album A Trick of the tail by Genesis. circa ....wait for it ....1976.
Who is the old man?
"Don't care, we are here for the models, and you are losing us"
OK, sorry ...
_________________
Some progress.
I would like to get the figure mounting squared away at this early stage (when everything is open and accessible), so that I can get them mounted on a pedestal for painting. Then its just a matter plugging them in at the end.
I figure out where I wand them posed, mark where there feet (legs) land, and then drill holes in the turret. I then temporarily re-pose them and (lightly) glue them in place. Then it's drill back up through the turret bottom to locate the holes for the pins in the legs. You get it. Once the torso is locked in place, the arms can be (hopefully) posed realistically, and glued on.
Thanks for checking in.
Cheers,
Bill


Tamiya Challenger2
What's wrong with arms propped 3" higher than the surface, thought that was a given in modeling? Diggin' your solution Bill.
Sorry about the name that tune thing, I was into the redneck rock back then. :dude
What's wrong with arms propped 3" higher than the surface, thought that was a given in modeling? Diggin' your solution Bill.

Sorry about the name that tune thing, I was into the redneck rock back then. :dude
iambrb
Well-known member
Tamiya Challenger2
REALLY FINE WORK SIR!
Thanks, Luis.
Thanks, Bob, Dave, and James!


_____________
"OK, So we didn't have a winner! The prizes will be rolled over to the next round".Name that tune. (Sorry about the clipping video and poor sound)
"There were prizes?"
No.
No prog rock fans from the way-back? That was "Dance on a Volcano" from the album A Trick of the tail by Genesis. circa ....wait for it ....1976.
Who is the old man?ldguy
"Don't care, we are here for the models, and you are losing us"
OK, sorry ...
_________________
Some progress.
I would like to get the figure mounting squared away at this early stage (when everything is open and accessible), so that I can get them mounted on a pedestal for painting. Then its just a matter plugging them in at the end.
I figure out where I wand them posed, mark where there feet (legs) land, and then drill holes in the turret. I then temporarily re-pose them and (lightly) glue them in place. Then it's drill back up through the turret bottom to locate the holes for the pins in the legs. You get it. Once the torso is locked in place, the arms can be (hopefully) posed realistically, and glued on.
Thanks for checking in.
Cheers,
Bill


REALLY FINE WORK SIR!
wds
Active member
Tamiya Challenger2
Thanks, Luiz!
Thanks, Bob! No biggie on the music. I just wanted to lay in some background for a "start" video.
Thanks, Brb!
Thanks, James!
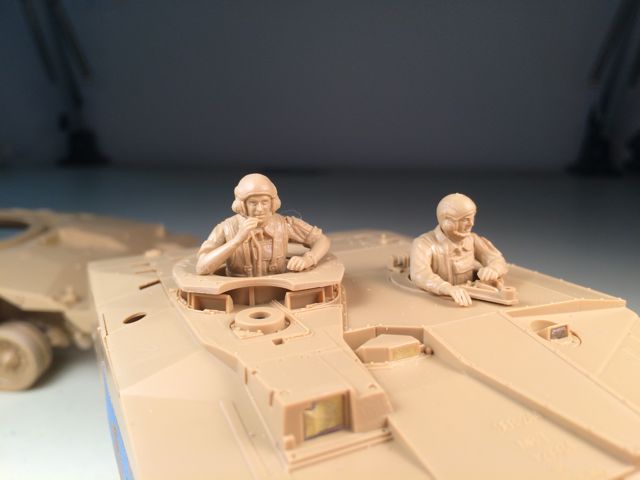
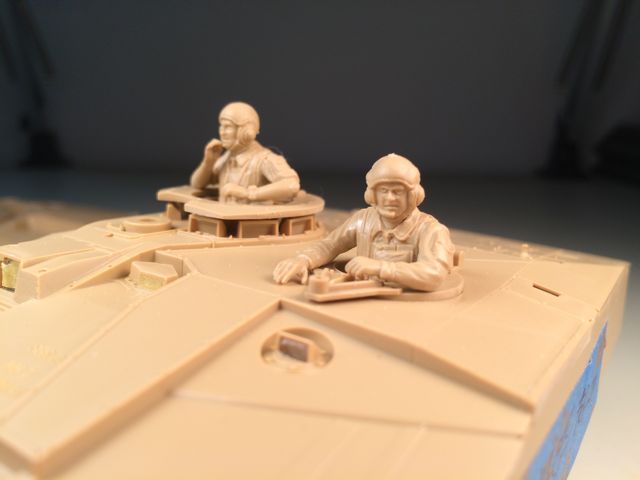
So here you go. These chaps need a lot of clean up before paint, but they are up to the task. Right-Oh!
If I can convince the commander (in the second picture) to lean into it a bit more, that left arm gap (the dreaded 3") will go away. :laugh:
Thanks for looking!
Cheers,
Bill
v85
Thanks, Luiz!
Thanks, Bob! No biggie on the music. I just wanted to lay in some background for a "start" video.
Thanks, Brb!
Thanks, James!

So here you go. These chaps need a lot of clean up before paint, but they are up to the task. Right-Oh!
If I can convince the commander (in the second picture) to lean into it a bit more, that left arm gap (the dreaded 3") will go away. :laugh:
Thanks for looking!
Cheers,
Bill


v85
Tamiya Challenger2


Skinny_Mike
Well-known member
Tamiya Challenger2

Mike

Mike
wds
Active member
Tamiya Challenger2
Thanks, Bob!
Thanks, Mike!
Fixing a goof.
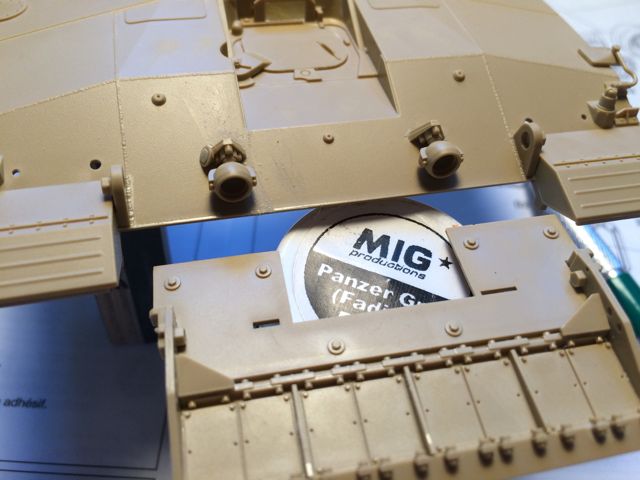
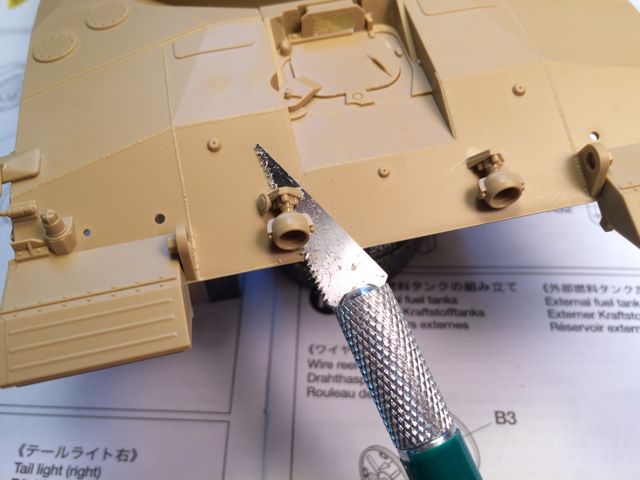
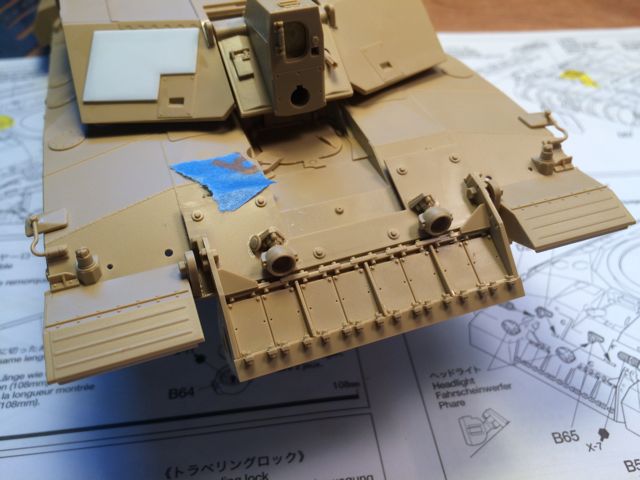
Because this is a newer ( ..ish c. 2004) Challenger II model, and uses the hull and other sprues from an older (1984) Tamiya kit, I saw the slots on the glasis for the headlights, and glued them on. They were supposed to go on the “add-on” armor on top of the glasis. So, … a little flush cutting with the #11 saw (from Mico Mark) and it was sorted out. The scaring from the cut was covered by the armour, and I didn’t loose too much material off the lamp bases. . I got lucky on this one.
Thanks for looking.
Cheers,
Bill
Thanks, Bob!
Thanks, Mike!
Fixing a goof.

Because this is a newer ( ..ish c. 2004) Challenger II model, and uses the hull and other sprues from an older (1984) Tamiya kit, I saw the slots on the glasis for the headlights, and glued them on. They were supposed to go on the “add-on” armor on top of the glasis. So, … a little flush cutting with the #11 saw (from Mico Mark) and it was sorted out. The scaring from the cut was covered by the armour, and I didn’t loose too much material off the lamp bases. . I got lucky on this one.

Thanks for looking.
Cheers,
Bill


