• Modelers Alliance has updated the forum software on our website. We have migrated all post, content and user accounts but we could not migrate the passwords.
    This requires that you manually reset your password.
    Please click here, http://modelersalliance.org/forums/login to go to logon page and use the "Forgot your Password" option.

SU 152

jknaus

Administrator
For Tony

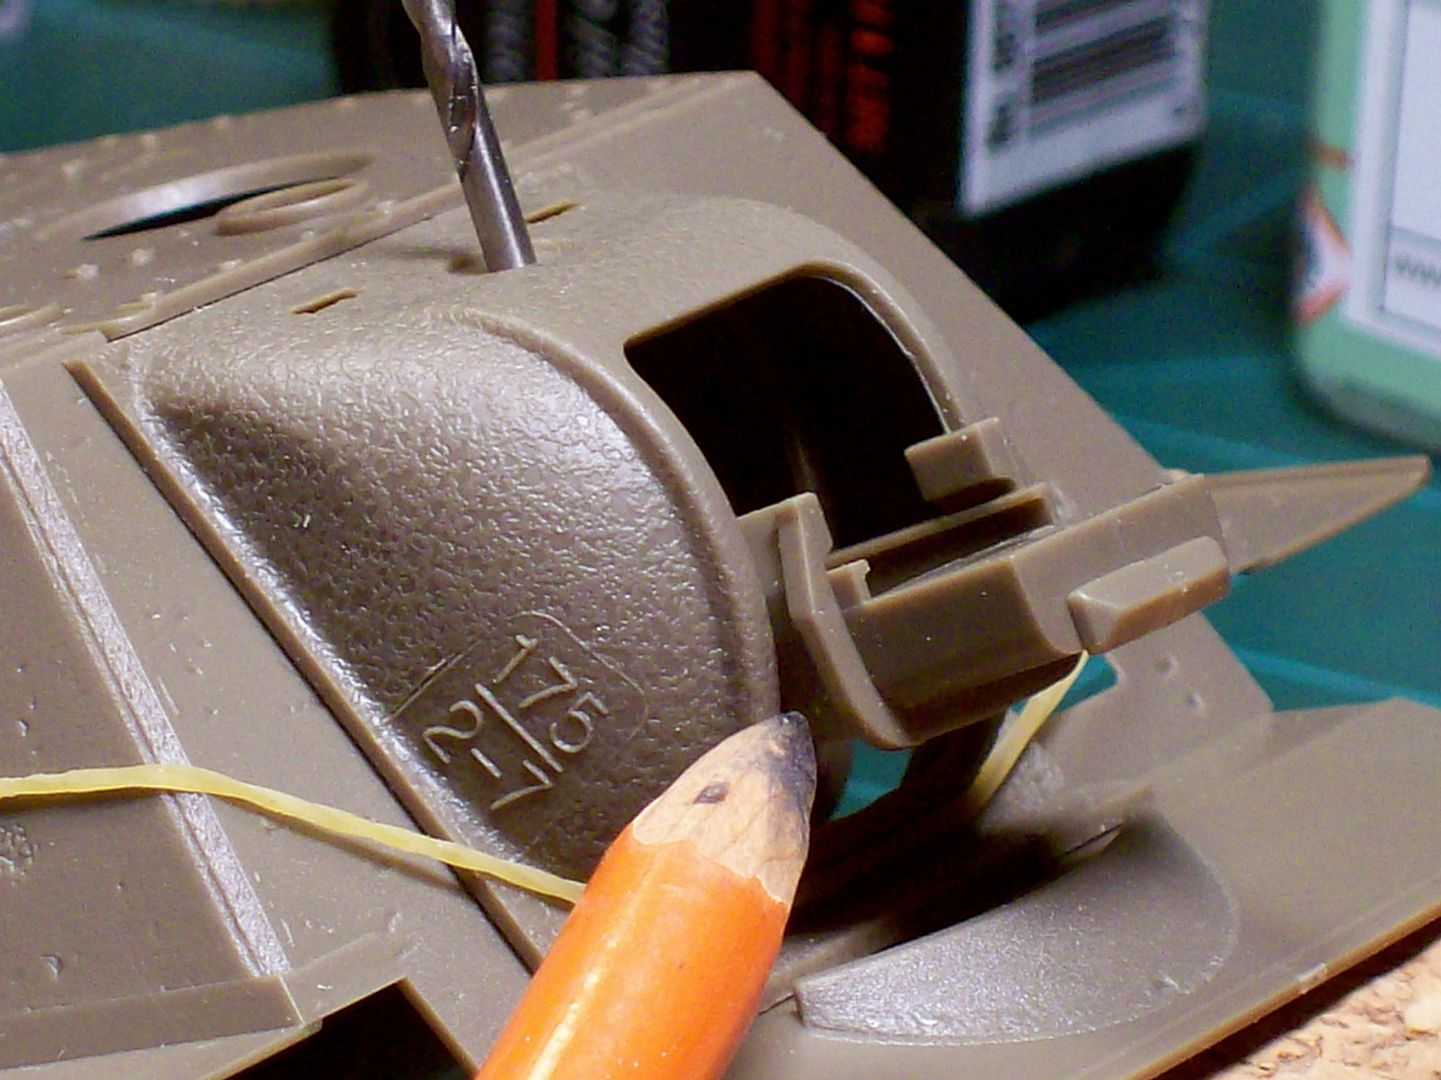
Figure this might be easier Tony.

DSC03020.JPG


DSC03021.JPG


DSC03022.JPG


DSC03023.JPG


I can seat the mount bottom into the hull . Then when you slide the mantle up in order to trap the mount top it pushes the mount out of position and the bottom slips out or the mount breaks in half. If you install the mantle first you cant get the gun in unless you use a lot of force and then it pops either the mount or the mantle. I got it togther onece but on installing the top pin the pressure was such that the mantle slipped and the pin went who knows were. Looking forward to your build to see what you do at this point.
Hope that helps.
James
 
Re: For Tony

OK James i've got the idea now. :idonno

I've been spraying some base color on the Sexton so I can get the interior painted and
my compressor just shut off.
May have just gotten hot and tripped off or because it's a cheapy but I can't complain because i've sure got my moneys worth out of it.

If it don't come back on when it cools i'll assemble the gun and see what's shakin.

Later buddy
Tony lee
 
Re: For Tony

James it should be against the law for me to be so G O O D. :rotf

I cut off the sprue the parts in question. Assembled the barrel tray or barrel cradle or what ever you call the thing. Glued the universal joint around the tray as per the instructions and let that set up.
I put those parts through the casement and slipped the mantle on the front and just like your said nothing fits like it should.

I looked that thing over inside, outside and sideways and determined that the mantle was not going back far enough. For it to position where it needed to be the collar on the front of the tray had to be on the outside of the mantle.

Looking over the instructions farther ahead at step #27 you'll see that I figured right.
002-24_zps0893e93d.jpg


Once you wiggle and twist the collar through the mantle opening everything fits A OK.
001-27_zps0fa4b3f0.jpg

I used a drill bit as you can see instead of the kit trunnion pin.

Sure hope this is your problem and fixes you up right as rain.
Holler iffen it don't.
Tony lee :D
 
Re: For Tony

As a matter of fact I fixed my problem.You got me thinking and wondering and I pulled the kit out again. I tried and tried again and nothing happening. Then I tried fitting the mantel in place and then the cradle even though I knew that wouldnt work. Short story long I noticed there is a ridge inside the mantle on top. The collar has a furough in it. I pushed the top of the collar instead of the whole gun and it snapped into the ridge slick as a whistle. Put a piece of brass rod in the top and now I am going to go and glue it all together. I'll have to cut the rod to size and then make a plate to replace the pin and carry on. Might get this to paint booth this weekend. Many thanks for getting me looking at this again.
James
 
Re: For Tony

Well i'll be dang (y)

I must have hit the sweet spot and didn't know i did. :gogo

Good job James now get R painted.
Tony lee
 
Okay I have started again on this model, the Bronco SU 152 thanks to Tony and his help in getting me re interested. above is the thread that got me going.
James
 
Okay first thing is when you go to put the mantle cover on (the big hunk of plastic covering the front gimbol) there are two huge pegs left over from the molding process. Not very impressed that Bronco would leave these here. I cut them out and then used a dremel tool to clean up. The insides also have a bunch of excess mold marks which look really bad even when you wont see them on the finished model. Just seems to be unprofessional.

I got to where I put the fenders on and then dry fitted the top to the bottom.

DSC03026.JPG


DSC03025.JPG


And that is were I am now. I promise I will document the rest of this build. Thanks Tony for the push :D
James
 
From Russia with love it is :cheer:

I have a weakness for those rough and beasty Russians.
Go for it friend, Im gonna watch your paintjob !

Succes, Willem
 
This is a really nice kit, but there are some problems. If you've read so far you know some. Just found the instructions want you to mount some rings (tie downs??) but dont bother showing what they mount to. No part number and not in the diagram. I think I know which part it is, but working through slowly. Got more built this aft and then gloss coated parts of my Fokker DVII so I can decal tomorrow. Will post pics later. Getting very close to paint time.
James
 
Back
Top