• Modelers Alliance has updated the forum software on our website. We have migrated all post, content and user accounts but we could not migrate the passwords.
    This requires that you manually reset your password.
    Please click here, http://modelersalliance.org/forums/login to go to logon page and use the "Forgot your Password" option.

Revell PBY Catalina in RDAF colours

Thanks for the comments everyone! Glad you are enjoying this build! I know I am! Just wish I had done more earlier in the year than I did because I'm feeling the pressure to complete this before the deadline.

Crunch time! This one is going to be close!!!

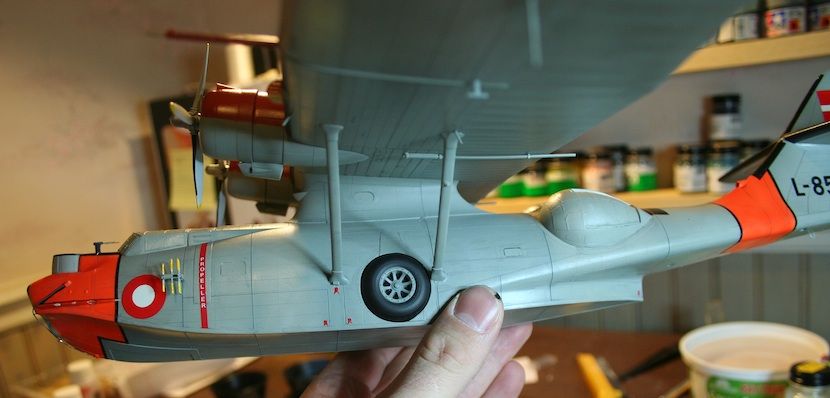
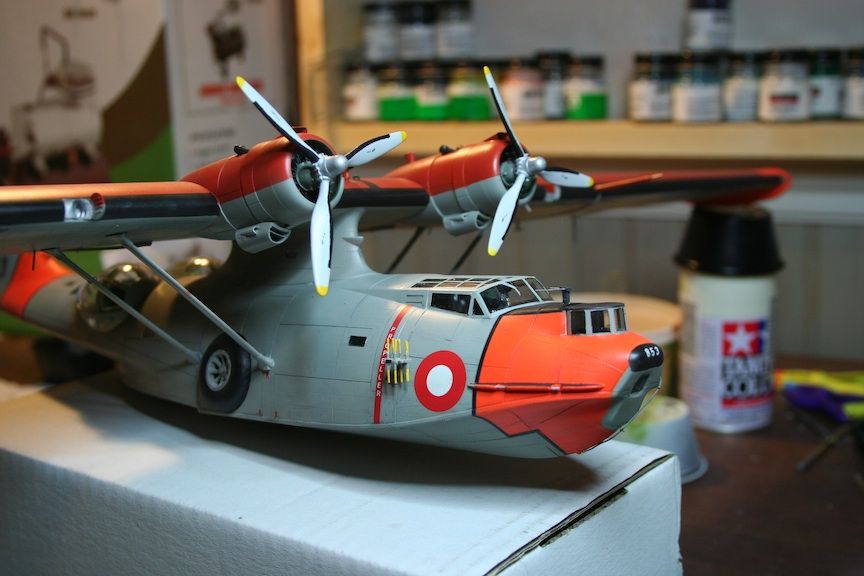
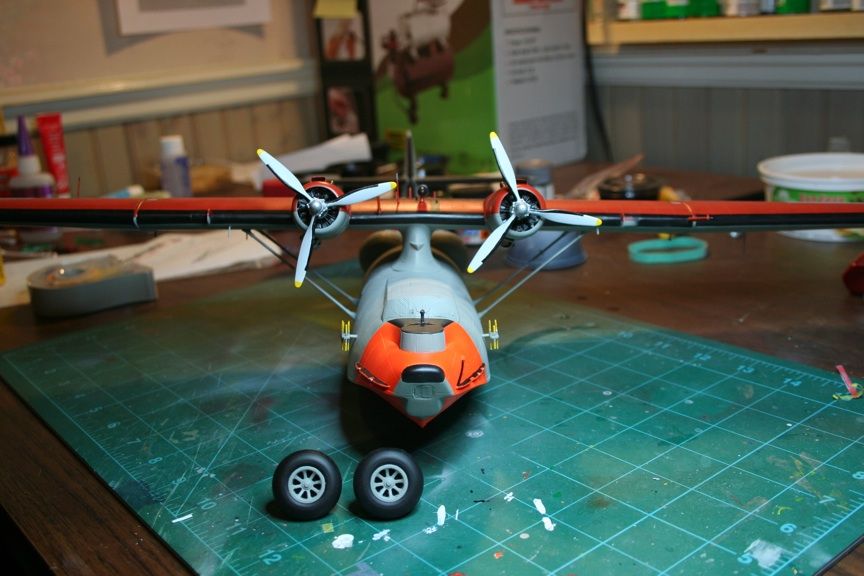
Wheels and props done!

pb169_zps0877dc70.jpg


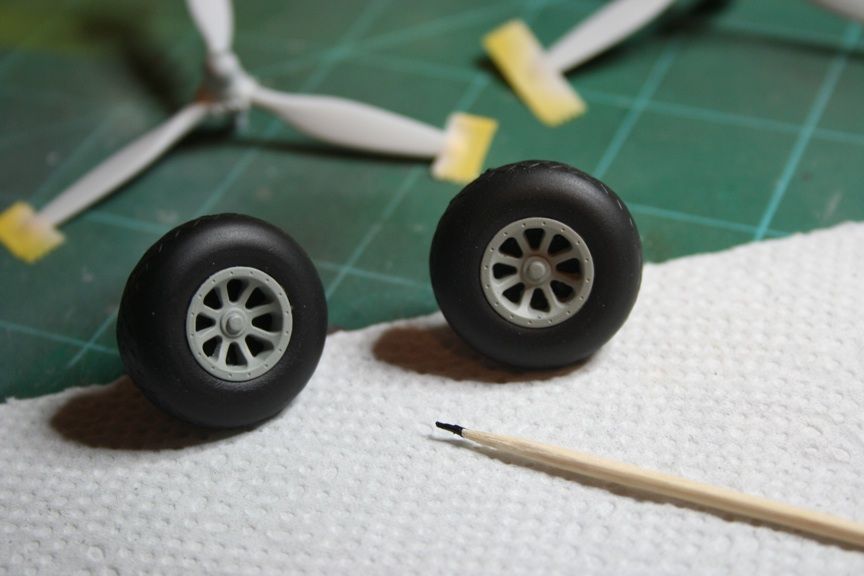
For the wheels, I used the end of a tooth pick dabbed in some Model Master semi gloss and just stuck it in the spaces of the wheel. Worked quite well!

pb170_zpsb5012384.jpg


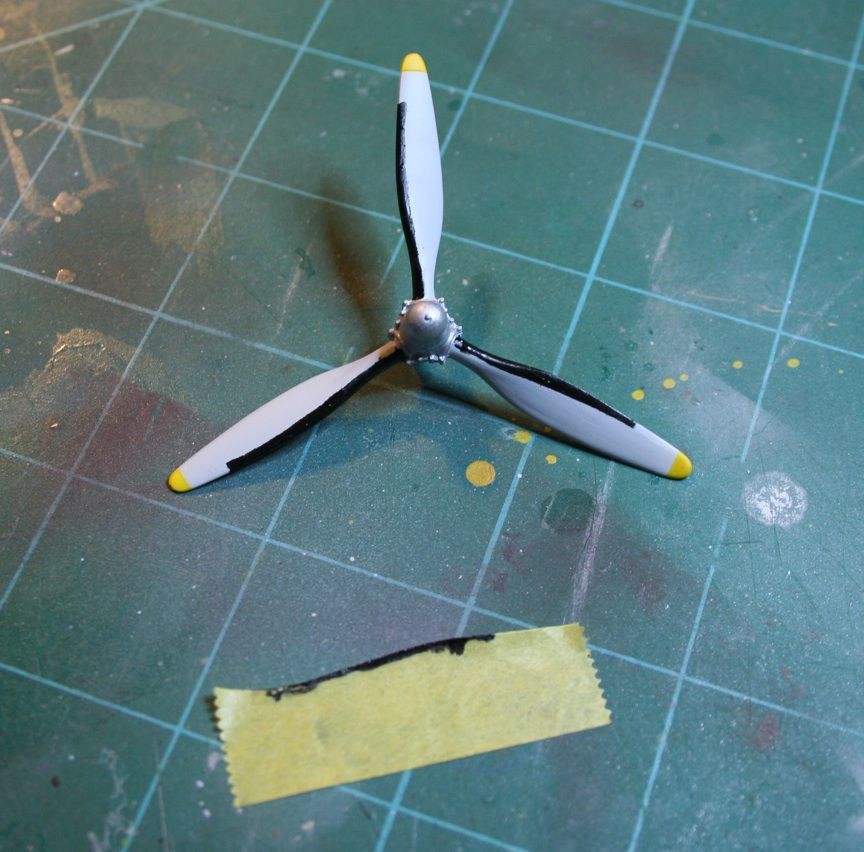
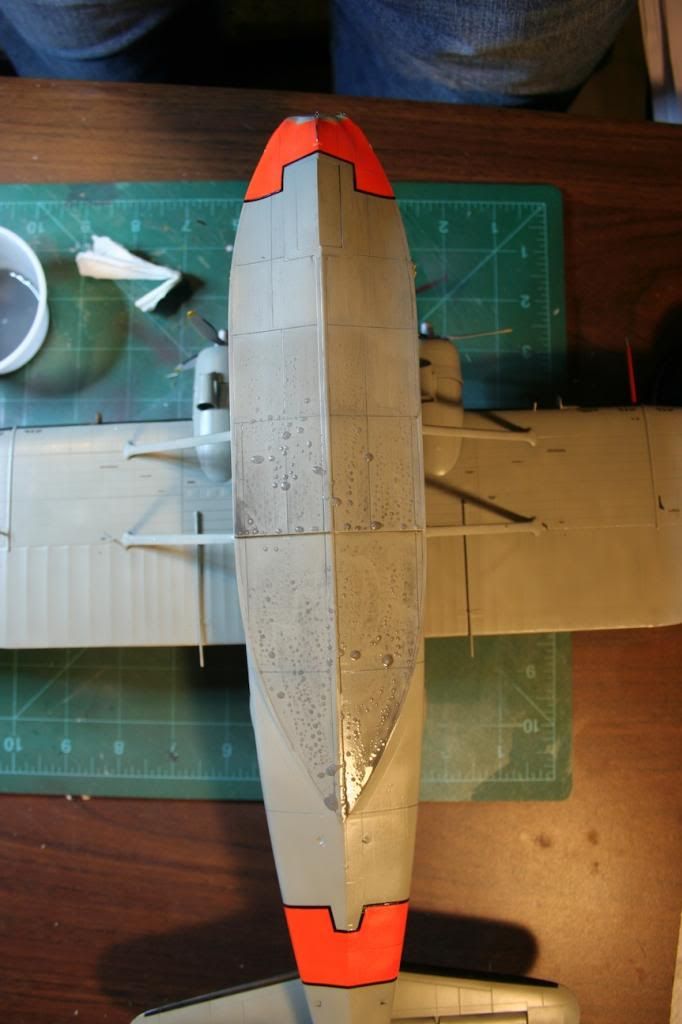
For the props, they had their tips painted white, then yellow from before, then I air brushed them light grey and used a simple mask of a piece of tape to make the black markings. Hubs are silver.

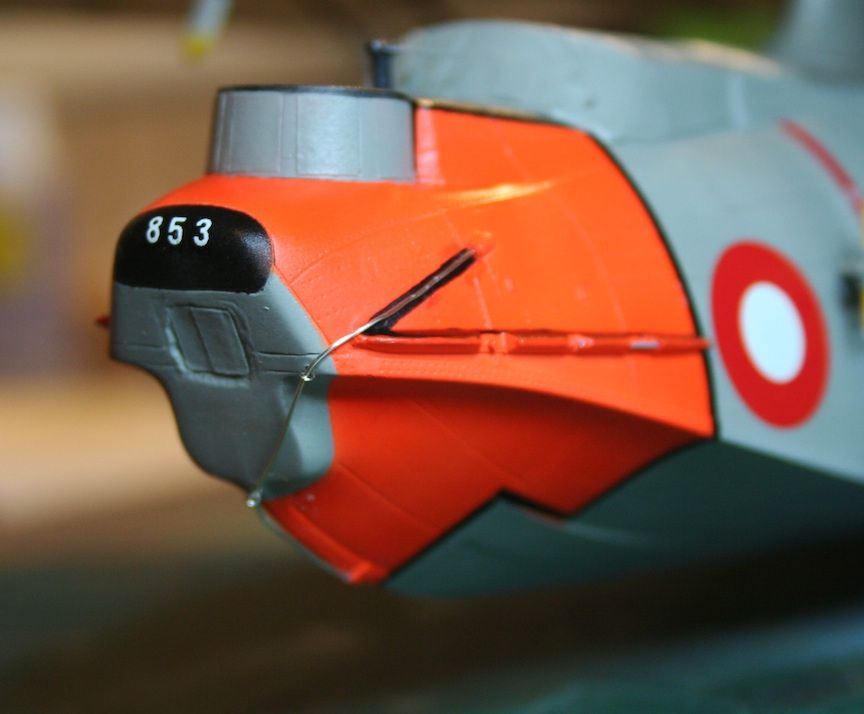
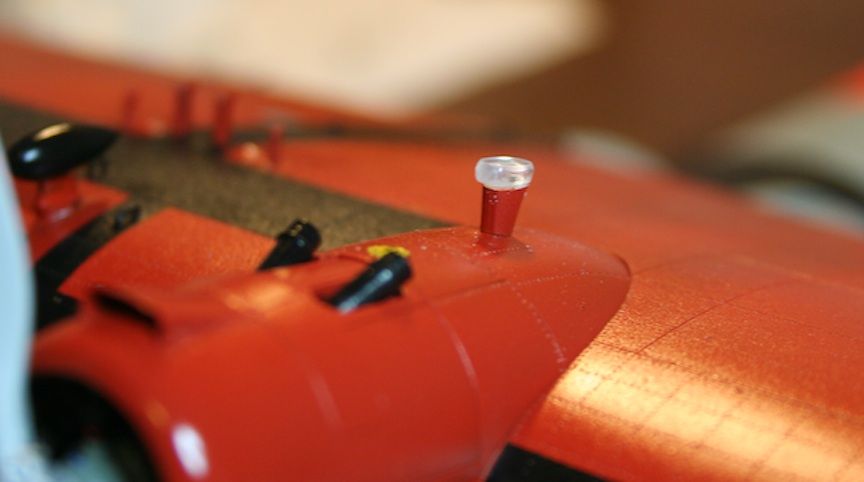
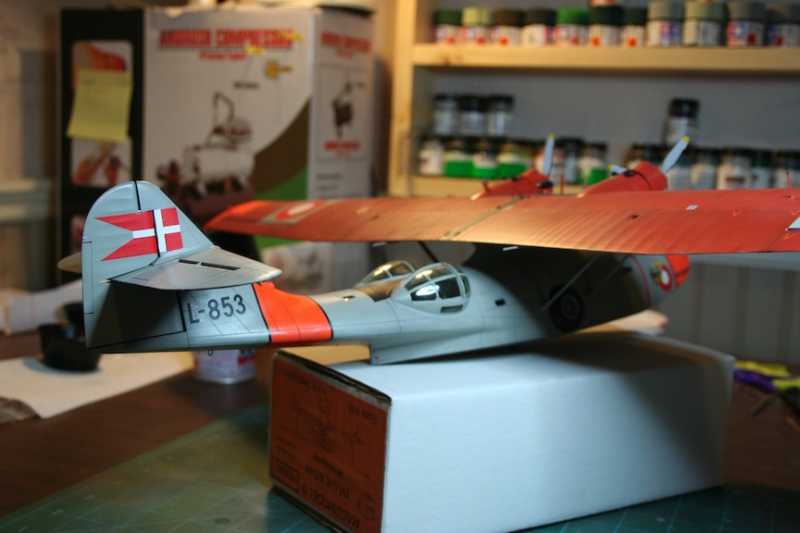
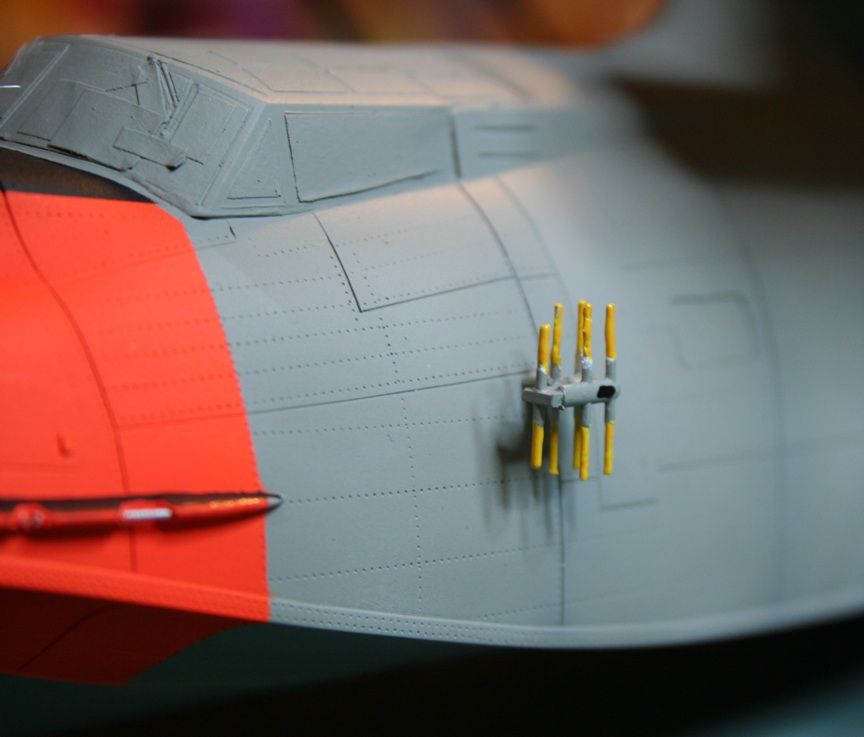
Got the side fuselage antenna arrays on and painted.

pb171_zps65b94a1c.jpg


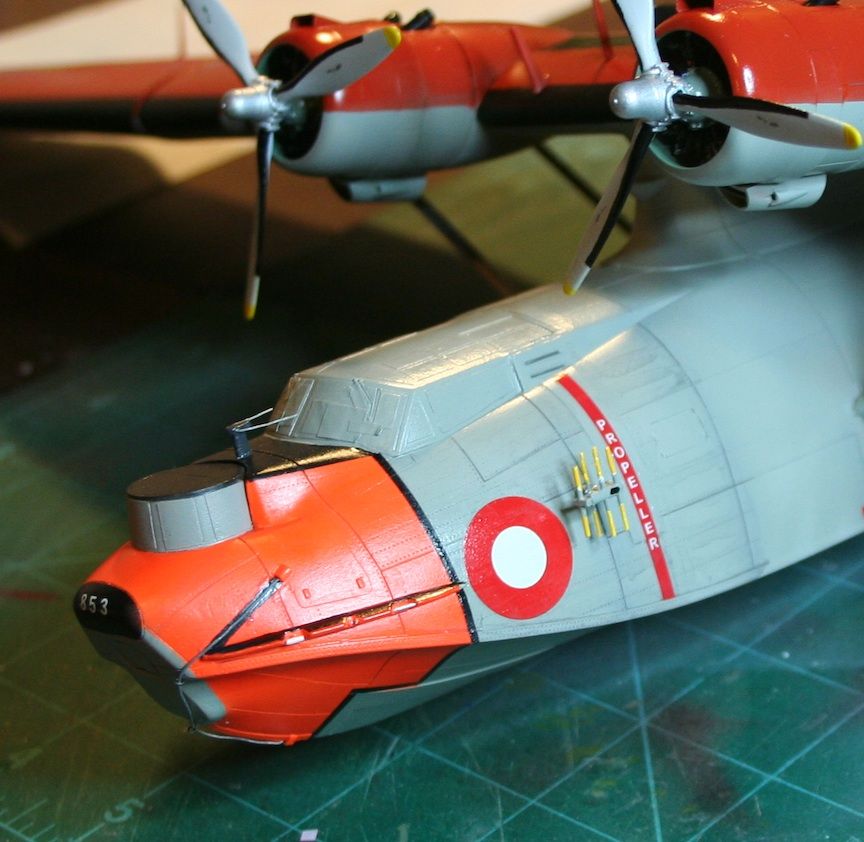
and the props attached

pb173_zps64f8f905.jpg


Just started to give it a bit of a gloss coat tonight in a few key areas. I don't want anything to bleed. I'm going to use a spray can to gloss coat the rest tomorrow (otherwise it'll take me forever). Then decals, a little bit of a wash and weathering, a couple last fiddly bits, rigging and a dullcote. 7 days to go!!!!!     :gogo

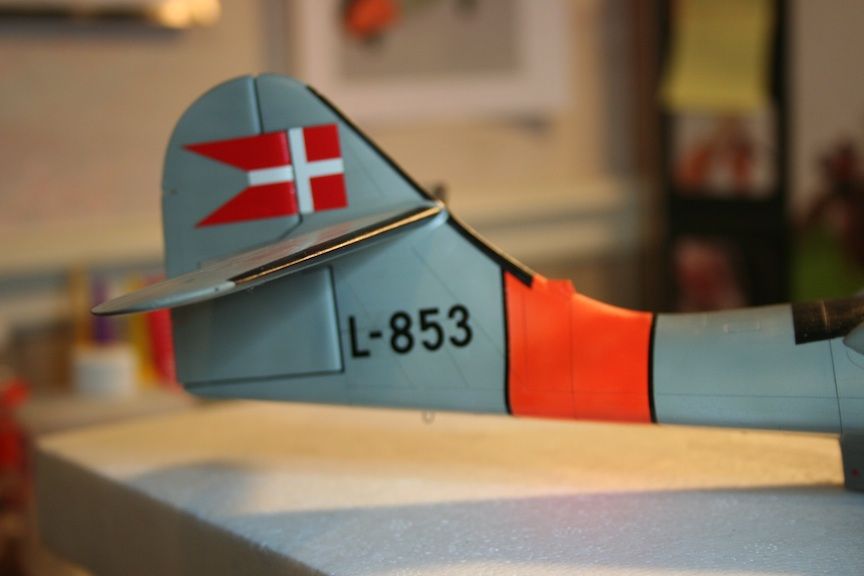
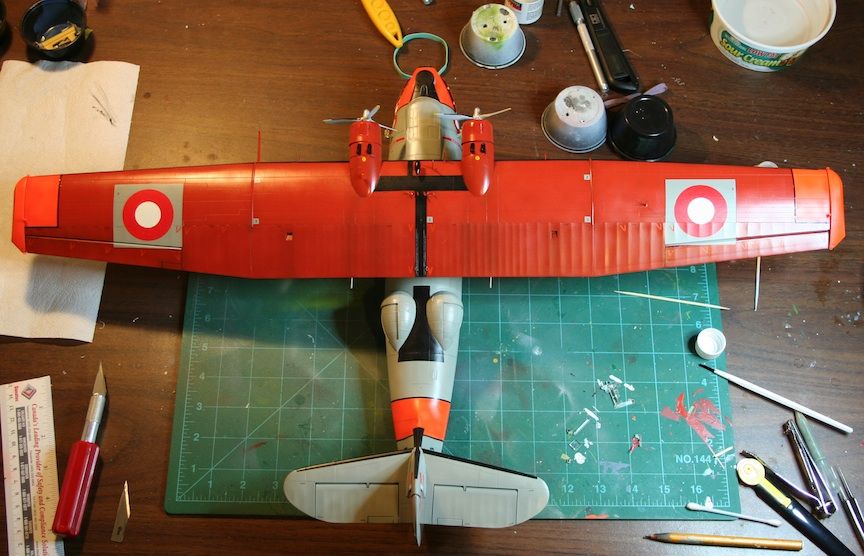
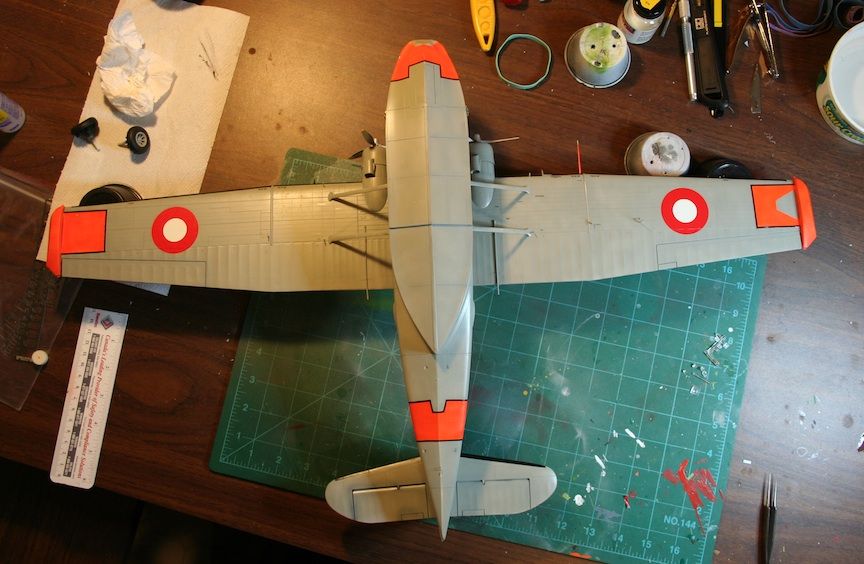
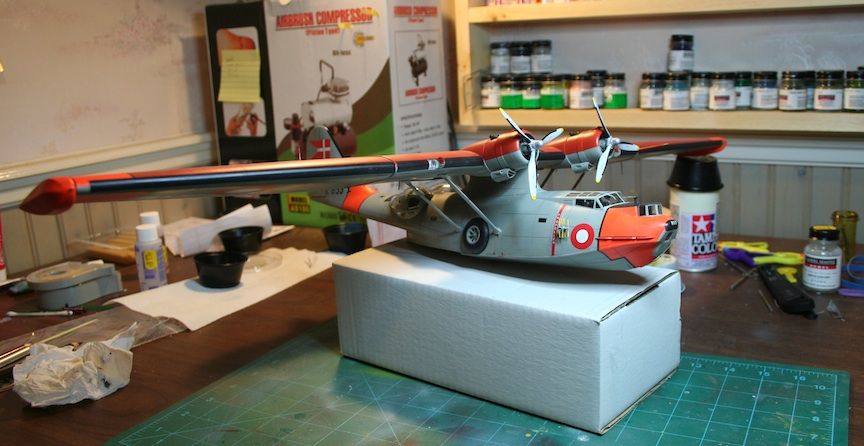
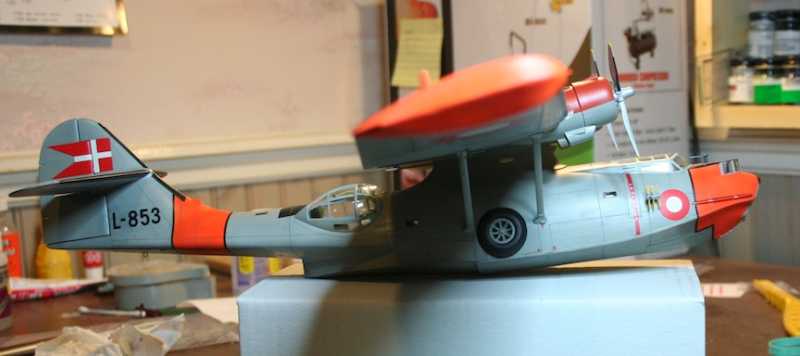
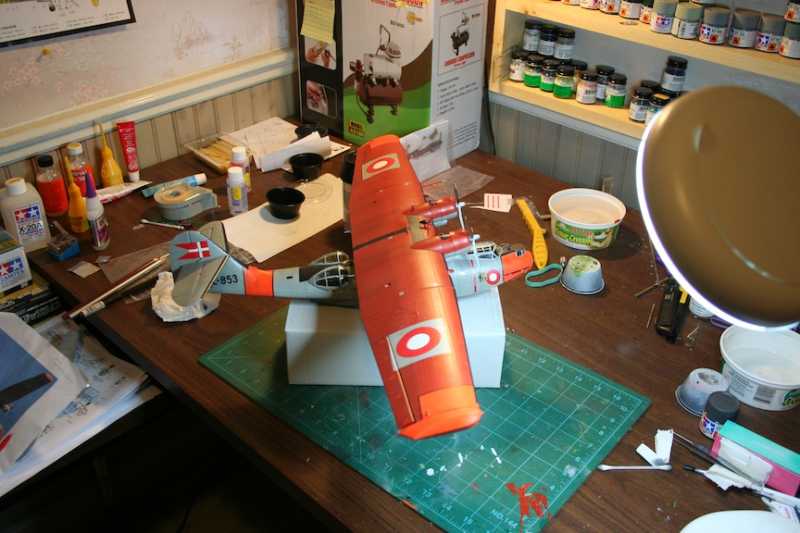
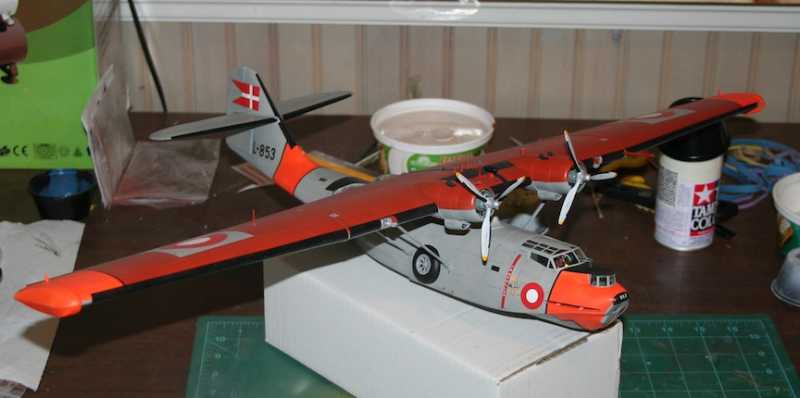
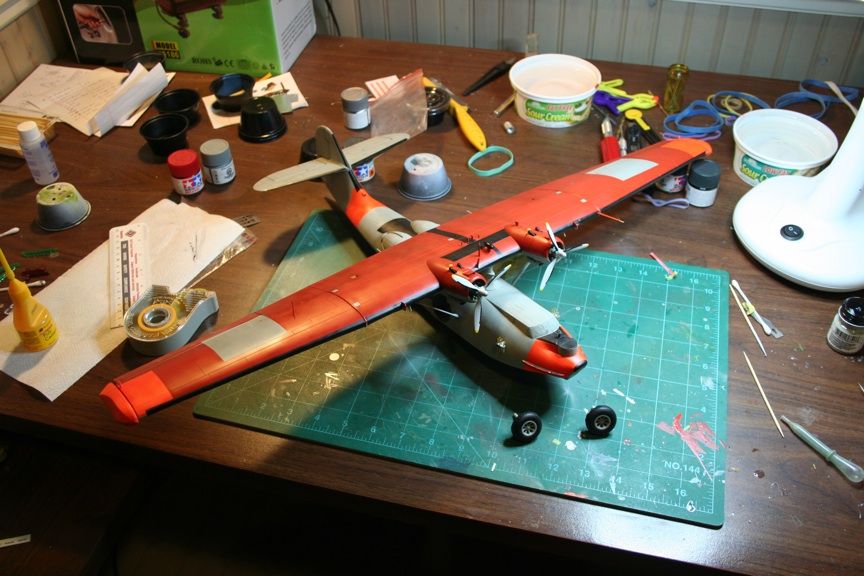
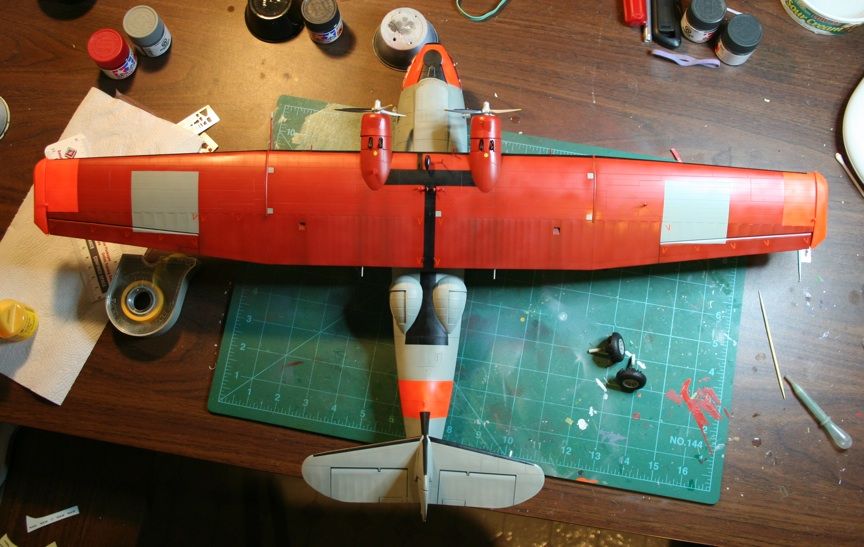
a couple overall shots....sorry the lighting sucks!

pb172_zps07e57945.jpg


pb174_zpsd198c113.jpg
 
Gotta find something to use as the pendent too!!

Any suggestions? I was thinking just a piece of wire.....
 
Spectacular. I think wire frame for the pendant would do the trick just fine. Really love the paint scheme on this and your attention to detail is excellent. (y) (y) (y)
James
 
Thanks Adam and James!

This is definitely the most masking I've ever done on a kit before! I've learned a lot!

Yeah, i think I might go with wire for the pendant.

;)
 
Thanks guys! I won't rush it!

Got the gloss coat on and finished off one session of applying decals tonight. Going to take a second night though and then I'll get some more updates posted.

:drinks
 
You got a place to display that Cat ?

If you don't have the room I will proudly display it on my shelf. :D

I actually don't at the moment Chris. My current modeling space is basically a bench and a shelf right now, and the shelf is full!
I didn't think that far ahead when I started this!


Adam, that has to be the best comment I've ever received!!

:drinks
 
Well, congratulation to you Sharkman. That's a keeper .

When I started back to building a few years ago I went and bought three display cases so i would have a place to keep them .

That's also why I build in 1/72 . Still no heavies, although I'm considering one this year.

Very nice job !

Cheers, Christian B)
 
3 days and counting!  At this point, I'm not sure if I am going to finish on time but I'm going to do my best.

The decals took a little longer than I thought, 2 full evenings worth but they turned out well and I'm happy with the results.

pb175_zpsc96e2a41.jpg


this one is a little blurry, I ended up cutting the flag decal in half so that it would lay down properly.

pb176_zps29497109.jpg


pb177_zps1e00e83b.jpg


pb178_zpsfbdf69d1.jpg


all the black outline decals took the most time (and those big danish roundels). I actually forgot about these one on the bottom of the wing and just added those tonight.

pb179_zps9173984f.jpg


Also tackled the pendent tonight and found something I'm happy with. I used a piece of wire and made a couple small eyelets to guide it through. I had a small hole drilled into the anchor locker and then just drilled a few more to accept the eyelets and one on the lower part of the hull.

pb181_zpscb73b93d.jpg


here are the eyelets. Just twisted some thin wire around a drill bit.

pb180_zps86fb7aa0.jpg


then it was on to making lights. These are all from scrap bits of clear plastic. From left to right; the wing markers (I drilled some small holes for bulbs), the tip of the skinny piece will be the new tail light, and the 2 on the right are the before and after of the anti collision light. I sanded it down with my Dremel and a finger nail buffer.

pb182_zpsbf1e10f1.jpg


here's the fingernail buffer. Works really well for $1.79!

pb183_zps30843dba.jpg


Here's the anti collision light in position. I might attack this a bit more with the buffer and file. One I get the flat coat on, I'll paint it clear red.

pb184_zps43456315.jpg


That's all for tonight. Hope to get another gloss coat on tomorrow night, then some light weathering.
 
Well, on the eve of the end of this GB, I have to say I won't make it. There's not a lot left to do, but I won't finish by tomorrow. So, I'll post what I have to date! Not such a big deal for you guys here though!

I got a second gloss coat on last night and it dried today. So tonight, I tried to apply a light wash. Just to dirty it up a little. I used Tamiya dark grey for this.

pb185_zps26458361.jpg


I started to apply it and it does look good, VERY subtle and just what I wanted but it doesn't show up in the pictures very well. All my reference pics seem to show a working plane with minimal weathering so that's what I was going for. Just wish it stood out a little more!

pb186_zpsafd477f8.jpg


I still find washes are a bit of a challenge to me, something I still need to work on!

getting the bottom messy...

pb187_zps6ec7067d.jpg


I finally plunked the wheels into their sockets, this worked out well!

pb188_zps991455d7.jpg


and then after a final flat coat, I took of the window masks!

pb189_zps11ebfeb9.jpg


pb190_zpsc76cb266.jpg


hbc571e1.JPG


h56bde37.JPG


h9cebe4b.JPG


So, where I stand right now is she needs the maker lights added, the wire rigging, and I was hoping to add a bit more Tamiya smoke to the engine exhaust and try a bit of pastel powders for the final weathering. So close!

Anyway, I will have it completely finished soon! Feel kinda bad for not being able to complete it on my first group build!

Oh well! Here's a final pic for tonight.

hd36fc1e.JPG


:soldier
 
Back
Top