• Modelers Alliance has updated the forum software on our website. We have migrated all post, content and user accounts but we could not migrate the passwords.
    This requires that you manually reset your password.
    Please click here, http://modelersalliance.org/forums/login to go to logon page and use the "Forgot your Password" option.

PV-1 Nightfighter-FINISHED !

Old Dog

Well-known member
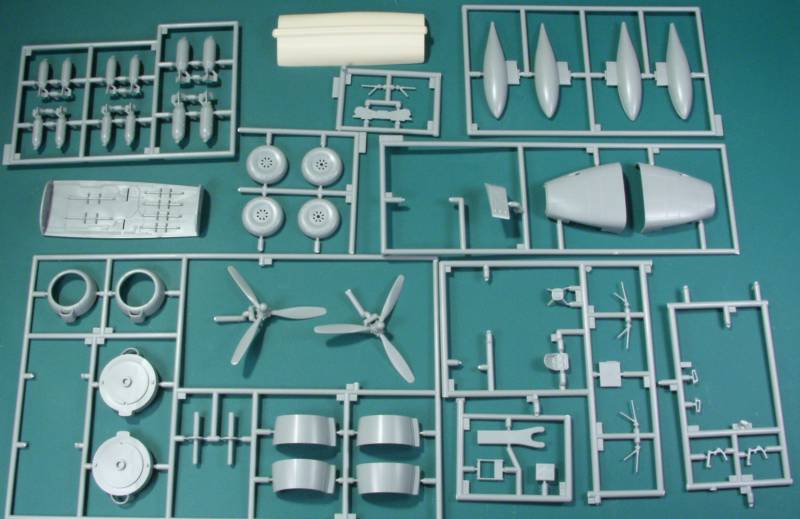
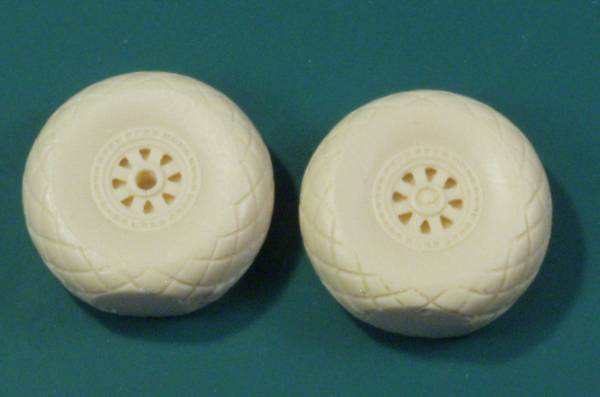
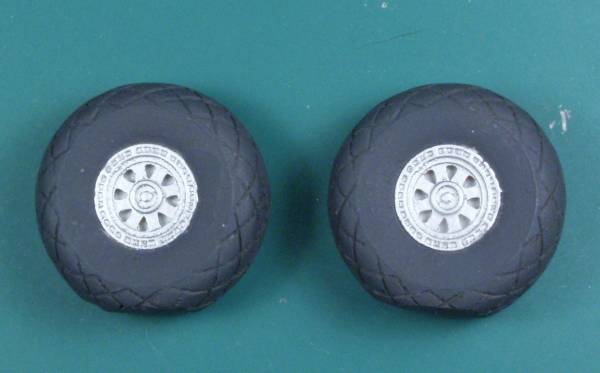
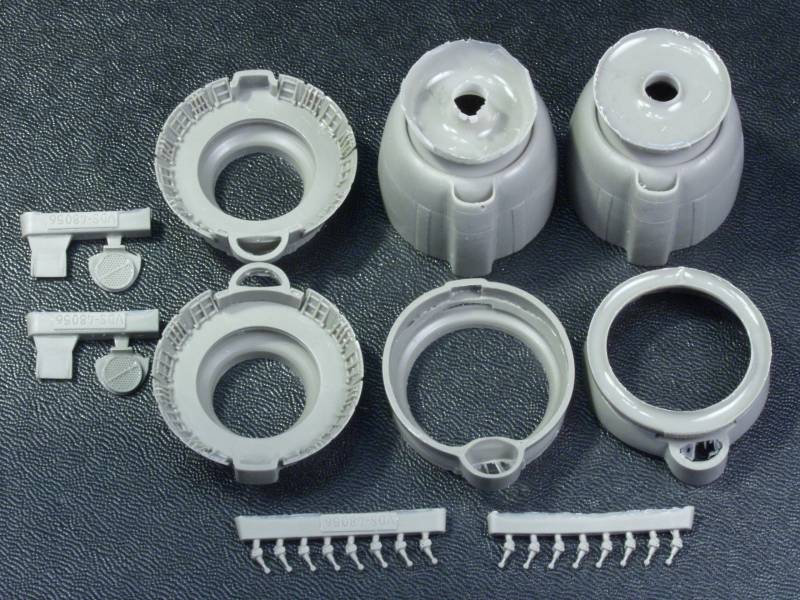
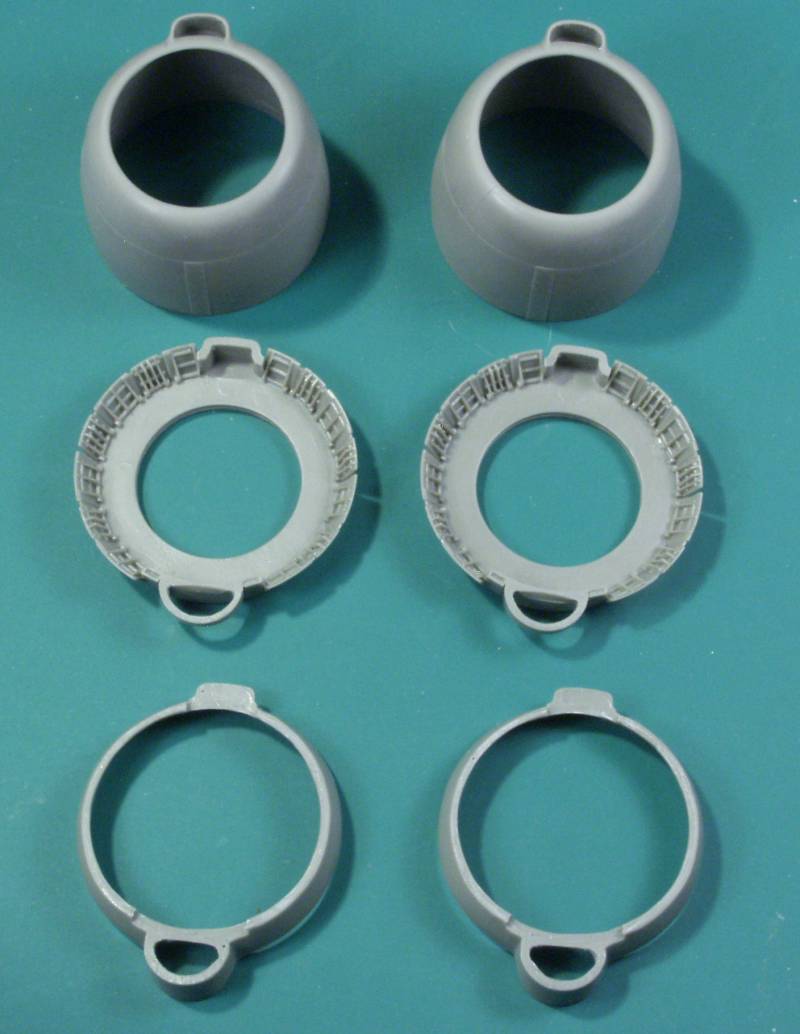
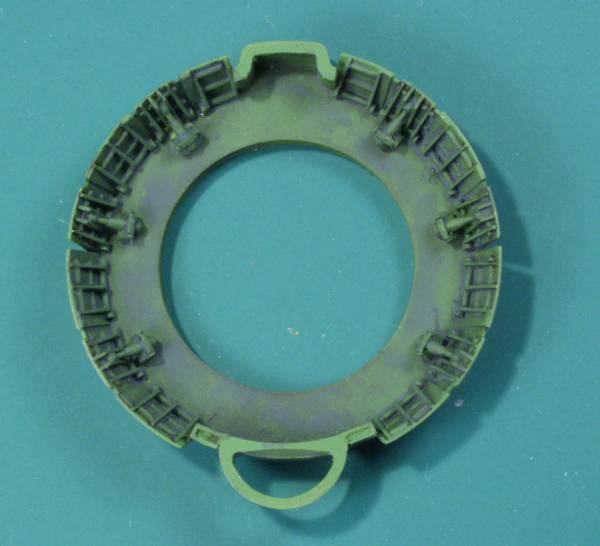
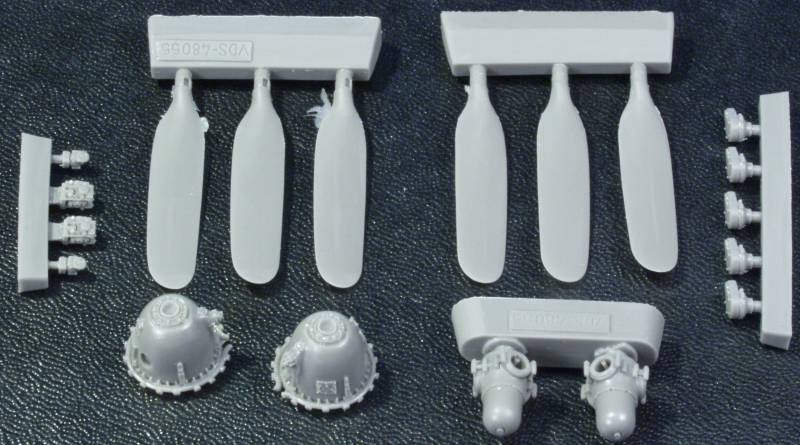
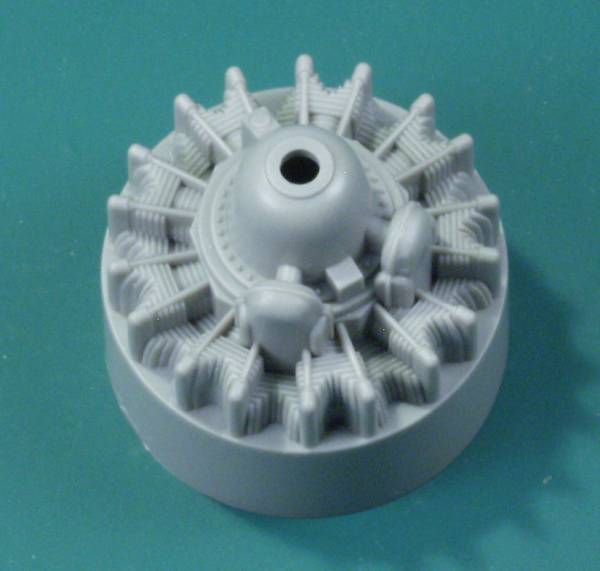
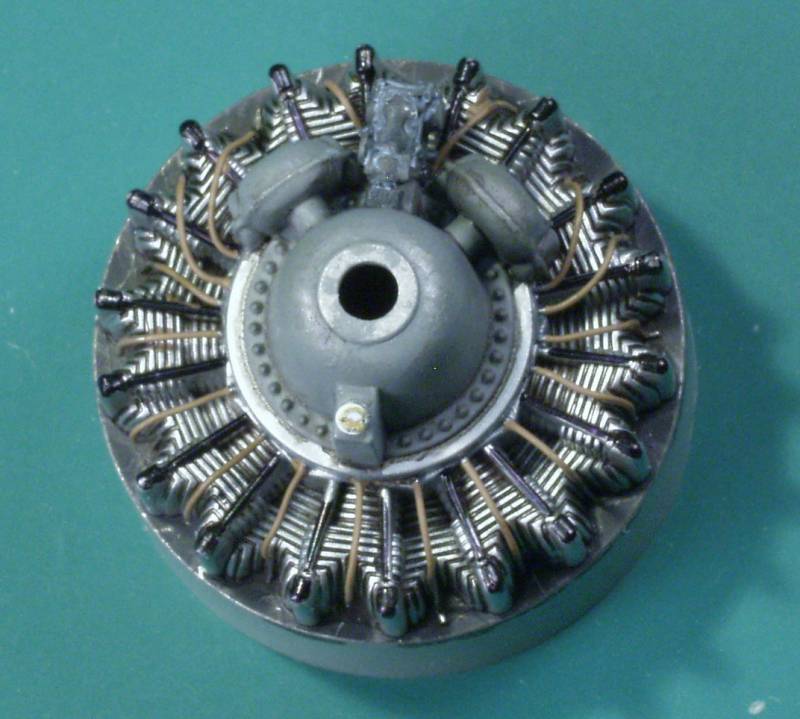
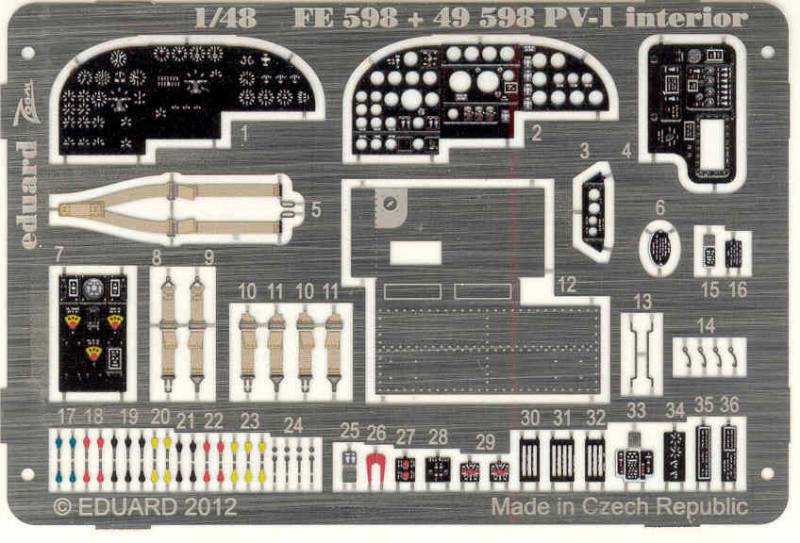
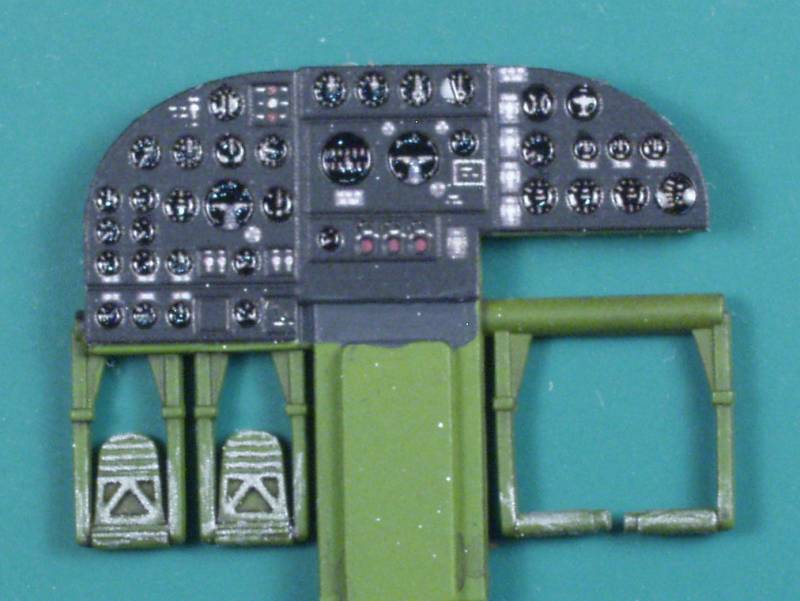
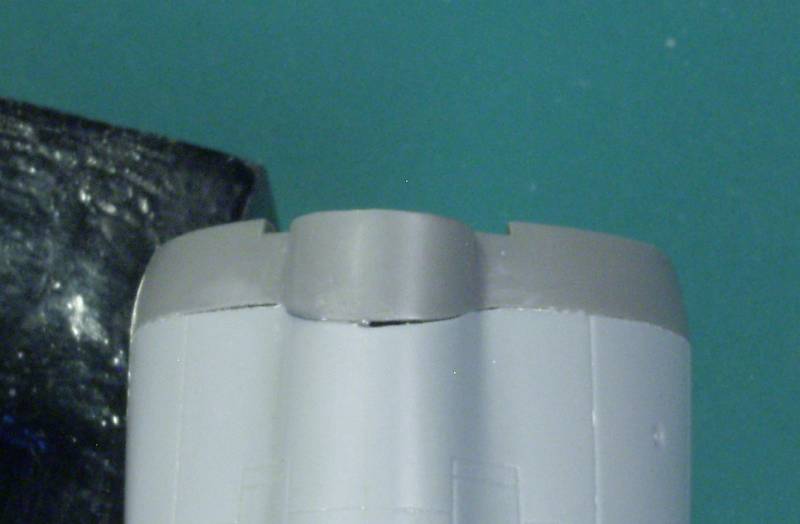
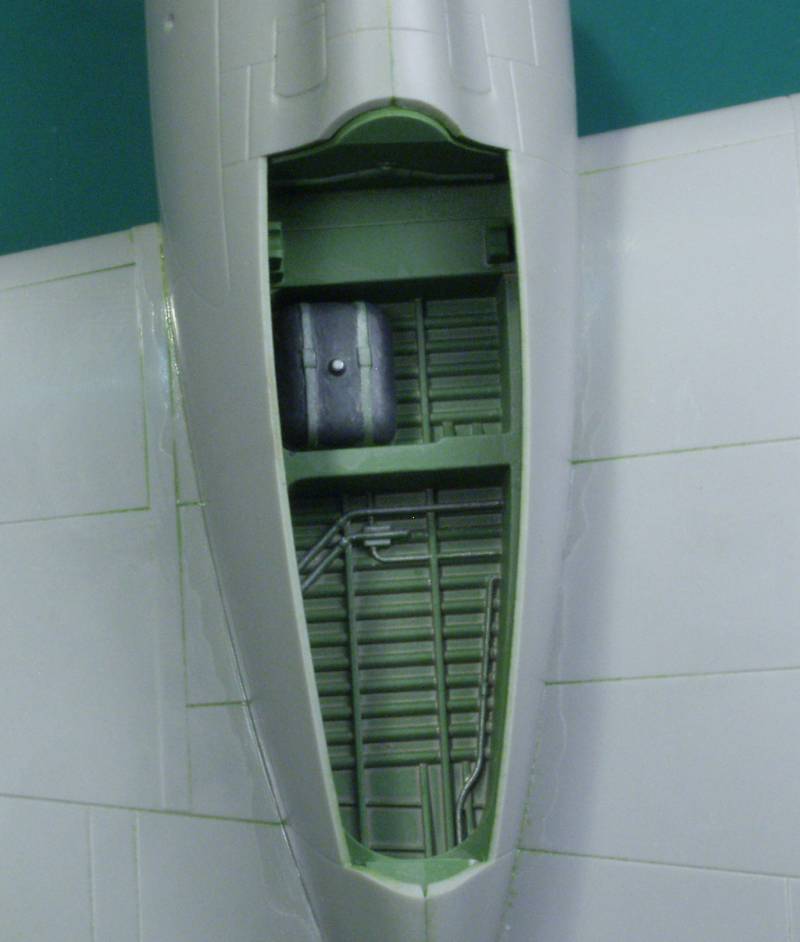
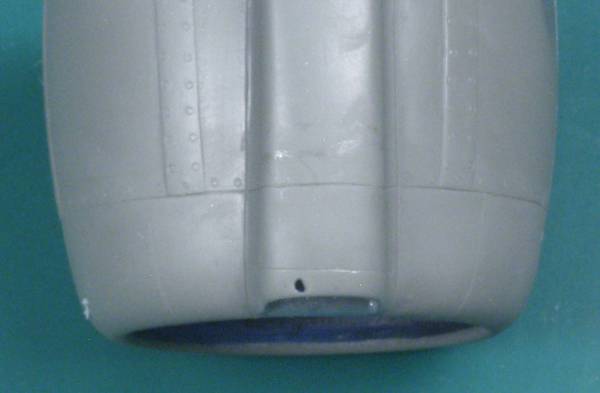
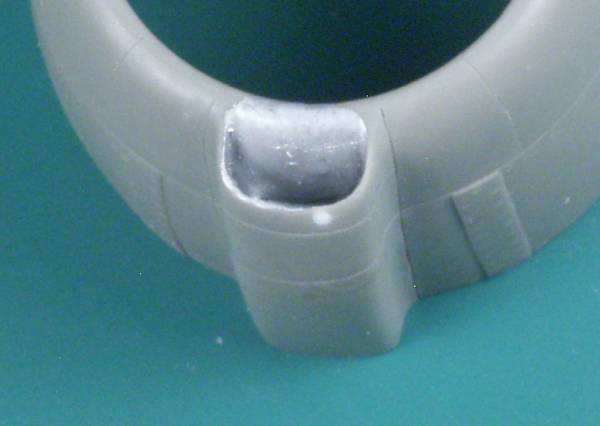
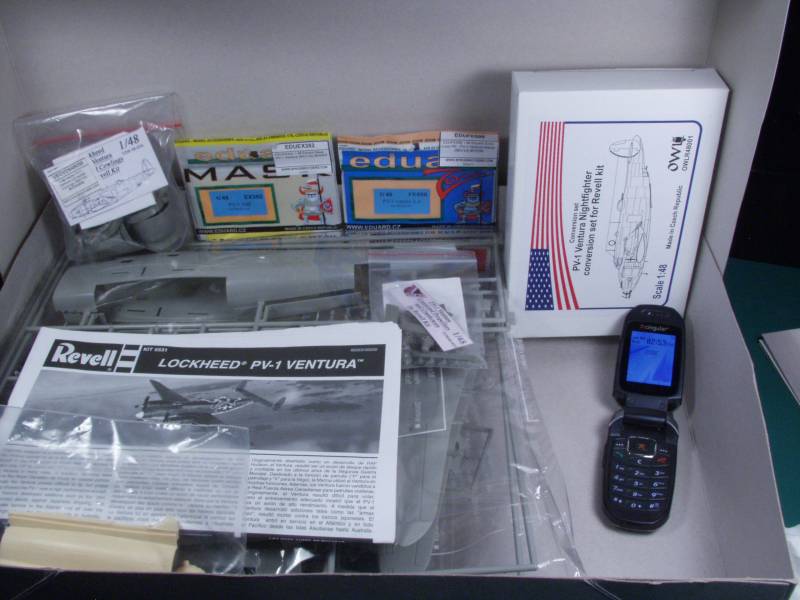
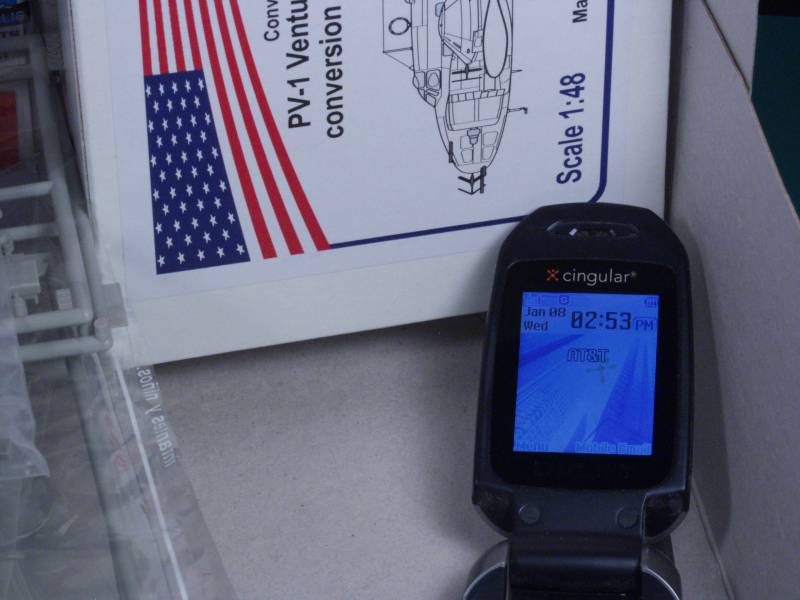
Time to cut bait or plastic on this one. First the obligatory time stamp photos

pv1timestamp1.jpg


pv1timestamp2.jpg


First a little about how the PV-1 became a night fighter...Well it seems that Marines decided they needed night fighters to protect newly won bases from night attack and to chase off or destroy nuisance attacks that kept troops from getting any rest at night. Unfortunately there wasn't much available. The Air Force was attempting to use the A-20 converted to the P-70 and the P-61 was still on the drawing boards and the likelihood of procuring any Beaufighters or Mosquitos from the British was slim to non existent. The Navy tried using radar in Corsairs and Hellcats but found that asking the pilot to be both pilot and radar operator was a bit too much multitasking. About the only multi-engined aircraft available was the PV-1. They installed in it the MK IV radar that the British were using and added four additional 50 caliber guns in the nose and reduced the crew to three, Pilot, radio / radar operator and turret gunner. While it took a while to get up to speed on all the new technology and methodology in the end they were way more successful with the PV-1 than the Air Force was with the P-70 finishing the war with 12 confirmed kills versus 2 for the P-70s.

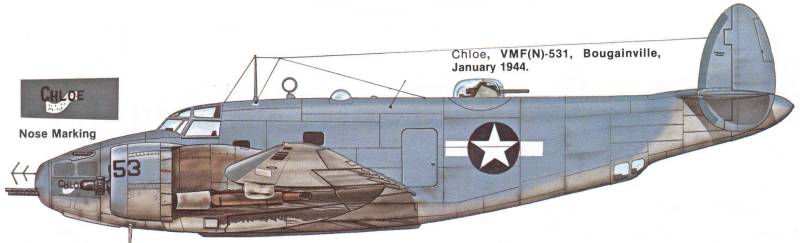
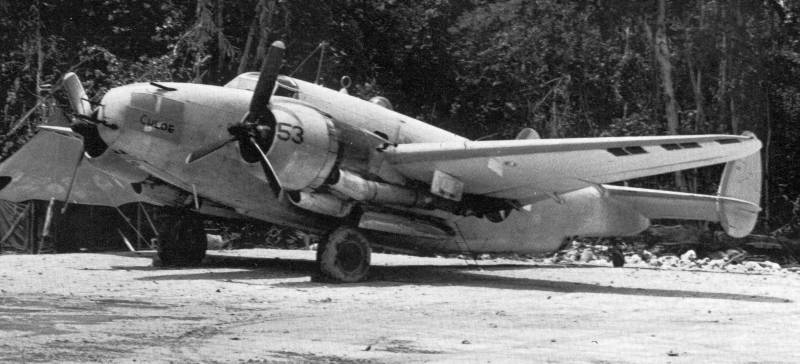
For it's size the PV-1 was pretty good performer. During operations in the Aleutians it was found that down on the deck in the cold moist air and with throttles to the firewall it pretty much matched the the speed of the Japanese fighters then operation in the theater, making the closure rate slow enough that the top turret gunner had plenty of time to pick them off. Its major disadvantage as a night fighter was the ability to slow down quickly during intercepts and lack of performance above 20,000 feet. Here is probably the most seen photo of one in the night fighter configuration, it is an early model PV-1 that still had the forward windows in the nose which can be seen in the photo painted over. I thought at one time I had a color photo of the same aircraft from a different angle but I have yet to located it. There were some variations in how these were configured and of the few photos I've found not two seemed exactly the same. Lacking additional information I will probably go with the markings on the one in this photo as I have a color profile of it as well.

pv1-photo.jpg


I'm still struggling to get the benched cleared of other projects as this one will use a lot of space but hope to get started in the next day or two...stay tuned !

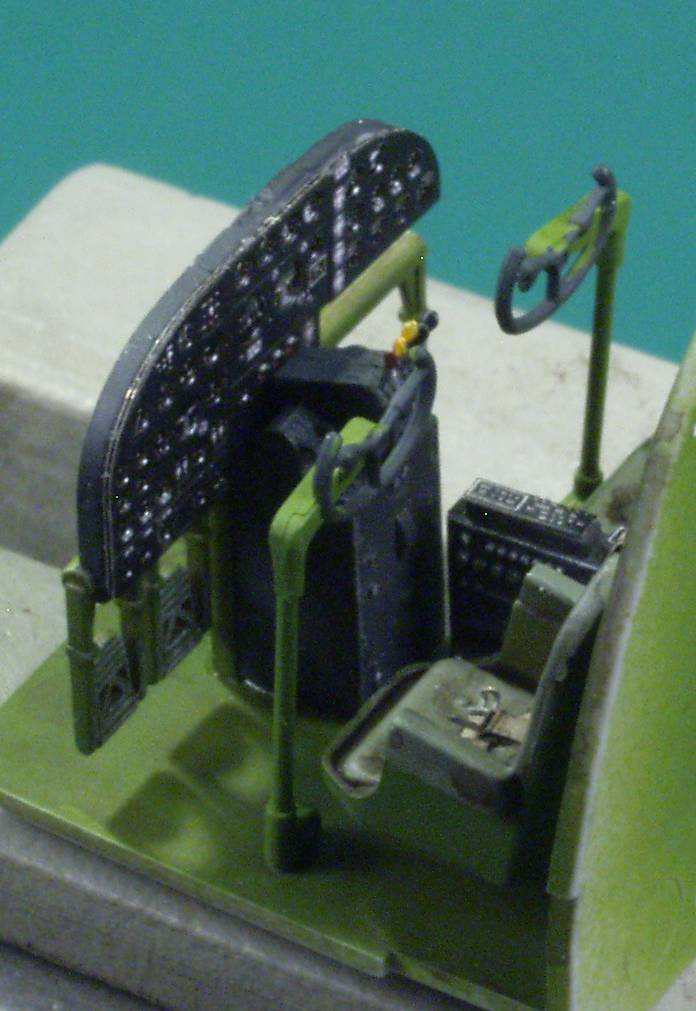
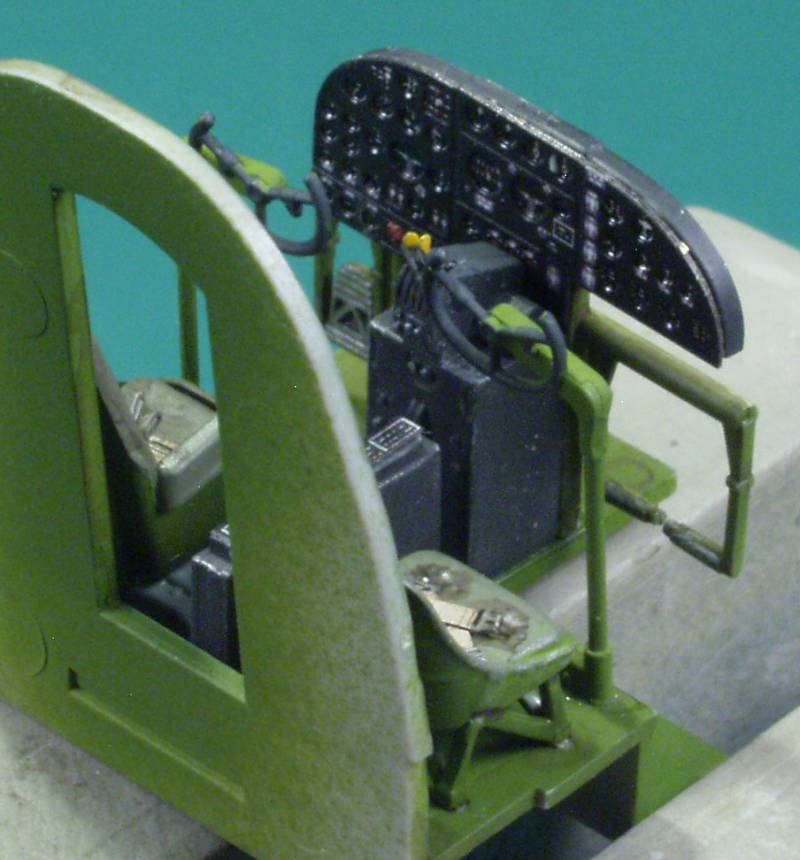
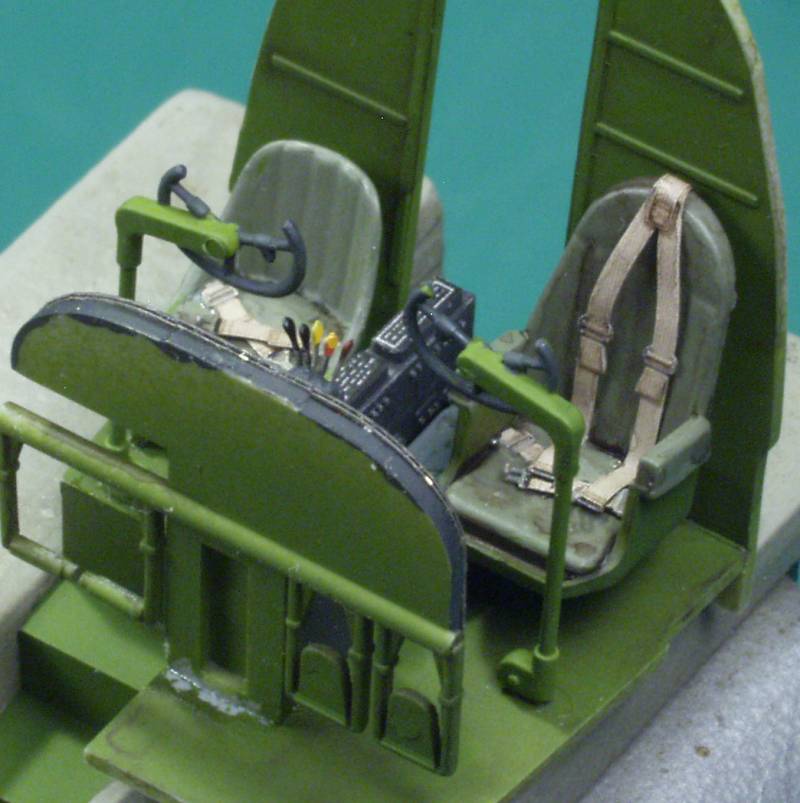
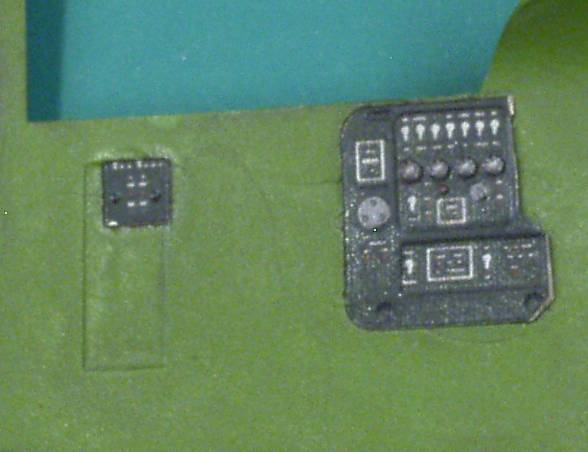
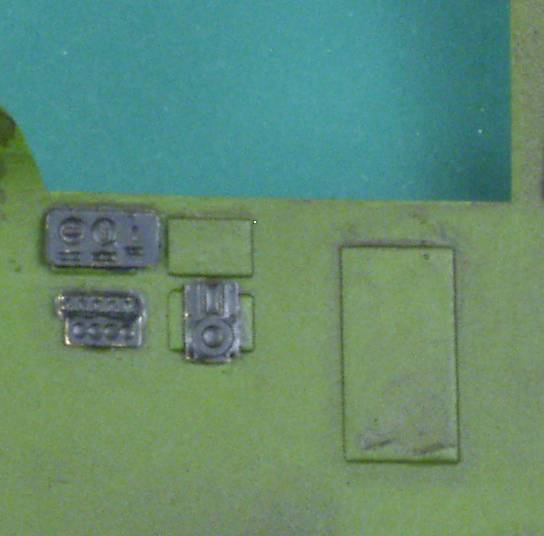
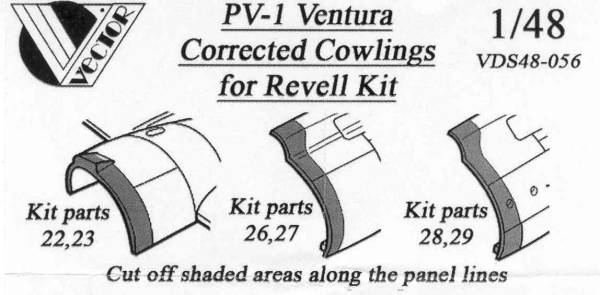
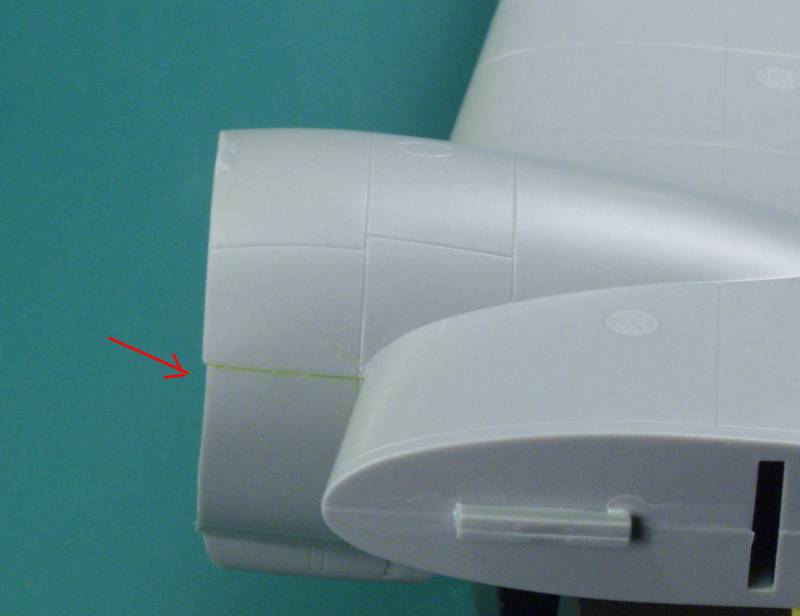
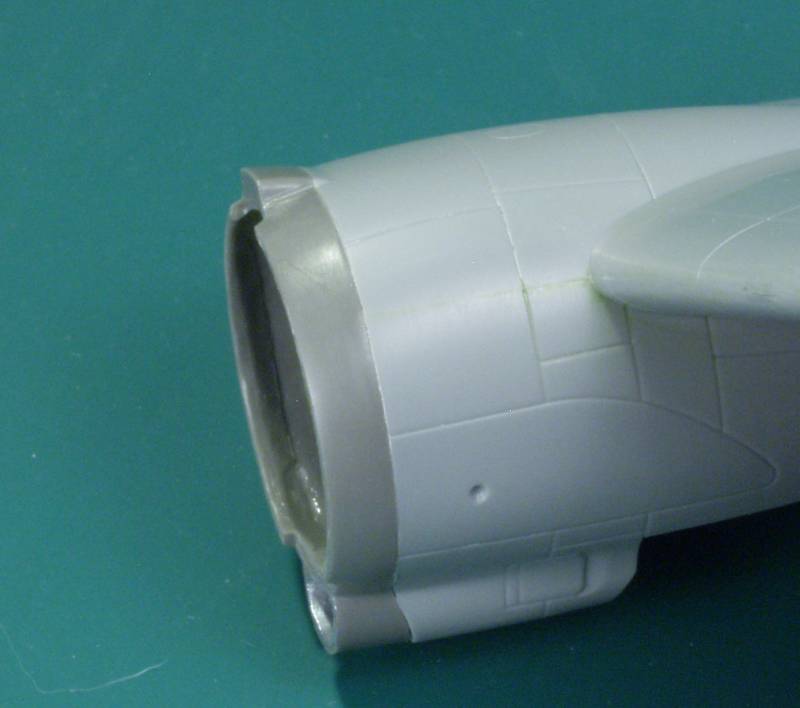
As you can see in the time stamp photos I have a lot of goodies to add, some necessary, some because I'm lazy. I'm looking forward to this kit as most of what I have been doing the past couple of years is limited run kits
 
PV-1 Nightfighter

My lesson for the day - I didn't know there was a Ventura night fighter :facepalm - But it makes perfect sense. A proven and available airframe, lots of space inside, great range....

OK, Senior Canine, you have my attention :popcorn

Ian
 
PV-1 Nightfighter

Dave, the only one I have definitive marking data on is the one the photo. I will need to improvise and make a few myself or paint them on. Here is a profile...

pv1paint.jpg


I made a lot of progress yesterday, will have photos later.
 
PV-1 Nightfighter

Nice looking bird, wonder how may entered civilian life like an executive aircraft or such.
 
PV-1 Nightfighter

Ginter's book lists 42 serial numbers that found work in the civilian world after their military service. Seeing that it was derived from a civilian airliner I'm surprised more didn't go that route but those two R-2800s were probably pretty thirsty.
 
PV-1 Nightfighter

Alright, lets get started ! I don't know if it's just me but it seems that building models is just a lot harder than it once was. In the old days you bought a kit, took it home and built it with what was in the box, trusted the paint call outs in the instructions and didn't questions the markings or the the accuracy of the kit. Now a days, one frets over the color of the interior, how much if any after market to use, are the markings and color call outs correct. Oh well, just rambling here. I am going to offer my 2¢ worth here on the aftermarket I chose.

The first thing I like to do when working on larger kits is sort through and remove all the parts that for one reason or another I am not going to use so I don't keep sifting through them when I'm looking for a part. In this kit there are a fair number. Note that the photo shows the bomb bay assembly and at this point I'm still on the fence as to whether it will be used. I may put it in just to add some additional strength to the fuselage.

pv1-b01.jpg


You may have also noticed the resin bomb bay doors in that photo. At the time I bought them I had read several places that the doors were fiddly to install in the closed position so I thought I would save my self some grief. Well when test fitted with the fuselage halves taped together, I found the resin door was too wide and about 1/16" too short. Fixable, yes, less trouble than dealing with the kit doors, no. Some test fitting indicates that if the bomb bay doors are glued in place on each fuselage half prior to assembling the fuselage they should fit fine and will allow them to be glued from the inside and positioned with ease. Problem solved.

Next thing I did was to see what could be put together quickly and that turned out to be the wings and tail. Only that needed to go inside the wings was landing light lenses.

pv1-b07.jpg


Next I wanted to deal with getting some of the other resin parts cleaned up. First the wheels, these were from Lone Star, I thought the tread looked better than the kit wheels and I hate cleaning up seams on wheels molded in halves. Also the weren't bulged or weighted so they don't look flat like True details tires often do. I did sand a flat on them to give some weighted appearance.

pv1-b03.jpg


And painted up ready for weathering...

pv1-b10.jpg


Next up was the cowling set. This was from Vector and the molding plugs had me worried that cleanup would be a bear...

pv1-am4.jpg


But it turned out that it was as easy as a light scribe around the outer edge of the plug with a tip of an X-acto and it popped right out. A little trimming and they were ready for use.

pv1-b02.jpg


The set provides open cowl flaps which most PV-1 photos show open when on the ground. With the actuators installed, some paint and grunge they look the part.

pv1-b04.jpg


The next set getting attention was the prop set, also Vector. The set included along with the props a new crankcase, magnetos and prop adjust and regulators to mount on the crankcase.

pv1-am3.jpg


To use the crankcase one would need to cut off the old. Not a big deal but the magnetos on the kit part extend clear back between the cylinders and removing all of them didn't look practical to me. see kit part below...

pv1-b05.jpg


Since it's not all that easy to see once in the cowling I decided to take a different route. I went with the kit part, added some token wiring and added the prop controls and called it a day. Due to the way the part was molded in one piece doing a prototype wiring job was really not possible so I added just enough that when view from the front it gives the impression of wiring or at least I hope so. The push rod tubes were done with a Sharpie.

pv1-b06.jpg


On the Eduard PE I found that with the exception of the main instrument panel, the other auxiliary panels more closely matched those in the PV-2 so I went with the kit parts for them.

pv1-pe.jpg


I have found that giving the panel a flat coat before using Future in the dial faces seems to eliminate most of the grainy effect on the Eduard parts.

pv1-b09.jpg


So far I have been most impressed with the fit of the kit parts, if I had any complaint it would be that the sprue attachment points are a bit heavy making removing and cleaning some of the smaller parts difficult and the softness of the plastic making trimming up the larger parts at risk for creating divots it one is not careful.

Stay tuned, more coming soon !
 
PV-1 Nightfighter

I've always said a build thread is about the best review one can have, Gary you set the bar very high! Great post :drinks

I love the Vector stuff (y)
 
PV-1 Nightfighter-episode 1, decisions, decisions

I echo Bobs comment. Very well written update. Looking forward to the next installment.

Ian
 
PV-1 Nightfighter-episode 1, decisions, decisions

OK, time to move along. Since the last thing shown was the IP we'll continue with that first. To me the kit cockpit was a bit lack luster. The control columns appeared to be too tall to me but when I looked at photos of the real thing they seemed to be in the right height based on their proximity to the throttle quadrant and IP and I came to the conclusion that the seats are just too low or everything else is too tall. My emphasis on this build is primarily the exterior so I decided not to get off track fixing things that won't easily be seen anyway so I left it as is. Due to its small size it was difficult to photograph...

pv1-b19.jpg


pv1-b20.jpg


pv1-b21.jpg


The cockpit side walls were pretty plain with just some molded in squares that could be almost anything and didn't seem to match any of my references. I had hoped to use the resin side wall panels that came with the Foundrie Miniatures kit but alas they didn't match references either. Do the kit designers just make this stuff up ? So I resorted to some creative gizmology. On the pilots side I repurposed a couple of the unused Eduard parts, not correct by a long shot but better than molded in blobs.

pv1-b18.jpg


On the copilots side I used some panel parts from the Airscale cockpit detail PE fret. Again not really correct but better than nothing in my book anyway.

pv1-b17.jpg


I have another one of these kits in the stash and when I do it I'll look into the issues in more detail. I've also ordered a True Details cockpit to see how it fairs. When it shows up I'll give my 2¢ on it as well.

Getting back to the airframe, in order to use the Vector cowlings some cutting is required so if you are squeamish about this sort of things you may want to pass on the cowlings.

pv1-b12.jpg


Fortunately the cuts follow panel lines, unfortunately four of the cuts have a curved section. I spent a lot of time doing this to make sure I stayed on the lines. I cut straight across on the parts with the curves and carved into the lines with an X-acto. Every thing looked good until I glued the parts to the wing. On both sides I ended up with a step...

pv1-b08.jpg


I was going to cut a wedge to fit but before attaching the first of the cowling rings I sanded the front surface on some sandpaper on a flat surface and that got rid of most of the step. Since this area was on the side facing the cowling I decided any gap could be filled as it wouldn't be all that visible anyway. When I attached the first cowl ring I tacked it at the top then did a progressive glue around the outside. In the end it fit pretty good although I do have a bit of a step between the resin and plastic in a couple places as if the ring were slightly too small. If I had to do it again I think I would cut just ahead of the panel lines and sand down to them, then I think the ring would be just about perfect.

pv1-b15.jpg


The worst of the fit was on the bottom where I did the hand carving, nothing that some filler won't fix.

pv1-b16.jpg


At this point I also did some preliminary wheel well weathering.

pv1-b11.jpg


While on the subject of the cowling mine had something I don't usually see on Vector resin and that was a big old bubble hole. This one went all the way through. I probably could have gotten a replacement but didn't want to wait, besides big holes are much easier to fix that the tiny bubble holes.

pv1-b13.jpg


In this case I enlarged the hole to fit the smallest styrene rod I had on hand, dipped the end into some thin super glue and stuck it in the hole. When set I trimmed it off inside and out and with a spot of Mr. Surfacer it will disappear.

pv1-b14.jpg


Finally to wrap up this installment I glued the bomb bay doors to the fuselage halves. Still fiddly but much easier I think than trying to do it after the fuselage is together as you can work from both sides. The fit was actually pretty good.

pv1-b22.jpg


Next time things should start going together...stay tuned !
 
PV-1 Nightfighter-episode 1, decisions, decisions

Taking notes!!

:popcorn

Terry (y)
 
PV-1 Nightfighter-episode 1, decisions, decisions

This was one of the few Revell kits that I really liked. For the props I used two from an old B-24 build from four years ago. Keep on Gary and I may just have to buy another along with the FAA one coming out this year.
 
Back
Top