• Modelers Alliance has updated the forum software on our website. We have migrated all post, content and user accounts but we could not migrate the passwords.
    This requires that you manually reset your password.
    Please click here, http://modelersalliance.org/forums/login to go to logon page and use the "Forgot your Password" option.

Planet Models FW 190V-18/U1

Skinny_Mike

Well-known member
Hi everyone! As it turns out my one little ribbon is getting pretty lonely, so I thought I might start another campaign and try to get him a buddy! Its time for a challenge! :fencing

Its funny we all get inspired in different ways. About a year or so ago we all watched in awe as one of my modeling idols chuckw, was building the Planet Models Ju-388. If you didn’t get a chance to see that build, here’s a link to it.

chuckw's Ju-388

For those of you that know me, I’m a bomber guy and pretty knowledgeable in the air to ground arena. This airplane immediately appealed to me, and following along with the fantastic build, inspired me to get my own Ju-388 kit. The problem is, I’ve been terrified to build it! I mean let’s face it, it’s a pretty expensive kit and as with most short run resin kits, takes a lot of skill to get it right. How does that get me to here? Well I’ve decided to build a slightly smaller full resin kit as practice. I saw this kit at Sprue Brothers, thought it looked cool, figured the single color paint scheme would be easier to accomplish so why not give it a try! It’s a confidence builder if you will. So here is the kit…

003221_05_015580_zpsa47796f9.jpg


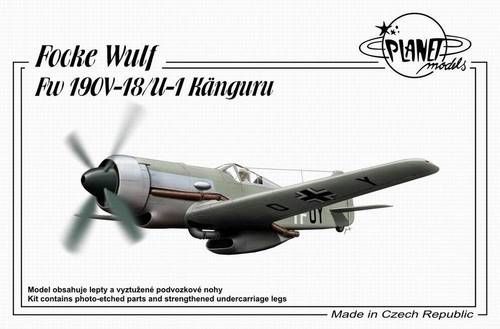
A brief history. In 1942 the RLM determined that there was a need for a new high altitude fighter to combat the allied bombers. The FW-190, while a great aircraft had pretty poor high altitude performance. Focke Wulf designers started work on an FW190 derivative powered by a DB603A engine. This was in theory to become the FW-190C aircraft. The FW190V-18/U1 aircraft used a DB603 engine driving a 4 bladed prop. The aircraft had a turbo charger installed under the belly of the aircraft. Exhaust gases were provided through long pipes that extended over the wing roots to the assembly. This effort was eventually discontinued due to problems with the turbo charger and the pressurized canopy.
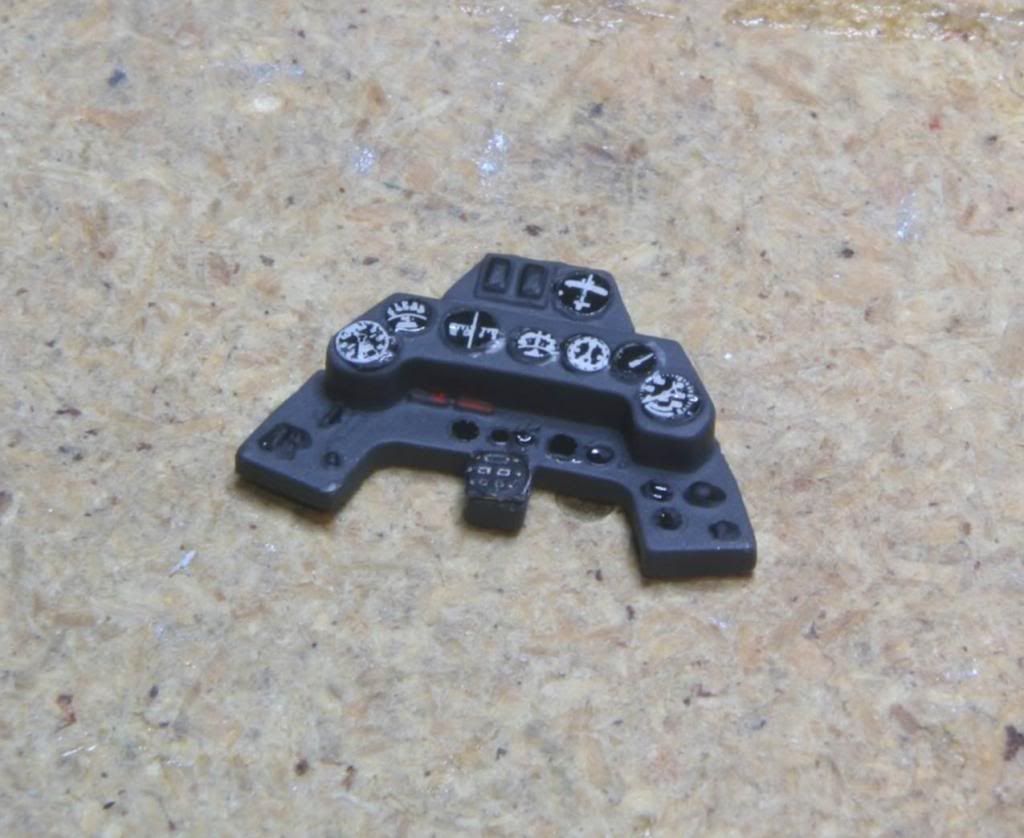
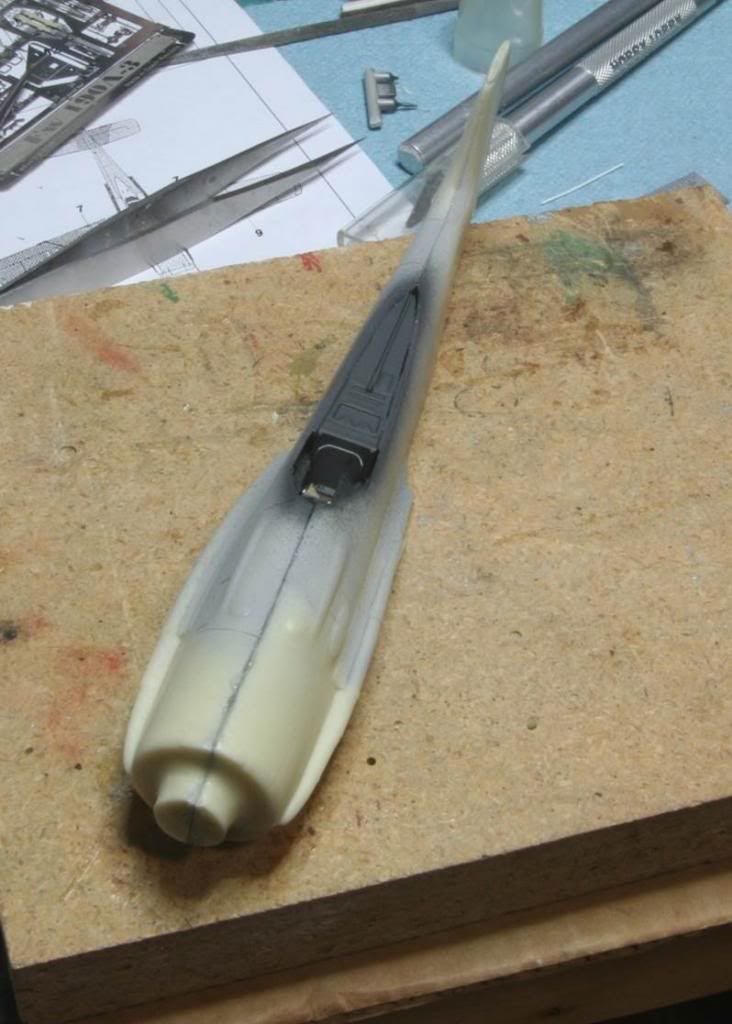
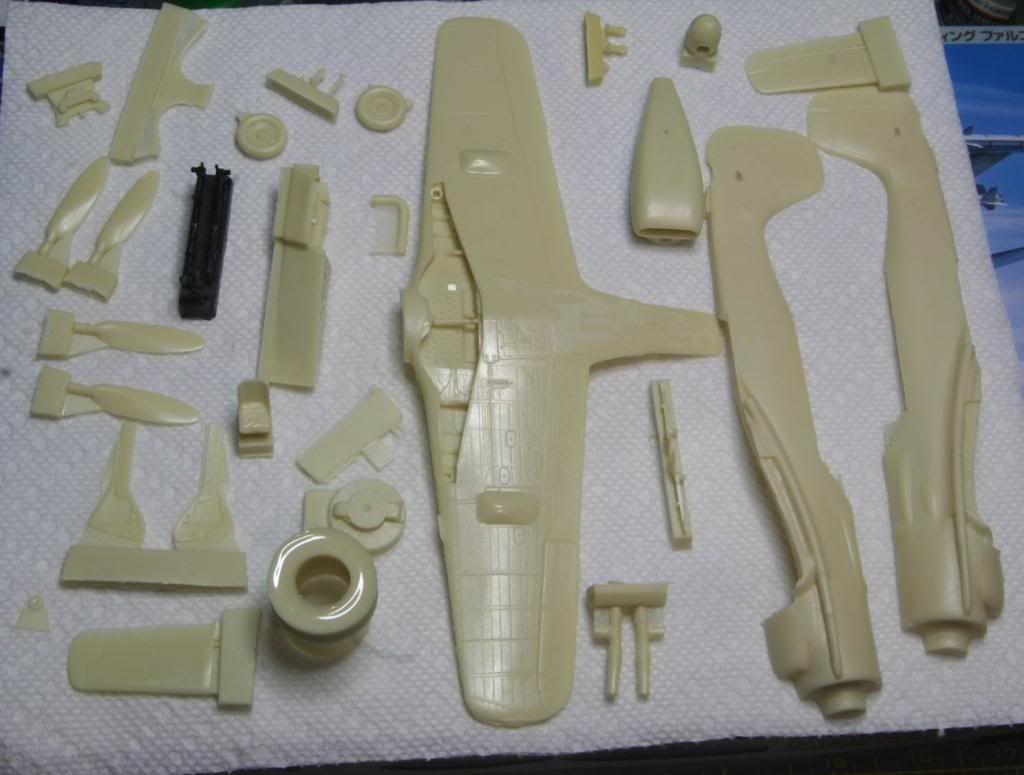
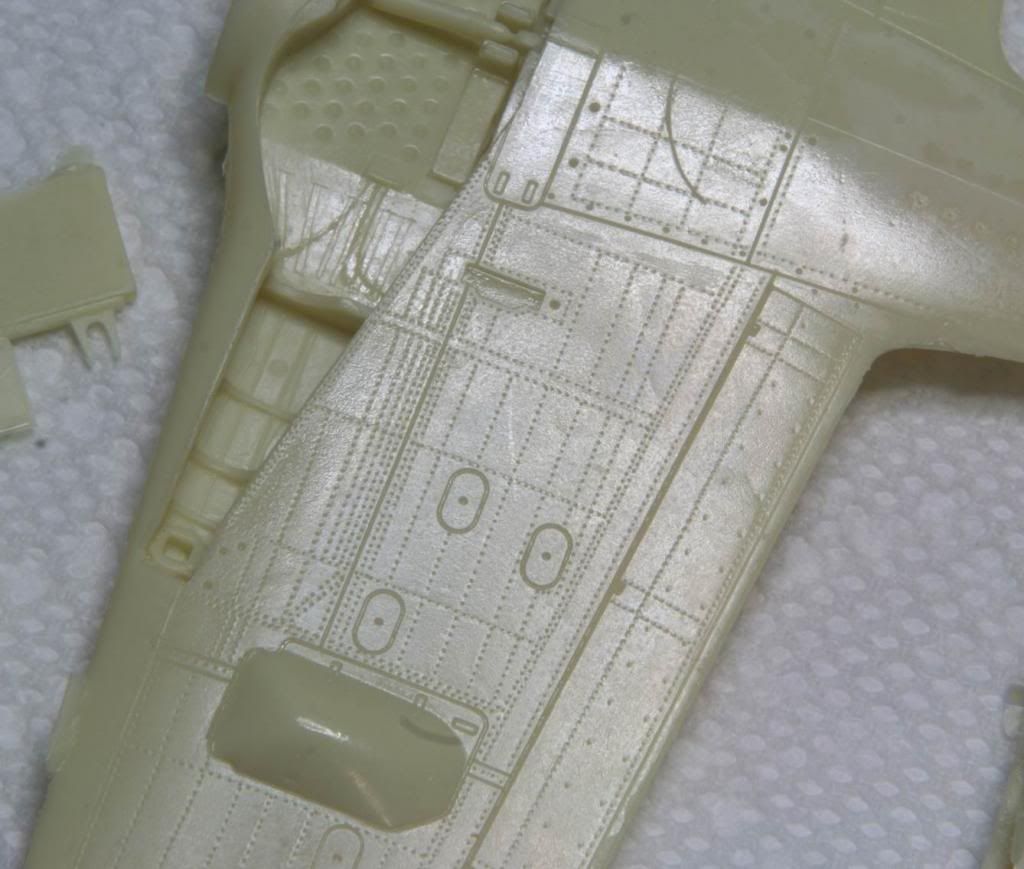
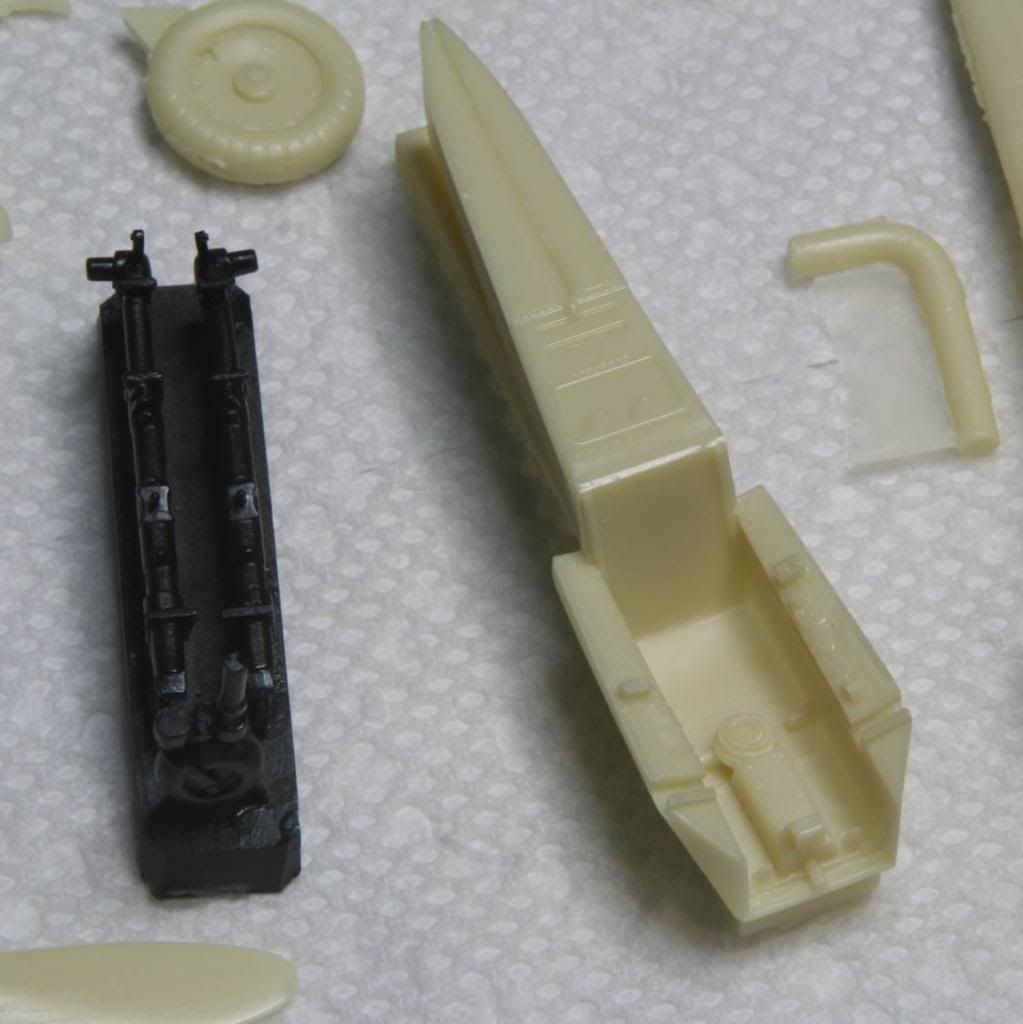
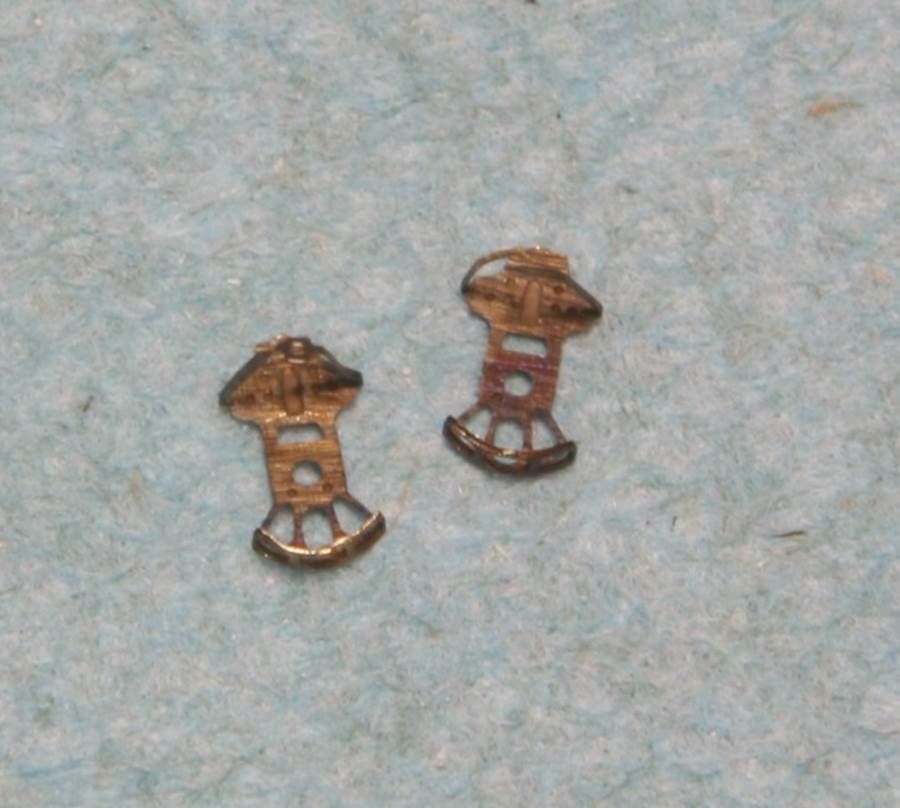
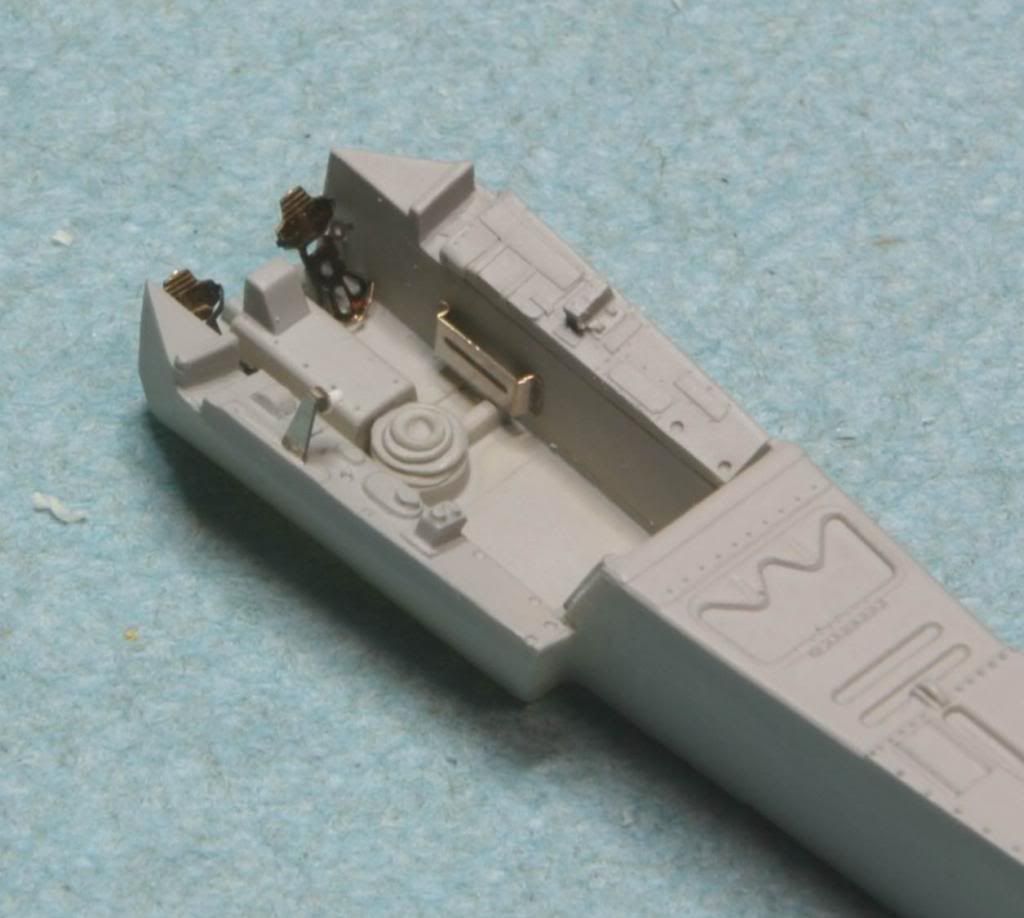
On to the kit! The box for this kit is pretty small, roughly the same size as the boxes for Hase’s egg planes. Inside we find a collection of parts is assorted bags. The fuselage halves are bagged separately and so are the wings, which are fully assembled. There are decals and two vacuformed canopies, one extra, and a small photo etch fret. We also get a one page instruction sheet.

Post11_zps027c88cd.jpg


Post12_zps81e03cf7.jpg


Post13_zpsd5925116.jpg


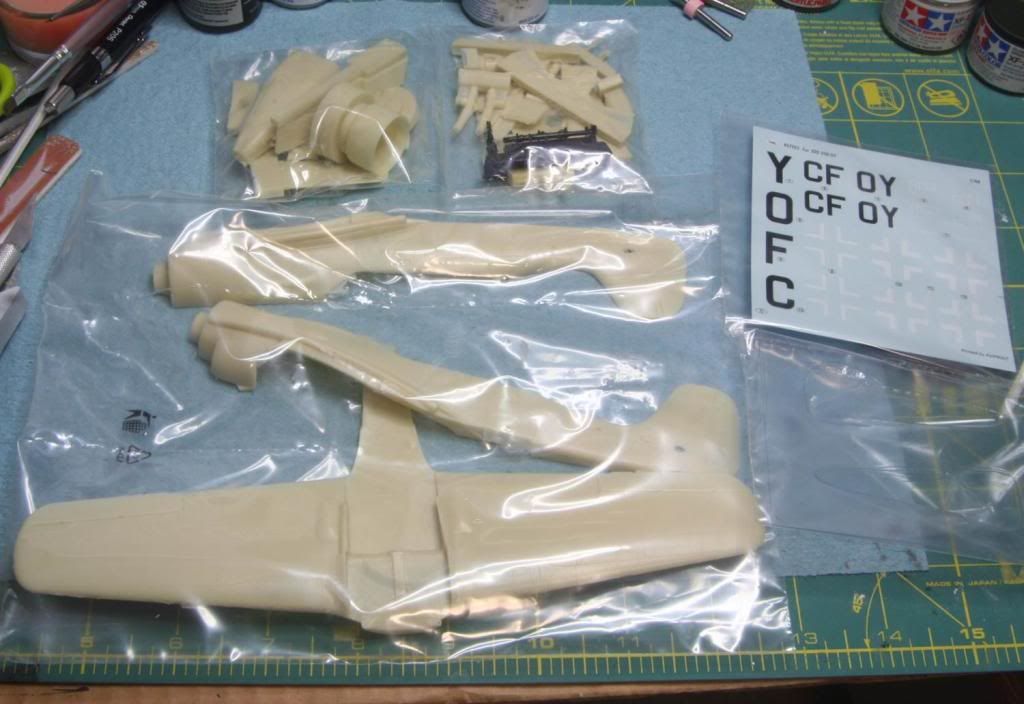
I started by putting all the resin bits into a nice warm bath with some dish soap. I like to let my resin soak overnight and then scrub with a soft toothbrush. Then I’ll let them dry. This one will probably be a slow starter over the rest of the month while I finish up my other two kits, but it’ll pick up to my usual snail’s pace after that! :snoopy

This is going to be a challenge for me for sure – so wish me luck!

Mike!

Oh yeah and just to show I'm legal for the campaign...

Post14_zpsf289d4d3.jpg
 
Great to have you Mike, looking forward to you filling up your signature line with Campaign ribbons :good:

I'm looking forward to learning a thing or three :popcorn
 
Hey everyone! Here are a couple of quick photos.

Everything is washed and dry now. Here are all the parts laid out in one place.

Post21_zps36d3b7a2.jpg


Just to preemptively answer – Yes - the wings, are one solid piece. Add to it the solid housing for the turbo charger and I think you can imagine how heavy this thing is going to be! Planet models says that the kit includes reinforced landing gear but they seem to be just plastic so I think I am going to replace them with a set of G-Factor brass landing gear for the FW-190 series. Anyone have any experience with G-Factor’s stuff?

Here is a close up of the detail in the wing bottom. Looks amazing! And the whole airframe is like that! I’m going to need to be really careful to not totally obliterate the details when I get to painting. Fingers crossed.

Post22_zps9751df6f.jpg


And lastly here’s a shot of the pit and the landing gear. Just a random shot.

Post23_zpsfe0170a7.jpg


No progress yet, but I should be starting the pit this weekend, between some of the fiddly work on the F-16. At least that's the plan, we'll see what SWMBO has to say about it!

Talk to you all soon!
Mike
 
Yeah I used the G-Factor gear on the Tamiya Mustang, really like them. They are not just white metal repops of the kit parts like the SAC gear are. Highly recommend them. :good:

Looking forward to this.
 
You flatterer! :blush:

Cool choice- I've always looked twice at builds of this kit. Those one-piece wings should make it a bit easier to get positive alignment! ;) Do the stabilizers have locating tabs?

Cheers!
chuk
 
Thanks MP, I'm ordering the gear right now!

Hi chuk - thanks for stopping by! It doesn't look like the stabs have any locating tabs. That will be something I need to work out. I also found that the glare shield in the cockpit is pretty much missing.... :hmmm This is truly going to be a challenge.
 
Hi Folks! I’m back with a little bit of progress to share.

First off I got some new things for this build that should help out quite a bit.

Post31_zps24a0bd51.jpg


Airscale Luftwaffe Instrument Dials and Placards
Eduard Photo Etch for the FW-190A-3
G-Factor Brass Landing Gear

After spending some time studying the kit, I decided to start with the cockpit. Start with what you know I guess. The tub was removed from its casting block and I gave it a quick shot of primer. For this build I decided to use some light gray automotive primer from the rattle can. I have been having problems as of late with my paint peeling up after masking, especially on resin, so I am hoping this primer will be a little more durable.

Post32_zps658da4ff.jpg


Next I added some of the photoetch. First I annealed the etch set included with the kit. It includes the seat belts and rudder pedals and some other assorted trinkets. I used a few pieces from both the kit set and the Eduard set. Here are the rudder pedals assembled, and then installed along with the throttle and the map case.

Post33_zps0bcb0b47.jpg


Post34_zpsdabfade7.jpg


Next step was the seat. I removed the casting block from the bottom of the seat and then did a test fit. He was my first issue (admittedly self-induced :angry: )the seat was way to low in the pit. Turns out some of that casting block should have remained as a pedestal to get the proper seat height. Oops! To fix I laminated some .010 inch plastic strip until I had the proper height. Easy fix – I’ll have to be more careful next time.

Post35_zps3bfe04aa.jpg


Once I got the seat squared away, I liberated the instrument panel from its casting block, gave the cockpit pieces a shot of primer and then painted on the RLM66 using Tamiya XF-63.

Post36_zpsd04cb793.jpg


Post37_zps6e45af82.jpg


I’ll let these dry overnight to get a good cure, then I’ll be moving on to the detail painting. I’ve also done a bit of work cleaning up the fuselage halves in preparation for mating them together. I won’t bore you with the details here, just cleaning up flash from the edges. I did learn my second lesson, resin sands a little too easily! :bang head 
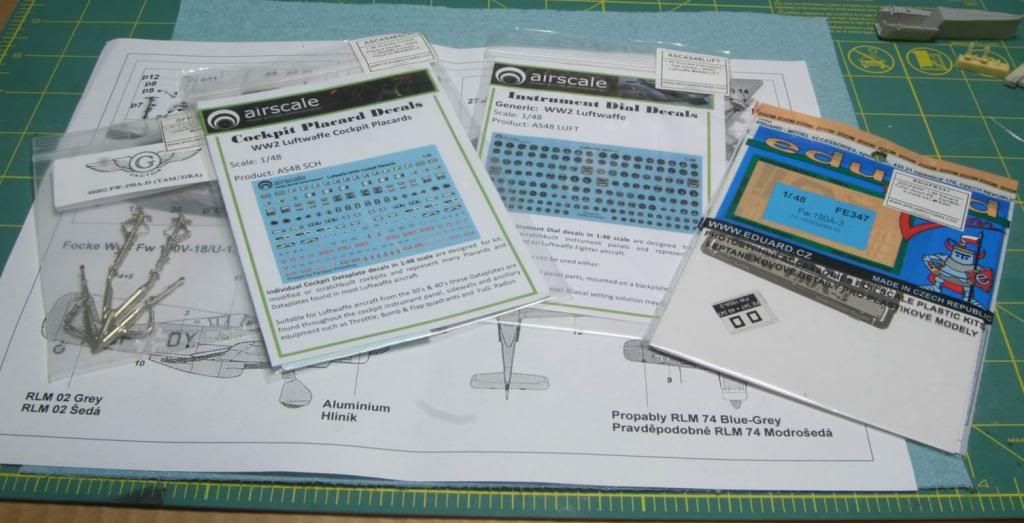
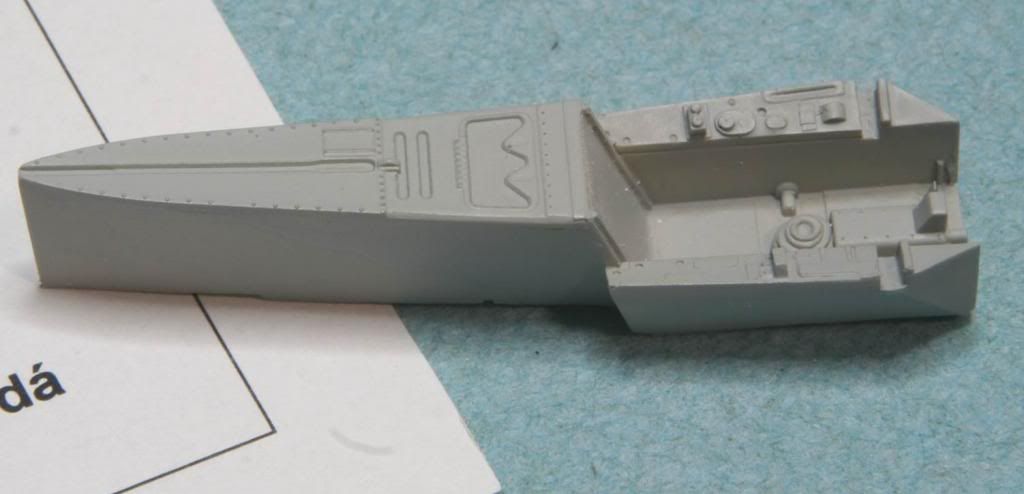
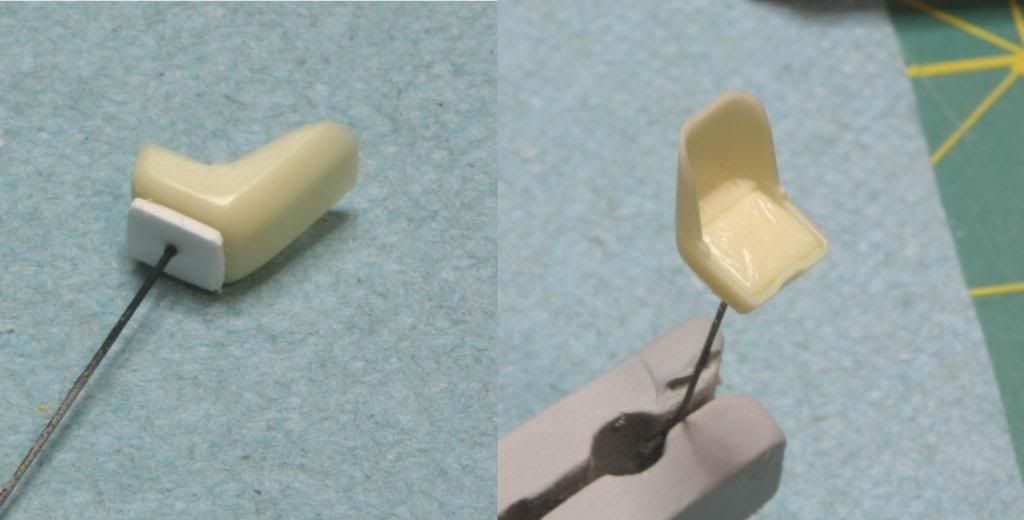
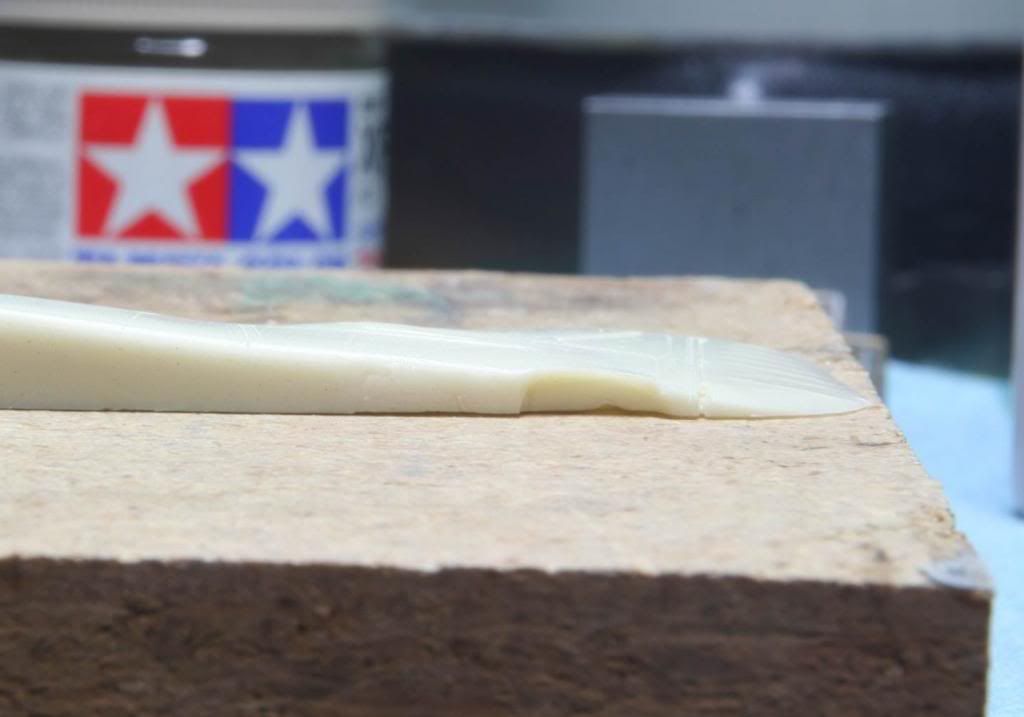
I’m going to need some putty later on! And I’ve started using finer grit sanding sticks!

Now I have a question. I’ve noticed that my fuselage halves are a little warped. I’ve heard quite a bit about the “near boiling water method” to realign them. Anyone have any details on that?

Thanks for looking! See you soon.
Mike
:fencing
 
Looking good Mike. I can't attest to the warm water and resin fix, never tried it. I know Chuk just mentioned it on his new build and Saul has said it many a times. Must be something to it. I believe it's suppose to be hot water, not boiling but someone will correct me if I'm wrong.

:popcorn
 
The water method works great Mike.

Though I have used boiling water for fixing my warped resin parts. I usually boil a kettle, get some cool water running in the sink and then pour the boiling water over the part that is warped, gently bend it back into shape and then hold it under the cool water for a moment. That usually does the trick.

I've done this 3 or 4 times now and it has worked out really well.


About this boiling water theory, I recommend making a jig to get it lined up the way you want first ( if you can ) .

By the way, I find listings for 1/48 and 1/32 versions of this model. Which is it ?

Cheers, Christian B)
 
Mike, what I do is boil a pan of water and then take the heat off. Once the boil stops you can dip the fuse half in that very hot water until it gets "loose." Then lay it down on a clean, flat cutting board and hold in place, if need be, with a towel.

388_098.jpg


388_099.jpg
 
Mike, what I do is boil a pan of water and then take the heat off. Once the boil stops you can dip the fuse half in that very hot water until it gets "loose." Then lay it down on a clean, flat cutting board and hold in place, if need be, with a towel.

Ok - now I feel stupid. I forgot you had to deal with this as well, Chuck! Total brain fart, thank's for the reminder! :drinks Do you remember roughly how long you kept the parts in the water? 30 seconds or 5 minutes? Just looking for a rule of thumb kinda thing. My guess is it can all go south pretty quick if you're not careful.


By the way, I find listings for 1/48 and 1/32 versions of this model. Which is it ?

Cheers, Christian B)


Hey Christian - I am doing the 1/48th scale kit.


Thanks for the help guys. I'll see how brave I feel when I get home from work. Fortunatly the fuselage halves are only curled a bit from the nose to the tail, so this shouldn't be too hard of a fix.
 
It just takes a few seconds- it won't melt. Hold it with tongs, man! Give it a wiggle and when it gets flexible you'll know.
 
Hi everyone! Sorry to be gone so long. Had quite the hectic couple of weeks and I have been taking my time with this bird, really trying to have a quality end product.

Work has continued on the cockpit. The seat cushion was painted in Vallejo leather and given a few spots of orange brown to break up the darker brown. Then the lap belts were added. I used the photo-etched belts included with the kit and after they were installed I painted them Tamiya buff with flat aluminum hardware. I’m not totally happy with the size of the belts, they look to large to scale. I compared them to the Eduard set and those aren’t much better. I think I think the seats with the molded in belts always look better and are much easier for me to work with, so I think I’ll stick with those in the future. The shoulder harnesses I’ll add after I’m trough masking the upper deck and painting the beast. The seat then got a bit of a rub down with the side of a pencil to show wear on the edges and a few scratches on the seat back before it was installed in the cockpit. The pit had also been detail painted with Vallejo and Tamiya paints.

Post41_zps45c39e92.jpg


Post42_zps0f16056d.jpg


Next was the instrument panel. After the RLM 66 details were picked out in black and red and a small photo etch detail was added from the Eduard set. I really didn’t go overboard here because its pretty tough to pick out the details in a FW-190 pit. I was really just trying to give the appearance that something was going on. Then I sprayed on a coat of future and applied the instrument decals from the Airscale set. I really just picked out some random details that fit the dials again just to give the appearance. After the decals dried the IP got a coat of MM Flat, the dials got a drop of future to simulate the glass and the panel was installed.

Post43_zps1cd439e3.jpg


Post44_zps38e56b04.jpg


Overall I’m not terribly thrilled with the cockpit. Not a fault of the kits, I was a little heavy handed with the primer and it softened up some of the details. I’ll need to be more careful next time.
Next step was the fuselage. I cleaned up all the mating surfaces and tried to remove any pour stubs or flash. There were only a few spots that needed attention. Then I set about dealing with the warped fuselage half. Thanks to Chuck (chukw) for the reminder on how to deal with this. I got the pot of water boiling, dipped in the tail of the fuselage and laid it on a flat board when I was done. I was pretty nervous, but after doing it, really don’t know what I was worried about. Totally easy. Worked out great. The fuselage is flat as a board! Here are the before and after photos.

Post45_zpsa3fc4bc2.jpg


Post46_zps2291495c.jpg


After that, I painted the area around the cockpit in RLM66 using Tamiya XF-63 and the area around the front air intake black. After a series of dry fitting and sanding, dry fitting and sanding, I was confident that the halved would fit as they were intended to. So I installed the cockpit to the left side and then added the right side fuselage half. I glued the tail first and slowly worked my way forward with CA glue and clamps to make sure that the panel lines all matched up. I think I was fairly successful doing it this way.

Post47_zpscde445e6.jpg


Post48_zps95e3551e.jpg


There are some rough seams that I have to deal with next and some big gaps where I was a bit heavy with the sanding stick.

Post49_zps77eaca40.jpg


Well that’s where I am. Time for the ritual of fill, sand, fill, sand. But I feel good because I am making some progress and its not been too horrible, yet!

Thanks for following along! See you next time
Mike
:fencing
 
Man that's a wicket hole behind the cockpit, one reason i'm scared of resin kits. Git'er done Mike, looking good! Like the leather treatment! (y)
 
For a full resin kit that is looking quite good!

I've built two full resin kits, a 48th Dodge Ambulance and a WWI 72nd R.E.8, the Ambos doors were so bad I posed them open, the RE8 's wings now droop so bad they almost touch the shelf base!

Resin kits are tough to do! you have that pit looking good too (y)
 
Black Milliput is what you need to seal the seam around the cockpit tub! It's a very dark grey and can be smoothed on with a wet finger- just wipe the excess away. No worries and a neat, no-sand join. I did it on my 388.

As I said over at ARC, Great stuff, Mike!
 
Thank you all for the kind words and the advice! I feel like I have a bunch of model building mentors helping me along the way. As simple as this kit is, there are still quite a number of interesting problems to overcome. The really cool thing is that I am really improving my modelling skills as a result of working out these challenges. My motivation on this kit is much higher then some in the past! :geek

MP - yeah there is a big hole behind the pit. It was my fault, the left half of the fuselage needed alot of work to get it cleaned up around the pit and I took too much off on the back side there. Oops! :facepalm The good thing is that I am not excited about the color of the back deck after the paint/wash/drybrush, so I'm going to clean up the seam and then repaint the whole deck. I have a better idea this time.

Thanks Phil! This thing really is taking all my skills, but I'm excited by the uniqueness of the aircraft so its keeping the motivation up, despite the problems with the full resin kit. Just wait until I show you the bizare twist I just found in the one piece wing assembly! Fortunatly I think I have a few days of seam work on the fuselage that should let me think about how to best handle straigtening that big chunk of resin! :hmmm

Thank you Chuck. I did pick up some of the black miliput, I also have the fine grained white as well. I've never used them before but I plan to give it a try on this kit. I really think the Miliput is going to be huge when I need to smooth out the seam at the attachment for the "kangaroo pouch", when I get there.

Talk to you all soon!
Mike
 
Back
Top