• Modelers Alliance has updated the forum software on our website. We have migrated all post, content and user accounts but we could not migrate the passwords.
    This requires that you manually reset your password.
    Please click here, http://modelersalliance.org/forums/login to go to logon page and use the "Forgot your Password" option.

Operation "Get it right this time around" - I hope

White_Wolf

Master at Arms
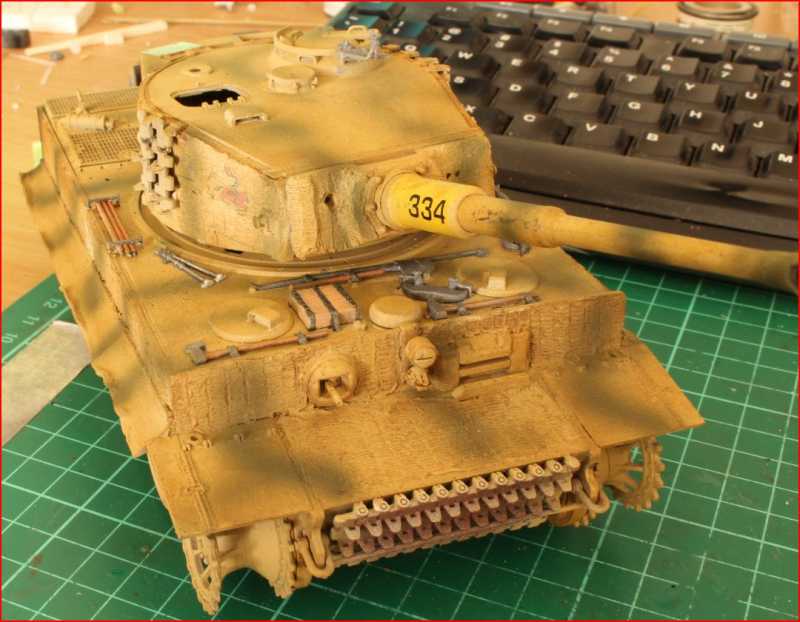
This is a Tiger that I absolutely slaughtered when I first started it. I was young, enthusiastic and kinda :gogo :gogo :gogo too. All I had at the time was a knife, two brushes and some paint and glue. I have decided the Tiger deserves a better fate so this is it, revisiting and trying to get it right this time:


haea3edc.JPG


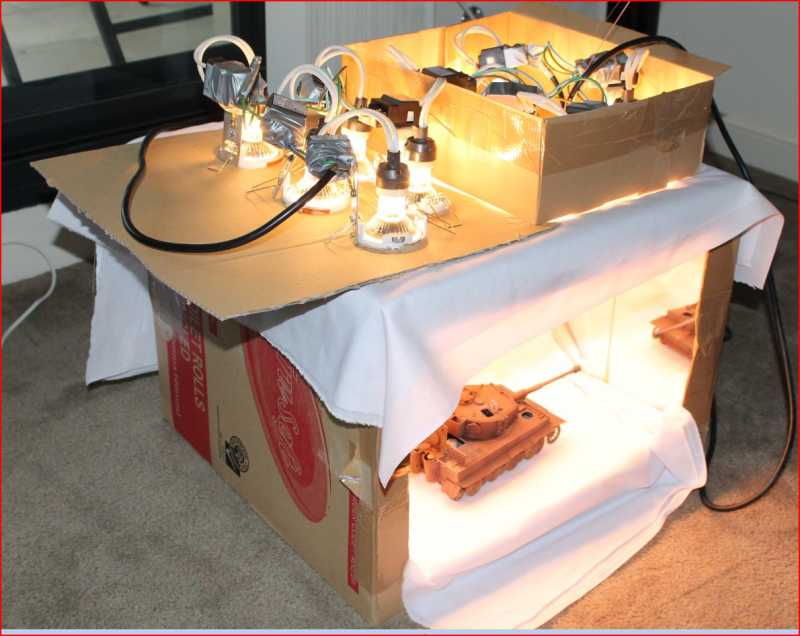
Built this box to take some better photos - two days worth of work and an old set of 10 spots that were collecting dust - much better use.


h0aaaec5.JPG


h55226d4.JPG


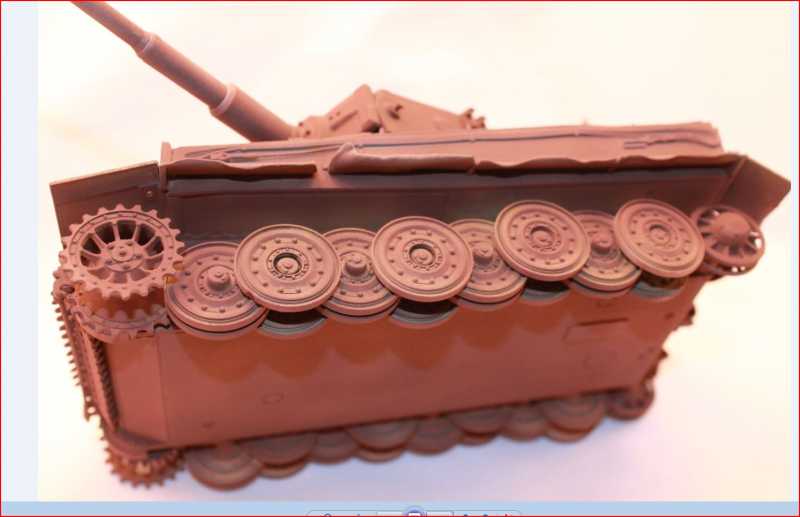
After priming it, the kitty got an undercoat, Tamiya Red Brown. Tracks got the first coat of Brown and then a mixture of Brown and Nato Black - Tamiya as well - thank you Terry for your excellent SBS in your Tiger post and the Painting one :notworthy :notworthy :notworthy

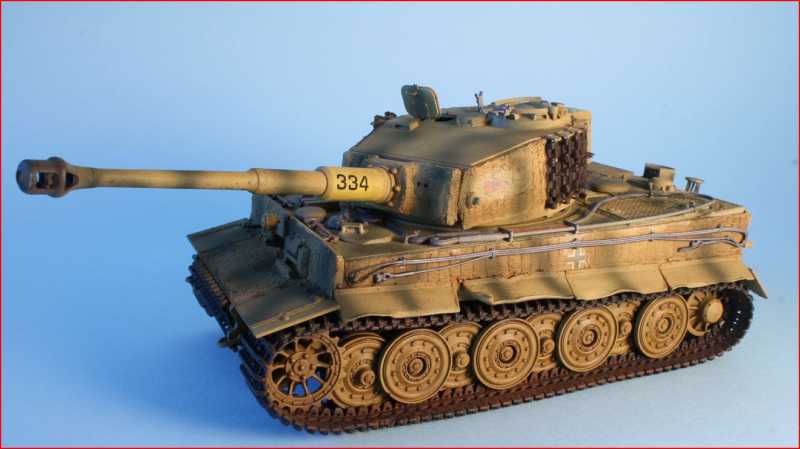
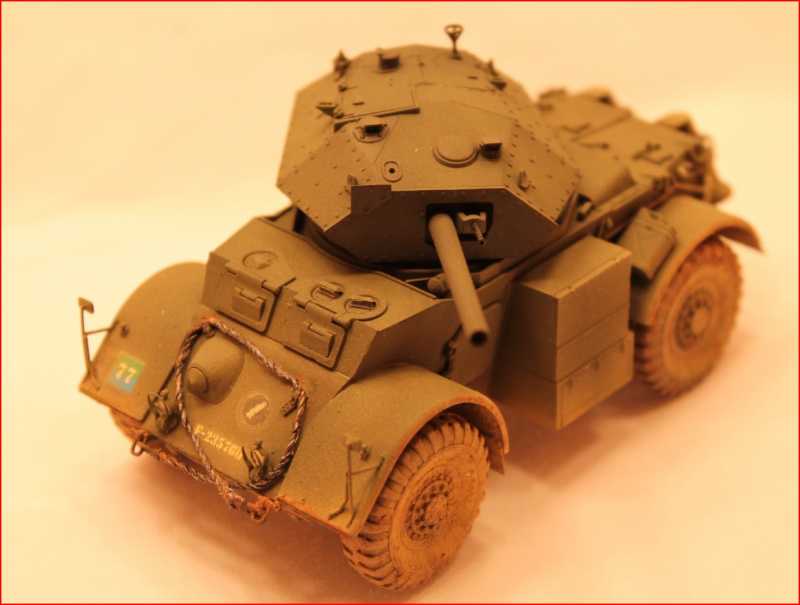
Not related to this post, a couple of shots to check the quality of photos from using the magic light box.
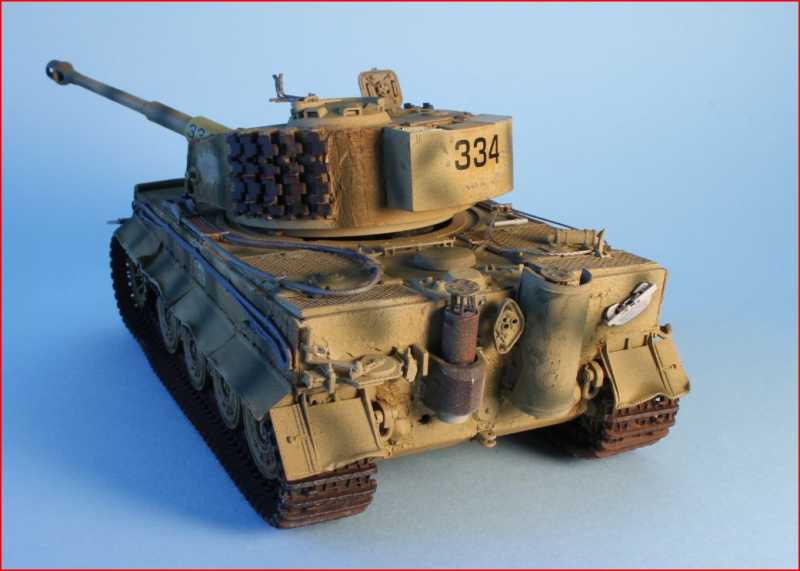
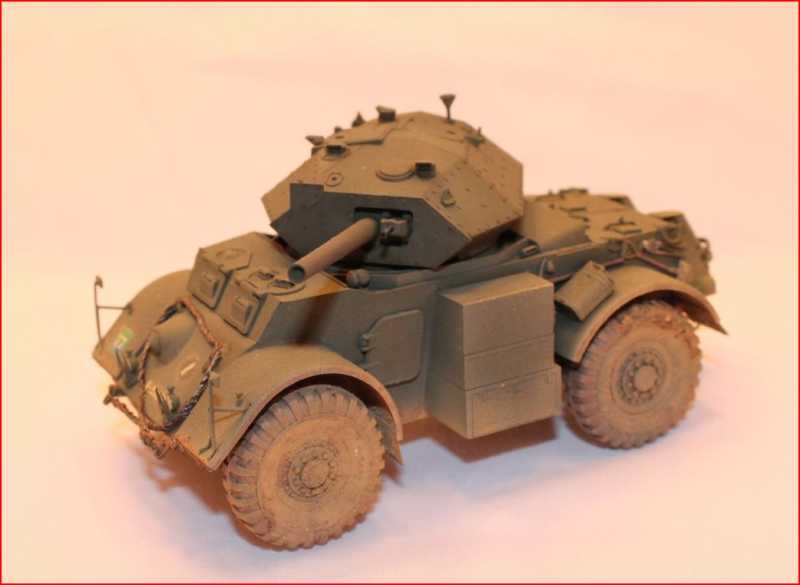

h35743b2.JPG


one more


hb814bc2.JPG


Comments please everybody :D I really would like to know what it looks like on your screen, both the concoction box and the Tiger.
More to come.
 
Laurence,

I would like to comment on your light box. I believe you are using too much candlepower. The photos are bleached even though you have used the white cloth between the light source and the subject to soften and diffuse them. Also, photographing models on a white surface is never a good idea as well, especially when using so much light. You want to capture the shadows as well as the highlights and make them both soft. The setup you are using now, is harsh and uncomplimentary to your models.

I've been photographing models since Moses came down with the tablets and learned a lot of tricks. If you would like some advice in setting up a photography bench or box, I'd be glad to help. Just email me.

[email protected]
 
Thanks MP - you always have a nice thing to say and that is much appreciated :notworthy

Bob, always want to learn, email sent :D

The setup is indeed rather rudimentary, I have used 10 x 50W spots. One block of 5 was more useful for the airbrushing section so it was relocated last night. Even though it's summer here, the working area is not getting much daylight when I get back home from work.

Laurence
 
This has been bugging me for quite some time now so I decided to allocate more time to this pussycat than I would have imagined.


h40e0e60.JPG


h440c509.JPG


Painted - then I thought where is the Zimmerit ??? :smack So the cat got the Zimmy - artists' modelling paste applied manually. Pattern manually as well - that took a while - then painted again, then the cammo then only a pin wash and brush it away towards the edges - raw umber diluted with rectified turpentine.
Tools - initially Vallejo natural steel - then redone with Humbrol Polished Steel.

Still a long way to go but I thought I'd share the progress.

Open to criticism - go for it gents, I need to make sure I get it right.

Laurence
 
Thanks MP - always encouraging comments :notworthy

The links on the turret and front need doing properly, tools need finishing, the towing cable on the right hand side is very damaged so I am still to figure out what to do - try to fix it and mount it or use it somehow in the scene - haven't thought that far yet :blink
 
I like it. Looks good top me. Really nice work on dirtying up the Staghound. Something I am not good at.
James
 
Thanks James - the Stag was dirtied using Vallejo pigments. I don't normally do 1/48 but this was a special category at a competition late last year so I thought I'd give it a go. Came in second, the rules were strictly OOB, weathering allowed, the reason it came second was that I did not put aerials on the vehicle (not included in the kit, but stretched sprue aerials allowed by organisers :blink :blink )

Work that one out. It was good fun though, the show was really great :good:
 
Way too long since the last update - so here's some more pics of what's been happening since last month.

The tracks took a while to put back in place and still some weathering to be done, the rear needs more attention as there are some unpainted parts, the whole thing is still a way away from where I want it to be, but slow progress is better than no progress at all. More to come.


h6292150.JPG


ha33e8ad.JPG


h74a779f.JPG


Cheers,
Laurence
 
Terry thanks mate - looking at your kitty for the Kursk campaign, this is an amateur-ish job but I am learning all I can. This is a tank that I put together ages ago, was my first Tiger and it's sentimental. I wanted to bring it back to life sort of speak.

Part of a small dio - still working out the details.

Cheers,

Laurence
 
Way too long since the last update - so here's some more pics of what's been happening since last month.

The tracks took a while to put back in place and still some weathering to be done, the rear needs more attention as there are some unpainted parts, the whole thing is still a way away from where I want it to be, but slow progress is better than no progress at all. More to come.


h6292150.JPG


ha33e8ad.JPG


h74a779f.JPG


Cheers,
Laurence

Looking good Wulf...watch that road wheel on the RHS towards the front, looks like it's going rouge on ya. :popcorn
 
So, now I know what "ReHab" is called, Down Under! What a nifty Tiger you've got there! I'm digging the mangled fenders as well. BRAVO!
I've never been able to bring myself to try very much Zimmerit. Intestinal Fortitude, that!
 
So, now I know what "ReHab" is called, Down Under! What a nifty Tiger you've got there! I'm digging the mangled fenders as well. BRAVO!
I've never been able to bring myself to try very much Zimmerit. Intestinal Fortitude, that!

Well thank you Sir - the zimmerit was a challenge - it was around 1,000 "strokes" with the Dremel, quite a time consuming exercise :blink

MP - some of the wheels need attention, well spotted mate (y) . When I put this together for the first time I was obviously lacking skill and magnifying lens too :S . I will model the terrain so that it won't be flat and that will make the wheels and tracks "fall" naturally around it. Or so I hope, fingers crossed.
 
Back
Top