• Modelers Alliance has updated the forum software on our website. We have migrated all post, content and user accounts but we could not migrate the passwords.
    This requires that you manually reset your password.
    Please click here, http://modelersalliance.org/forums/login to go to logon page and use the "Forgot your Password" option.

MODERN RUSSIAN ARMOUR - T-72BA [B 1990 model] in UKRAINE (update 24th Nov 2025)

Brokeneagle

Master at Arms
While i procrastinate on finishing my figures to finalise my T-72B3M, and before finishing my T-80U, I thought I could fit in another version of the T-72 currently used by the Russians and Seperatists in the Ukraine confict.

20250425_220245.jpg

This particular version is basically an early T-72B3. It doesn't have the Sosnar-U thermal sight on the turret roof , so it still has the L-2AG Lunar-2 IR spot light on the right side of the turret front next to the barrel. It also lacks the 'stand-off' grates and Kontakt -5 side plates seen on the B3M. I will also be adding the external fuel drums on the back for this one.
This will be the tank i will use as a ref for the look(though not using the damaged roof grate armour) while adding the fuel drums on the rear. Of particular interest are the added Kontakt-1 bricks attached to the front of the Kontakt-5 angular bricks on the turret front. Also the damaged rubber side panels and stowage, plus dead leaves.
FcnV9UUXkAEP8zZ.jpg
FcnY7y1XgAA2ALg.jpg

I will use the decals from this Star decals sheet for the BA version.
T72BA.jpg

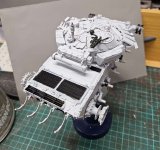
While on holidays i managed to do the wheels, chassis and start on the turret.
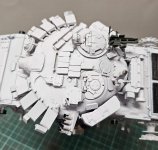
The rubber on the wheels has some mild damage. I am currently getting 'bogged down' on the 94 small circular PE details that have to go all over the anti- radiation layer on the roof top.
20250510_231131.jpg
20250510_230948.jpg


20250510_230929.jpg

20250510_230910.jpg
 
Last edited:
A touch more progress................ Working on the turret stuff and Aber barrel details.
-replaced kit parts with fired Voyager smoke dischargers
- finished detaching and glueing the 94xPE head details for the securing of the anti-radiation layer on the turret top.
- replaced kit parts with an Aber brass ariel base.
- replaced the complicated, multi-part gunner hatch from Trumpeter with the 1 piece and more finely moulded hatch (lighter colored)
- rear deck assemblies attached.
20250523_014407.jpg

20250524_133213.jpg

20250524_133224.jpg

20250527_192122(1).jpg


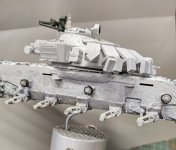
Wheels, rear external petrol tanks and rear plate done. I am going to try cutting a real piece of wood (small stick) from the forest here to replace the crappy vinyl offering from Trumpeter. The angle of the smoke dischargers is slightly incorrect as Trumpeter don't give you a very clear mounting point, just a slight mark on the plastic surface. As a result I didn't attach it at a steep enough angle and the lower inner 2 tubes , if launched, would exploded into the Relickt armour brick in front of it. So advice for the smoke rack when constructing this kit is attach the dischager tubes first then mount the assembly as a whole so you can clearly see the angle needed(which is what they advise in the instructions after rechecking just then :smack:).

20250527_192127.jpg
 
Last edited:
Small update.....
I switched-out 3 of the wheels for a different pattern [from my T-72 M1] which have 8 spokes instead of 6. This mix is not uncommon even on T-90's where 3 or more patterens can be seen sometimes as pointed out in the B3M post.
20250604_232148.jpg

20250604_232427.jpg

449694408_8317138891651763_5700673740123198644_n.jpg


I also attached the rear plate with the barrel mounts and PE straps for attaching the unditching beam.

20250604_232235.jpg

and painted the black undercoat on the engine deck grills.
20250604_232740.jpg
 
Some more progress with adding the extra ERA 1 blocks on the end of the Kontakt 5 ones, finished more PE and then added some texture. This time I sealed it with a Vallejio primer to secure the PE and begin with a lighter base than the t-72B3M.
The extra ERA 1 blocks were from Royal model.........
20250620_162124.jpg


I finished the Eureka tow cables and eneded up using the unditching beam from my RFM T-80U that would not be part of that build.
20250620_162049.jpg
20250620_162142.jpg
I added some copper wire grab handles to the right side of the commanders cupola that seem to be missing on every companies T-72 kits.
Also used my left over Voyager smoke candles from the T-72B3M build.
Initial hull dirt texture done once again with with Tamiya acrylic Mud.
20250620_161426WEB.jpg

20250620_162020WEB.jpg

20250620_162028WEB.jpg

20250620_161512WEB.jpg

20250620_161439WEB.jpg

20250620_161953WEB.jpg

20250620_162014WEB.jpg

20250620_161500WEB.jpg

20250620_161447WEB.jpg

20250620_161532WEB.jpg

Then Primer time.....
20250624_150757.jpg

20250624_150804.jpg

20250624_150813.jpg20250624_150835.jpg20250624_150903.jpg20250624_150910.jpg
 
Last edited:
Ok, some new progress on the BA - I decided to create a vehicle using a mix of the details from both tanks shown at the start of this post. This would also mean that I could use the travel tanks on the rear which I hadn't modelled on the T-72B3M.
Tracks finished
Mud added - guards on.
Brass/ PE added

102b0c95-8234-4461-8422-f6d116bad8bd.jpg


I added a new front track guard, spring wire, to replace the damaged detail after trimming the guard back. I bent the side rubber guards and thinned them out a little more while bending them and re-shaping them a bit more to warp a bit as in the photos.
I also drilled out the holes for the mounting bolts on the rear side guards, that would have been removed with the rubber matts.
18b0206b-b237-4a02-b1e8-8f9bc23f86bd.jpg

61eb5e72-da57-44ed-af9d-6390503d1b98.jpg

8f52c7c4-8afd-48c3-af8b-a414fec64dca.jpg
71756ea8-baa1-4ddb-8431-ecc022083ec0.jpg
0603f523-8749-466d-ae32-acedc766caac.jpg


The guards on the exhaust side were a little difficult to attach due to the space in chassis, matching the exhuast outlet being undersised. This need some modifying.

2f435d4e-7a31-492d-b05d-e189a785c59f.jpg


Weld seam added to the tube on the turret rear, missing on every T-72 kit that I have seenso far. The missing grab handles on the right side cupola added as well as they are also missing on every kit.
738514f9-fa79-4c04-b1f5-5cc6331c7261.jpg

FcnV9UUXkAEP8zZ.jpg

c71e82ad-72f1-4a6c-a3bc-c2f4b5d1cee6.jpg

I scratched -up a rear deck drone frame as per the photo but my cross bars are a bit wider. I am mixing details between the 2 tanks shown at the start of the post.
At this point I still have to add the rear guard box straps and finish some of the thermal cover straps on the barrel. The PE starps were a test to see how 'fiddly they are for future builds becuase part of the process involves shaving -off the existing molded strap detail.
ff39956c-5181-473f-8e21-7a898248bac5.jpg

I then realised it was time to start working on the base.
I quickly sketched my layout on top, using the tank to measure the width of the tracks. This base will have a small amout of rubble, as well as dirt and the tank will be raised on one side running over some bricks etc - well thats my current idea.
215ae8b6-fa11-421e-a411-5b1a51029268.jpg


053920a1-184f-43e4-a8ae-c0444a273236.jpg
9f5e96b1-323f-48cc-aa20-ffdd2ecc27a2.jpg
401bf97b-8aa6-453d-836a-92db990cb8e7.jpg

I have learnt over the 5 or so models with these small foam bases that it is way easier to add the felt underneath as step 1 , before any other details have been added.
To be continued.......................
 
I'm trying to get my confidence with bases, one thing that alludes me with foam bases is how we edge them off? what do we do to clean it up, make it presentable?
 
I'm trying to get my confidence with bases, one thing that alludes me with foam bases is how we edge them off? what do we do to clean it up, make it presentable?
I will photograph my construction process as best I can but you make a good point. Bases are all different and different displays require varying approaches, such as larger dioramas than this with a bit more story, are more suited to a base like John's Tiger 1 Russian scene, that looks more museum quality. I have also seen square foam pieces mounted on a fancy wooden base but the edge problem still has to be dealt with.
Plastic card cut to size or those super thin wooden veneer sheets work, then paint them black.
This set of bases I am keeping super simple and going for the opposite effect [which you saw on the T-72B3M] - crumbly, damaged earth that looks as though its been ripped from the ground and the black veneer edging is falling away - not to everyone's liking but i think it suits these subjects with very simple displays.
Another option is like the base for the Razorcrest - just paint it black as long as its been cut smoothly (using a hot wire).
20221027_161424w.jpg20221028_142510w.jpg
 
Thanks for this Ian. I gotta get on with it. I have a base for the Baron and it's red D.VII, just got to settle in on the layout. Played with something this evening, I've kinda got in my mind that I don't want to start anything till I get the last several projects mounted on something.
 
Thanks for this Ian. I gotta get on with it. I have a base for the Baron and it's red D.VII, just got to settle in on the layout. Played with something this evening, I've kinda got in my mind that I don't want to start anything till I get the last several projects mounted on something.
Sounds like the right approach - finish before you start :) not always easy.
Also forgot to add that some people go for the curved foam bases like Verlinden introduced back in the day.
 
Back
Top