• Modelers Alliance has updated the forum software on our website. We have migrated all post, content and user accounts but we could not migrate the passwords.
    This requires that you manually reset your password.
    Please click here, http://modelersalliance.org/forums/login to go to logon page and use the "Forgot your Password" option.

MODERN RUSSIAN ARMOUR IN COMBAT - T-72B3M BUILD 25th April 2025 update

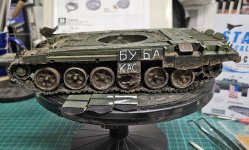
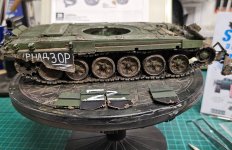
Decals and weathering started. First half of the Barrel attached. Ditching beam finished
Wheels and tracks attached so that I could start the weathering and attach the side skirts once that has been done.
20250326_190011.jpg
20250326_190135.jpg
20250325_182503.jpg20250325_182620.jpg
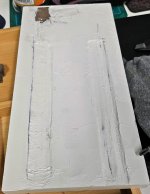
I have started on the Base as well and will have it as a simple muddy road - something like the image below the pics of the base. I use the flat rounded ends on the tools to push the stiff foam down into lengths that the tank will sit into.
20250326_172532.jpg

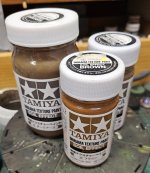
20250326_191257.jpg20250326_233001.jpgI plan to use my go to for mud - Tamiya, these are an excellent acrylic base for any mud with weathering effects.
3abf5263ba4c41ef5261c9270f4d60503e950092.jpeg

The next stage will be to complete the stand - off armour grates and damaged side panels with charge bags. I will then start on the modern accessories that appear all over Russian and Ukrainian tanks in many photos.
20250326_191246.jpg
20250326_190837.jpg 20250326_191048.jpg
 
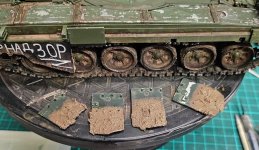
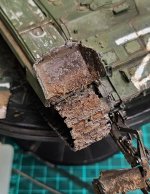
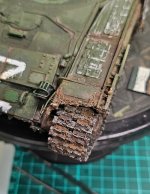
Update - I have decided to leave off the charge bags for another version but have started on the side panel damage and mud on the wheels as well. I also ended-up damaging the left side front mud guard, as I didn't like the look of the full version - It looked too boring.
I also started modifying the rear stand-off grates so that they are bent and broken. These are damaged in most photos I have seen of the vehicles in combat.
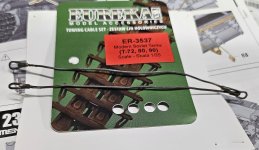
I recomend the Eureka tow cables, as their scale weave is very fine and perfect in size, as well as being very 'bendable', which means you can easily form them over the tanks details etc and they stay in shape.
20250330_144724.jpg20250330_144807.jpg20250331_004717.jpg20250331_004748.jpg20250330_144842.jpg20250330_144903.jpg20250331_193620.jpg20250331_214255.jpg
 
Last edited:
Looks fantastic. Really enjoying watching this come together.
James
Thanks, out here in the real world the tank is nearly finished and I am working on the base. There is always a lag due to photo taking and editing etc. More very soon.
 
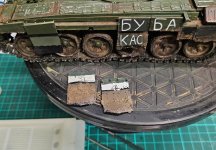
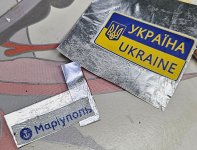
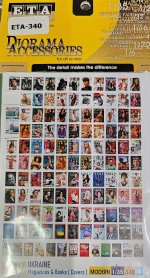
Quick update ...just a couple of little things. I have created some Ukraine road signs from the ETA set by gluing the prints to silver foil. The prints are nice and very robust, as they are printed on thick card. I have added some bullet holes as well now. Also using some ETA Ukraine magazines.
20250412_194622.jpg20250412_200655.jpg
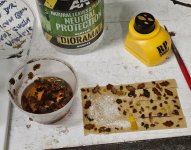
Iam adding some autumn leaves to the base made from the Autumn leaves falling outside......
20250417_190738.jpg
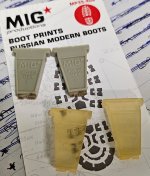
Also got some modern russian boots which have worked really well making tracks in the hard foam base.
20250424_014928.jpg
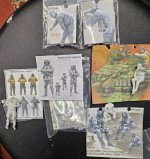
....and finally the 'array of figures I am choosing from.
20250412_194003.jpg
this finished scene will be titled 'Fuel stop near Mariupol 2022.
 
Last edited:
I have a question, Ian. From the pics it looks like the stowage bins are aluminum. Not knowing Russian armor, "at all," are they heavy aluminum? That chip work looks double layered in spots, whether intended or not, pretty dang impressive.
 
I have a question, Ian. From the pics it looks like the stowage bins are aluminum. Not knowing Russian armor, "at all," are they heavy aluminum? That chip work looks double layered in spots, whether intended or not, pretty dang impressive.
Thanks Steve, glad you picked up on that. Yes the Russian T-72's have Aluminium petrol tanks and storage containers[which the 1-80'S & 90'S do as well as far as I know], which is why I painted these in the base color Aluminium, so I could apply chipping fluid and peel it back after the first green coat. The double layering is achieved in 2 ways , 1. the aluminium base coat is painted in varying shades. 2. the chipping is done with fluid and removal of the green then followed-up with some chipping with a small piece of songe dipped in the brighter Alumium color.
In the image below you can see where I applied the light Aluminium coat and then once that was dry I applied a second thinner darker coat which I moved around with a brush. I then mixed in some of the lighter coat in places before this darker coat had dried. I n this way I achieved a variable Aluminium finish that had sustaned some wear and tear over time, as a lot of these vehicles have been operating for quite some time and even stored for a while.
20250322_164754.jpg
 
Back
Top