-
Modelers Alliance has updated the forum software on our website. We have migrated all post, content and user accounts but we could not migrate the passwords.
This requires that you manually reset your password.
Please click here, http://modelersalliance.org/forums/login to go to logon page and use the "Forgot your Password" option.
You are using an out of date browser. It may not display this or other websites correctly.
You should upgrade or use an alternative browser.
You should upgrade or use an alternative browser.
Logistics, Base & Buildings, Updated Feb. 13, 2020
- Thread starter bob letterman
- Start date
It is beyond my capacity to imagine your process. Planning, construction, all the minutia included to make such a project. Then the dedication to keep going to completion. Holly Molly! Model story telling at it's extraordinary finest!
Thanks Rhino,
But, not really as difficult as it may seem. You have to remember, I've been building these things now for more than 40 years. It's like anything else. It seems complicated until it's something you do all the time. But, I do appreciate your comment!
Thanks again!
Bob
All I can say is...


All I can say is...


Thanks MP!
I've made more progress, the roof is finished and a lot more weathering and detailing. I still don't have the figures built for the train station, I just had the idea to add it not long ago! I will be posting the finished building this week. I seem to have always underestimated the final fixes, touch ups and additions when completing these buildings!
Btw, I'm still in debt to you for Chattanooga and I will be receiving some copies of the New release Volume 5 of Dioramag magazine. When I get them, one is for you!
Dad
Just amazing. Every time I look at this I see more.


James
Thanks you James
As often as you have seen my work on here, and commented, Thank you for your kind words!
I appreciate them!
Bob
phantom II
Master at Arms
Truly mesmerizing work Mr Bob . My brain can't even comprehend the complexity of this sort of work . :woohoo:
Cheers, Christian B)
Cheers, Christian B)
Truly mesmerizing work Mr Bob . My brain can't even comprehend the complexity of this sort of work . :woohoo:
Cheers, Christian B)
Thanks Christian,
It just looks harder than it really is. You have to remember, I've been doing this stuff for 75 years. I built my first model at age 4. Jeez, if I wasn't at least a little good at it, I should have switched to another hobby! Think about it. 75 years steadily is a ton of experience.
Thanks again,
Bob
Iron Mike
Master At Arms And Resident Curmudgeon
Logistics, Base & Buildings, Updated Feb. 13, 2020
See, I said I'd be back. Bumping to a new page.
I have been promising photos illustrating the finished train station for a few weeks. My problem is always all those tiny details and things that look finished but are not quite. The major hold up on this one was thousands of tiny windows that had to be filled with glass. Not all, but most of them.
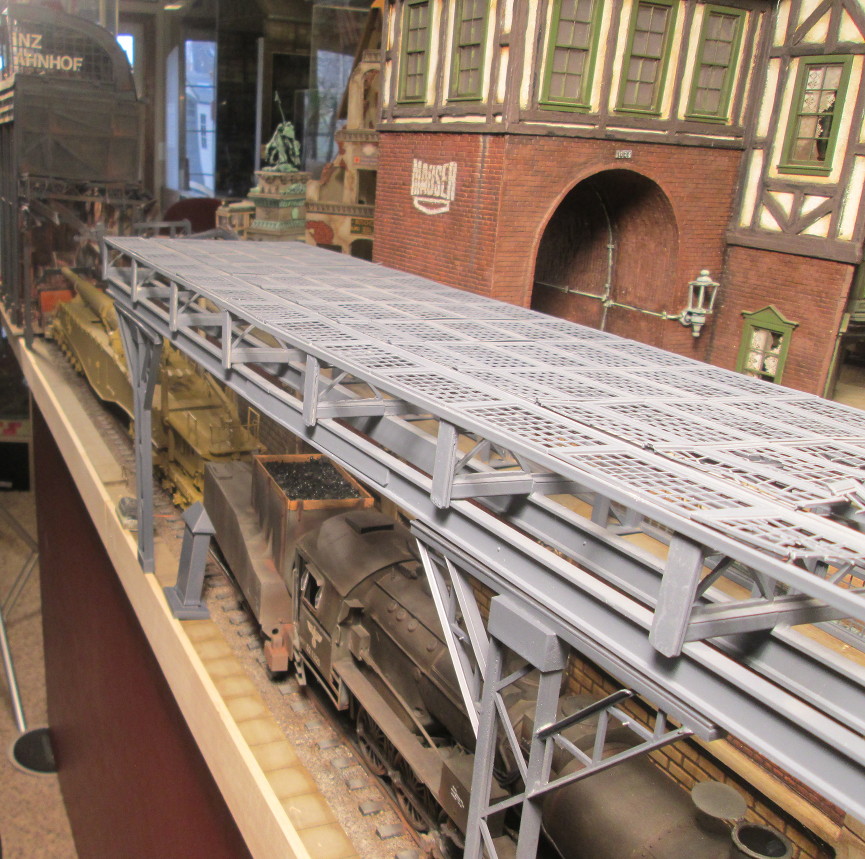
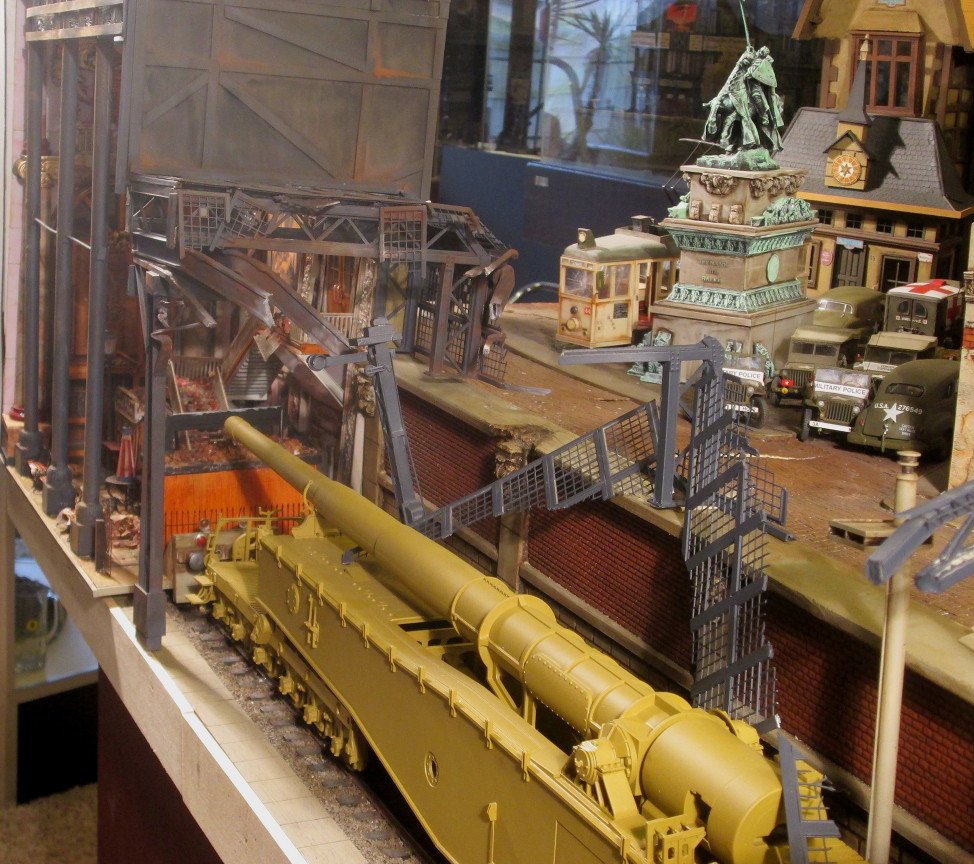
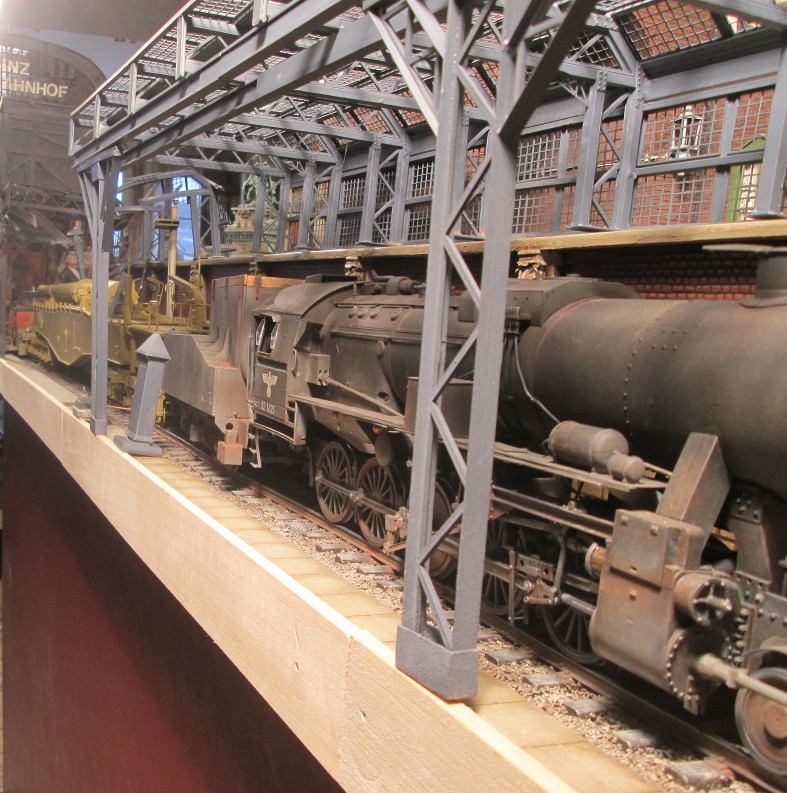
I placed the train station on the diorama where it will go and then put the locomotive and rail gun in place and part of the canopy, (Train Shed), in place, so people can see where I am going with this. I only have a tiny few hunks of burned, bent and broken steel trusses, girders and I-beams so far. There will be many, many more. None of those or the larger part of the canopy towards the right end of the diorama have been weathered. They are only base coated. Neither has the rail gun. It has yet to be weathered or detailed.
I'll begin this with the reason for a lot of the delay. Those damned windows! I'm sure some will look at this and wonder why I didn't just use sheet plastic to fill them in. The Micro-slip glass would have taken me another 10 years to use that, cutting each one with the home glass cutter I have posted in other threads here. Sheet plastic could have worked where all the tiny frames were full and intact. However, although the windows in the train station will have far more intact glass that the shed when completed, it would have been a nightmare to cut out random quarter inch by quarter inch windows blown out of the frames by explosive concussion. Even then, you can view both sides of the windows in this diorama and there would have been frames only on one side using sheet plastic.
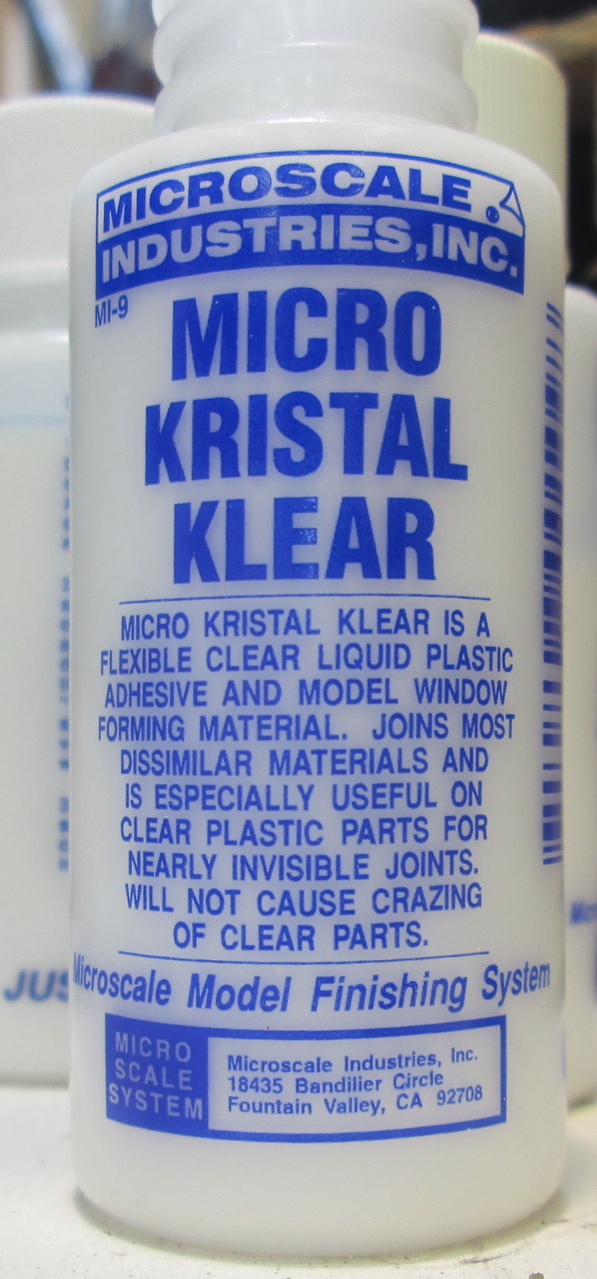
In the past, I have used Elmer's white glue to make windows like this in the past. It does work. However, I had three bottles of a product Micro Kristal Klear. So, I used that.
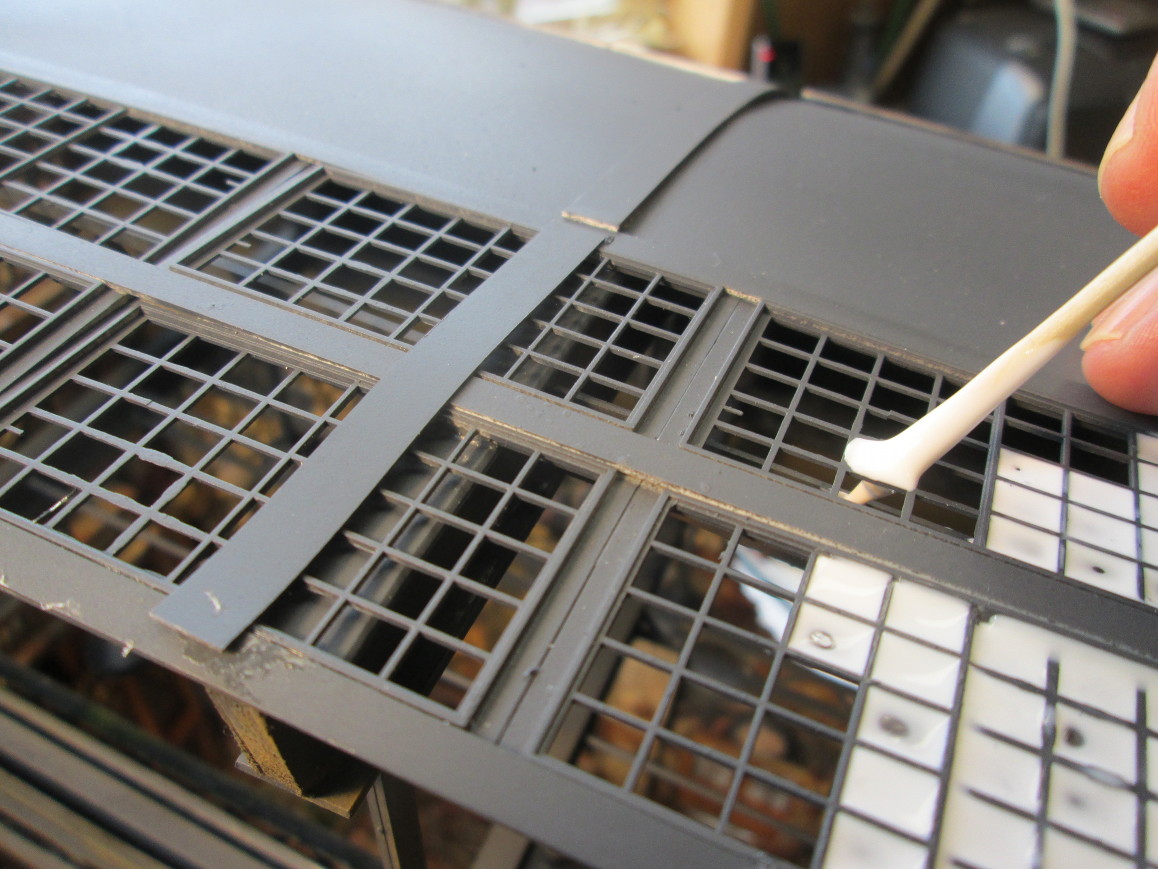
I use a round toothpick, (A flat one takes longer), dip it into the glue and then run the toothpick around all four sides of the frame until it fills. Not as easy as it sounds!
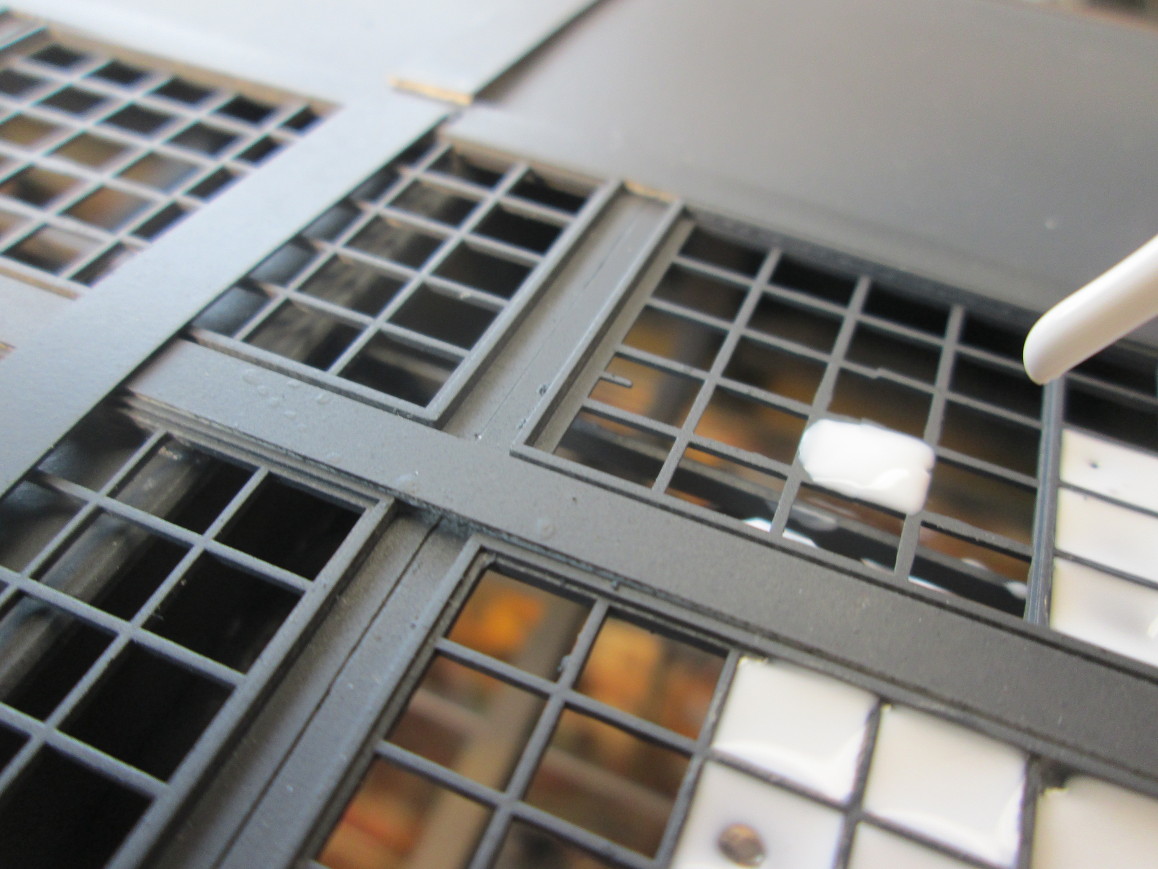
Then, when filled, gradually pull the toothpick out at one of the corners very carefully and slowly. Otherwise it will open up and you have to start all over again. I did that a lot!
Because of the height of the train station, I had to stand up while doing these. There are hundreds and hundreds on the train station alone.
It was a long, painstaking process over a three day period. When dry, close up, they resemble glass blocks. From a distance they look like glass.
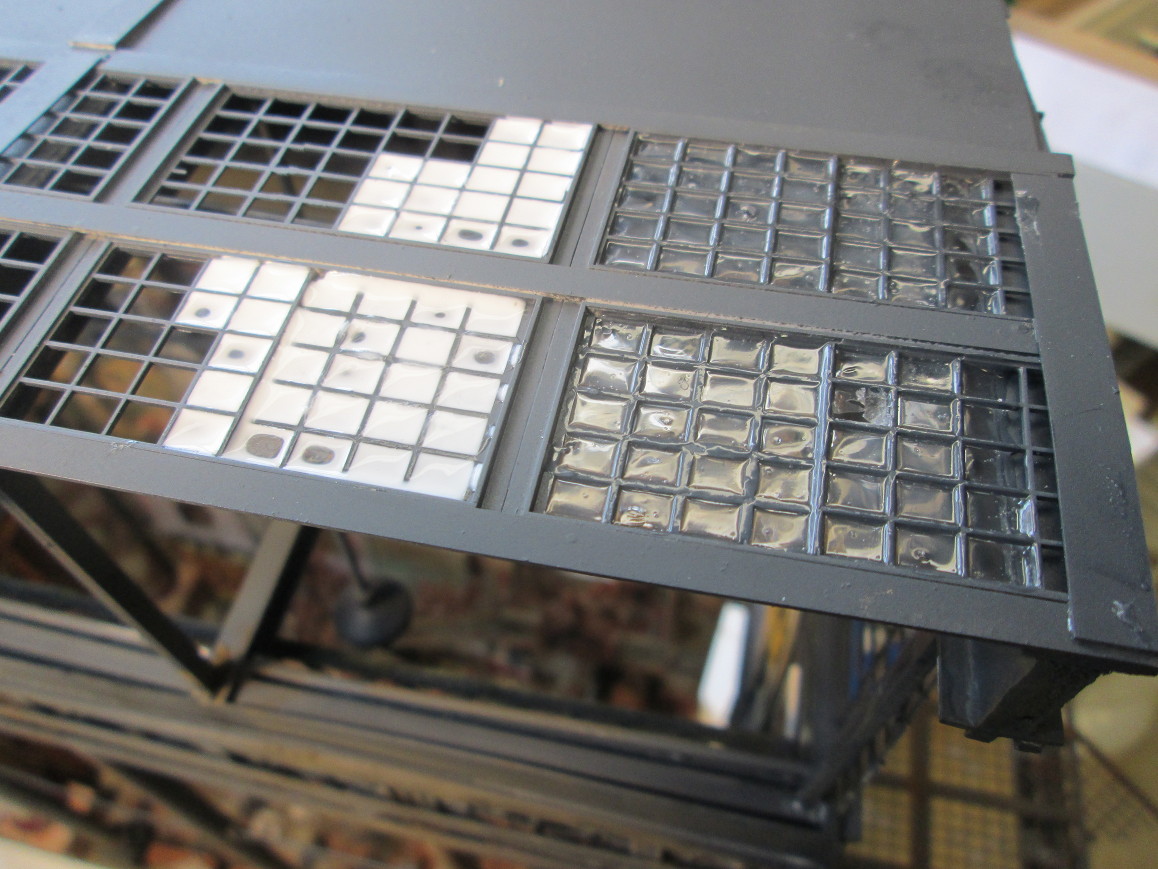
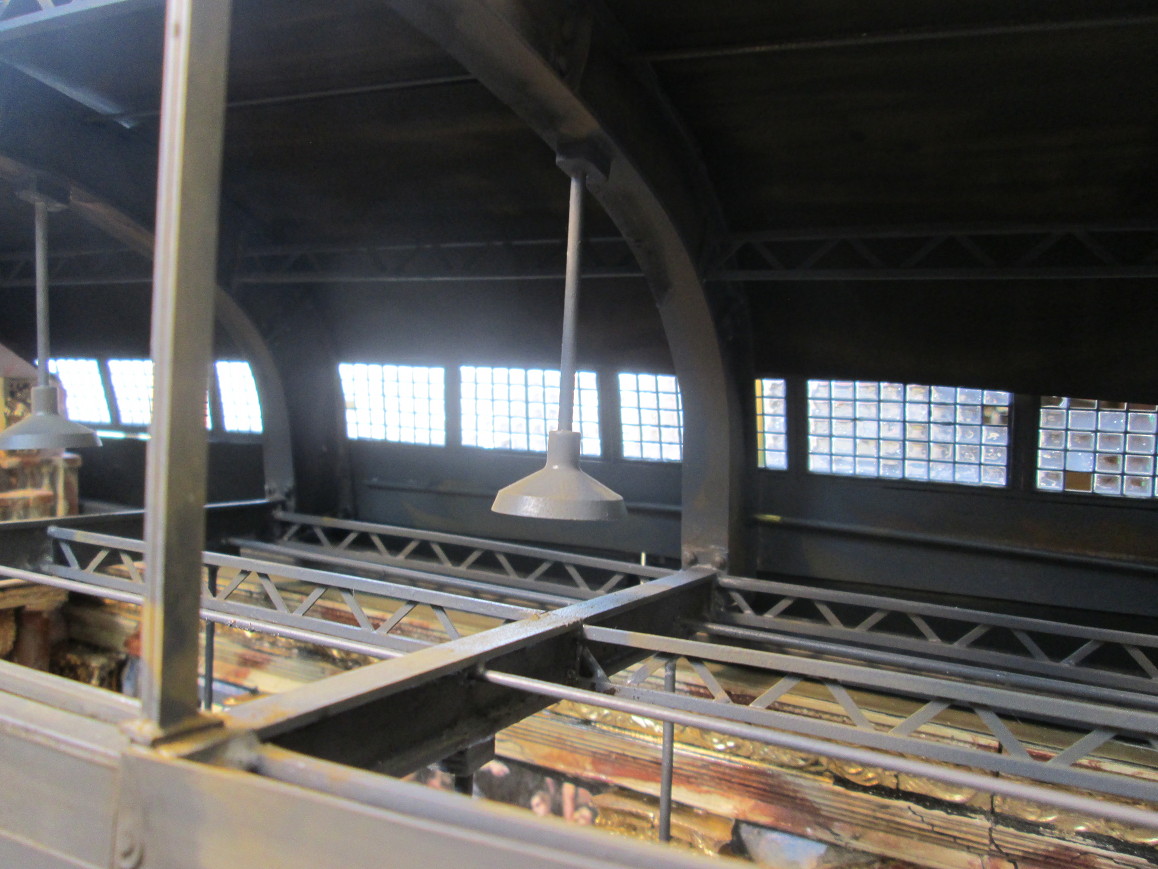
The windows from the rear of the roof.
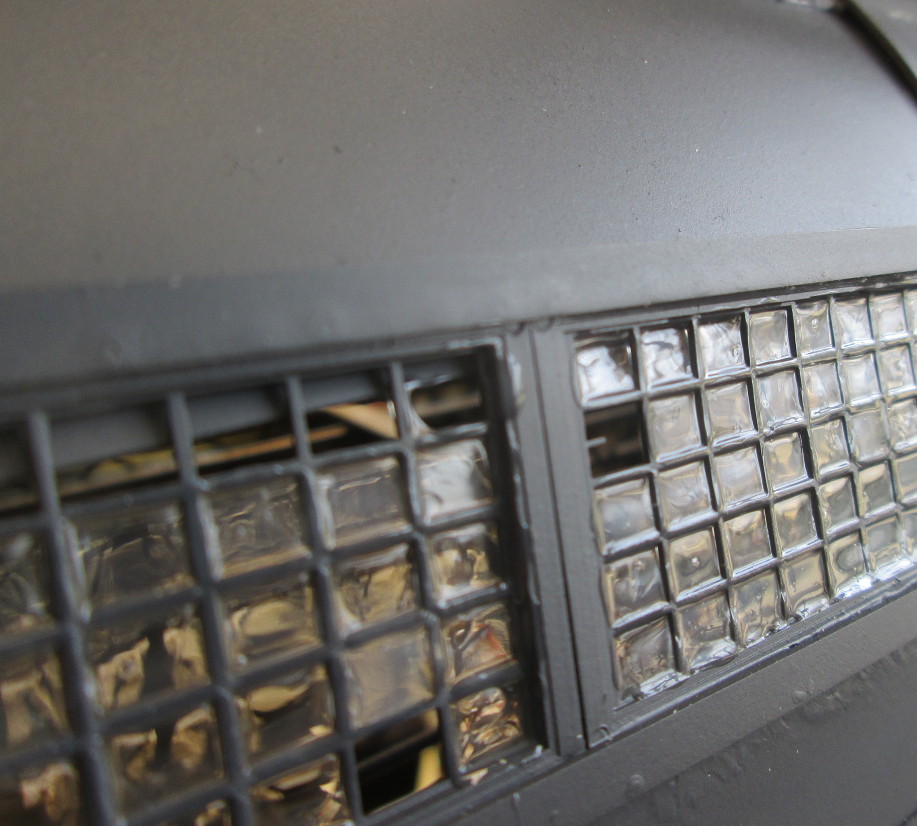
The skylights on the ceiling of the hall being filled.
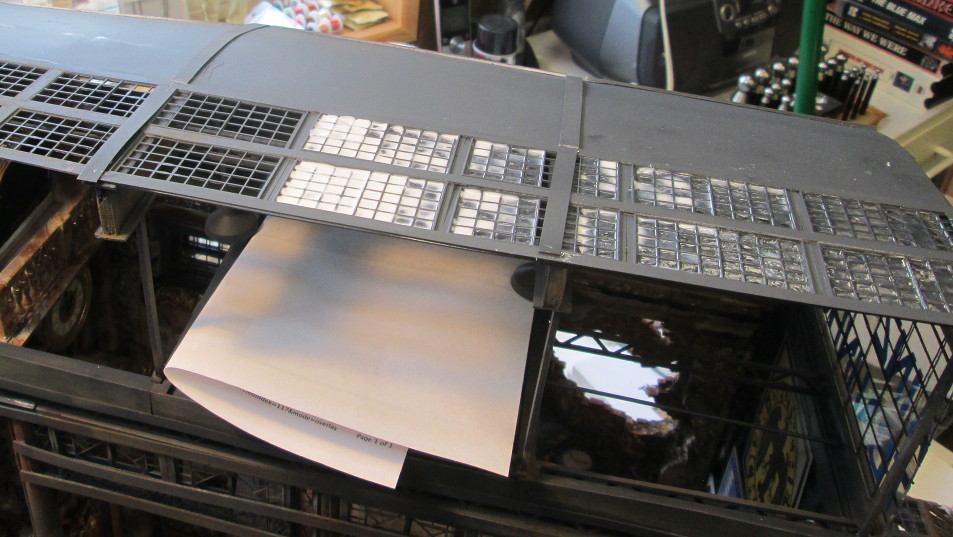
Finally finished. They begin to dry and become clear almost immediately. It takes maybe 30 minutes to cure.
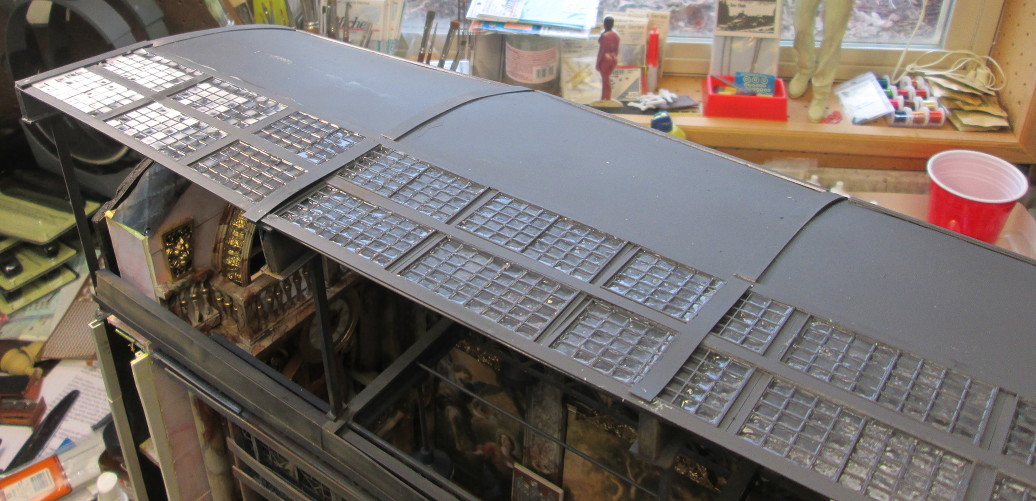
Here you can see both the rear windows as well as the skylights.
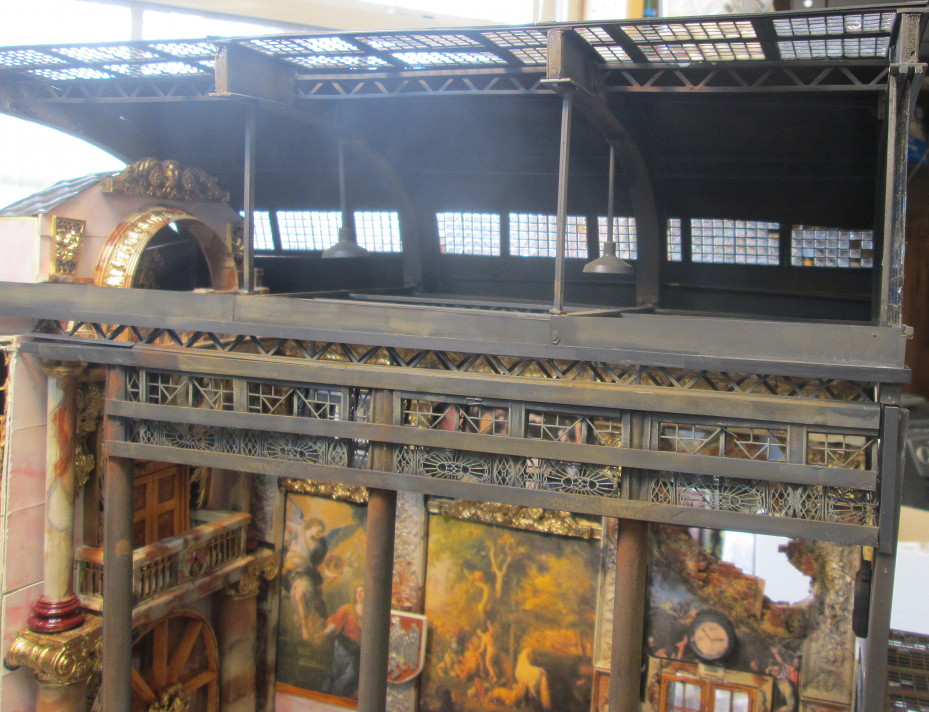
Once cured, they look like windows.
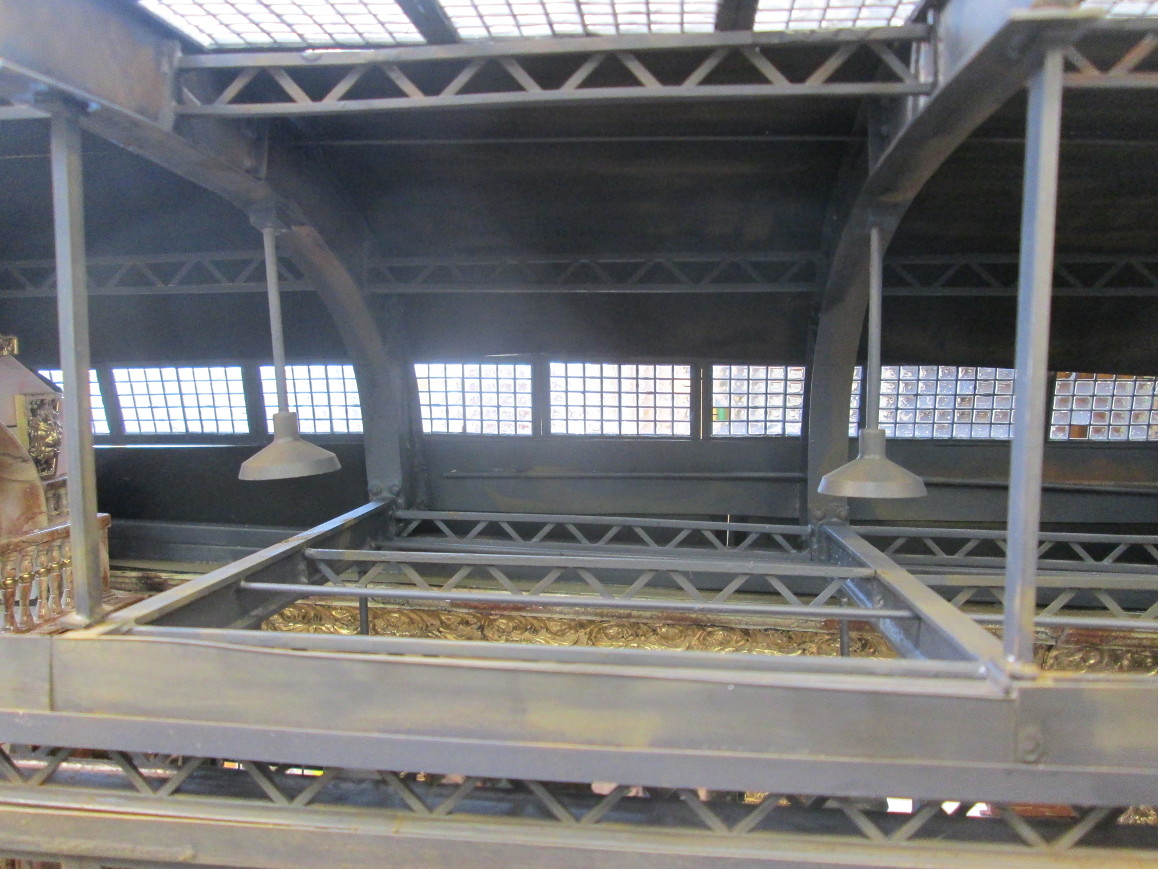
Here I have put the train and the unweathered canopy in place on the other end of the diorama.
Here you can see some of the steel girders, I-beams and window frames in place. I still have lot more to do to them.

And her, the canopy that connects to the trim station.
The rear of the roof. Still has some more weathering. That will come when I finish the canopy altogether.
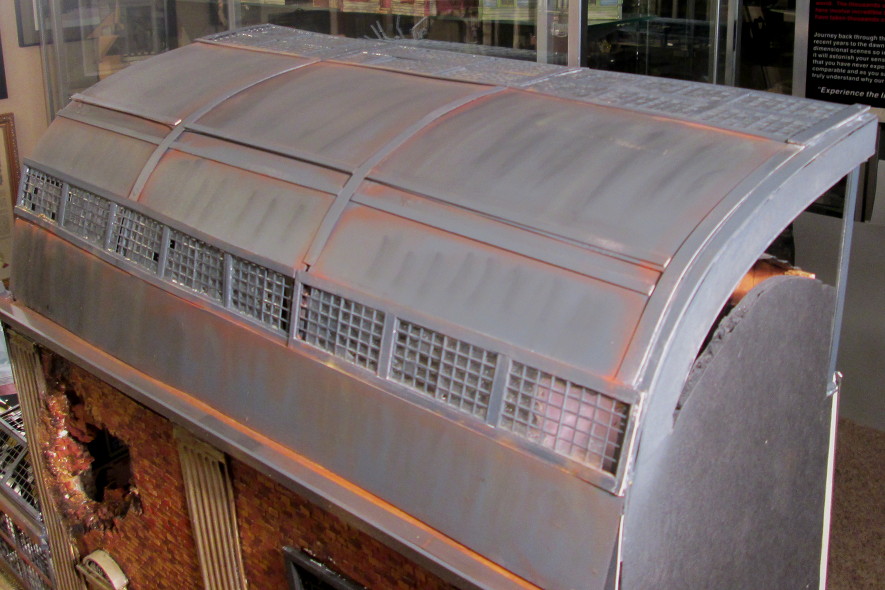
Here the badly damaged canopy connects to the right hand wall of the train station. A lot of the photos have a red cast. It has something to do with the lighting in that room. To move it elsewhere would require another three people. When the diorama is finished, I will have it taken outside to photograph.
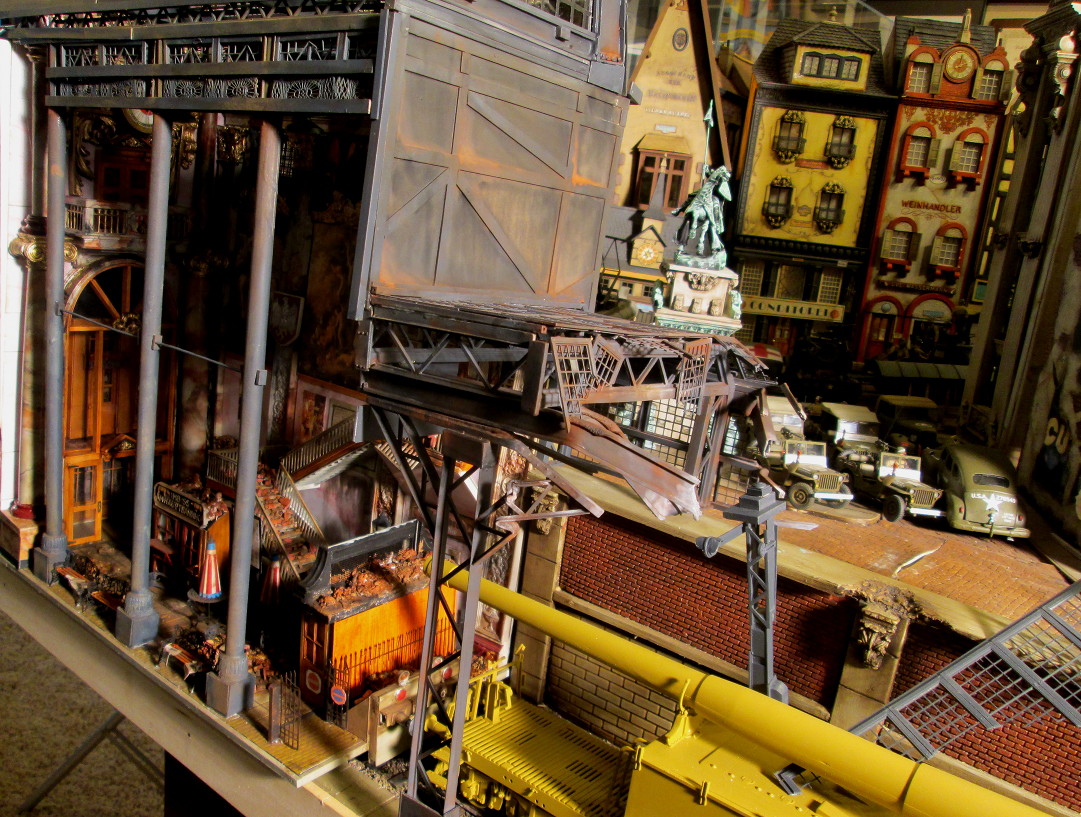
The Locomotive, rail gun under the canopy. BTW, all the 53 vehicles in this diorama are just sitting here and there on the base, not where they will eventually go! Also, I still have to add all the light fixtures and signs, signals, etc., to the underside of the canopy.
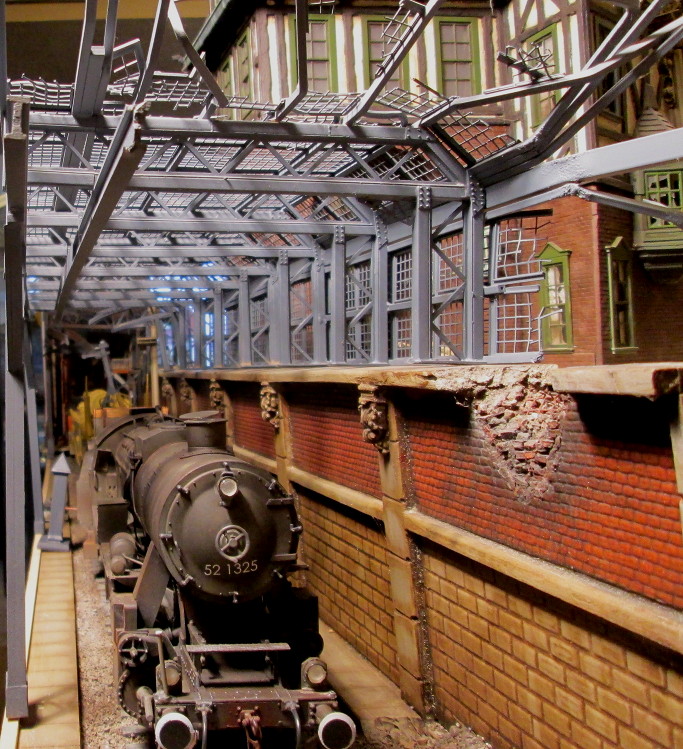
Here is photo I photoshopped to remove the background. I am no expert on Photoshop for sure. A person trained in it could do a much better job. When all this is published in a book, there will be a lot of photoshopping to erase the background walls and other things.The area I did is where the black is.
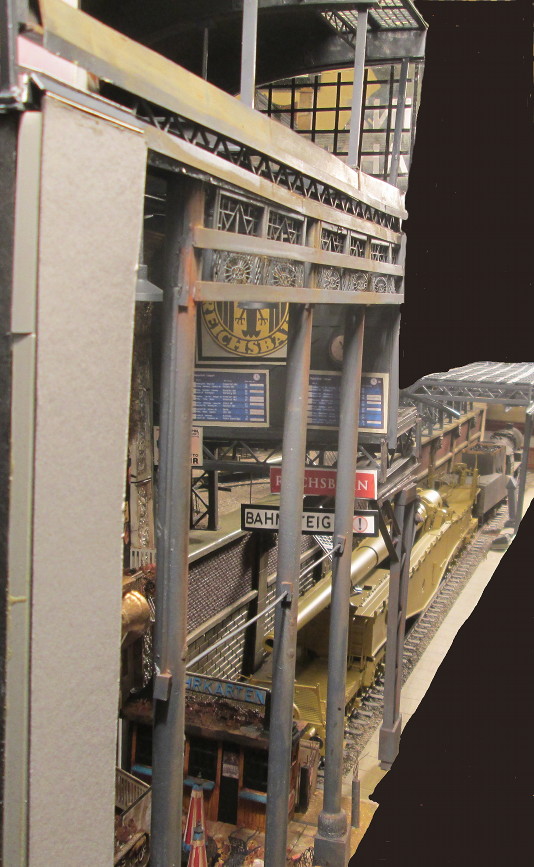
The Train station interior.
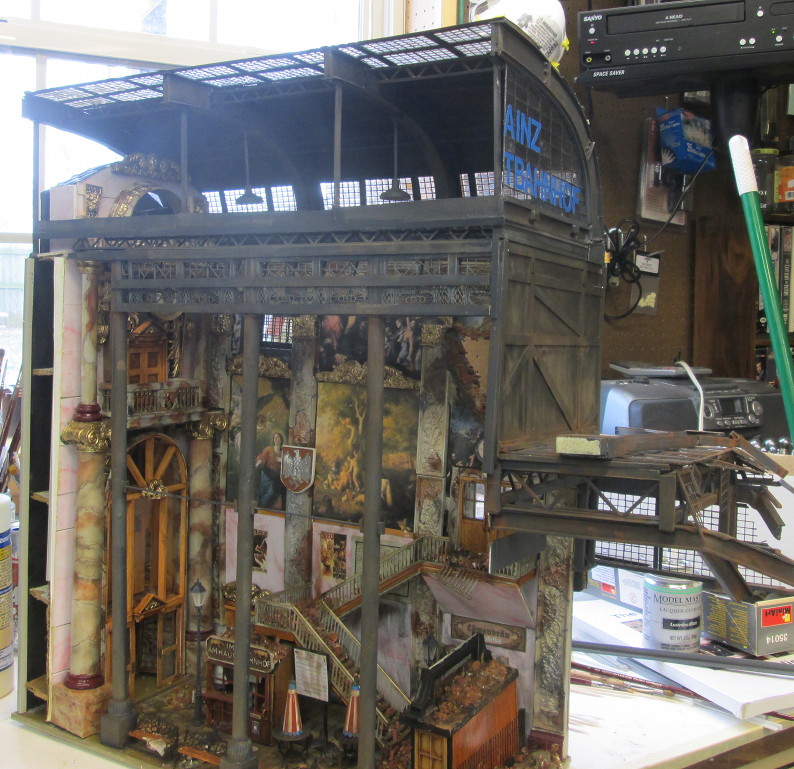
Various shots of the tracks.
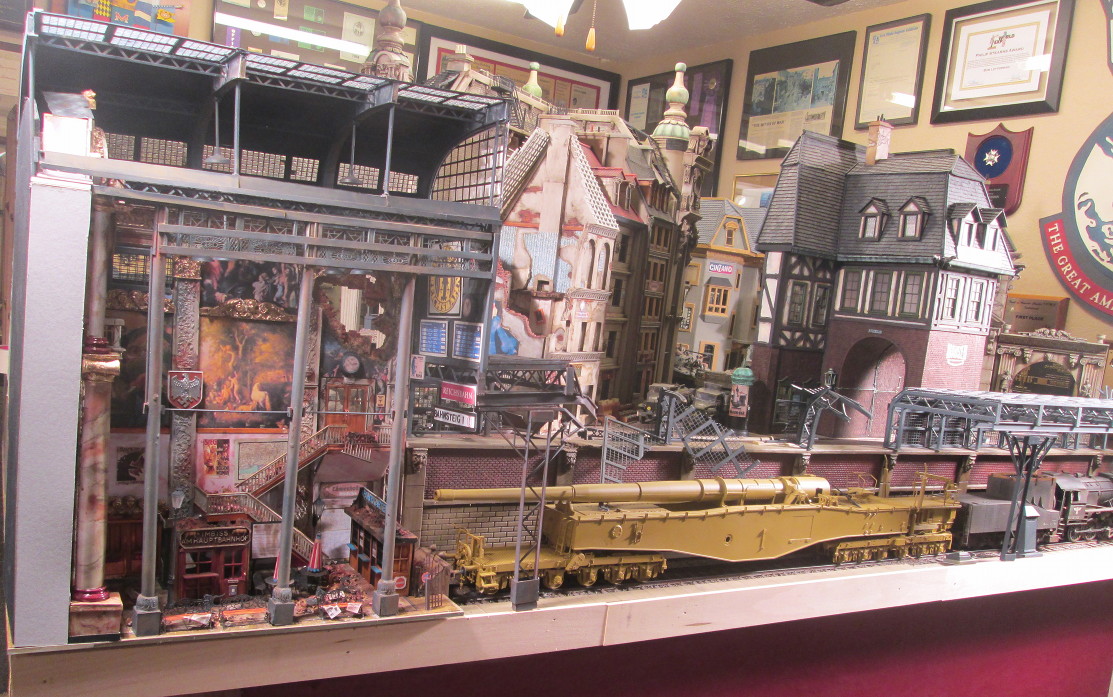

I have always like the woe's eye view photos. They are dramatic and look more real.When the RR gun is detailed, weathered and damaged from the Allied bombing raids, both with explosives and incendiary bombs.
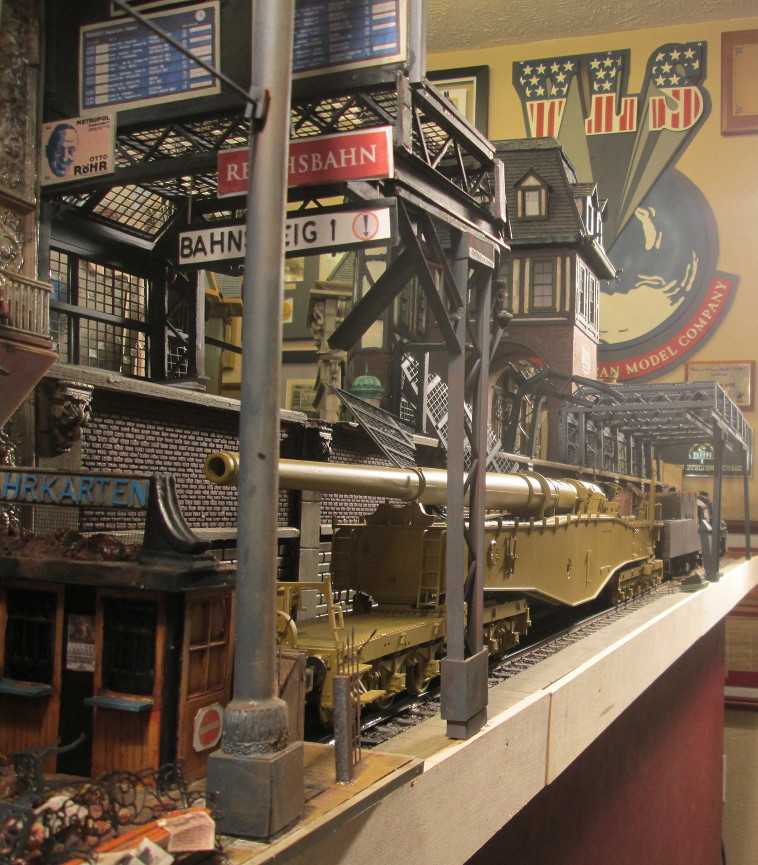
Another view.
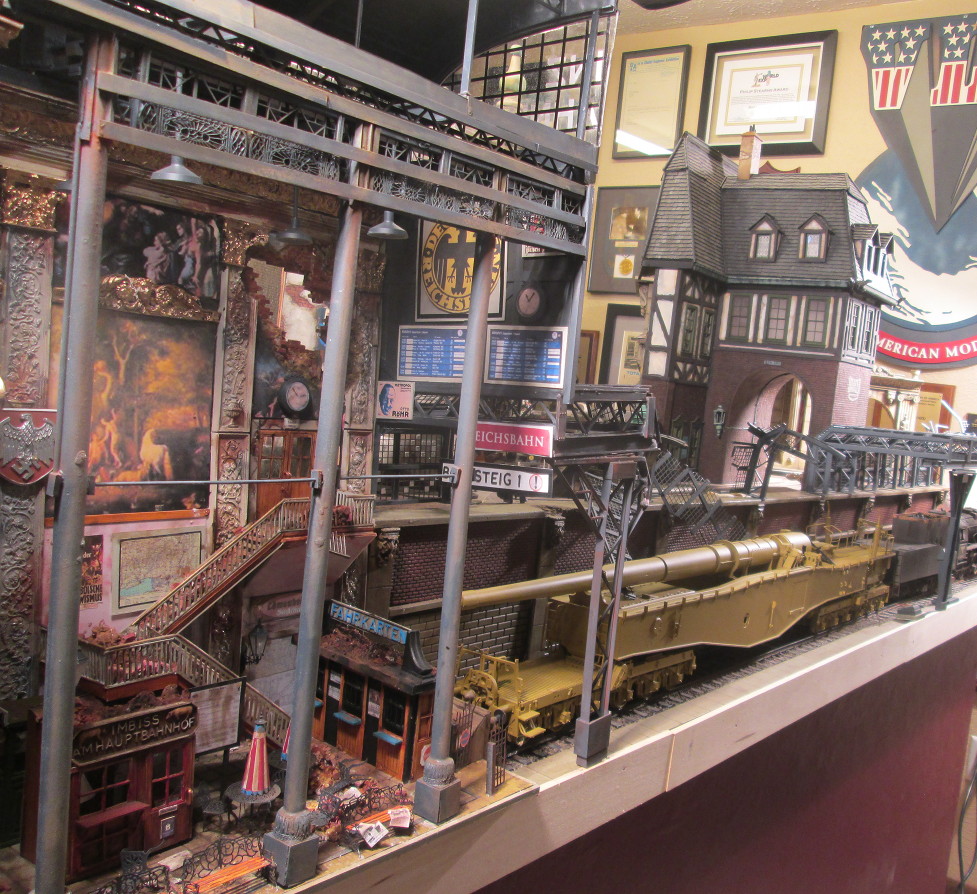
From the right.
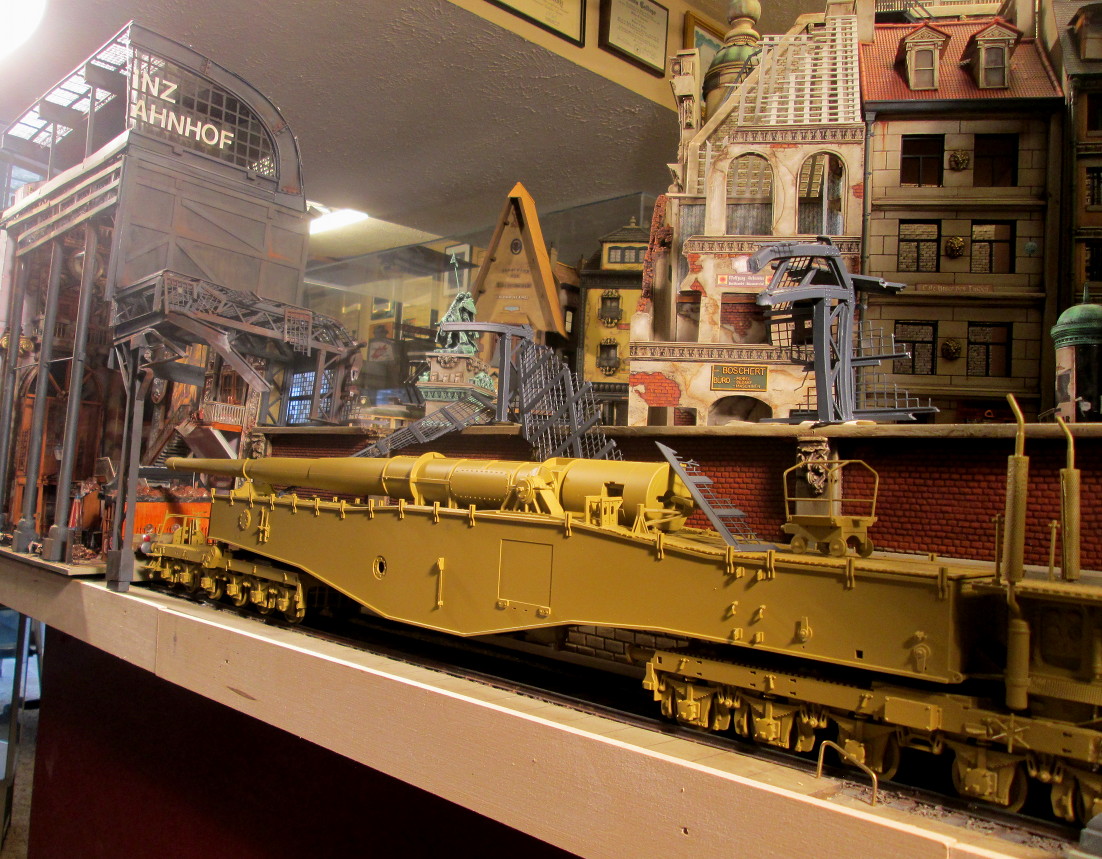
A better view of the station interior.

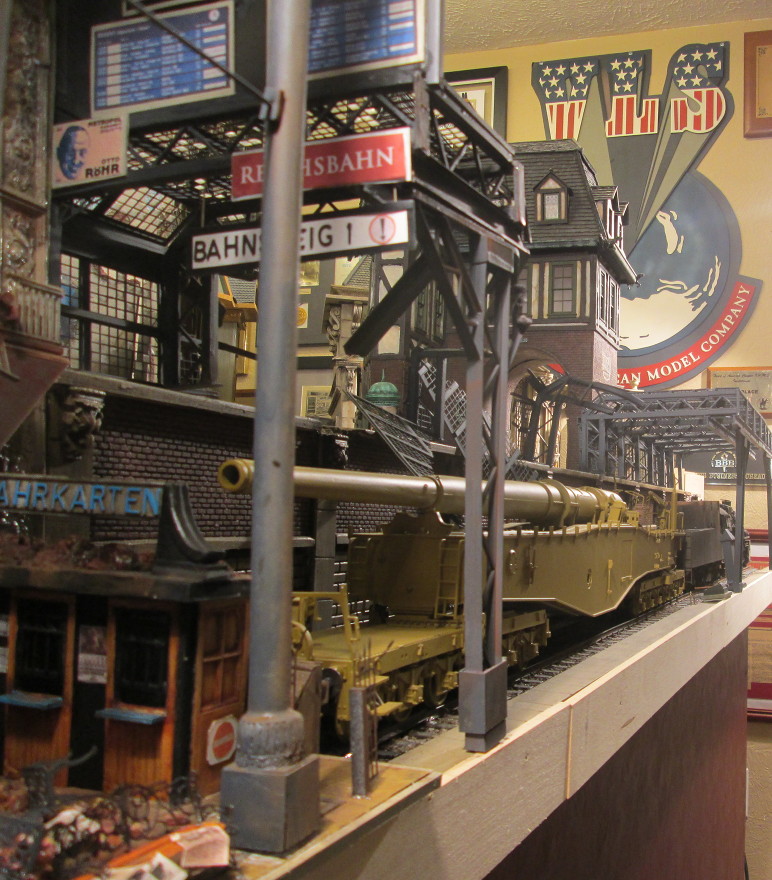
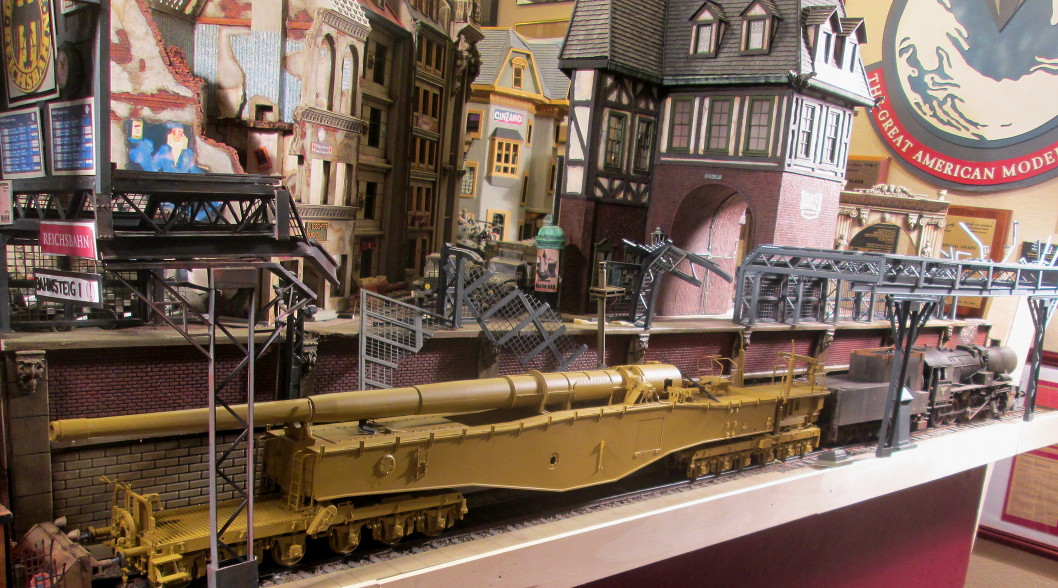
Again, the yet to be weathered cnp[y.
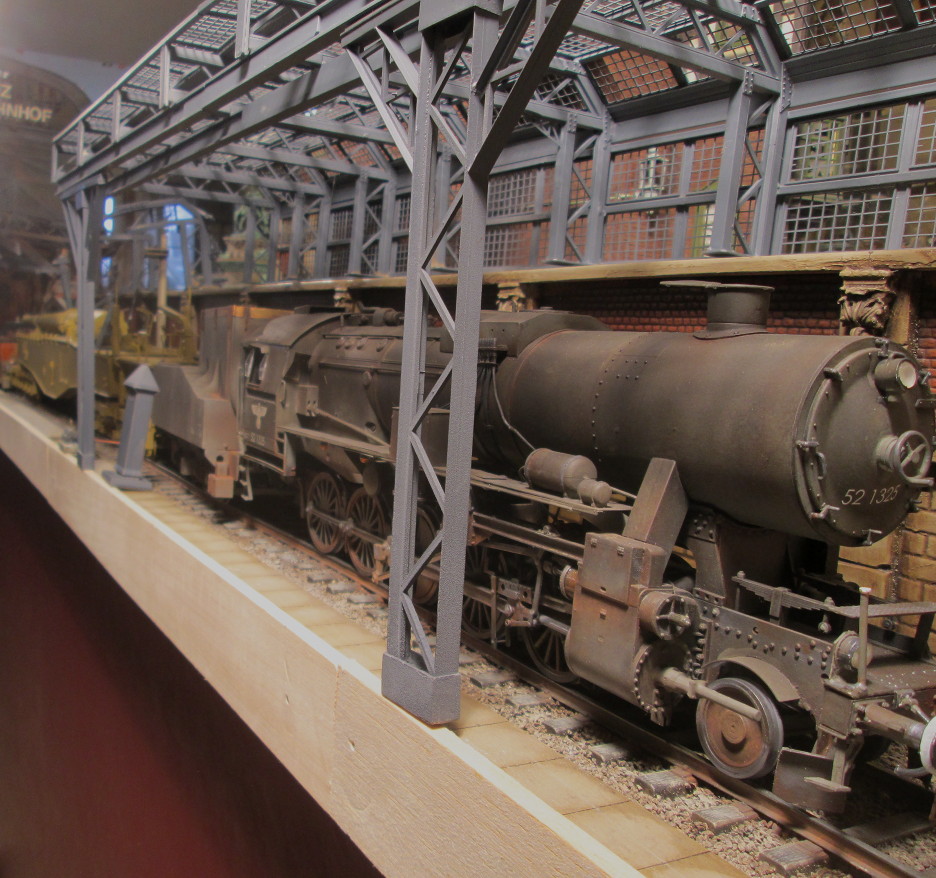
Ditto.
Hope you guys enjoyed this very long post.
Thanks for stopping by!
Bob Letterman
See, I said I'd be back. Bumping to a new page.

Logistics, Base & Buildings, Updated Feb. 13, 2020
Totally AWESOME!
Totally AWESOME!
Heavens Eagle
Well-known member
Logistics, Base & Buildings, Updated March 5, 2020
I have seen it several times as well. Each time there is something I missed before in addition to whatever Bob has added in the meantime. Now I am getting some idea of what is in store for the train station. It's nice still in that I can run the camera down into the middle of all that work for unique photos. I can hardly wait to see it this next time.
It is really looking great Bob! The photos just don't do it justice..

White_Wolf
Master at Arms
Logistics, Base & Buildings, Updated March 5, 2020
Can't put that into words


Laurence
Can't put that into words


Laurence
Similar threads
- Replies
- 18
- Views
- 523
- Replies
- 53
- Views
- 7K

