• Modelers Alliance has updated the forum software on our website. We have migrated all post, content and user accounts but we could not migrate the passwords.
    This requires that you manually reset your password.
    Please click here, http://modelersalliance.org/forums/login to go to logon page and use the "Forgot your Password" option.

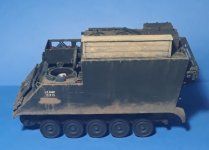
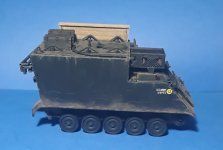
M577 HQ11 from 2d BN 47th IN (Mech) 9th ID

JamesOLeary

Master at Arms
Several months ago, last July to be exact, I had started working on two M577s - one being made from the Tamiya kit and the other being a kit bash of AFV Club's M113A1 ACAV and the Tamiya M577 kit. The one this thread is about is the Tamiya M577.

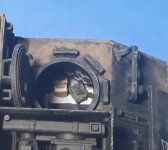
Some things that I have done to improve the kit was drill out some details, drill holes where the bolts and the side skirts were attached and removed, and add the drivers compartment.

20230719_203306.jpg
20230719_203147.jpg
20230719_204116.jpg
 
After priming the model with black spray paint, I used a regular brush to apply Reaper's Black Green which I have found to be the best match for me for the dark OD green used during that time period. I then applied dry transfer markings, painted yellow circles, and then applied dry transfer numbers to the yellow circles.

20240330_211305.jpg
20240330_211327.jpg
20240330_211354.jpg
20240330_211416.jpg
20240330_211441.jpg
 
Two nights ago I painted the trim vane. In mid 1967 all of the trim vanes in the Battalion were to have a Panther painted onto them as the battalion was known as the Panthers. There were several variations and poses allowed. All of the HQ tracks whether M577s or the Commander's and S3 M113s had the same pose for the Panthers painted onto their trim vanes. Since these were painted by crew members, they varied from looking ferocious to looking kind of cartoonish like the one on HQ.

20240410_214204.jpg
20240410_214946.jpg
20240410_215016.jpg
 
After completing the tribute to SGT Russell Fant, I started working on this model again. I used DEF Models early road wheel set for the road wheels. I attached them today. I still need to weather them.
Other things I have done:
Removed masking tape from driver's compartment.
Installed driver's hatch.
Made a large box out of styrene strips, textured it with a wire brush, and painted it.
Painted two footlockers.
Painted and mounted the poles. I also made the bracket that was missing from the kit that holds the two ridge poles at the bottom.
Painted and installed the generator minus the lifting bracket.

20240421_204637.jpg20240421_204606.jpg20240421_200729.jpg20240421_201034.jpg20240421_200944.jpg
 
Nice work James. The weathering looks really good

Thank you. Normally I would have started the weathering process using oil washes, but I couldn't find my oil paints so it is all done with powdered pigments with chipping and scratches done with black and white acrylics mixed to look somewhat like aluminum.
 
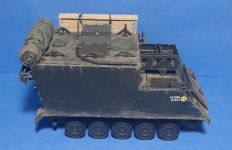
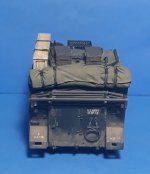
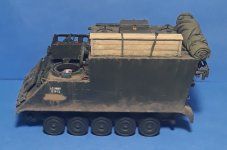
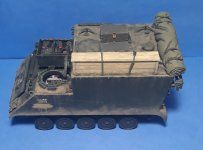
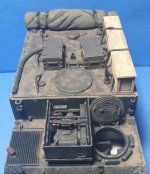
I thought I had posted the latest photos of my progress but I guess I hadn't. Here is the M577 as she has been for the past week or so. I sculpted the tent roll, made and painted the long wooden box that the crew had made, and added two footlockers that were used as seats during movements.

20240428_222533.jpg20240428_222557.jpg20240428_222617.jpg20240428_222640.jpg20240428_222703.jpg20240428_222819.jpg
 
The photos are not that great because of the lighting, but gives you an idea of what I have been working on now that the "Hootch Maid" vignette is complete. I used the 3D printed workable tracks from DEF Models. They were easy to remove from their supports and clean up. They also were connected quickly. I painted them and was ready to install them. I decided to go with the DEF Models idler wheel and the drive sprocket from ModelKasten's track kit since I had already installed the transmission and the DEF drive sprockets require the use of their own transmission.
The first set of tracks went onto the left side rather easily.
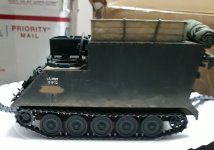
20240525_151112.jpg

However, that was not the case with the right side. First I discovered that the pin to the transmission was a bit canted which did not allow for the drive sprocket to be positioned correctly. I cut the pin in half so the shaft from the drive sprocket would fit.
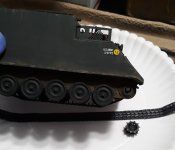
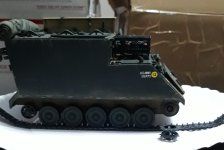
20240525_151132.jpg20240525_151204.jpg

After I solved that problem, I started to install the tracks. They kept coming apart at three different points and would come apart when the tension was applied to them while trying to put the tracks on. After several attempts and the use of numerous four lettered explicatives, I decided to not use those tracks and started building a set from ModelKasten. After about seven hours of work on the replacement tracks, I figured I would do a test fit before painting them. They broke at one point, too. Since I had already painted the DEF tracks, I decided that I would go ahead and use those. I glued the tracks that had been coming apart and was able to install them with no problems this time.
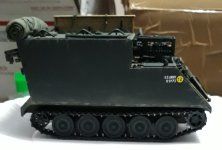
20240526_131123.jpg

After these photos were taken, I glued the two footlockers to the roof. I still need to weather the tracks and road wheels, add the antenna, and place the shovel onto the front. I started working on figures last night and today.
 
Here are the figures I plan on using for this diorama. I may add a few more. The four that are not yet primed have some sculpting work that needs to be done to them. Not sure how many I will be able to get done in time for the Tulsa Figure Show. Whatever I do get done in time can always be added later.

20240527_230417.jpg
 
Back
Top