
-
Modelers Alliance has updated the forum software on our website. We have migrated all post, content and user accounts but we could not migrate the passwords.
This requires that you manually reset your password.
Please click here, http://modelersalliance.org/forums/login to go to logon page and use the "Forgot your Password" option.
You are using an out of date browser. It may not display this or other websites correctly.
You should upgrade or use an alternative browser.
You should upgrade or use an alternative browser.
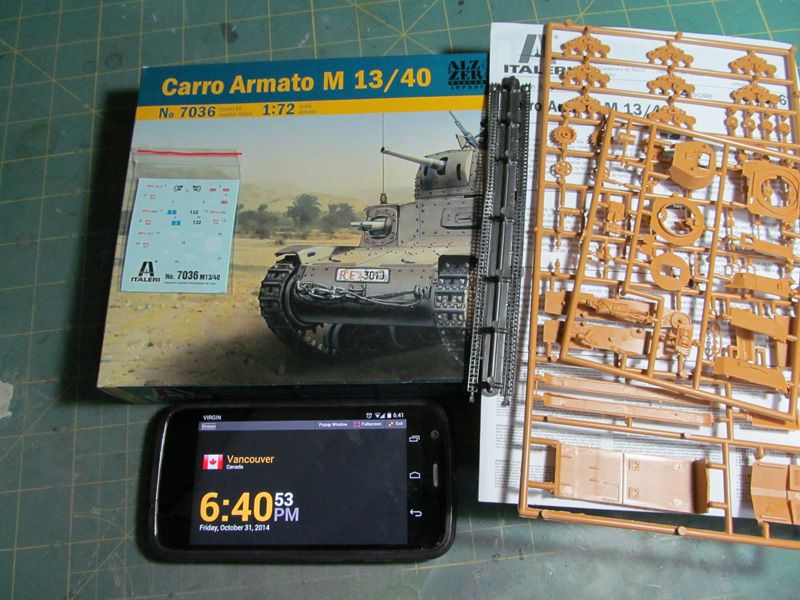
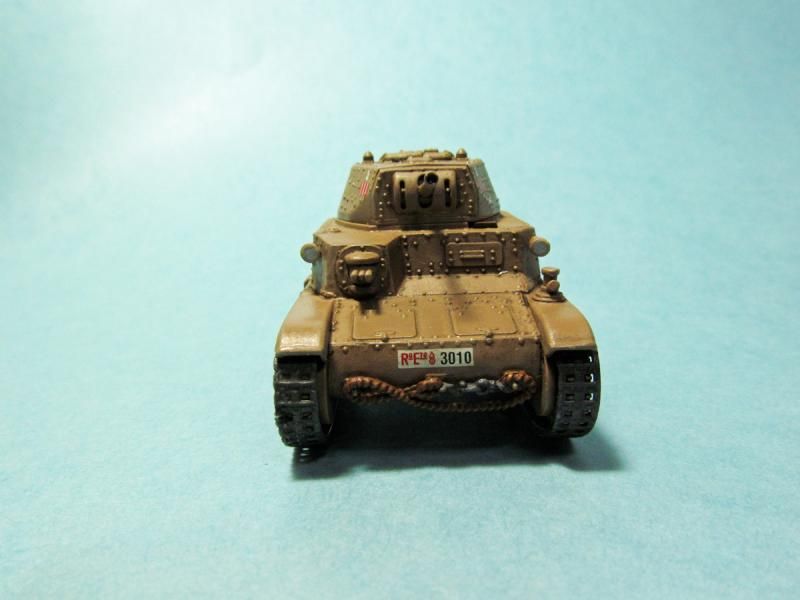
Italeri 1/72 M13/40
- Thread starter razordws
- Start date
Go Dave! 
Sherman 18
Master at Arms
Cool it did not know that there was a 1/72 scale kit. ")
razordws
Well-known member
Thanks guys, yes it is tiny but tiny can be fun! :gogo
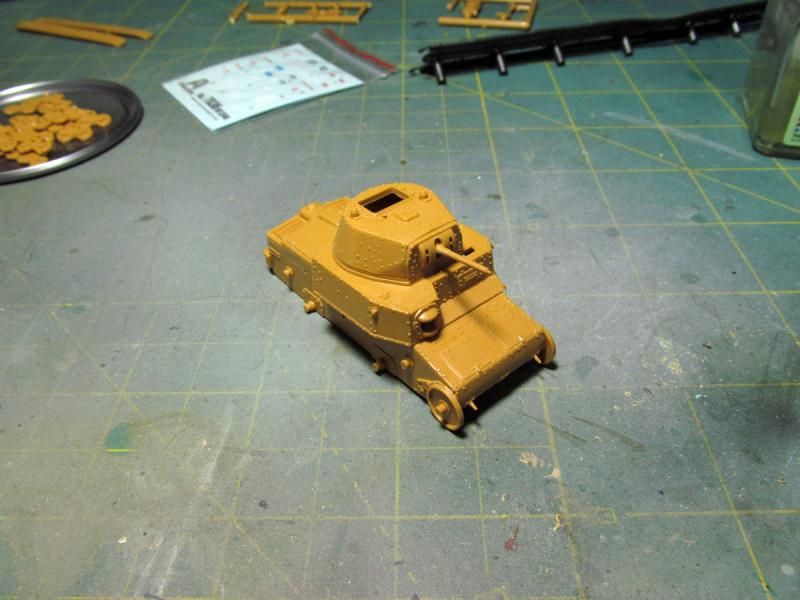
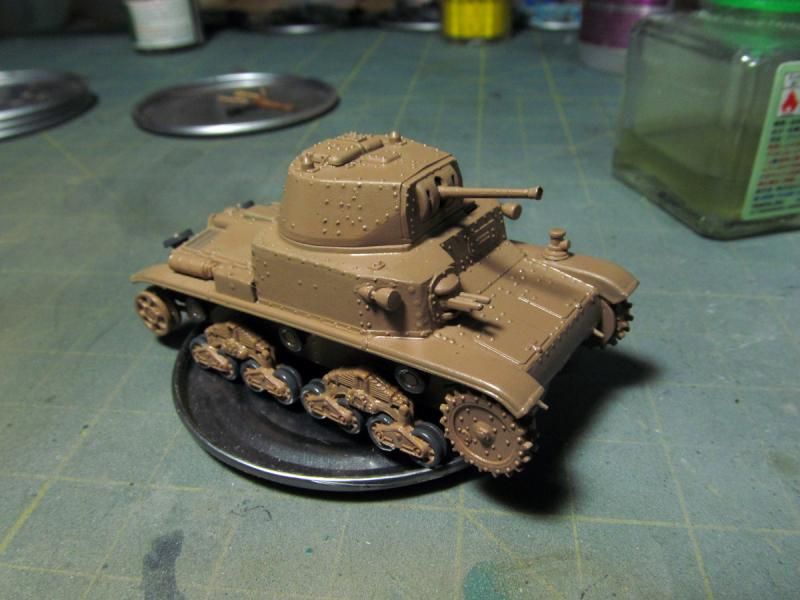
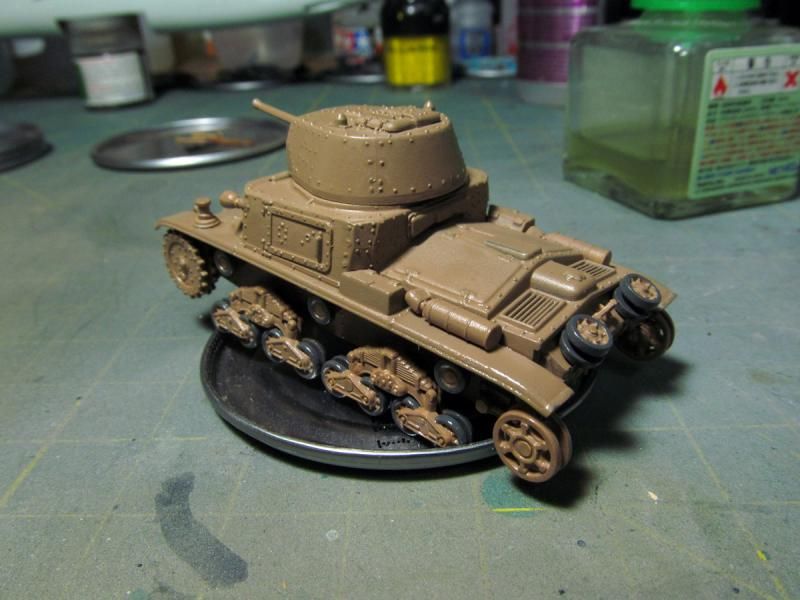
More progress yesterday. Hard to fill in the seams without ruining all the rivet detail. Still have a couple seams to fix but it is getting there. I'm pretty sure this is one of the old ESCI molds that Italeri have reissued so lots of ejector pin marks etc in places where you just can't fix them but still a neat kit regardless. Running gear is not glued yet. Need to get some primer on next.

More progress yesterday. Hard to fill in the seams without ruining all the rivet detail. Still have a couple seams to fix but it is getting there. I'm pretty sure this is one of the old ESCI molds that Italeri have reissued so lots of ejector pin marks etc in places where you just can't fix them but still a neat kit regardless. Running gear is not glued yet. Need to get some primer on next.
Dave. Maybe cut up some rod to replace those big rivets?
jknaus
Administrator
As Bob said, you can use rod for those. If I remember correctly they are half dome? if so drill hole, add plastic rod and then heat a small screw driver and hold it close. The rod should mushroom back. Otherwise look for Caliber 35, they have replacement rivets at a reasonable cost. Just saw Meng has some also.
http://www.meng-model.com/index2ss.php?id=205
Here would be the ones you want.
http://www.meng-model.com/index2_new.php?id=216


James
http://www.meng-model.com/index2ss.php?id=205
Here would be the ones you want.
http://www.meng-model.com/index2_new.php?id=216
James
razordws
Well-known member
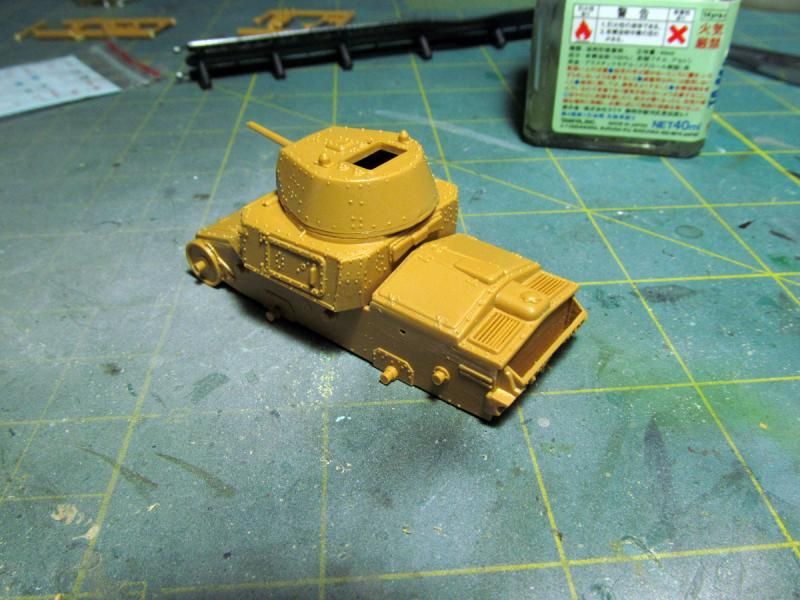
I tried drilling the holes and using strecthed sprue to recreate the rivets. The stretched sprue was too soft and did not work very well so I did the CA glue thing on the rest of them. I bought the smallest diameter styrene rod I could find to use for making the rivets but it was still too big.
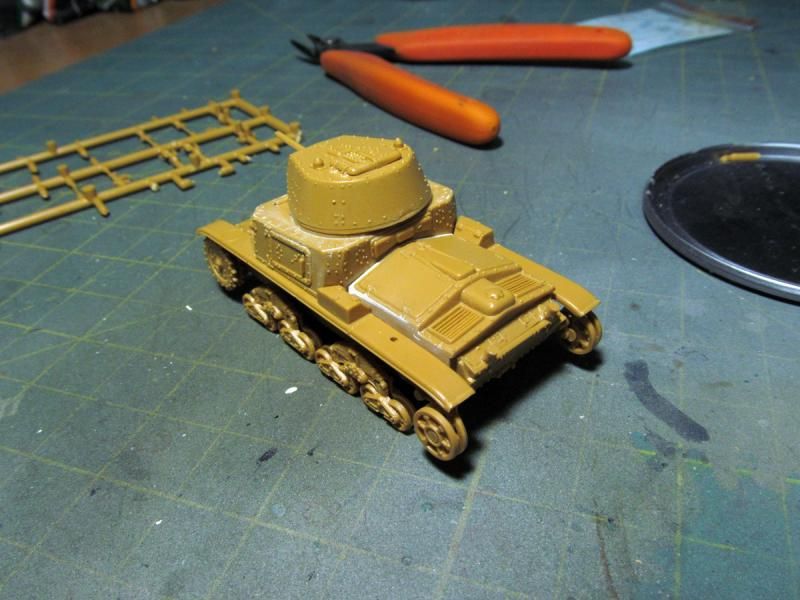
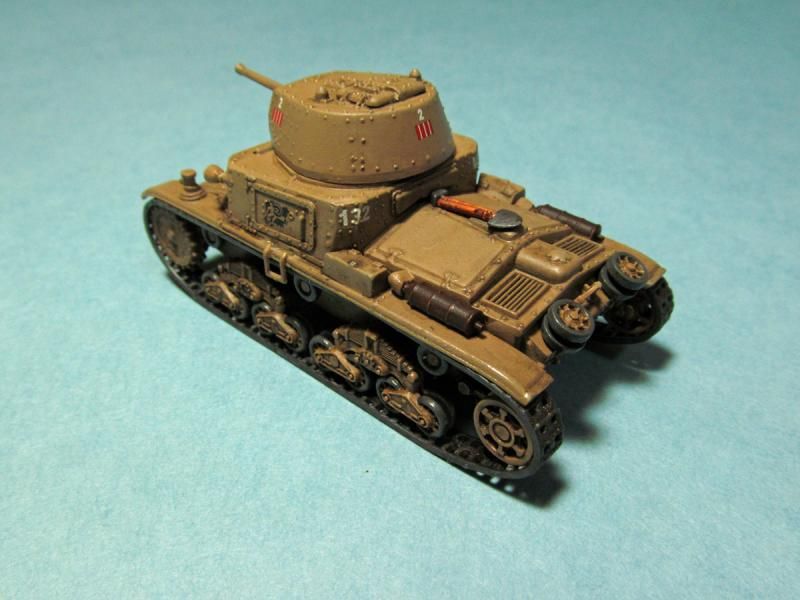
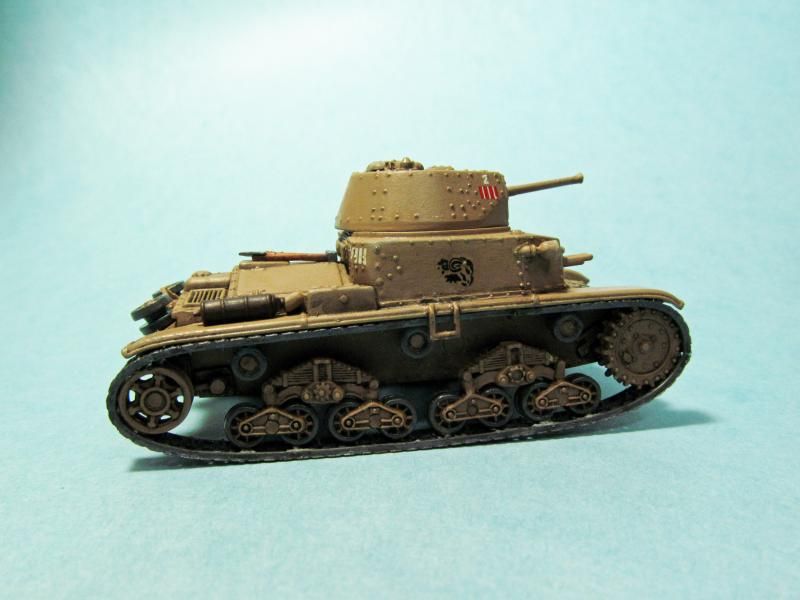
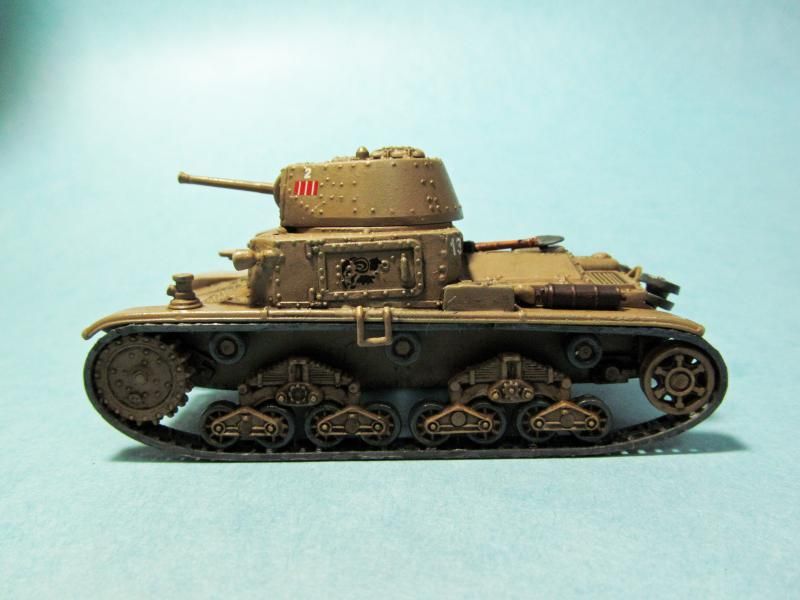
I finished painting the road wheels on it yesterday and futured it this morning so that I can give it a wash at some point. Oh and I spent most of the night last night on my hands and knees searching for wheels on the floor. Carpet monster went hungry last night.
I usually don't future my armor models but I used Model Master enamels because I had some Italian Sand. The paint was almost beyond use and kept clogging the nozzle but I gotter done. I am also using this build for a 10 day challenge build on another site so I futured it instead of trying to wait for the enamel to fully harden before giving it a wash.
The model itself is pretty crappy. Ejector pins in crazy places and out of round wheels but this is the only kit of this thing in this scale so what are you going to do. :idonno
Don't feel like doing much on it tonight but maybe I'll go start painting the tracks or something.
Sure can't see any of the issues from here. If it's that bad slap some mud on it. 
razordws
Well-known member
Needs some touch ups and a few do dads. I need to work on the weathering a bit more but it is pretty much done. The old school vinyl tracks were a royal pain in the petunias. Took a wack of CA glue to get them to sit half decently on the wheels and sprockets. Oh well it is something different for the display case.
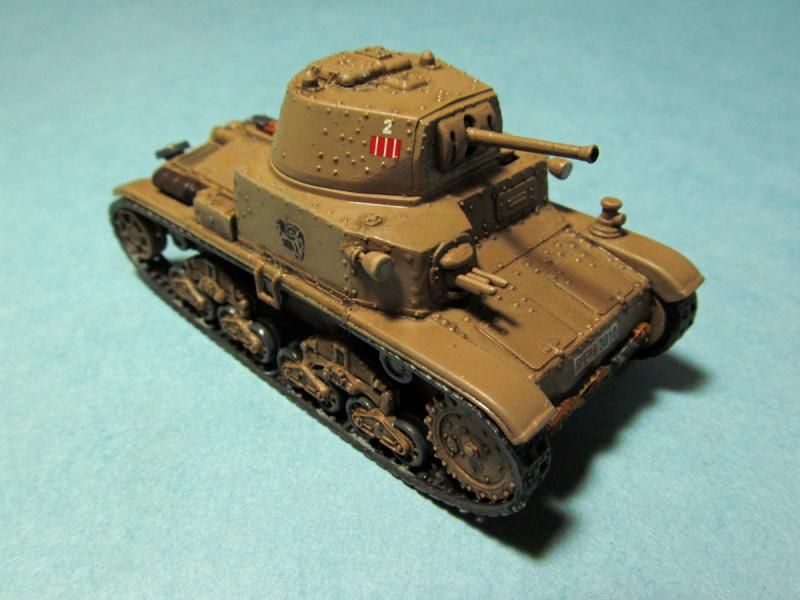
Pretty cool little tankette thing. Git'er done Dave!
gotta agree 110% :drinksPretty cool lookin little tank Dave. Especially for a 10 day build.
Similar threads
- Replies
- 73
- Views
- 5K
- Replies
- 3
- Views
- 301