• Modelers Alliance has updated the forum software on our website. We have migrated all post, content and user accounts but we could not migrate the passwords.
    This requires that you manually reset your password.
    Please click here, http://modelersalliance.org/forums/login to go to logon page and use the "Forgot your Password" option.

IDF M60A1 w/mine roller

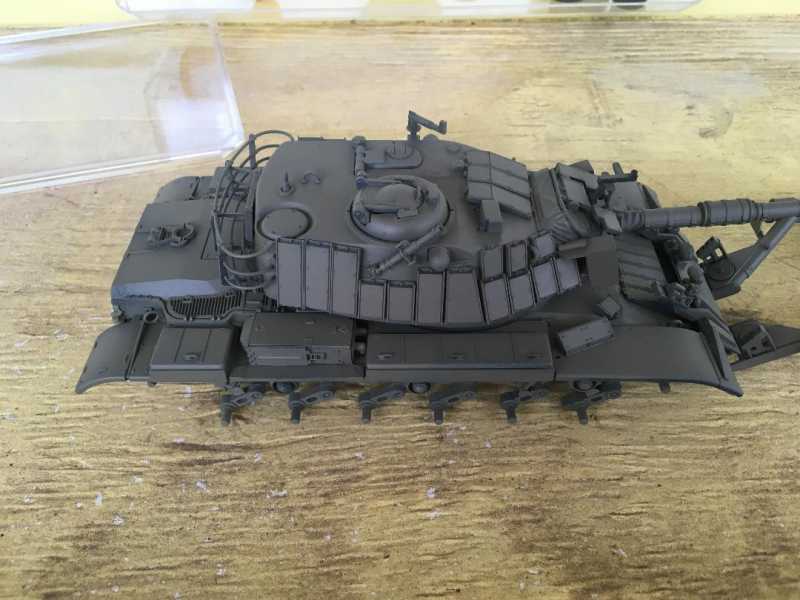
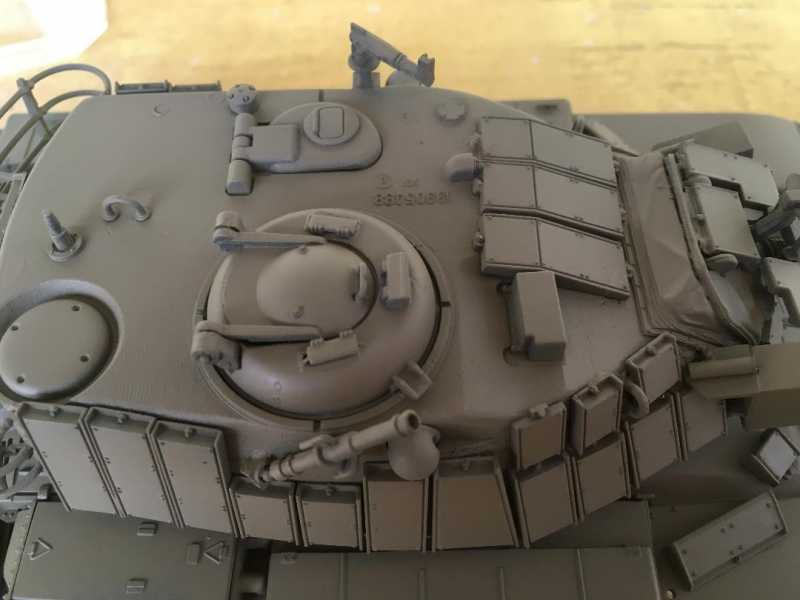
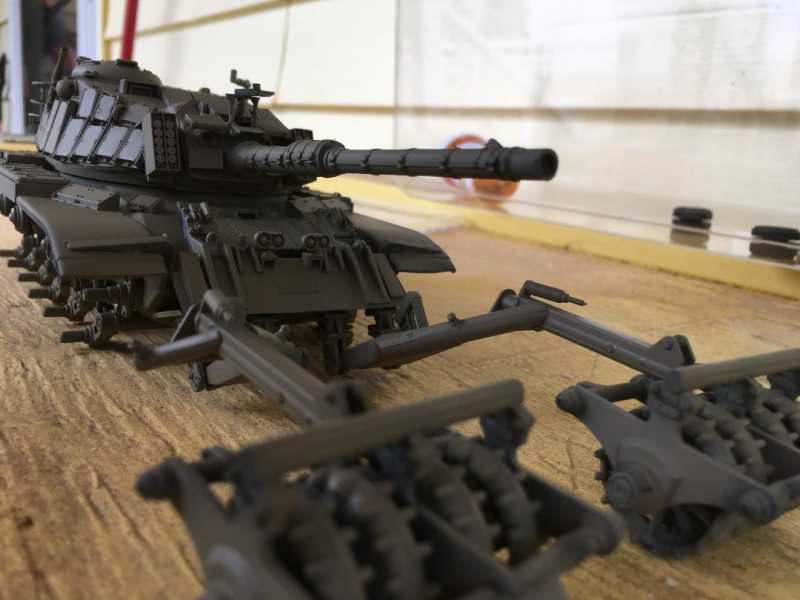
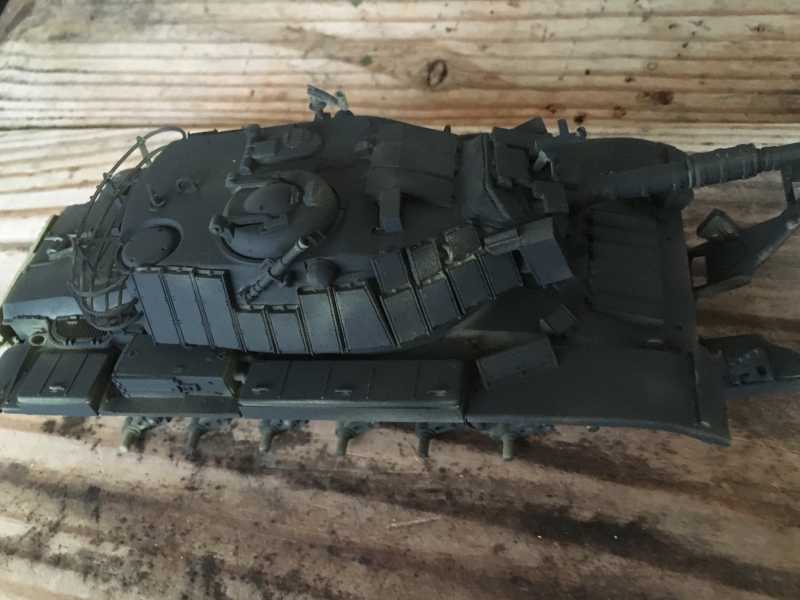
Well, about 4:30pm I decided to see if I could get a coat on the M60. I had up to now only primed it with Tamiya Flat Black

h2526282.jpeg


h082fd48.jpeg


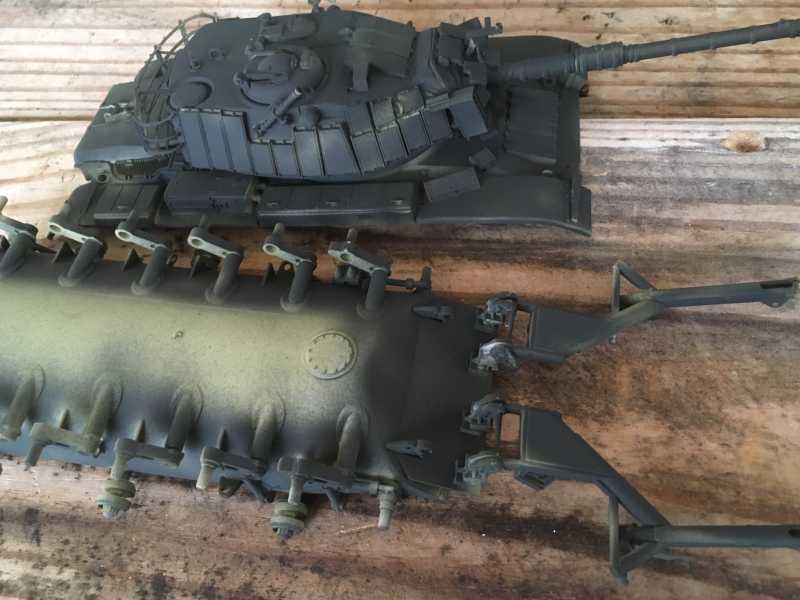
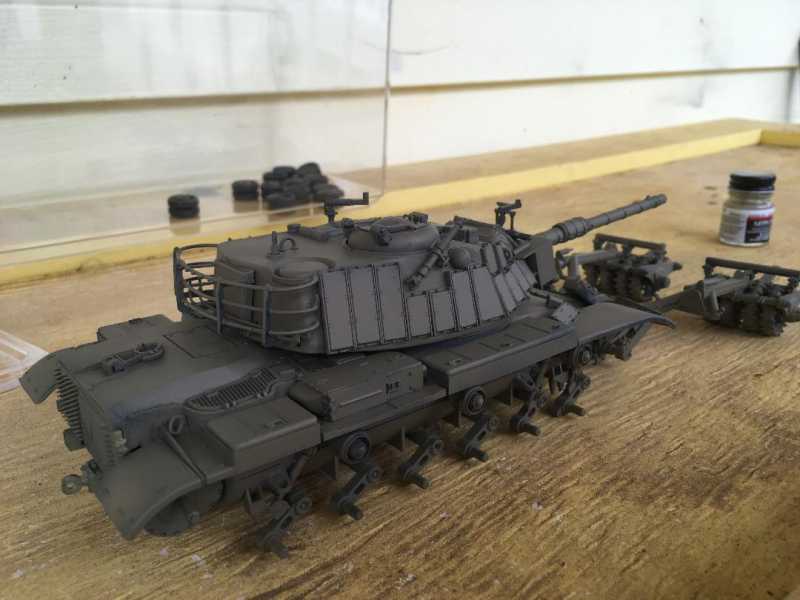
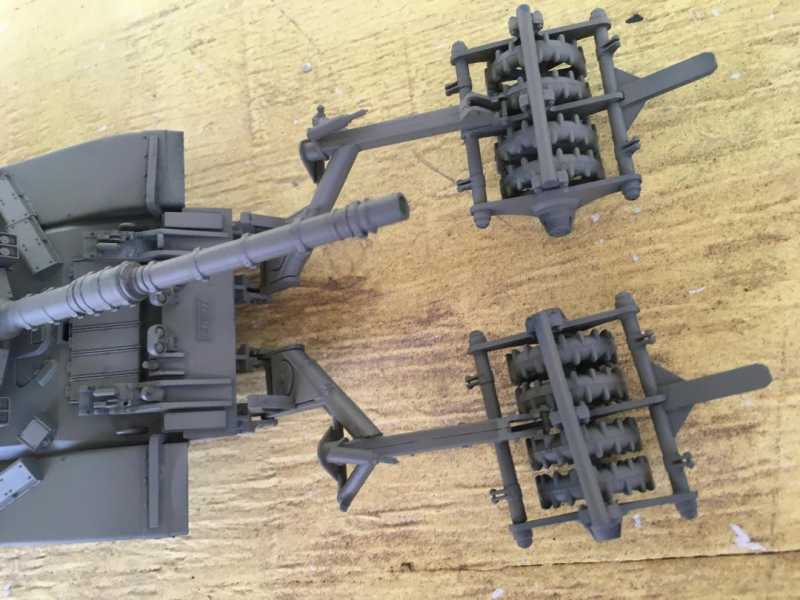
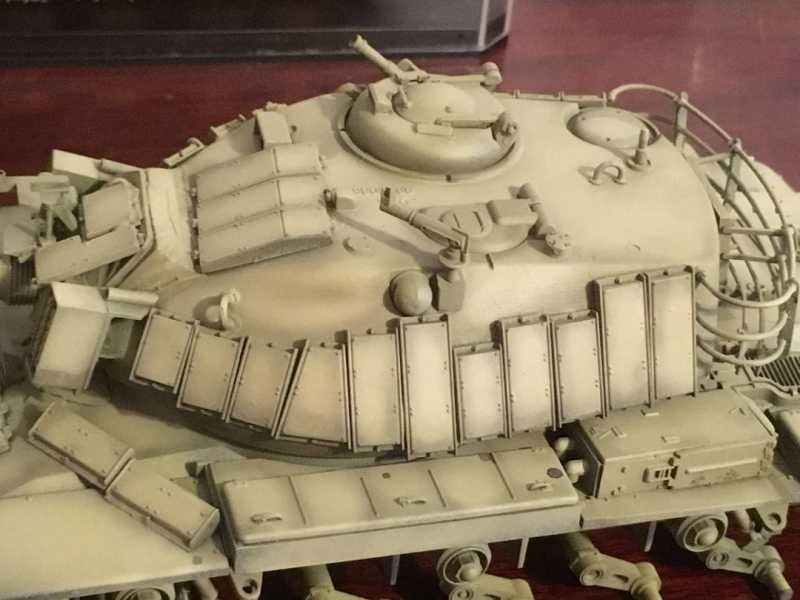
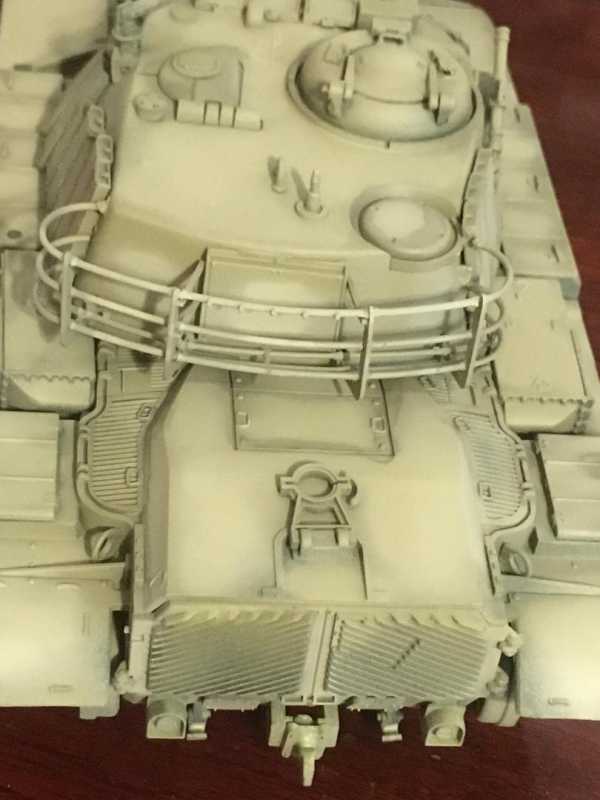
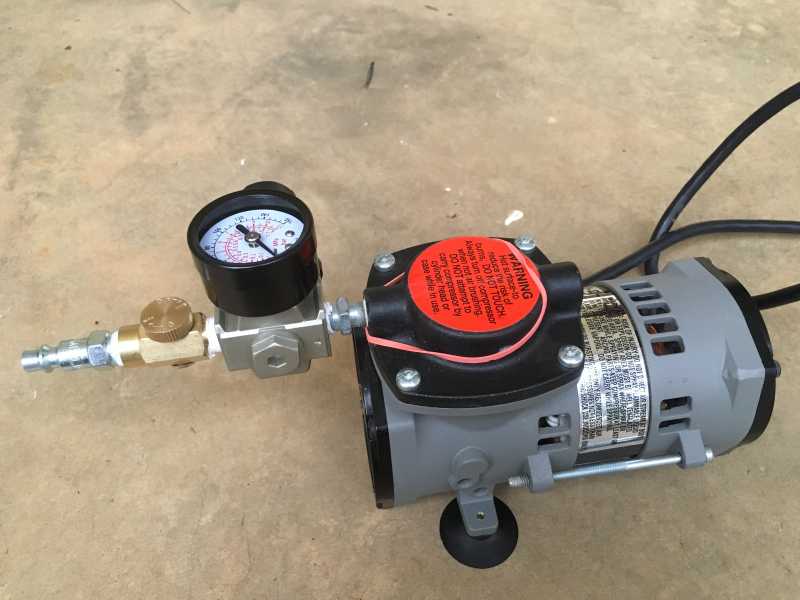
I broke out the Model Masters Israeli Armor Sand/Grey, my new-to-me little compressor and the Badger Patriot & was able to lay one good coat. I had to ‘call it’ due to failing light, & had to use the porch light to clean the AB, but it turned out well for the initial coat


h1bcc0d1.jpg


hf1ac89f.jpg


The little Compressor worked great! The only issue I seemed to have with this was that it runs constantly once plugged in, although it is admittedly MUCH quieter than the Pancake Harbor Freight compressor when that puppy kicks on!
And YES bob, after taking this snap, I took the rubber band off!
h655726c_2018-12-30.jpeg


Supposed to go see Aquaman with the missus and some family members tomorrow, so it may be the weekend before I can start the modulation, but slooooooowly, it is getting there!
 
That compressor has no tank so it will run constantly. That's just a pressure regulator on the output, not a shut off.

Looking good. :popcorn
 
I originally wanted the little compressor like this but at Harbor Freight. No tank, but it is a ‘demand’ type, it cuts on when you need it, shuts off when you let go of the trigger.

Check it out at 2:28
https://www.youtube.com/watch?v=hQ2pa6lHPxI

It was only available if I could use their coupon, but coupons do not apply to their compressors. So I low-bid on this one and one, nothing to complain about, just wish it had that feature, but then again, I paid less than half the price for the Harbor Freight model
 
Ok so the pics from last night sucked, so I got some better ones today. Am going to perhaps try and get some items corrected this weekend, including getting the barrel striped. the Testors Model Master paint is enamel, but it lays down great & I really like it, very easy to use:

h0635e41.jpg


h172c2d3.jpg


h857a62c.jpg


h233a6a8.jpg


hfade18a.jpg


h2f2ae8a.jpg


Still have some final assembly and corrections to do, along with modulation, but this tough-to-build model is turning out pretty well!

About 7 hours ago, I pus some mushroom, carrots, taters, and chunked chicken in the crockpot with a simple mix and some broth to cover most of it......dinner is looking good...see ya later!!!

hf561c24.jpg
 
I originally wanted the little compressor like this but at Harbor Freight. No tank, but it is a ‘demand’ type, it cuts on when you need it, shuts off when you let go of the trigger.

Check it out at 2:28
https://www.youtube.com/watch?v=hQ2pa6lHPxI

It was only available if I could use their coupon, but coupons do not apply to their compressors. So I low-bid on this one and one, nothing to complain about, just wish it had that feature, but then again, I paid less than half the price for the Harbor Freight model

It's not the same compressor. What you got is nothing more than that 35+ year old one that I gave you that you rigged the regulator on.

Tank is looking good, not sure about the crock pot.. I think James' Dr Pepper Pork is in order. :good:
 
Bruce, looking good. I also love using Testor's Model Master enamels. They do go on very smooth and easy. Brilliant work man, looking forward to seeing more.
 
Ok so it got to a whopping 45 degrees F today, and I decided to use that to FINALLY get some paint on this beast! I tried something very different here - after laying a base coat of Model Master Israeli Armor Sand Grey, I then added Model Master Flat white to lighten it two shades for modulation. THEN...I thinned some Tamiya Panel Line Accent using Tamiya XF-20 thinner, and used that to darken undersides, shadows, and also the areas between the Blazer Armor.


hc22266d.jpg


h0ec3bf8.jpg


h2cf0f0e.jpg


haca2e65.jpg


he17f169.jpg


Note that this last one even has the Egyptian IS-3M I built earlier:


h598980d_2019-02-09.jpg


So that is where she currently stands. Hope to get on to the individual link tracks next!
 
So I am using the DEF-Model individual link tank tracks for the MerkavaI/II which this tank did also use. These should work well, but I don’t know if they are individual links or if they snap connect. I guess we'll find out!


hbd1c103.jpeg


ha761815.jpeg


There are a total of 216 links. And I have to make 4 cuts per link so that is a mere 864 cuts total!
 
Hey Bruce your build here is looking good! You definitely have the right idea by lighting up the tone for highlights. While it looks like the white behaved well, white sometimes doesn't like playing well with others. Keep in mind that you can other colors such as a desert yellow.

As for the Panel Line Accent "filter" not sure it was as successful, but its hard to tell in pictures as filters don't always photograph as they should. That being said a nice contrasting pinwash will do wonders, especially on this kit that has so much detail.

If your interested I could post some ideas on how to approach the finishing and weathering...Oils are key. Just let me know or PM/email me.

Now them tracks...I got a Magach 6B Gal Batash kit bash (Academy & AFV Club) on my Shelf-of-Shame and I used/using this set as well. They are clickable but I suggest glueing. I really love working with DEF tracks and detail is outsatand on them.

Good Luck Dude :v

I think the accent panel filler came out pretty well, we'll see. Please DO post the ideas as they relate to weahering using oils...very interested!
 
Hey Bruce :Hiay

So to start with watch the following videos. The first one is rather long but provides the philosophical and contextual approach to the weathering process. The last one is technical in nature and server as a great starting point for the Oil Paint Rendering or OPR as it is called. I have watched these over and over...and over so to pick as much info as I can.

https://www.youtube.com/watch?v=FlntGqRgcBU&t=529s&list=WL&index=11

https://www.youtube.com/watch?v=oE_9XijaHP8&list=WL&index=5

Enjoy and Good Luck :v
 
Hey Bruce here is some more info on the method of using oils for finishing and weathering.

First up is check out this article "Oil Paint Rendering(OPR) - an Introduction". It provides additional insights to materials use and application of technique. (FYI--this article is on the older side and Mr. Rinaldi has refined this process which is shown in the videos I linked earlier)

The cornerstone of OPR is how little of the paint and thinner that is applied. The surface is never pre-wetted and/or flooded with thinner...never

Literally "LESS IS MORE"

Below are the products I use for OPR. All were bought at the local HobbyLobby.

The Paint
h460ecd6.jpg


Odorless Thinner. This is a weak thinner and is perfect for OPR and runs the least chance of damaging pervious paint layers.
h2296a9a.jpg


Lastly is the brushes.
h4a02bcc.jpg


Hope this helps out a bit. I'll post additional insights here soon. :v
 
ERIC RAINS, thanks so VERY MUCH!!!! I have been enjoying these and they are JUST what the Doctor ((Doctor Rains???) ordered!


OK, I finally got some time on this. I was going to use the WOLF/DEF model individual link tracks for the Merkava & Magach, but then I remembered I had the AFV tracks for the M-60. These tracks go together so easy and have almost no cleanup, so I decided to use them and they are working great! You can see how are use them in the pictures below:


h2aabcf4.jpg

I separated them like this, as I found one track link at a time worked better for me


hcf6f0d8.jpg

It was then a matter of simply taking the little connectors, still on their tree 'tabs' and installing them a few at a time

hb8769c0.jpg


hc657d85.jpg


then you simply connected a tree together, and you had a section:

hfb8710f.jpg


and eventually, enough for a full run!

hedc89c0.jpg


Well if it works out, I can get a bit more done this week before IPMS Atlanta, looming next week - hope to post more before then!
 
Great work on the tracks Bruce!! I'll sit down with you on saturday and go over some weathering techniques.
See you then!
:v
 
Back
Top