-
Modelers Alliance has updated the forum software on our website. We have migrated all post, content and user accounts but we could not migrate the passwords.
This requires that you manually reset your password.
Please click here, http://modelersalliance.org/forums/login to go to logon page and use the "Forgot your Password" option.
You are using an out of date browser. It may not display this or other websites correctly.
You should upgrade or use an alternative browser.
You should upgrade or use an alternative browser.
IAW 2 Completed Works
- Thread starter Iron Mike
- Start date
OK, I'll call this one finished! This build is NOT prize eligible!!!!
I would have had it finished earlier but....I'll bet everybody here has had this experience. I was test fitting one of his two belt "control panels". All of a sudden it went flying in the air and where it landed? Forget it! I pulled out all the desks, shelves, got a flashlight, no chance in hell! There has to someplace where those parts go to and stay there for eternity, that is, except after it is finished and on the shelf. Then they sometimes appear on top of you desk, unencumbered by any other parts, tools or paints. Just sitting there!
Anyway, I got tired of looking and used the remaining panel to scratch a new one. Made a tiny box, then stretched sprue buttons, and evergreen strips for the flip type switches.


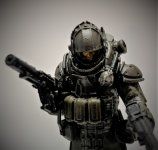
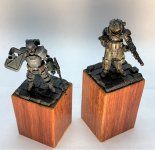
OK, here it is finished. It is around 120 to 150mm in height.

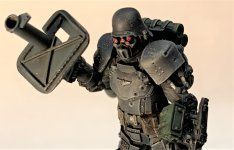
I was surprised at the number of parts in this kit, much more than I would have expected, but, it went together well and painted well No complaints! I painted the light saber white, then used a strip of micro tape and then painted it Florouscent red and orange. That's the best light effect I could come up with.
I used a lot of Humbrol Polished Steel paint and then buffed it out to achieve the metallic effect. The primary colors are Testor's Flat Black and Gloss Black. I also used a lot of Humbrol clear gloss enamel, especially in the facial mask.

A shot from the rear to illustrate the"cloth" effect of the flat black paint and stippled black pastels. The helmet has a super high gloss finish that I was trying to achieve.

These are a bit closer up to show the details.

"Luc, you have no idea of the Power of the Dark Side"!

And that's my trick!
Enjoyed this one Mike, But now, back to the beast!
Thanks for looking in!
Bob
I would have had it finished earlier but....I'll bet everybody here has had this experience. I was test fitting one of his two belt "control panels". All of a sudden it went flying in the air and where it landed? Forget it! I pulled out all the desks, shelves, got a flashlight, no chance in hell! There has to someplace where those parts go to and stay there for eternity, that is, except after it is finished and on the shelf. Then they sometimes appear on top of you desk, unencumbered by any other parts, tools or paints. Just sitting there!
Anyway, I got tired of looking and used the remaining panel to scratch a new one. Made a tiny box, then stretched sprue buttons, and evergreen strips for the flip type switches.
OK, here it is finished. It is around 120 to 150mm in height.
I was surprised at the number of parts in this kit, much more than I would have expected, but, it went together well and painted well No complaints! I painted the light saber white, then used a strip of micro tape and then painted it Florouscent red and orange. That's the best light effect I could come up with.
I used a lot of Humbrol Polished Steel paint and then buffed it out to achieve the metallic effect. The primary colors are Testor's Flat Black and Gloss Black. I also used a lot of Humbrol clear gloss enamel, especially in the facial mask.
A shot from the rear to illustrate the"cloth" effect of the flat black paint and stippled black pastels. The helmet has a super high gloss finish that I was trying to achieve.
These are a bit closer up to show the details.
"Luc, you have no idea of the Power of the Dark Side"!
And that's my trick!
Enjoyed this one Mike, But now, back to the beast!
Thanks for looking in!
Bob
Brokeneagle
Master at Arms
Looks good Bob, especially all the different black tones. 
Can you give us some insight in what paint and how you got the blacks to look like flat material of all shades please.


Can you give us some insight in what paint and how you got the blacks to look like flat material of all shades please.


Looks like he's about to start moving. But, Dark Side and all, shouldn't there be a more ominous background? A few squeezed heads laying around?
Yeah, with a little imagination, you could do a lot with this future in a diorama. Scratch a corridor as in his first appearance in "A New Hope", and then use maybe three storm troopers behind him, etc., etc.
Bob
Looks good Bob, especially all the different black tones.
Can you give us some insight in what paint and how you got the blacks to look like flat material of all shades please.
Thanks Ian,
To begin, there are always a hundred ways to do things. This is how I like them to look but, to others, maybe not. I am always looking for new ways to improve my dioramas. At 79 years old, I am still experimenting and I change techniques continuously. I've yet to achieve perfection but I keep trying!

It is a thing I have developed over the last 20 years or so. It is not only effective with black, but with all colors. I use this on military and civilian figures as well as military armor and vehicles. This is the technique I used to paint Darth Vader. First, I get all the paint tones and colors together I can find that will be complimentary combined, plus the pastel powders and the flats, semi-glosses and the high glosses. Then, using actual photographs, I determine what shades, tones and which parts to be flat, glossy or semi-glossy. For clothing, I match the color paint I will use and a pastel stick. Then I grind the stick into powder. I spray the cloth parts with the enamel and then, before drying, I use an old, worn out brush, about a size 8 or 10, with the bristles worn down. I stick the brush into the powders and then stipple it onto the still slightly damp paint. That creates a texture similar to cloth. It drys flatter than dead flatI With Vader, I only used one shade pf pastels. However several shades can be used to achieve various blends of shadows and highlights. Then in both black as well as in most military gear, the various parts are different shades, textures and tones.
I swear there are dozens and dozens of olive drab paint shades in the model market, most paint manufacturers have several shades. There are various colors of Olive drab that go from very light, (Khaki Drill), to very dark Khaki drab and every shade imaginable in between. The more the better. I also. use acrylics, enamels, lacquers, artist's oils, and a lot of varied metallics. Then I start with a base color and never paint two parts the same shade or tone or texture, unless of course, there are several pieces to the same part.
When I was in the army for four years, everybody was issued their uniforms and gear during basic training. Through the four years various things happen to both uniforms and gear and they are treated individually. That makes what began as maybe a half dozen or less shades when new, into some with their original shade that rarely needed cleaning to very bleached out gear that was scrubbed with soap and brushes by their owner and the clothing by the commercial dry cleaning and laundering shops on base. Varying them creates a very natural appearance that monotone figures or vehicles can never duplicate. Using a single or a couple of shades never looks real to me, regardless of the blending and shading! Another thing, I never use drastic shading and highlights. Many do and they look beautiful! I really like the way they look but, I prefer to get the gritty, realistic appearance.
Here are photos of American G.I.s I have painted using this system. These will be tank riders. You can see what I mean by using a dozen or more paints with varying shades, tones, textures, even some that are so close you may bot notice them individually, but, the overall effect could not be created without them. Using this technique for a single figure would increase the time expended, but, I use the Henry Ford technique and paint many of the same uniforms at the same time. These are all 1/35th scale figures.
Here you can see the pastel/enamel texture in an overcoat.This best simulates a heavy wool or other such material.
The various shades create a unique "look" as opposed to a bunch of figures that came in a set.
Maybe this photo will demonstrate what I mean. None look alike, each has their own personality.
As I said before, this same technique can be used on vehicles, even buildings, especially interiors
Was this what you wanted Ian?
Bob
Last edited:
centaur567
Well-known member
Remarkable!!! When I do my 1/48th figures I also try to vary the uniforms shades, but you take it to a whole new level. Very well done and most informative. Gary S. XLV MMXX
Brokeneagle
Master at Arms
Thanks Bob, I really appreciate your taking time out to give us the 'good oil'. You are always extremely helpful. I love the overcoat effect. I use a similar technique on my tanks, just with pigments and a thin layer instead. I need to get more patient with my figure painting after looking at yours and the great variety you have achieved!Thanks Ian,
To begin, there are always a hundred ways to do things. This is how I like them to look but, to others, maybe not. I am always looking for new ways to improve my dioramas. At 79 years old, I am still experimenting and I change techniques continuously. I've yet to achieve perfection but I keep trying!
It is a thing I have developed over the last 20 years or so. It is not only effective with black, but with all colors. I use this on military and civilian figures as well as military armor and vehicles. This is the technique I used to paint Darth Vader. First, I get all the paint tones and colors together I can find that will be complimentary combined, plus the pastel powders and the flats, semi-glosses and the high glosses. Then, using actual photographs, I determine what shades, tones and which parts to be flat, glossy or semi-glossy. For clothing, I match the color paint I will use and a pastel stick. Then I grind the stick into powder. I spray the cloth parts with the enamel and then, before drying, I use an old, worn out brush, about a size 8 or 10, with the bristles worn down. I stick the brush into the powders and then stipple it onto the still slightly damp paint. That creates a texture similar to cloth. It drys flatter than dead flatI With Vader, I only used one shade pf pastels. However several shades can be used to achieve various blends of shadows and highlights. Then in both black as well as in most military gear, the various parts are different shades, textures and tones.
I swear there are dozens and dozens of olive drab paint shades in the model market, most paint manufacturers have several shades. There are various colors of Olive drab that go from very light, (Khaki Drill), to very dark Khaki drab and every shade imaginable in between. The more the better. I also. use acrylics, enamels, lacquers, artist's oils, and a lot of varied metallics. Then I start with a base color and never paint two parts the same shade or tone or texture, unless of course, there are several pieces to the same part.
When I was in the army for four years, everybody was issued their uniforms and gear during basic training. Through the four years various things happen to both uniforms and gear and they are treated individually. That makes what began as maybe a half dozen or less shades when new, into some with their original shade that rarely needed cleaning to very bleached out gear that was scrubbed with soap and brushes by their owner and the clothing by the commercial dry cleaning and laundering shops on base. Varying them creates a very natural appearance that monotone figures or vehicles can never duplicate. Using a single or a couple of shades never looks real to me, regardless of the blending and shading! Another thing, I never use drastic shading and highlights. Many do and they look beautiful! I really like the way they look but, I prefer to get the gritty, realistic appearance.
Here are photos of American G.I.s I have painted using this system. These will be tank riders. You can see what I mean by using a dozen or more paints with varying shades, tones, textures, even some that are so close you may bot notice them individually, but, the overall effect could not be created without them. Using this technique for a single figure would increase the time expended, but, I use the Henry Ford technique and paint many of the same uniforms at the same time. These are all 1/35th scale figures.
View attachment 127052
Here you can see the pastel/enamel texture in an overcoat.This best simulates a heavy wool or other such material.
View attachment 127053
The various shades create a unique "look" as opposed to a bunch of figures that came in a set.
View attachment 127054
Maybe this photo will demonstrate what I mean. None look alike, each has their own personality.
View attachment 127055
As I said before, this same technique can be used on vehicles, even buildings, especially interiors
Was this what you wanted Ian?
Bob
Thanks mate


Ian.
Just fantastic Terry!


Bob


Bob
Nice work Mike! 

Similar threads
- Replies
- 8
- Views
- 2K
- Replies
- 26
- Views
- 3K


