• Modelers Alliance has updated the forum software on our website. We have migrated all post, content and user accounts but we could not migrate the passwords.
    This requires that you manually reset your password.
    Please click here, http://modelersalliance.org/forums/login to go to logon page and use the "Forgot your Password" option.

Hasegawa F6F-3..or 5

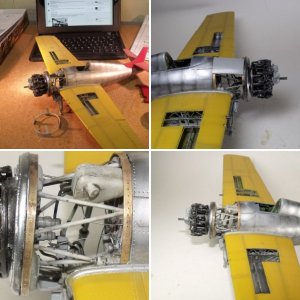
One other thing Moon P
When you said you were building a panel off wildcat it made me think ? wasnt i doing one as well at the time? I seem to remember yours..
I keep having flash backs about this build but i dont think i have done it before but i did do a Corsair so maybe it this engine thats triggering vague memories and i am getting muddled up.
Blimey if i did one of these before i need to ask myself how i did the exhaust last time. Knowing me i probably will not tell myself....:)
 
That's tough. Some brass tubing and a little heat will make some nice pipes. Fresh CA is in your future. :zen
 
I think so Paddy, Let me dig and see if those images are here. I had to make custom motor mounts for mine. Don't recall what I got hung up on that stopped me, let's go diggin' the archives.
 
Oh yeah, it's in my gallery.
I was this close to the exhaust
full

Looks like I had the pieces ready but never did solder them together. The thing about the Wildcat's pipes was they collected into a manifold that expanded at each collection port. I couldn't figure out how I was going to replicate that nor do the flared exit port. I think at this point I figured out I was using the wrong kit for a open panel hell. :rotf
 
Cripes Moon P was that really 10 years ago :-( you so nearly made it as well.


Well i have no choice now, a cap full of acetone and i am back to square one .... days to assemble , 2 mins to disassemble ..


DSC_1301.JPG
 
Wow, talk about one step forward... three steps back! But hey, you got the mad skills to fix this. And if you do need to get away for awhile, feel free to do an OOB build to refresh yourself from this.

Looking forward to seeing more.
 
Absolutely John :) its a 1000 hours service......feels like i have spent 1000 hour on this anyway :)
 
after a bit of head scratching I drilled each barrel to take a piece of copper wire withthe idea of bending it into shape and sliding some black plastic sleeving over it... and making it up as i go along

DSC_1304.JPG


That looked like it might work so i re assembled the engine with the wired barrels.

DSC_1305.JPG


I gave it a quick coat of silver ( i will sort that out later)

and put it back on its bulkhead.

DSC_1306.JPG


Then bent the wire and fitted the sleeving..Piece of cake....lousy photo but you get the idea :)

DSC_1311_01.JPG
 
Many thanks for all you encouraging comment :)

OK so now its starting to look a bit more like i hoped it would. i have cut most of the cowling away but i left the underside so the front ring is not suspended in mid air on its own :)

DSC_1317.JPG


Its not a bad fit on the underside given all the chopping and changing to the front, just a little bit of tidying

DSC_1321.JPG


I have toned down the silver engine to a bit more of an alloy finish with some oil wash and flattend the exhaust a bit from the glossy plastic tube i used.

The front cowl ring is only balanced so sitting a bit low but with luck it will marry up with the PE cowling frame work ...
Looking better now with a better in focus picture :)

DSC_1322.JPG
 
I'm sure we all have ways of doing things like the exhaust and no doubt its all been done before however its worth posting this stuff because what old news to some is new news to others. My next hurdle was the PE cowling frame. I'm sorry i didn't take a picture of it flat but i rolled it round a tube to get the curve. Unfortunately it has so many pin holes in it ,it bends from hole to hole and you and up with a couple of dozen flats that together make a curve :)
I couldn't see how to fix it securely to the cowling front ring as its basically butted up edge to edge so after a bit of head scratching i glued a thin strip of white plastic card to the cowling which glues a lot easier than PE and has a much better edge to but up again lack of pictures but i was then able to glue the PE to the plastic strip

DSC_1325.JPG


Picture shows the white strip in place and securely glued with super glue, i then attached the PE at the top centre and then a drip of super glue every 1/8" round working from the top pressing the PE down to the strip with scalpel blade

and hey presto

DSC_1331.JPG


I think i got away with it ...at least i will have when its painted. (PE not attached at the back yet just against the cowl.

Macro shots dont do it any real favours but with the naked eye without 10x magnification it loos quite good :) Of course if this takes your fancy then Airfix do exactly this in 1/24 which would make life a whole lot easier but where is the fun in easy :)
 
The only way you can roll this stuff smoothly when it has a lot of holes in it is to anneal it, which makes it rather soft. It takes a lot of care to handle the softened PE, but it can be done. I had a half round fuel tank for a model once that had a hole init. Had to anneal it to make it a smooth curve.
 
Back
Top