Yeah, right...I'm suppose to do that? OK, we'll give it a shot, maybe have it done this weekend.

-
Modelers Alliance has updated the forum software on our website. We have migrated all post, content and user accounts but we could not migrate the passwords.
This requires that you manually reset your password.
Please click here, http://modelersalliance.org/forums/login to go to logon page and use the "Forgot your Password" option.
You are using an out of date browser. It may not display this or other websites correctly.
You should upgrade or use an alternative browser.
You should upgrade or use an alternative browser.
Groundwork Class with Anthony Reeves
- Thread starter moon puppy
- Start date
TREEMENDUS
Member
Bob i've seen your PE work, if you can do that you can do this.
There is another way to achieve great grass effects -
1. Cut your Raw Grass with scissors to the shape of the area you want to cover
2. Trim into the fabric to give some variation in the height, leave some areas long whilst cutting some areas short.
3. Colour as shown in this SBS.
4. You can then highlight the long grasses with a suitable coloured paint from your airbrush - very lightly. Let it dry before handling it.
5. Stick the "sheet" in place using PVA glue.
6. Blend the edge of the grass sheet into the rest of the base using Earth Powder, Leaves and fine tufts - like the ones you will make for the rest of the woodland floor. You can always add more tufts to the sheet to enhance it further - See the photos below, the embankment was created using the above method.

Take your time with this step. I'll hold fire until you both catch up if you like?
Ant
There is another way to achieve great grass effects -
1. Cut your Raw Grass with scissors to the shape of the area you want to cover
2. Trim into the fabric to give some variation in the height, leave some areas long whilst cutting some areas short.
3. Colour as shown in this SBS.
4. You can then highlight the long grasses with a suitable coloured paint from your airbrush - very lightly. Let it dry before handling it.
5. Stick the "sheet" in place using PVA glue.
6. Blend the edge of the grass sheet into the rest of the base using Earth Powder, Leaves and fine tufts - like the ones you will make for the rest of the woodland floor. You can always add more tufts to the sheet to enhance it further - See the photos below, the embankment was created using the above method.
Take your time with this step. I'll hold fire until you both catch up if you like?
Ant
Taking a mulligan, didn't read the chop to fine fibers...
Well I didn't get to the yard work this weekend, no grass planted yet but I'll get there. I did work on the moss farm. I tried a couple of techniques in coloring and application. I know which one I like, I'd like the Professor's take

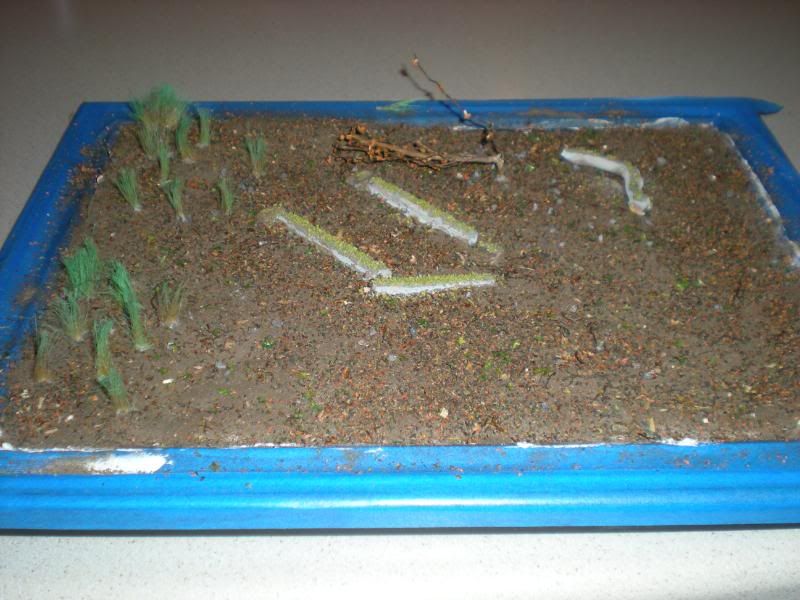
An overall shot. Not sure why it looks like it's wet, it's not my intent to make it so. Maybe it's the way the light was catching it. I think I need more clutter up in the northern corner, looks barren there.

Candidate one.
opps...I forgot to upload the other candidates. Guess that leaves little guess which one I like best.
An overall shot. Not sure why it looks like it's wet, it's not my intent to make it so. Maybe it's the way the light was catching it. I think I need more clutter up in the northern corner, looks barren there.
Candidate one.
opps...I forgot to upload the other candidates. Guess that leaves little guess which one I like best.
TREEMENDUS
Member
That looks great MP. Well done :cheer:
Not sure what the other version looked like but I think you nailed it with the moss as it is here. Pretty straight forward hey? Nice touch with the green "freshly fallen " leaves on the floor too.
I'm guessing if it looks a little shiny it may be that the dried PVA is showing through? You could always add some Earth Powder and Forest Floor scatter to those areas at a later date but I think you have done very well considering it is your first attempt at groundwork. You can always put grass/tufts in those areas too. If it doesn't look shiny under normal light then I'd leave it as it is.")
Most importantly are you happy with the result so far?
Ant
Not sure what the other version looked like but I think you nailed it with the moss as it is here. Pretty straight forward hey? Nice touch with the green "freshly fallen " leaves on the floor too.
I'm guessing if it looks a little shiny it may be that the dried PVA is showing through? You could always add some Earth Powder and Forest Floor scatter to those areas at a later date but I think you have done very well considering it is your first attempt at groundwork. You can always put grass/tufts in those areas too. If it doesn't look shiny under normal light then I'd leave it as it is.
Most importantly are you happy with the result so far?
Ant
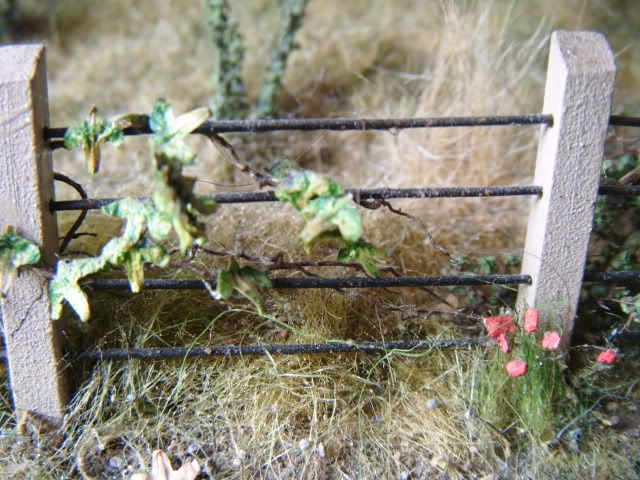
Oh yeah, really happy. I even placed the M2A1 halftrack on the ground just to see what it would look like and I really liked that.
You can see the other attempts of moss on the other beams in the first image. Not as close up but it's there. I'll work on this more this evening if time permits and get some grass down.
Looking forward to seeing Toms work now.
You can see the other attempts of moss on the other beams in the first image. Not as close up but it's there. I'll work on this more this evening if time permits and get some grass down.
Looking forward to seeing Toms work now.
TREEMENDUS
Member
Haha - I wondered how long it might be before the halftrack made a guest appearance. Good work MP. I look forward to seeing your grass soon and Toms' base too.
Ant
Ant
Alrighty then, here is what I have done so far. First, I had an idea for a dead tree so I used some of the root material that Ant sent along, sprayed it with PVA glue then sprinkled some autumn leaves on it that I had left over from a previous order.
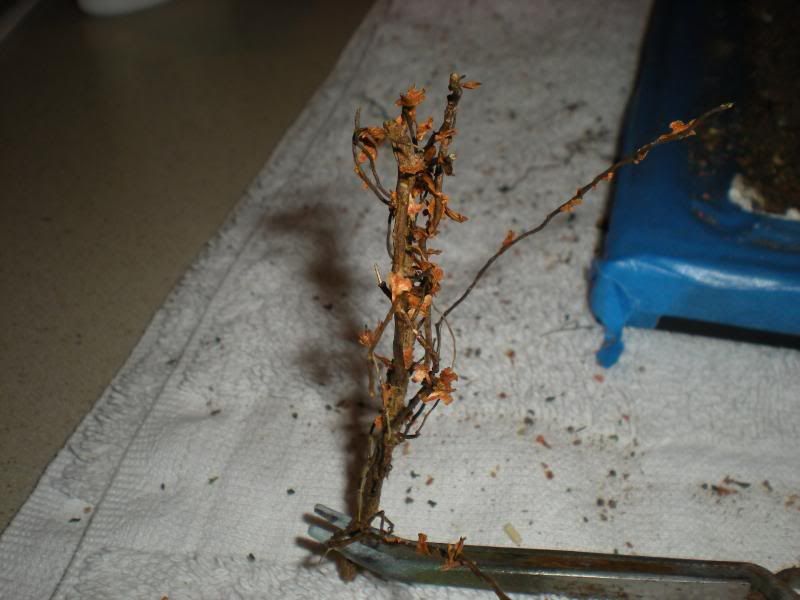
Back when I colored my grass I combed it out then tossed the stuff caught in the comb so I used some more product from my last order.

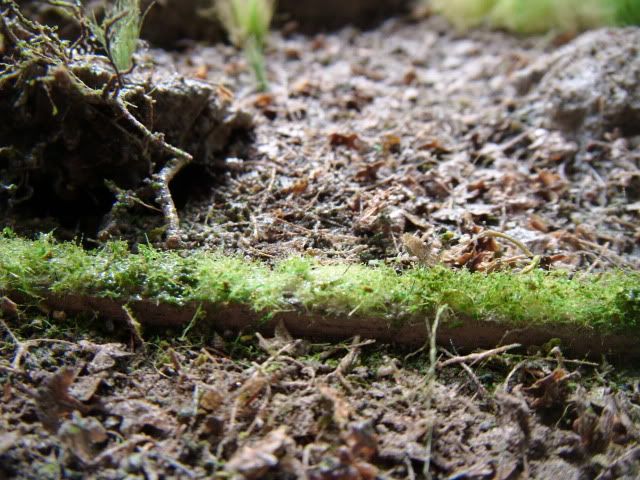
These lousy pic's are washing out a lot of color but its all I have right now. I had colored the wood beams and the log with a light earth pigment powder mixed with water and brushed on, when that dried I brushed on some PVA glue and carefully sprinkled on the mossy looking product.

You can see my attempt at a sapling that blew down and the log with moss on it.
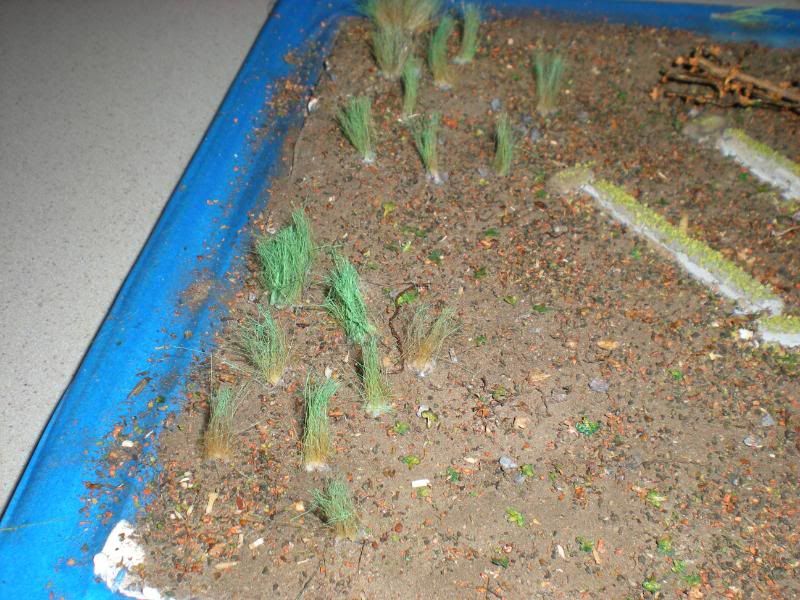
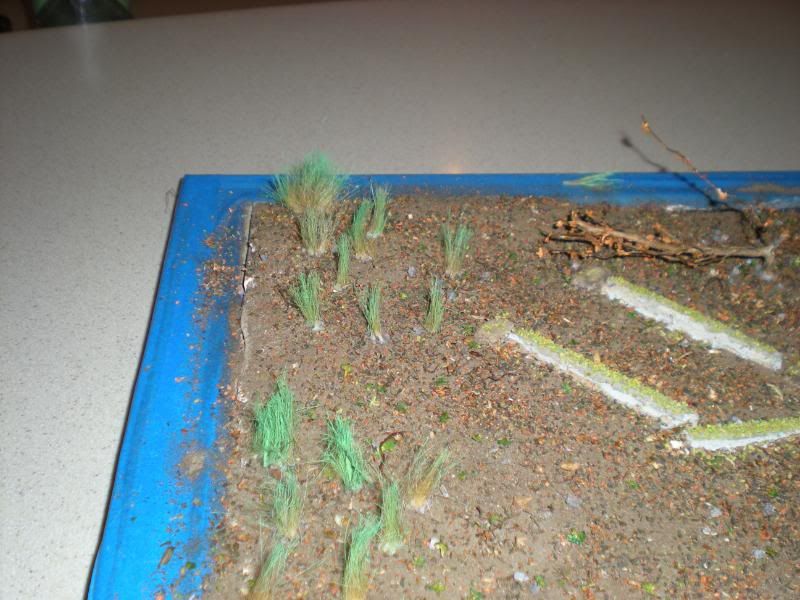
Still have a lot to do regarding the grasses, adding more, different colors and bigger clumps. I can see the dried glue holding the grass in place so will fix that also.
Tom
Back when I colored my grass I combed it out then tossed the stuff caught in the comb so I used some more product from my last order.
These lousy pic's are washing out a lot of color but its all I have right now. I had colored the wood beams and the log with a light earth pigment powder mixed with water and brushed on, when that dried I brushed on some PVA glue and carefully sprinkled on the mossy looking product.
You can see my attempt at a sapling that blew down and the log with moss on it.
Still have a lot to do regarding the grasses, adding more, different colors and bigger clumps. I can see the dried glue holding the grass in place so will fix that also.
Tom
Tom one thing I'm picking up on, and I think this is true with all things we do related to our hobby and photos. I think we have to over do it a bit in our eye to be seen correctly in pictures. The ground clutter in my shots look thin, looks a little thin in your lower left or southwest corner of your last picture. I bet when you look at it, it looks OK.
The tree looks great. I did one also but was sand baggin' till later. I use the horse hair stuff and mixed the clutter and some greens. I'll post mine later.
Another thing I'm getting, again a common thing with our hobby. The technique we use to apply the "stuff" may vary between me, you and Ant. I played with making a slurry of materials, glue and water and applied it with a thick large brush. It went on pretty well and when I checked it before turning out the lights it was drying out well. I may be braggin' too soon but I think I see how this is going to work.
TREEMENDUS
Member
Hey Tom the sapling looks good, nice effect.
If you want to improve the look of the moss to give it a more fiberous organic look you can take a large pinch of the Raw Grass fibers, which have been coloured a suitable colour and trim them into tiny lenghts (1-2mm) as I did above - it creates a kind of greenish "fluff" this can be applied into some of the glue from the kit over the cork scatter you already have down. I promise you you will be more pleased with the result.
When you put more grasses down in between the tufts you already have in place it will hide the glue we can see on your photos. Make sure you vary the height and colour of the grasses to add even more realism.
As Bob said you can afford to put some more forest debris on to your base in certaibn areas - some of the Natural Leaves I sent you would work well.
Keep it up!
Ant
TREEMENDUS
Member
Bob
You are right in regards to all the different tecniques that can performed with the same product. I may have said this before but there is no right or wrong way as long as we are pleased with our results. Mixing them together is fine because this is what generally happens to real forest floors over time. On top of this goes the most recently fallen leaves and twigs which eventually will become part of the mix.
With regards to the colour on photos though I would suggest you try to take them in natural daylight where ever possible, and certainaly no flash!
There are many ways to use the Raw Grass alone. Over time it will be pleasure to show you other little tecniques which can bring great results with little effort.
Cheers
Ant
Thanks for the comments guys, I'm starting to like this diorama stuff alot!!!! Now for the tough part, I'm going on vacation tomorrow and I'm going to be gone for 9 days so this is as far as I can go right now, got a bunch of stuff to do tonite to get ready so I'm in a holding pattern till I get back. Keep on with the awesome work and I'll catch up!!
Tom
Tom
You live in Florida, what vacation do you need?? Where do people in Florida go for vacation, Ohio?? 
Have fun Tom, this stuff is addictive ain't it! We'll be here when you get back.
Have fun Tom, this stuff is addictive ain't it! We'll be here when you get back.
So what's next Professor, we gonna lay some bricks yet?
TREEMENDUS
Member
It's up to you if you want to do that next then sure we can. There are still loads of plants, weeds and ivy to be added to the groundwork yet but we can add those when the we've built a wall if you want.
OK leave it with me I'll get the cement out
Again there are a few ways to do the wall/chimney stack. I will make a start and post lots of photos.
Back soon
Ant
OK leave it with me I'll get the cement out
Again there are a few ways to do the wall/chimney stack. I will make a start and post lots of photos.
Back soon
Ant
jknaus
Administrator
TREEMENDUS wrote:
Okay that is too cool. When I get some spare cash I will definately get this stuff. It would add soo much to my figures. I really like this.
James
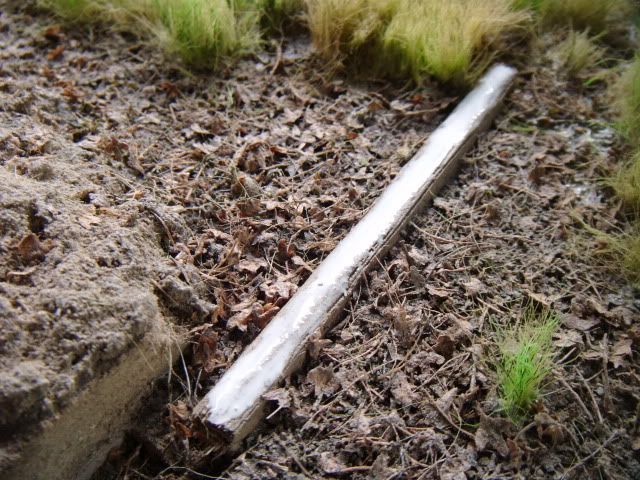
Whilst I had all the materials on the bench it seemed like a good time to add the moss that grows on the wooden beams - This is a fairly east step
Take the "fuzz" that gathers in the comb when you comb the Raw Grass. Trim it with scissors into tiny fibers, almost making a dust with it.
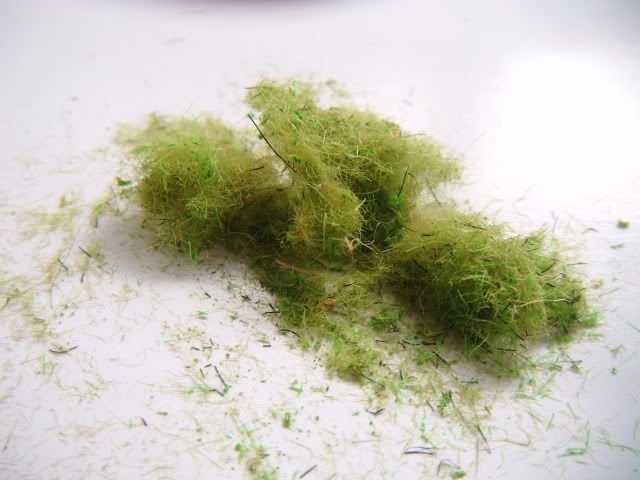
Paint glue onto the tops of the wooden beams.
Onto the glue carefully place the fuzz you have previously chopped, Use a cocktail stick to help you position it. Also make sure it comes into contact with the glue. When in position give it a blast of hairspray. You may also want to add some moss to the stones on your base.
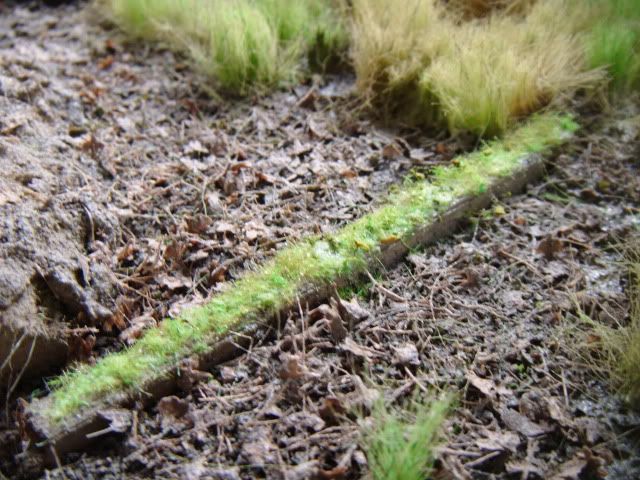
So this is where I will leave it for now. There is still lots to do in the way of refinement but that will mostly wait until all the other forest growth has been added. Then there's the trees and of course the stonework.

If there is anything I've not explained properly let me know.
Thanks
Ant
Okay that is too cool. When I get some spare cash I will definately get this stuff. It would add soo much to my figures. I really like this.
James
TREEMENDUS
Member
Thanks very much James I'm glad you're enjoying this SBS.
The next layer of groundwork should really bring the base to life. If you have any questions then please ask.
Cheers
Ant
The next layer of groundwork should really bring the base to life. If you have any questions then please ask.
Cheers
Ant
Hi guys, I'm back home from vacation so I'll be working on mine during the weekend. Moon Pup, I don't know about other Floridians but this one and six of his buddies went to northern Minnesota to play in a golf tournament then headed for the U.S./Canadian boundary waters for some relaxing and walleye fishing. Went from 95 degree weather to a high of 55 degrees....cold but alot of fun!!!
Tom
Tom
Glad you had fun Tom. Now git back to work!
Similar threads
- Replies
- 2
- Views
- 185