
-
Modelers Alliance has updated the forum software on our website. We have migrated all post, content and user accounts but we could not migrate the passwords.
This requires that you manually reset your password.
Please click here, http://modelersalliance.org/forums/login to go to logon page and use the "Forgot your Password" option.
You are using an out of date browser. It may not display this or other websites correctly.
You should upgrade or use an alternative browser.
You should upgrade or use an alternative browser.
Groundwork Class with Anthony Reeves
- Thread starter moon puppy
- Start date
AndyFettes
Master at Arms
Wonderful Ant
If you put up your groundwork against a real background I swear you wouldnt be able to tell if the whole scene wasnt real
Top marks
If you put up your groundwork against a real background I swear you wouldnt be able to tell if the whole scene wasnt real
Top marks
jknaus
Administrator
jknaus wrote:
Evidently you have to put the code in for a picture to show . After watching star trek I assumed the computer knew I wanted to show this.

Scotty, come down and fix this will ya.
James
This is what I got done today. Need to make moss next. I use Micro metal foil adhesive which is very sticky and very watery for doing the ground work glueing. A couple of more pics in my figure build.
James
PS This is awesome stuff for doing a forest floor.
Evidently you have to put the code in for a picture to show
. After watching star trek I assumed the computer knew I wanted to show this.
Scotty, come down and fix this will ya.
James
TREEMENDUS
Member
andyfettes wrote:
Thanks very much Andy. I have been busy with commissions/shows over the last month or so but will hopefully find some time to carry on with this soon. There is still lots to add to the groundcover. Thanks for looking.
Ant
Wonderful Ant
If you put up your groundwork against a real background I swear you wouldnt be able to tell if the whole scene wasnt real
Top marks
Thanks very much Andy. I have been busy with commissions/shows over the last month or so but will hopefully find some time to carry on with this soon. There is still lots to add to the groundcover. Thanks for looking.
Ant
TREEMENDUS
Member
jknaus wrote:
Well done James, that looks great, I'm really glad you like the Materials. Is it true when I say they are pretty straight forward to use? I hope so 'cos thats's the idea behind the whole range. Keep it up.
Ant
This is what I got done today. Need to make moss next. I use Micro metal foil adhesive which is very sticky and very watery for doing the ground work glueing. A couple of more pics in my figure build.
James
PS This is awesome stuff for doing a forest floor.
Well done James, that looks great, I'm really glad you like the Materials. Is it true when I say they are pretty straight forward to use? I hope so 'cos thats's the idea behind the whole range. Keep it up.
Ant
Ant, I did not mean to distract you from the floor when I asked about laying bricks. what I see on my base looks great to me and I would call it done, really looking forward to seeing more homework assigned when you get time. It's your class, don't let the students get you off the lesson plan..
James, NAILED IT! but I don't understand how you can have a tall frosty stein out in the middle of the forest.
James, NAILED IT! but I don't understand how you can have a tall frosty stein out in the middle of the forest.
TREEMENDUS
Member
I tell you what - lets carry on with the forest floor then. Bob if look at the photo below we still need to add saplings etc, this will make a huge difference to the overall look of the base. Please bare with me on this, i'll post something as soon as I can.
We can do the wall/chimney stack later -
Ant
We can do the wall/chimney stack later -
Ant
At your leisure sir, you are the Master and we are the humble serfs... 
TREEMENDUS
Member
moon puppy wrote:
In the words of my Grandad - GIVE OVER
At your leisure sir, you are the Master and we are the humble serfs...
In the words of my Grandad - GIVE OVER
johnbowery
Member
Anthony,
Many thanks for taking the time to do this. It is great instructions and excellent photo's Congratulations to all who are following along. It is great to see all the bases and colours. :laugh:
Cheers
John
Many thanks for taking the time to do this. It is great instructions and excellent photo's Congratulations to all who are following along. It is great to see all the bases and colours. :laugh:
Cheers
John
TREEMENDUS
Member
Hey John - Thanks very much. We're glad you are enjoying it as much as we are. ")
Ant
Ant
[article]317[/article]
TREEMENDUS
Member
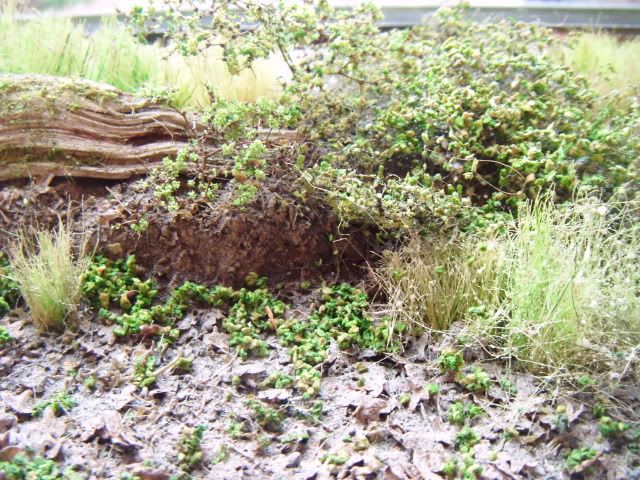
Time for an update!
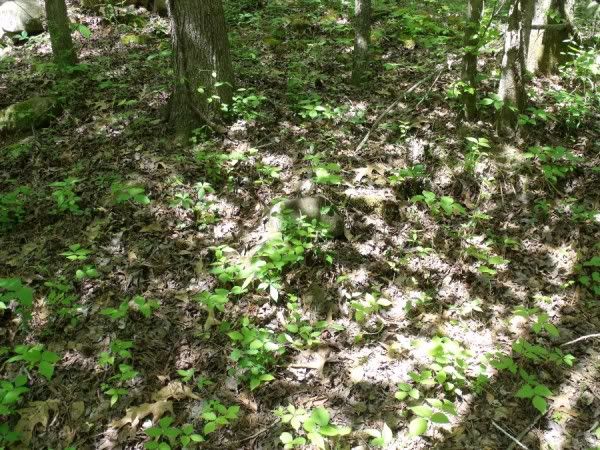
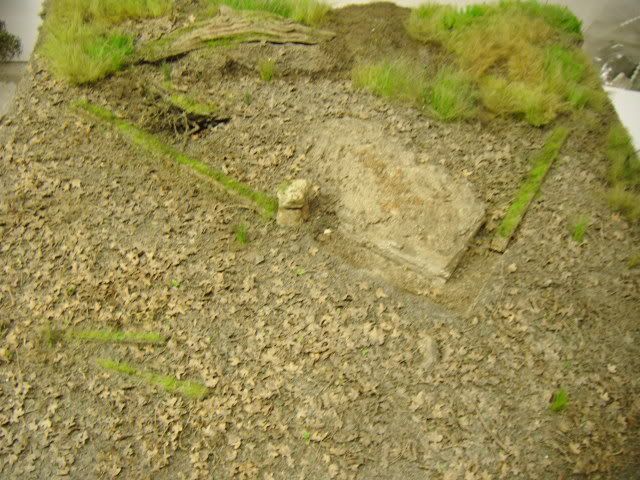
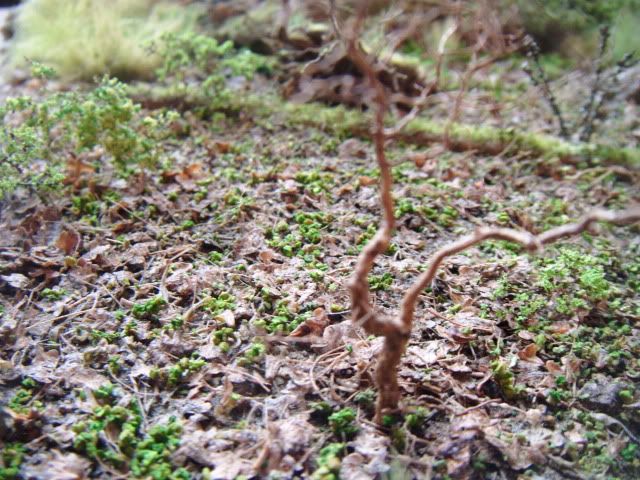
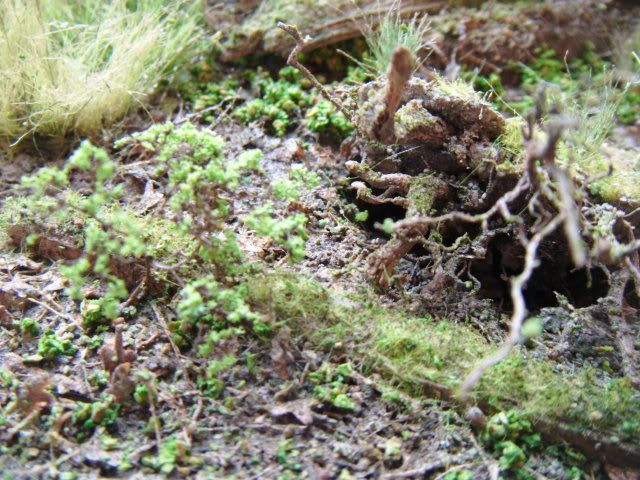
Here is where the groundwork was left at the last update. The basic leaf litter etc is down so now is the time to add some weeds, new growth, more tufts and saplings.
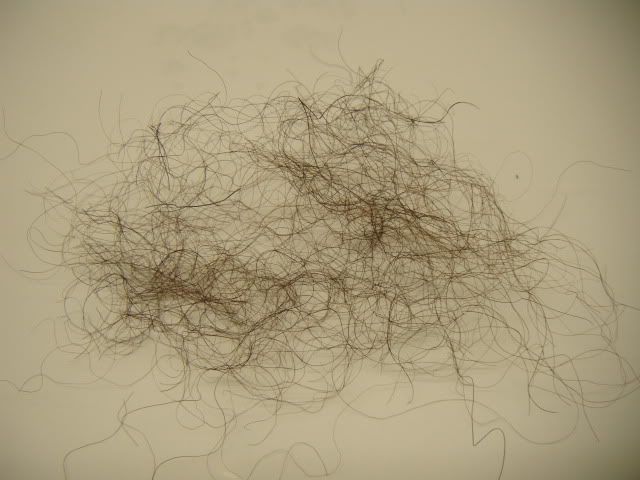
We will make a few saplings using some of the roots, not too many just a suggestion of a few growing below the main forest canopy. The first thing to do is make a small hole in the base where you want the sapling to go. Take a piece of root dip it in PVA and insert into the hole. You could add the "leaves" first using the Ivy leaves but I am going to stick mine on the branches later.


I also want to put some nettles into the ground, I'm not sure if there are any in the photos but whilst we are dealing with weeds etc it seems like a good time to do some. For this you will need some stiff bristles from a decorating brush. Nettle stems are almost black so if you use a black bristled brush these are perfect. You will also need neat PVA glue and a suitable coloured scatter. (These photos are a bit dark) You can use whichever scatter you want and it may be worth you making two or three different coloured weeds to add some variety - use a pale bristle with the lighter scatter for even more subtle differences.
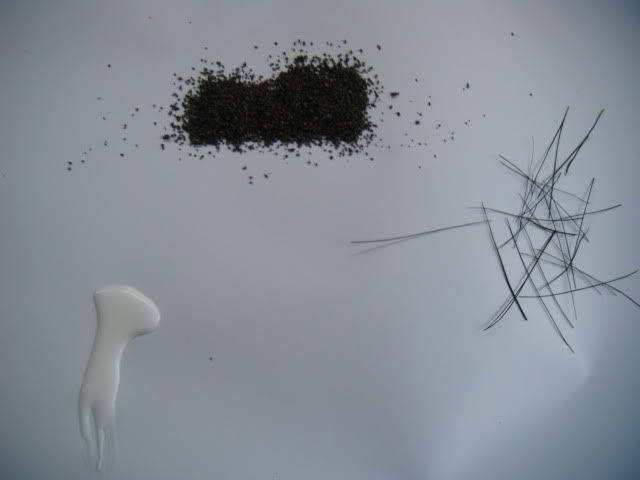
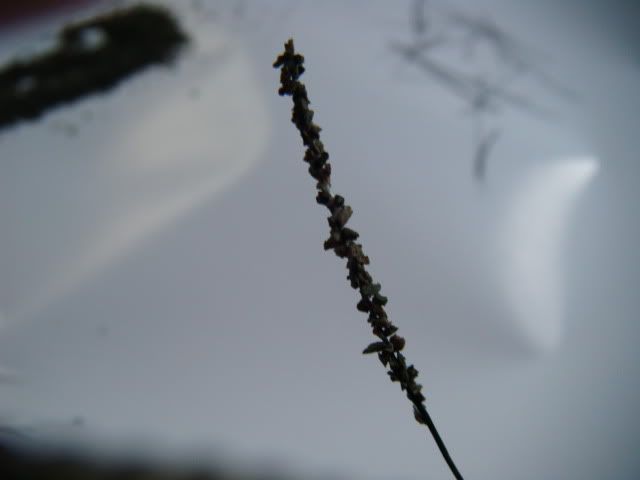
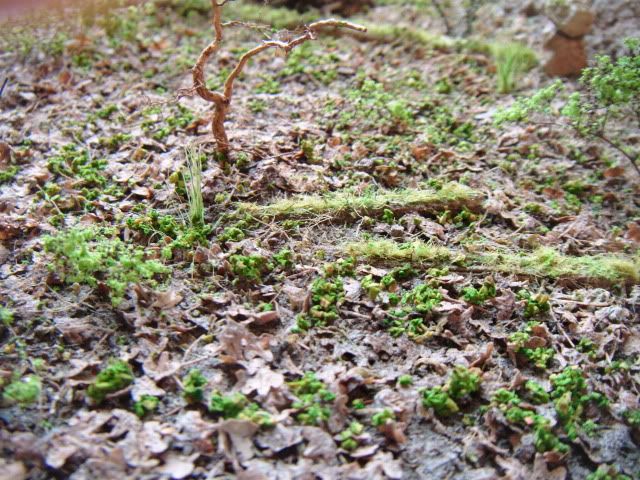
Take a single bristle and drag it through the PVA, roll it on a sheet of paper to remove most of the glue then roll it in your chosen scatter. Some nettle stalks are covered in leaves and some stalks have very few leaves, try to make a variety.


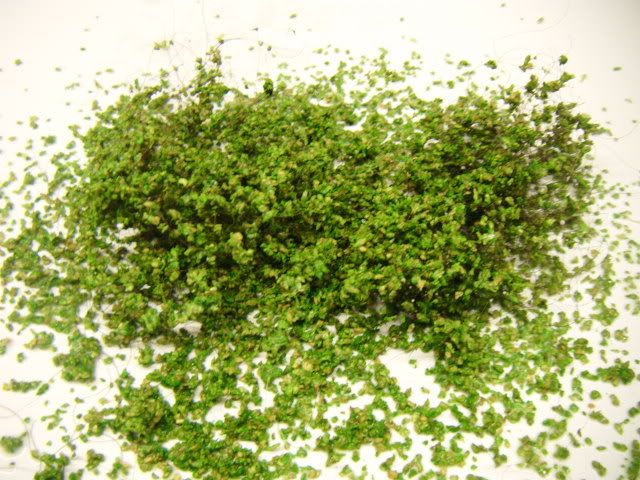
For the smaller weeds in the photos we will simply use some of the lighter scatter from the kit to represent all the tiny leaves on the floor I also want to put some bushier plants of the same colour growing to the rear of my base so......... take a pinch or two of the "canopy", tease it into an open structure, spray it with hairspray and add the scatter. Put the atomiser onto the glue bottle and give the whole thing a good spray. Put some of the scatter onto a piece of paper and spray it with the glue and let it soak up the glue. This can be used straight away on the base as all the little leaves. I just randomly sprinkled the wet scatter over the whole area then using a small paintbrush worked some of it into the ground below as if it were growing from underneath the leaf litter. A blast of hairspray and a light misting of scenic glue should hold it all in place
More coming very soon
Ant
Here is where the groundwork was left at the last update. The basic leaf litter etc is down so now is the time to add some weeds, new growth, more tufts and saplings.
We will make a few saplings using some of the roots, not too many just a suggestion of a few growing below the main forest canopy. The first thing to do is make a small hole in the base where you want the sapling to go. Take a piece of root dip it in PVA and insert into the hole. You could add the "leaves" first using the Ivy leaves but I am going to stick mine on the branches later.
I also want to put some nettles into the ground, I'm not sure if there are any in the photos but whilst we are dealing with weeds etc it seems like a good time to do some. For this you will need some stiff bristles from a decorating brush. Nettle stems are almost black so if you use a black bristled brush these are perfect. You will also need neat PVA glue and a suitable coloured scatter. (These photos are a bit dark) You can use whichever scatter you want and it may be worth you making two or three different coloured weeds to add some variety - use a pale bristle with the lighter scatter for even more subtle differences.
Take a single bristle and drag it through the PVA, roll it on a sheet of paper to remove most of the glue then roll it in your chosen scatter. Some nettle stalks are covered in leaves and some stalks have very few leaves, try to make a variety.
For the smaller weeds in the photos we will simply use some of the lighter scatter from the kit to represent all the tiny leaves on the floor I also want to put some bushier plants of the same colour growing to the rear of my base so......... take a pinch or two of the "canopy", tease it into an open structure, spray it with hairspray and add the scatter. Put the atomiser onto the glue bottle and give the whole thing a good spray. Put some of the scatter onto a piece of paper and spray it with the glue and let it soak up the glue. This can be used straight away on the base as all the little leaves. I just randomly sprinkled the wet scatter over the whole area then using a small paintbrush worked some of it into the ground below as if it were growing from underneath the leaf litter. A blast of hairspray and a light misting of scenic glue should hold it all in place
More coming very soon
Ant
Nice! Tom we got homework this week!!!
TREEMENDUS
Member
Some slightly better photos of the base as it stands at the moment. It's dull and grey here today so not much natural light for taking piccies. I have also added some seamoss saplings to my base. There could be more greenery (scatter) added to the base but i'm happy to leave mine like this The next step will be to stick the leaves onto the roots one at a time..........
So in no particular order.......... and I hope this is capturing it Bob?
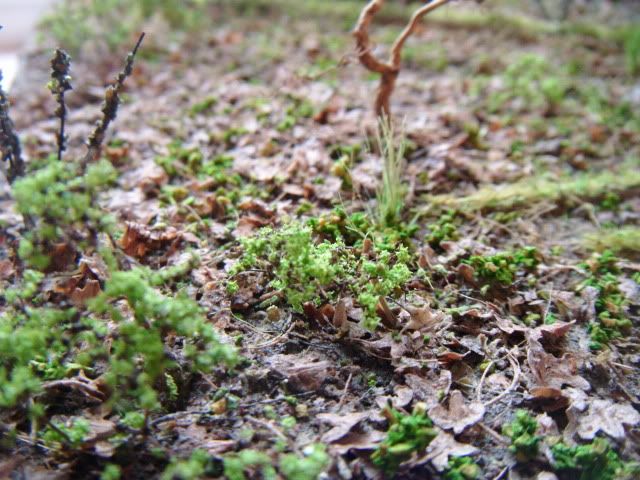

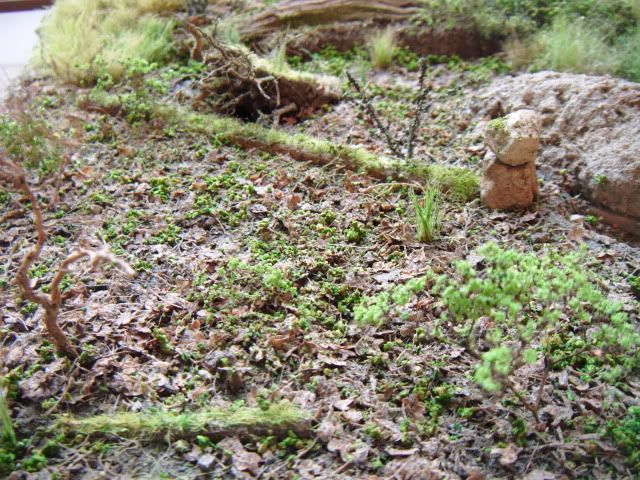
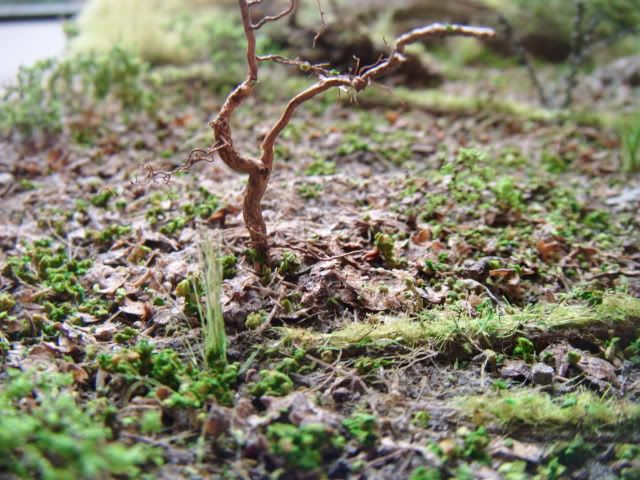


Thats it for now. I'll post an update as soon as I have some foliage on the "saplings"
Thanks for taking the time to read this stuff.
Ant
So in no particular order.......... and I hope this is capturing it Bob?
Thats it for now. I'll post an update as soon as I have some foliage on the "saplings"
Thanks for taking the time to read this stuff.
Ant
Been busy last couple of evenings and I haven't had a chance to look here yet. Holy Cow! We have to do that!!
I just showed Cindy, had her fooled...
I just showed Cindy, had her fooled...
Similar threads
- Replies
- 2
- Views
- 185