
Just wrapped up a review a few weeks ago for IPMS USA.
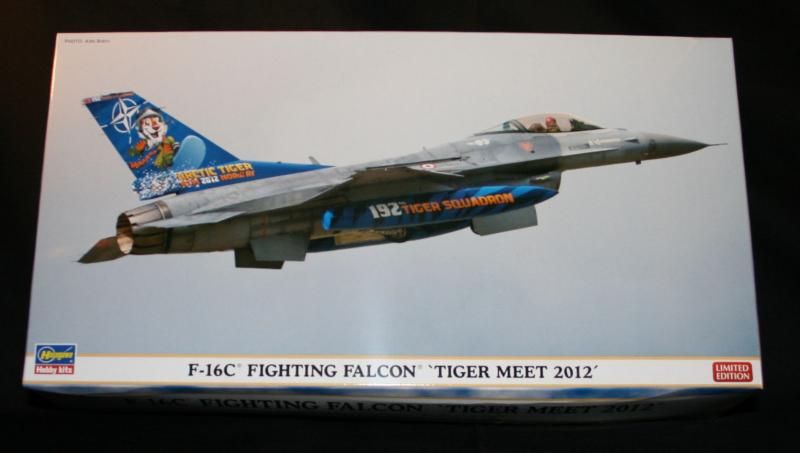
F-16C Fighting Falcon “Tiger Meet 2012” Limited edition
Scale: 1/48
Reviewer: David Horn, IPMS #44962
Kit #07338
MSRP $65.00 USD
Review type: Full Build
Product type: Model kit
Company info: Hobbico (Hasegawa)
Link to kit: http://www.hasegawausa.com/product-pages/hsgs7338.html
Provided by: Hobbico (Hasegawa) www.hasegawausa.com
Aircraft and history:
NATO Tiger meet started around 1961 with the Royal Air Force (RAF) and grew into a large multinational military exercise over the years. The aircraft that participate usually sport distinctive tiger stripe markings and unique tail art. The model depicted is Turkish air force F-16C (Block 50) 192 squadron “ Filo “ which became a member of NATO Tiger society in 1980. The last F-16C version produced is the block 50/52 aircraft (block 50 GE engine and block 52 Pratt & Whitney engine). Turkey has operated F-16’s since 1987 starting with the block 30 and as of 1996 Turkey received block 50 Vipers.
Kit:
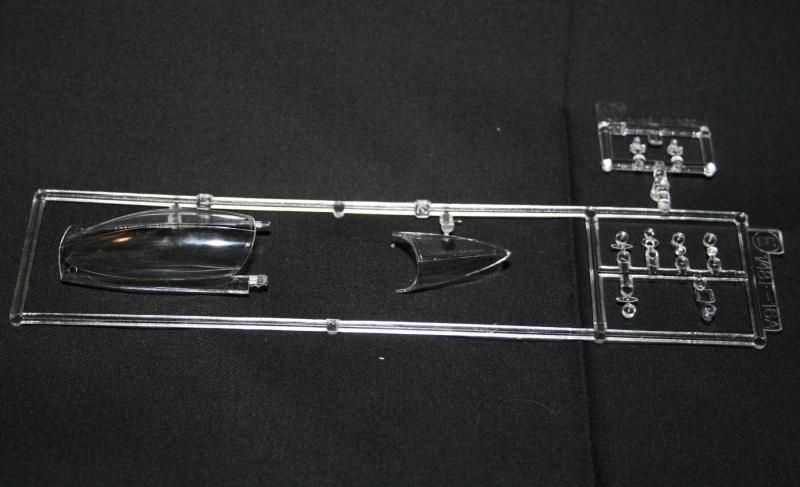
As far as 1/48 scale F-16 kits, Hasegawa has been the leader since their first Viper kit was released in the 1980’s. Other companies have recently released kits that are challenging their lead but Hasegawa is still holding strong. When you first look at the plastic sprues, you will find many legacy parts in the box as well as newer sprues to accommodate the updates, which make the Viper kit competitive in today’s market. There are, however, a few areas that are lacking if you are building the kit out of the box. Some of the legacy items include an intake that lacks a full trunking and landing gear bays short on detail. These items have been addressed on aftermarket accessories. Another other item that has always been an issue with this kit is a very fine seam right in the middle of the canopy that needs to be carefully removed.
Build:
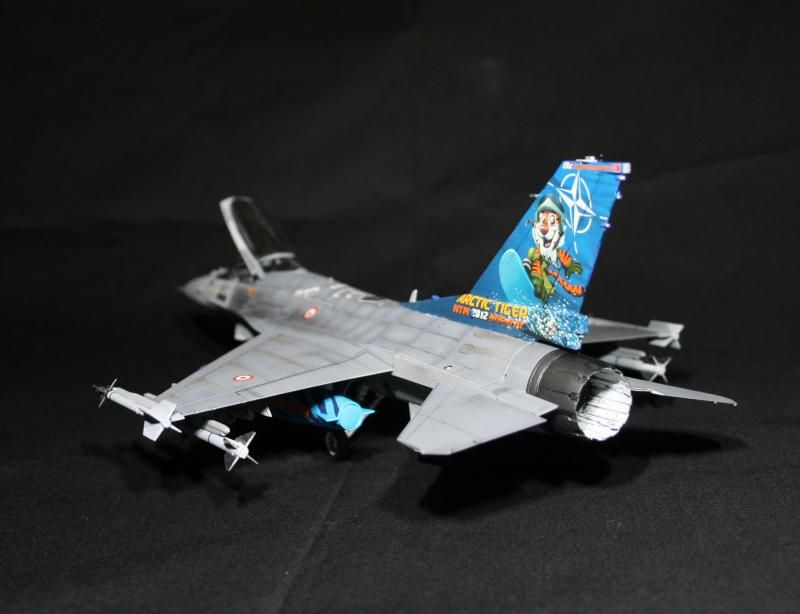
Starting with the cockpit, assembly is straightforward, however, the ejection seat does appear to either be a little on the large size or the cockpit tub is small. When I test fit the seat with the Main Instrument Panel (MIP) installed, the front of the seat hits the lower center MIP, so the ejection handle would not fit. To solve this, I removed a little plastic from the ejection seat where the ejection handle goes. The rest of the cockpit is simple to build, but make sure you glue the throttle lever to the inner fuselage before you install the tub and fuselage halves. Be sure you drill out any holes as indicated by the instructions before you seal the fuselage halves and tub together. Early in the build is assembly of the engine exhaust. The detail is decent with a full depth afterburner section, nicely detailed turbine section and “turkey feathers”. The kit calls out for a GE engine (with “big mouth” MCID intake) however the box also has the legacy Pratt Whitney F100-PW-220 and “small mouth” NSI intake.
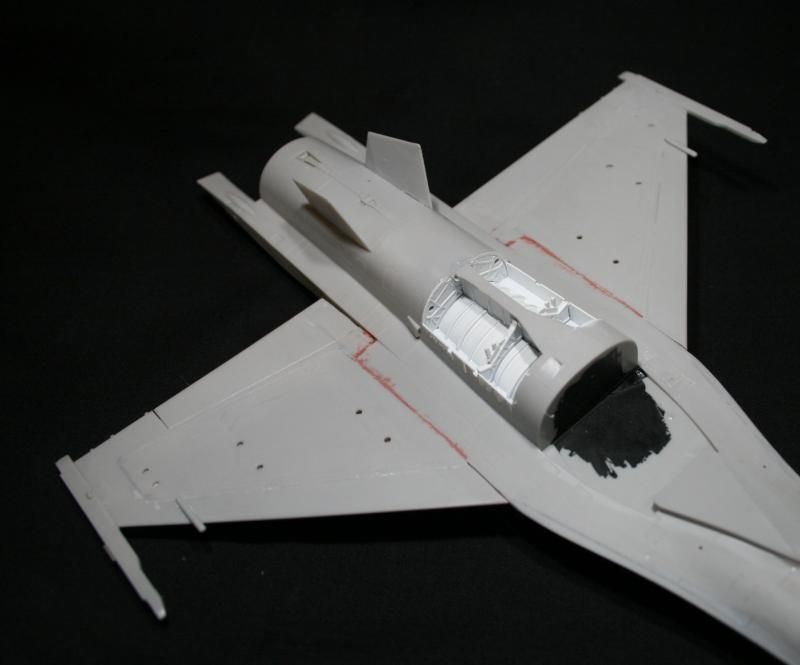
The next step is to assemble the wings, which are just two pieces for each side. Step four instructs you to remove the missile rails which are older style rails (pre AIM-120 missile) and install later style rails (LAU-129) in step five. When I looked at the box photo and looked at online pictures of the real aircraft, it still had the older style rails so I decided to leave the molded missile rails attached. I wish Hasegawa gave you the option to drill out the pylon mounting holes, instead of putting the mounting holes in there so you have to fill them when not installing pylons. I did have a few gaps between the wing and fuselage, so make sure you dry fit the wings and make adjustments before using glue. Make sure you do not forget to add the two small antennas (RHAW antenna or “Beer Can” antennas) on the wings leading edge. One area of assembly where I question the instruction on is on step five, a note about installing the two small vents on the base of the tail. It recommends that you install the vents (items H3 and H4) after the decal is installed. If you follow the instructions, make sure you clearly mark where the vent will go so you can make appropriate cuts in the decal. I followed the instructions and well after the decals were set, the vent covered some of the text. I ended up painting the vent blue and there is a gap in the text. The reference pictures show that text does go over the vent. When I installed the radome, I overlooked installing the one gram nose weight. The good news is that a weight was not needed in my build. That might be an issue if wing tanks are not used.
Assembling the intake was a little tricky, and it might be just me, but I had a gap and misalignment between the intake sides and the front of the intake. Intake detail is limited with basically only the lower half of an intake trunk represented, which leaves a modeler with only a few other options, install an aftermarket intake or install an intake cover. Since this kit’s plastic has been around a long time, there is not a shortage of aftermarket intake and landing gear bay options. On the subject of landing gear, the kit’s detail is short of detail in the wheel bays but unless you are putting a mirror under your display, detail is sufficient. Hasegawa does have current style wheels on an updated sprue but the only landing gear option is the lightweight gear but not that many people can spot the differences between heavy and light weight gear. I pre-painted the gear but made sure I knew what the part numbers are, the opposite parts look nearly identical so keep track on what is left and right.
The last of the airframe steps is to install gear bay doors, navigation light extensions, AIFF “Bird Slicers” on the nose along with a few other little items. The canopy can be positioned opened or closed, with a relatively tight fit when closed which is a plus. Unlike previous kit released, Hasegawa only offers only one clear sprue and instructs you to tint the canopy if desired. Most of the Vipers have made the switch to a clear canopy so it is up to the modeler to choose tint.
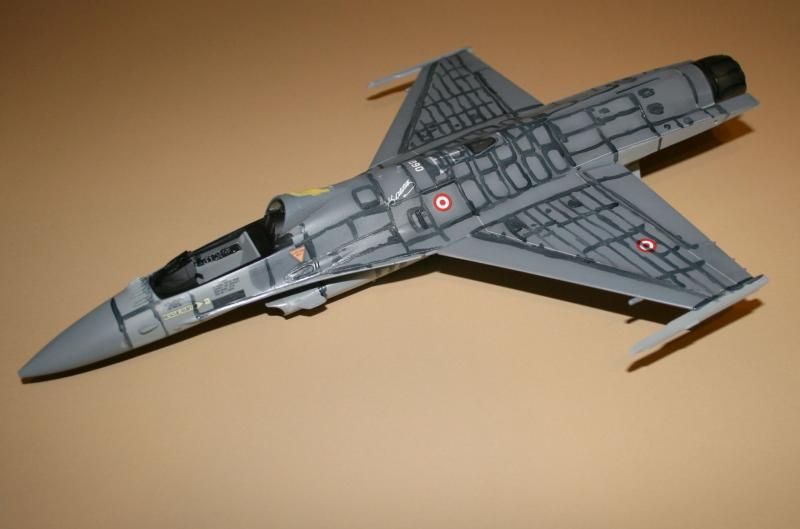
The only weapons supplied in the kit are missiles as well as wing fuel tanks, centerline tank and a travel pod. I had a hard time deciding if I wanted to have the same load out as shown on the box or install all the pylons and missiles, I chose the latter. The last item to add is a boarding ladder which really rounds out the build.
Painting and Decals:
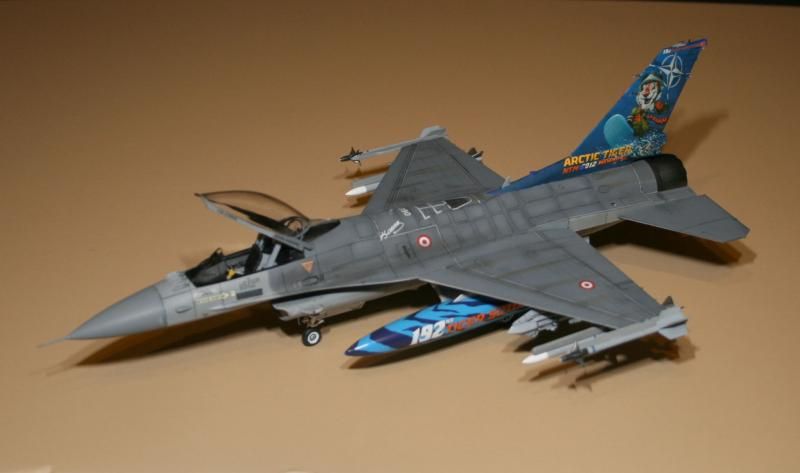
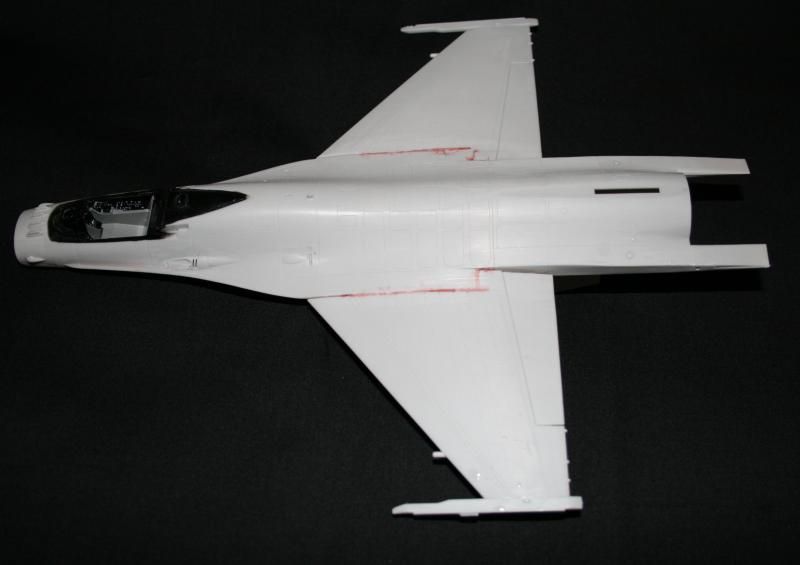
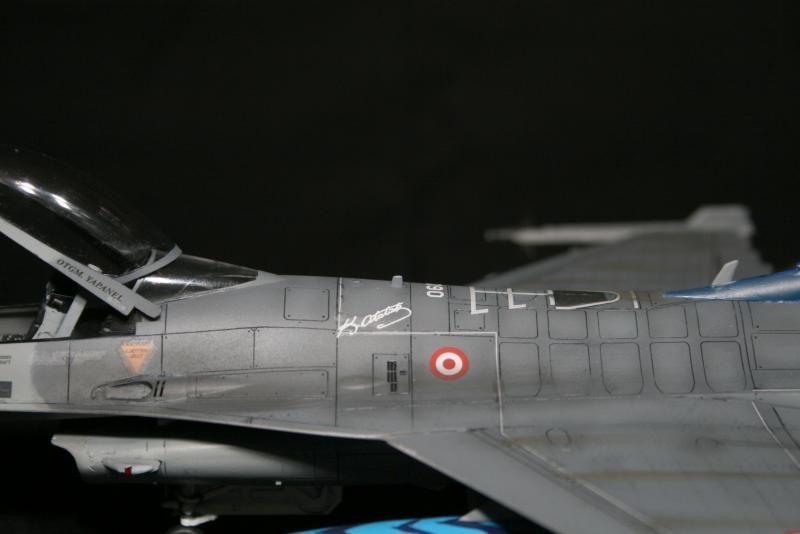
When reviewing my colors, the wing tank colors instruct you to mix 70% yellow with 30% sky blue, unfortunately that make green. From reference photos, sky blue is the color you need so I used just that color for my base coat on the tanks. The remainder of the kit I used Xtracrylix paints with a little color blending with the darkest gray on top of the fuselage. The box photo clearly shows variations in gunship gray (FS 36118) so most of the dark gray was lightened to give a sun bleached appearance. Next I used Gunship gray as is except for thinning. The darker gray tone was sprayed around panel lines to give the same effect as the box photo.
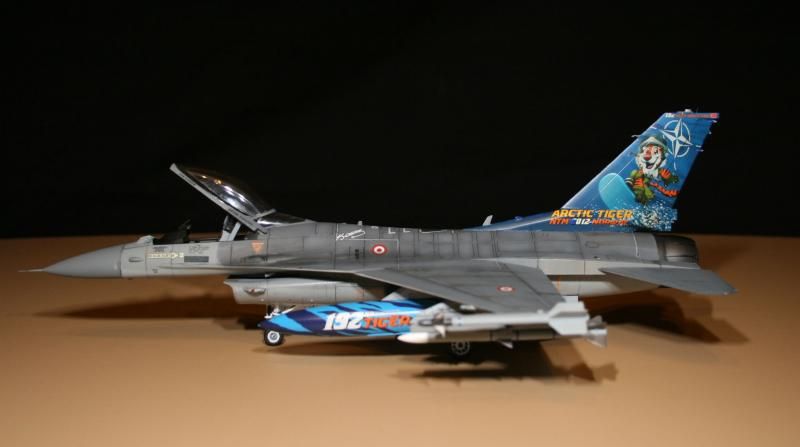
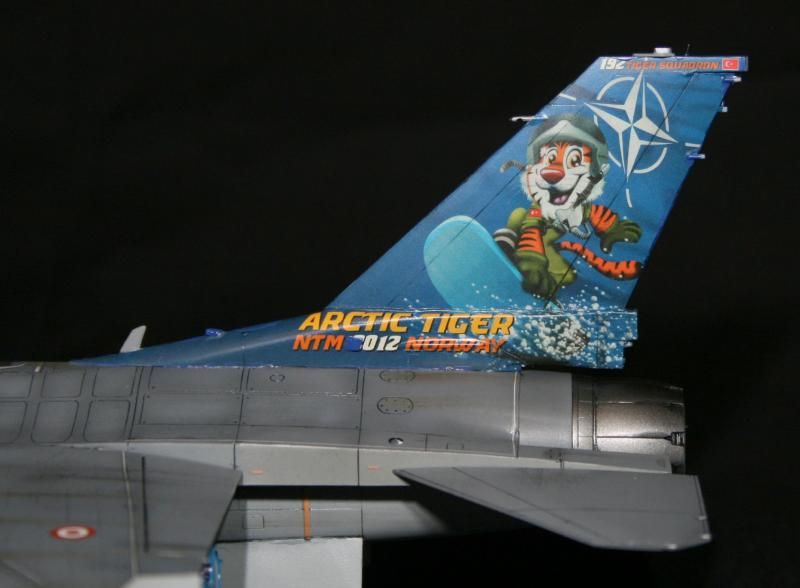
I was really concerned with installing the large decals on the tail (four pieces total) but I was really surprised how well the decals went on. The ones I was concerned with are at the base of the tail since there are a few bumps to form over and as mentioned earlier, the “vent” issue. The decals did form over the actuator bumps after solvaset was used however the decals did not want to wrap around the aft end of the tail base. To fix this, a small drop of future floor polish did the trick. Probably the most challenging decals to install are on the wing tanks. The “tiger stripe” decals are large, trimming away the carrier film is required to get them to lay down properly. The remainder of the decals went on very well and to my surprise, the thin walkway lines went down without any issues, probably a first for me.
Last step is to add panel line shading for which I use “The Detailer” to really make the panel lines stand out. One good coat of dull clear coat and the model is ready to display.
Conclusion:
You really cannot go wrong building any 1/48 Hasegawa F-16 kit. As the years go on and competition heats up but Hasegawa remains strong by making the necessary updates as the market demands. This build went together without too many issues and other than some of the decals (wing tanks). A novice should not have any problems making a show stopper build! Many thanks to Hasegawa for providing this kit to IPMS for review.
David Horn
IPMS #44962
F-16C Fighting Falcon “Tiger Meet 2012” Limited edition
Scale: 1/48
Reviewer: David Horn, IPMS #44962
Kit #07338
MSRP $65.00 USD
Review type: Full Build
Product type: Model kit
Company info: Hobbico (Hasegawa)
Link to kit: http://www.hasegawausa.com/product-pages/hsgs7338.html
Provided by: Hobbico (Hasegawa) www.hasegawausa.com

Aircraft and history:
NATO Tiger meet started around 1961 with the Royal Air Force (RAF) and grew into a large multinational military exercise over the years. The aircraft that participate usually sport distinctive tiger stripe markings and unique tail art. The model depicted is Turkish air force F-16C (Block 50) 192 squadron “ Filo “ which became a member of NATO Tiger society in 1980. The last F-16C version produced is the block 50/52 aircraft (block 50 GE engine and block 52 Pratt & Whitney engine). Turkey has operated F-16’s since 1987 starting with the block 30 and as of 1996 Turkey received block 50 Vipers.


Kit:
As far as 1/48 scale F-16 kits, Hasegawa has been the leader since their first Viper kit was released in the 1980’s. Other companies have recently released kits that are challenging their lead but Hasegawa is still holding strong. When you first look at the plastic sprues, you will find many legacy parts in the box as well as newer sprues to accommodate the updates, which make the Viper kit competitive in today’s market. There are, however, a few areas that are lacking if you are building the kit out of the box. Some of the legacy items include an intake that lacks a full trunking and landing gear bays short on detail. These items have been addressed on aftermarket accessories. Another other item that has always been an issue with this kit is a very fine seam right in the middle of the canopy that needs to be carefully removed.

Build:
Starting with the cockpit, assembly is straightforward, however, the ejection seat does appear to either be a little on the large size or the cockpit tub is small. When I test fit the seat with the Main Instrument Panel (MIP) installed, the front of the seat hits the lower center MIP, so the ejection handle would not fit. To solve this, I removed a little plastic from the ejection seat where the ejection handle goes. The rest of the cockpit is simple to build, but make sure you glue the throttle lever to the inner fuselage before you install the tub and fuselage halves. Be sure you drill out any holes as indicated by the instructions before you seal the fuselage halves and tub together. Early in the build is assembly of the engine exhaust. The detail is decent with a full depth afterburner section, nicely detailed turbine section and “turkey feathers”. The kit calls out for a GE engine (with “big mouth” MCID intake) however the box also has the legacy Pratt Whitney F100-PW-220 and “small mouth” NSI intake.


The next step is to assemble the wings, which are just two pieces for each side. Step four instructs you to remove the missile rails which are older style rails (pre AIM-120 missile) and install later style rails (LAU-129) in step five. When I looked at the box photo and looked at online pictures of the real aircraft, it still had the older style rails so I decided to leave the molded missile rails attached. I wish Hasegawa gave you the option to drill out the pylon mounting holes, instead of putting the mounting holes in there so you have to fill them when not installing pylons. I did have a few gaps between the wing and fuselage, so make sure you dry fit the wings and make adjustments before using glue. Make sure you do not forget to add the two small antennas (RHAW antenna or “Beer Can” antennas) on the wings leading edge. One area of assembly where I question the instruction on is on step five, a note about installing the two small vents on the base of the tail. It recommends that you install the vents (items H3 and H4) after the decal is installed. If you follow the instructions, make sure you clearly mark where the vent will go so you can make appropriate cuts in the decal. I followed the instructions and well after the decals were set, the vent covered some of the text. I ended up painting the vent blue and there is a gap in the text. The reference pictures show that text does go over the vent. When I installed the radome, I overlooked installing the one gram nose weight. The good news is that a weight was not needed in my build. That might be an issue if wing tanks are not used.

Assembling the intake was a little tricky, and it might be just me, but I had a gap and misalignment between the intake sides and the front of the intake. Intake detail is limited with basically only the lower half of an intake trunk represented, which leaves a modeler with only a few other options, install an aftermarket intake or install an intake cover. Since this kit’s plastic has been around a long time, there is not a shortage of aftermarket intake and landing gear bay options. On the subject of landing gear, the kit’s detail is short of detail in the wheel bays but unless you are putting a mirror under your display, detail is sufficient. Hasegawa does have current style wheels on an updated sprue but the only landing gear option is the lightweight gear but not that many people can spot the differences between heavy and light weight gear. I pre-painted the gear but made sure I knew what the part numbers are, the opposite parts look nearly identical so keep track on what is left and right.
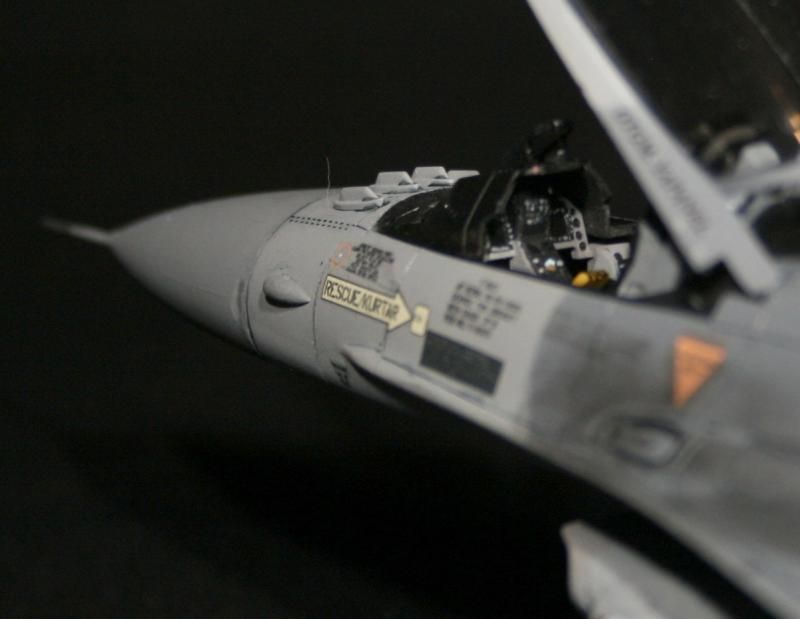
The last of the airframe steps is to install gear bay doors, navigation light extensions, AIFF “Bird Slicers” on the nose along with a few other little items. The canopy can be positioned opened or closed, with a relatively tight fit when closed which is a plus. Unlike previous kit released, Hasegawa only offers only one clear sprue and instructs you to tint the canopy if desired. Most of the Vipers have made the switch to a clear canopy so it is up to the modeler to choose tint.
The only weapons supplied in the kit are missiles as well as wing fuel tanks, centerline tank and a travel pod. I had a hard time deciding if I wanted to have the same load out as shown on the box or install all the pylons and missiles, I chose the latter. The last item to add is a boarding ladder which really rounds out the build.
Painting and Decals:
When reviewing my colors, the wing tank colors instruct you to mix 70% yellow with 30% sky blue, unfortunately that make green. From reference photos, sky blue is the color you need so I used just that color for my base coat on the tanks. The remainder of the kit I used Xtracrylix paints with a little color blending with the darkest gray on top of the fuselage. The box photo clearly shows variations in gunship gray (FS 36118) so most of the dark gray was lightened to give a sun bleached appearance. Next I used Gunship gray as is except for thinning. The darker gray tone was sprayed around panel lines to give the same effect as the box photo.

I was really concerned with installing the large decals on the tail (four pieces total) but I was really surprised how well the decals went on. The ones I was concerned with are at the base of the tail since there are a few bumps to form over and as mentioned earlier, the “vent” issue. The decals did form over the actuator bumps after solvaset was used however the decals did not want to wrap around the aft end of the tail base. To fix this, a small drop of future floor polish did the trick. Probably the most challenging decals to install are on the wing tanks. The “tiger stripe” decals are large, trimming away the carrier film is required to get them to lay down properly. The remainder of the decals went on very well and to my surprise, the thin walkway lines went down without any issues, probably a first for me.

Last step is to add panel line shading for which I use “The Detailer” to really make the panel lines stand out. One good coat of dull clear coat and the model is ready to display.

Conclusion:
You really cannot go wrong building any 1/48 Hasegawa F-16 kit. As the years go on and competition heats up but Hasegawa remains strong by making the necessary updates as the market demands. This build went together without too many issues and other than some of the decals (wing tanks). A novice should not have any problems making a show stopper build! Many thanks to Hasegawa for providing this kit to IPMS for review.
David Horn
IPMS #44962
