• Modelers Alliance has updated the forum software on our website. We have migrated all post, content and user accounts but we could not migrate the passwords.
    This requires that you manually reset your password.
    Please click here, http://modelersalliance.org/forums/login to go to logon page and use the "Forgot your Password" option.

Eurofighter Typhoon

ij001

Well-known member
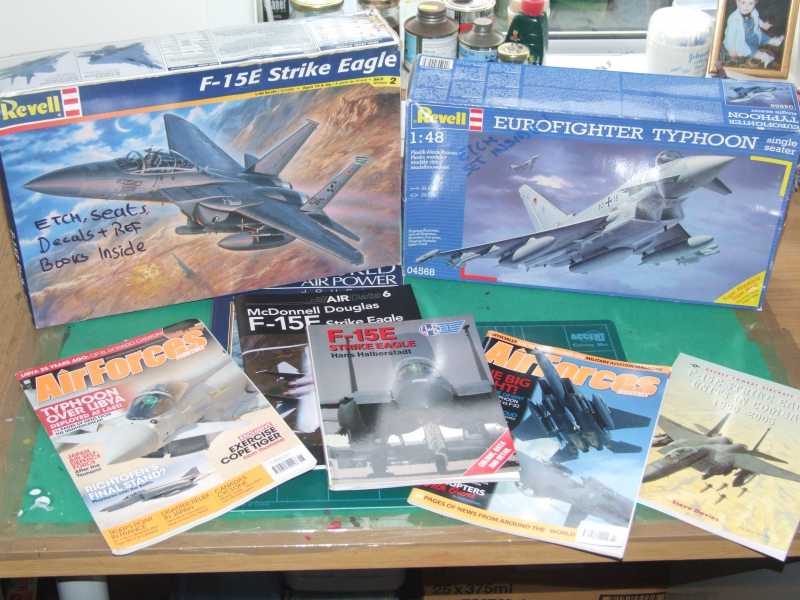
The bench is cleared & cleaned (I've even bought a new cutting mat). The references are out, and the box is open....

"Once more unto the breach, dear friends, once more...."

Henry V - Act 3 Sc. 1


Mostly I've just been getting the paint mixes sorted for now:
Overall Barley (Camouflage) Grey - Xtracolour enamel, straight from the tin.
Neutral Grey - Very close to radome and other ECM covers - Xtracolour again.
Leading edge RAM coating - Humbrol 'Light Gull Grey' (H129).
Cockpit - Still working on this. The actual colour is 'Admiralty Grey', but US ADC Grey is very, very close, and matches the Eduard Zoom set.

Anyhoos, a quick start-up pic here:


hf9601d1.JPG


hd5b2490.jpg


...and a video taken last week of this seasons' Airshow demo aircraft being thrown around the spring skies over RAF Coningsby... Enjoy.

https://www.youtube.com/watch?v=Ryip4MfjS5A


More very soon.

Ian
 
Thanks, chaps... Made some progress over a l-o-n-g sitting last night and a much shorter session this morning. Essentially this is what I'm aiming for;


A British F.2 from around four years ago. So my first step was to carve and sand away the detail from the kit parts, then spray with an appropriate grey. I ended-up using Xtracolour 'Silbergrau'. I should make a comment here about this particular kit. I first built one around six years ago, but never finished it and still have a lot of the parts in a 'leftovers' bag and am happily using them on this build. BIG difference in the state of the moldings. The more recent purchase, and the subject of this build has lost a lot of definition in its' finesse of detail. The older kit is far, far better.

Anyhoos, here's what the pit and IP looked like before I 'Got busy' with the Eduard:


And here's how it looks right now:


I've said it before, I'll happily say it again... You just cannot beat Eduard pre-painted sets for this sort of thing. C'mon, the displays on the MFD's are readable :woohoo:

More soon.

Ian
 
Looks great Ian, I don't mind the Color Zoom stuff so much when they get the colors right. I don't like the self adhesive stuff, tend to float. Check that top right panel Ian, looks like it floated a bit. (y)
 
Check that top right panel Ian, looks like it floated a bit. (y)


Thanx, boss... missed it, but sorted now. It was one of the 'sandwhich' pieces and the top etch hadn't properly bonded to the lower one.

Just hope I can persuade this to drop into the fuselage without any dramas.... :idonno

Ian
 
.... :bang head yeah, this didn't go well !! - Had a feeling this was gonna happen.


h6619f2b.JPG


When I sandwiched the 'pit' into the fuselage halves it all went very wrong. Cannot see why, but the short-version is this. I can have the pit straight and level but the IP springs forward as you see in the pic...

OR, I can have the IP sitting flush on the combing as it should be, but the forward fuselage won't align leaving a gap to cross that would give Moses nightmares.... I've chosen the first option and will fill the gap with plastic card, putty and rude words !! I keep telling m'self it's just a hobby, but I don't think that I believe me anymore :S

Ian
 
I just realized I have not written anything here. Weird that. Anyways looking good so far. I think the choice you made is the easiest. Just check first and see if the canopy will block out the gap before you get too involved. Looking at it the IP looks a bit high above the combing so you might want to check the canopy will sit down on properly there also, especially when you look at your IP photo. Keep at it Ian as this is a pretty bird.
James
 
Hey James - Great minds and all that...
...One of the first things I checked was the canopy fit. I'm good to go. Just cannot figure what went wrong unless it's the attachment point between the IP and the pit itslef :hmmm - I did mention how degraded the detail is on this kit compared to the first one I built just after the kit came out.

:idonno

Whatever the cause is, isn't important now, what is important is getting it fixed !!

Ian
 
Don't think it's because of the added etch, Bob. I just think that the molds have lost so much 'integrity' that the locating points are scr*w*d-up.

Ian
 
Sort of sounds like a modern flying clog :sick:

Who says today's models are so much better :idonno

Cheers, Christian B)
 
Kids at 'after-school club' all day, so finished chores by lunchtime then had a two-and-a-half hour session at the bench, and another two hours this evening. Suffice to say I got a LOT done. The combing is finished and looks so much better than the kit supplied one - if that sounds immodest, I'm not apologising, I worked on that thing :eek:hmy: .

I also sprayed, assembled and fixed the gear bays and the intakes, attached various ECM nodes, small intakes and finally but-joined the upper wings to the fuselage. Here's a couple of 'visuals' of todays progress:


This afternoon, I filled the gap between the IP and the combing with some scrap plastic card, then trimmed it back and belnded it with 'Green Stuff'. But whilst I had the card and putty to hand I went ahead and built-up the whole combing to a more realistic shape and also raised and extended the HUD mounting. I used a little 'artistic license' but it looks a lot better now IMHO.


More in a minute, stay tuned.

Ian
 
As I mentioned, when I got back to the bench this evening, I assembled the wheel wells, (I'd already sprayed them this afternoon), and the intake trunking, then bolted them onto the lower wings/fuselage:


I then glued each upper wing separately onto the upper fuselage. Because I'd built this kit before I was ready for the 'mating problems' ( :blush: 
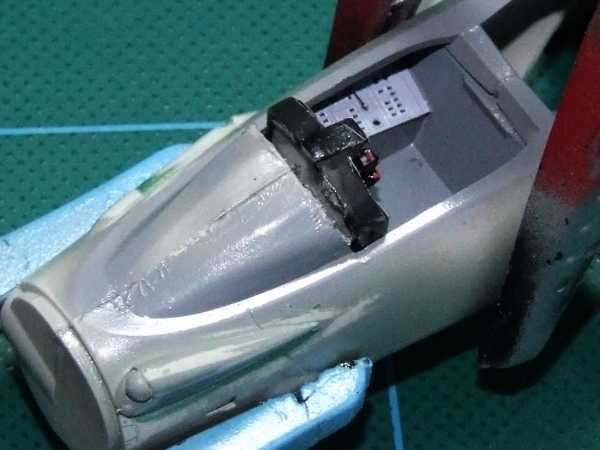
), that occur at this point. I used slow setting Revell 'Contacta' glue and kept adjusting each joint as it was setting. In total it took around 45mins, but I've saved m'self a sh*t-load of filling, sanding and cursing when I come to join the whole thing together.


All set to one side now, to harden and cure, but very close to the point where I can take it for a noisy test-flight around the garage !!

:pilot

As ever thanks for taking the time to look and/or comment. More soon.

Ian
 
Back
Top