• Modelers Alliance has updated the forum software on our website. We have migrated all post, content and user accounts but we could not migrate the passwords.
    This requires that you manually reset your password.
    Please click here, http://modelersalliance.org/forums/login to go to logon page and use the "Forgot your Password" option.

Eduard 109 trop.

ausf

Master at Arms
I'm throwing my kit in the ring with Eduard's Royal edition.
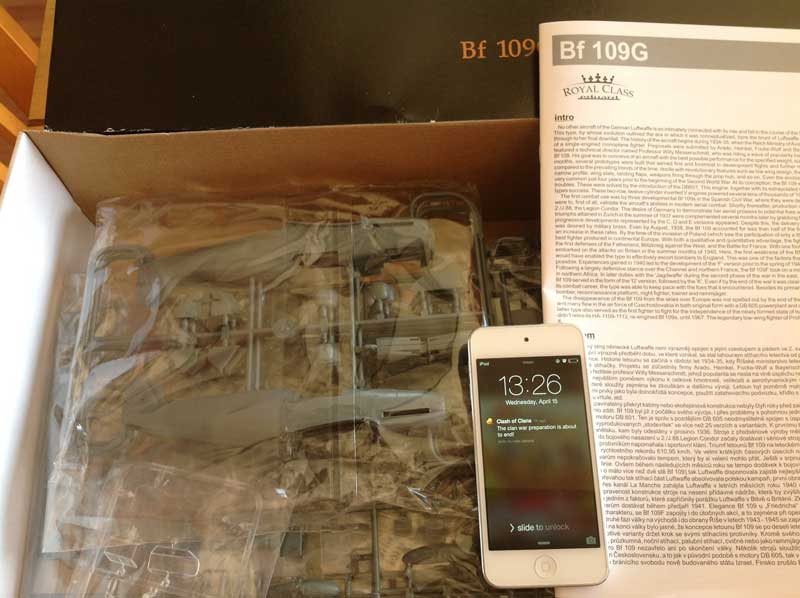
Here's the startup:

h7ba8300.jpg


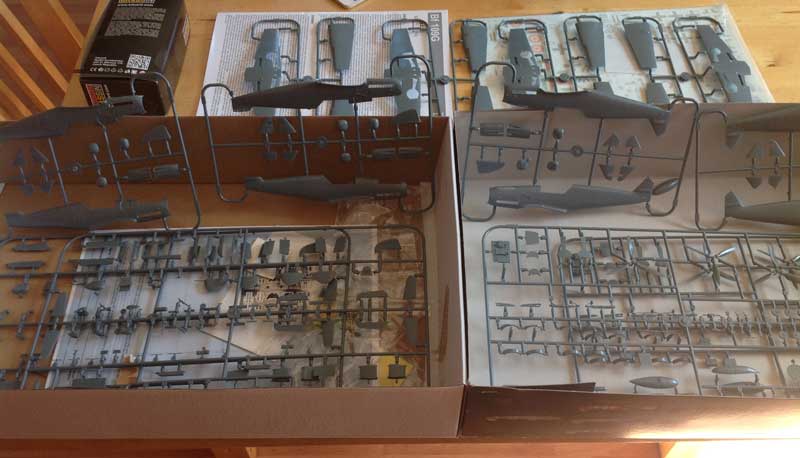
And here's a shot of the included sprues: You get two complete kits, but with my limited AC knowledge, it looks like there's enough here for four, especially if two are wheels up. I'll figure it out as I build the first, but with a quick look over, it appears I'd need two spinners, wingtips, LG doors, cockpit parts and canopies. I assume there's a bunch of AM cockpit parts available, canopy too, so I might just need to run some resin for the tips and gear doors to squeeze out four Bfs. There's markings for 12 ships...


hbad9f53.jpg
 
Eduard's Royal kits have enough parts to build 2 complete aircraft. In this case the extra parts are such that they go together in different combinations to build the particular aircraft variants. This is where you will have to pay close attention to the instruction sheets in order to use the correct parts for the variant you choose to build. There are differences in the parts!

If you have not built one of these multi choice kits before it can be confusing. Start with choosing the plane you want to build and then go through the instructions and make note of the parts used for the variant (A, B, C, D, etc) that you have chosen. I would almost take a zip-lock bag and pack just the parts your plane needs in it and put the other parts away. Less confusing and less likely to grab the wrong part that way. :bang head

I myself wouldn't want to end up with a Frankenschmitt which it could be easy to do. :facepalm
 
I have this kit as well, and am planning to build a G-2 in desert colors, just as soon as I get my bench back up and going. Will be very interested in your thoughts on this one.

:popcorn

Skinny Mike
 
Thanks for the interest guys.

For the sake of sanity, I'm sticking with a B craft, the camo'd trop instead of the usual change of mind as I progress. There are so many options here, but the external air filter and campo pattern is to cool to pass up.

I can see mixing up variants pretty easy here, especially when the mark the fuse halves S1-S10 or T1-T10. Couldn't they pick a different digit?

Theres a heck of a lot of nice armament options include the resin and PE rockets, but I can't find which version they belong to. Only one option so far mentioned cannon pods, so I assume all Gs could use what they give you.
 
That is where the reference books come in handy. Eduard does a fairly decent amount of research on their subjects, but I have found a number of glitches in their products over time. I always like to try and find at least 1 photo of my subject when building. Doesn't always work, but I try.

I wish Eduard would include some of the reference photos for their kits like WnW does on the WW1 planes.

I'm with ya, but I have the equivalent of a small library on German armor filling all my shelf space. Even if I had room to fit AC reference books, I'd end up spending too much money and time on them, then decide on such a specific project, I'd never get it done, same as I currently do with armor.

I wish every company provided directions like WnWs. ;)

I've assembled the pit as far as I can before paint. I'll lokk over my inventory, but have a feeling I'll be mixing to match RLM numbers. I have a few around, I should be okay.
 
May I suggest you ask Matrixone for some help He is VERY clued up with WW2 german planes and I find he is extremely helpfull whenever I or anyone have asked for help with these german birds
 
Jeff, reference wise I have everything you'll ever need but remember that these Eduard kits are slightly off scale so you must stick to the items in the box as all other aftermarket will be too small.

If casting the wingtips, use clear resin. :)

E-mail me if you want help with references. Come by and pick up a few books.

Regards,
 
Thanks for following guys.

Those are great points Saul, thanks. I didn't take in to account the 1/47.pie of this kit when thinking about it, so yeah, no AM for me. Also another good idea regarding clear tips to account for the lights. In light of all of that, I think I'll just build the two in the box and be happy with it. by the time I bought clear resin, which ups the hazards in casting a notch, I'd have to do more than it's worth. I'll probably be 109'ed out after two anyway. I'll toss the spares in te spares bin, maybe do a bottom of the Channel wreck or something. :hmmm

I appreciate the reference offer. I may take you up on the next one, I'm afraid of going back to my normal habits of getting bogged down. I'm enjoying this loose and fast building I've seemed to evolve too. :zen
 
The other option for making the nav lights is clear red and green tooth brushes. Simple to do.
James
 
Okay, some progress on the 'pit.

I absolutely love the detail in this kit. The seatbelts are almost a kit to themselves, embossed paper with all the individual buckles and clips in PE. It took the better part of two hours to assemble, but I remembered to grab a pic of the pieces of the lap restraint before I assembled, here with the fuel sight glass, X-acto for scale:

h9718196.jpg


The rest of the pics, looks a bit dark, but it's RLM66:

h89e474a.jpg


h3d4247c.jpg


PE pedals:

h4de426d.jpg


And dry fit into the wall to check fuel line alignment:

h922e41f.jpg


Not up to the standards of what I see on MA, but I'm lovin' this AC building. :D

Do you guys ever use CA to glue something like the fuse together? I'm dreading putting these halves together, there's beautiful rivet detail on the top that I'm sure to obliterate with my normal methods. I'm thinking of clamping and taping the halves, then running a bead of glue down from the inside, only there isn't much access for the rear and the thinnest styrene glue I have is Testors blue. I have thin CA though.

I'm sure you guys have some tried and true ways that'll get me on the way.
 
Jeff do you have any of the thin solvents like Tanex7 or Tamiya Extra thin? You're right in your thinking of doing it from inside as much as you can, I do it all the time.

Also have you see the Touch'n Flow applicator for solvent based glues?


http://store.spruebrothers.com/product_p/flx7000xxx.htm

Very controlled application of the thin stuff.
 
Thanks Bob,

I just ordered some Extra thin online. I was hoping Amazon Prime would cover it but no joy, so I found a shop in Boston that'll have it here by Weds. I can wait until then to button it up. Plenty of other stuff to work on, including masking the inside of the canopy.

I do have PlastiWeld I use on ABS, but that might be too strong for this. I wouldn't want to melt/distort the thin areas.

Does the extra thin run? In other words, what I envision is being able to hold the fuse upright and put a couple of drops on the inside and have it wick/drip it's way down the seam.
 
PlastiWeld will work fine if it's the same stuff i'm thinking of. I find Tenax is hotter. You should be ok as long as you're not to liberal with it. I'll run just fine.
 
Back
Top