• Modelers Alliance has updated the forum software on our website. We have migrated all post, content and user accounts but we could not migrate the passwords.
    This requires that you manually reset your password.
    Please click here, http://modelersalliance.org/forums/login to go to logon page and use the "Forgot your Password" option.

CTA1: J-35 Draken (Update 4/8/2015)

Re: CTA Entry: Adam Baker 1/48 Saab J-35 Draken

It looks like a plane!

Draken021_zps39cb485f.jpg


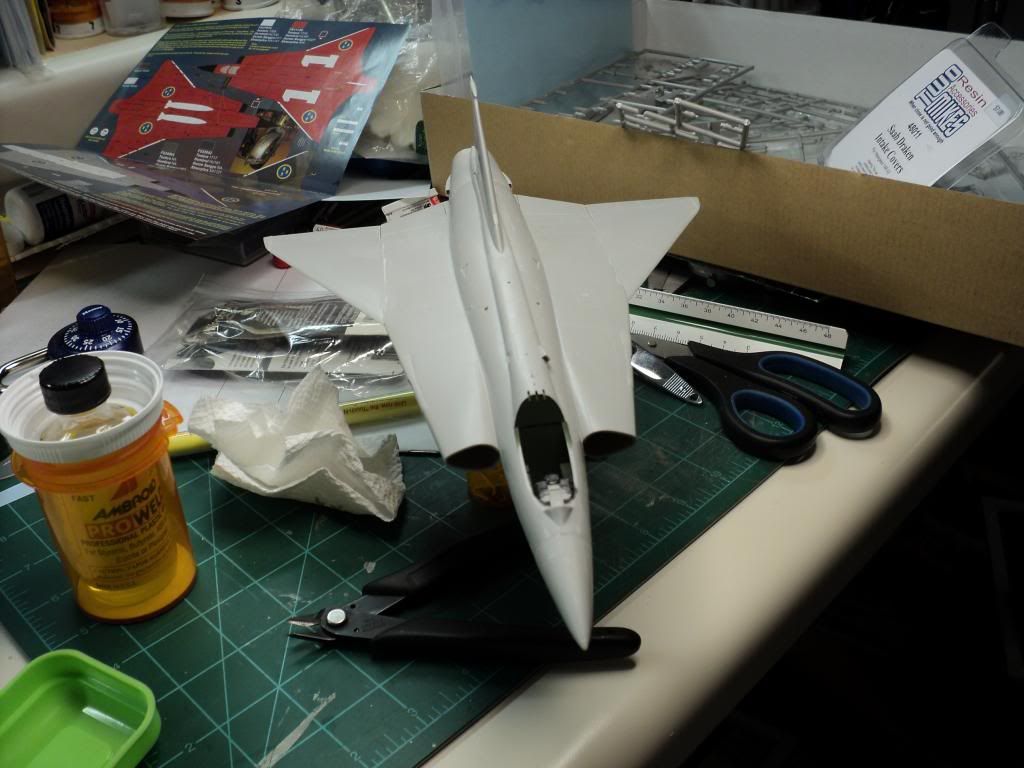
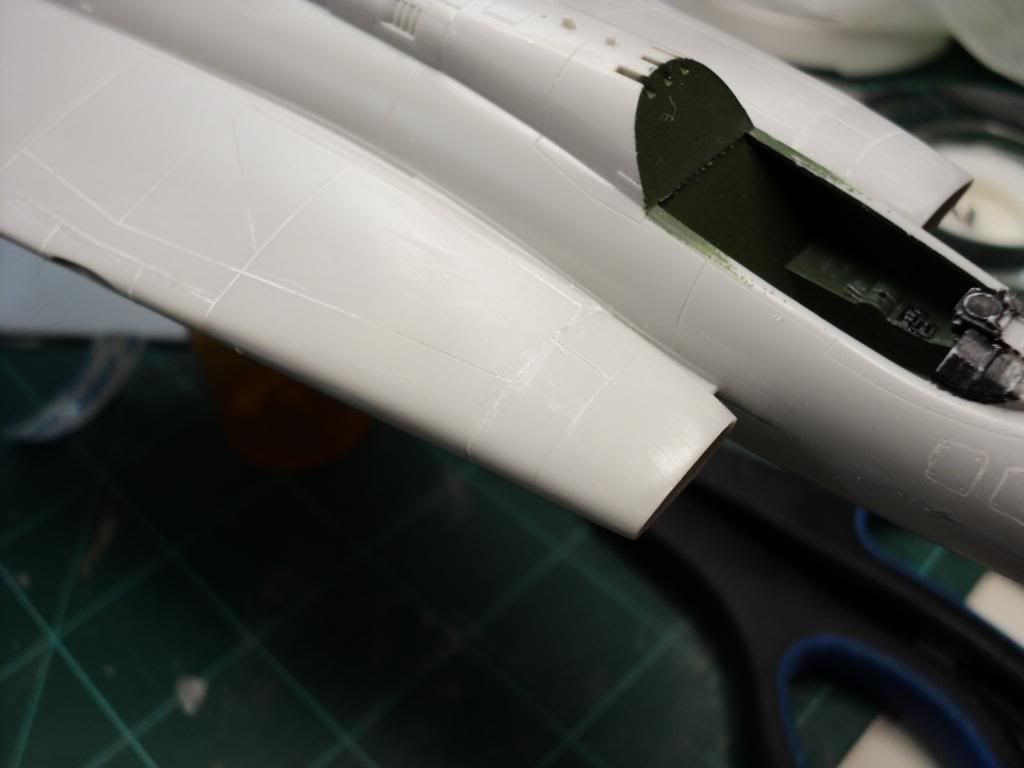
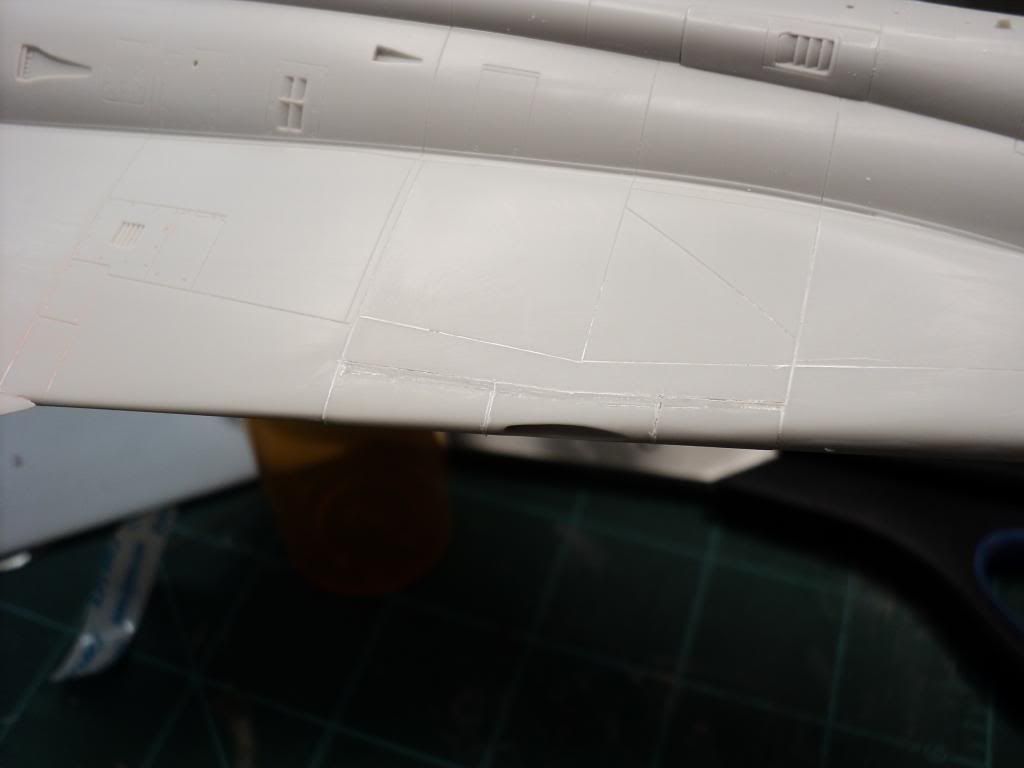
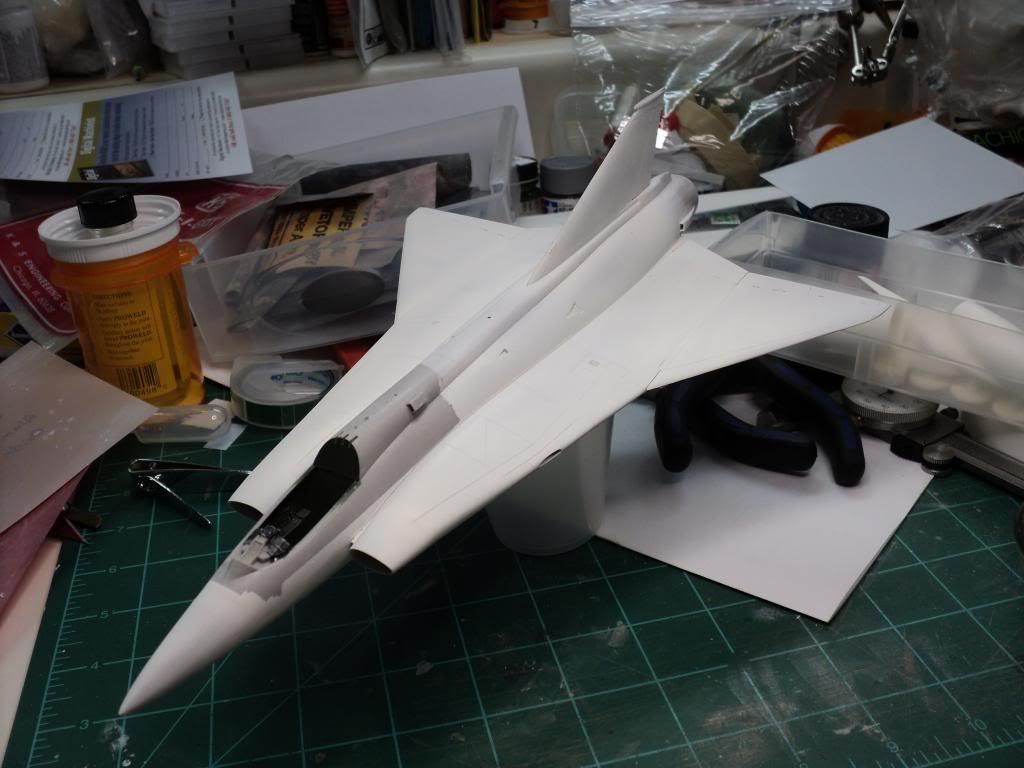
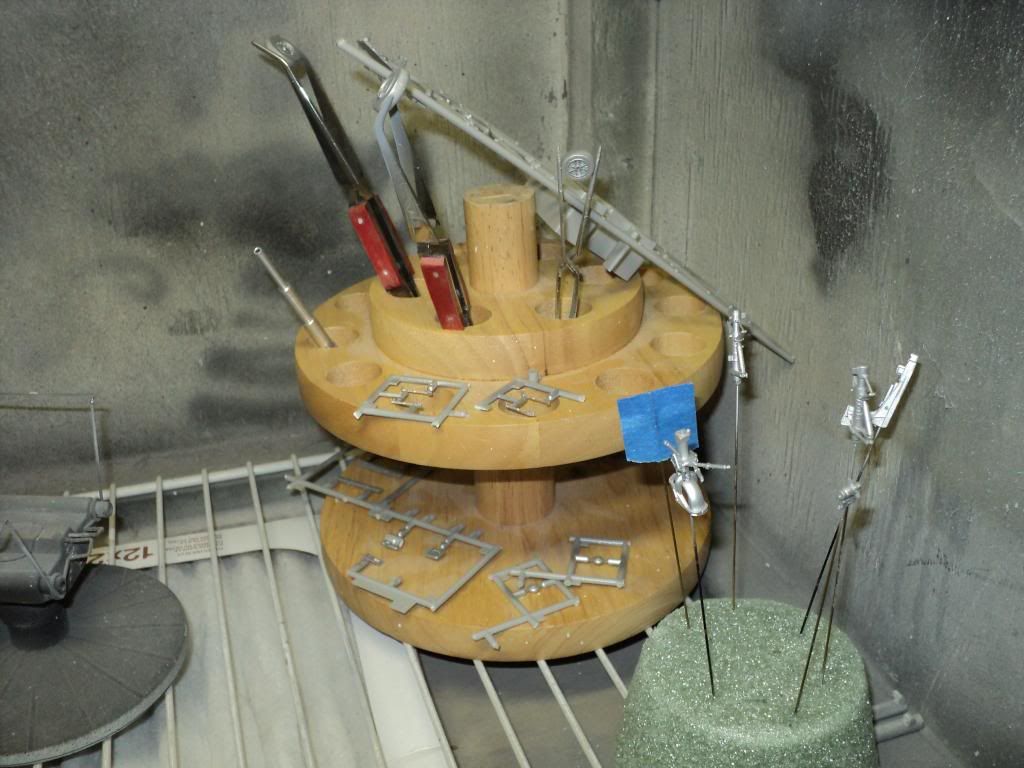
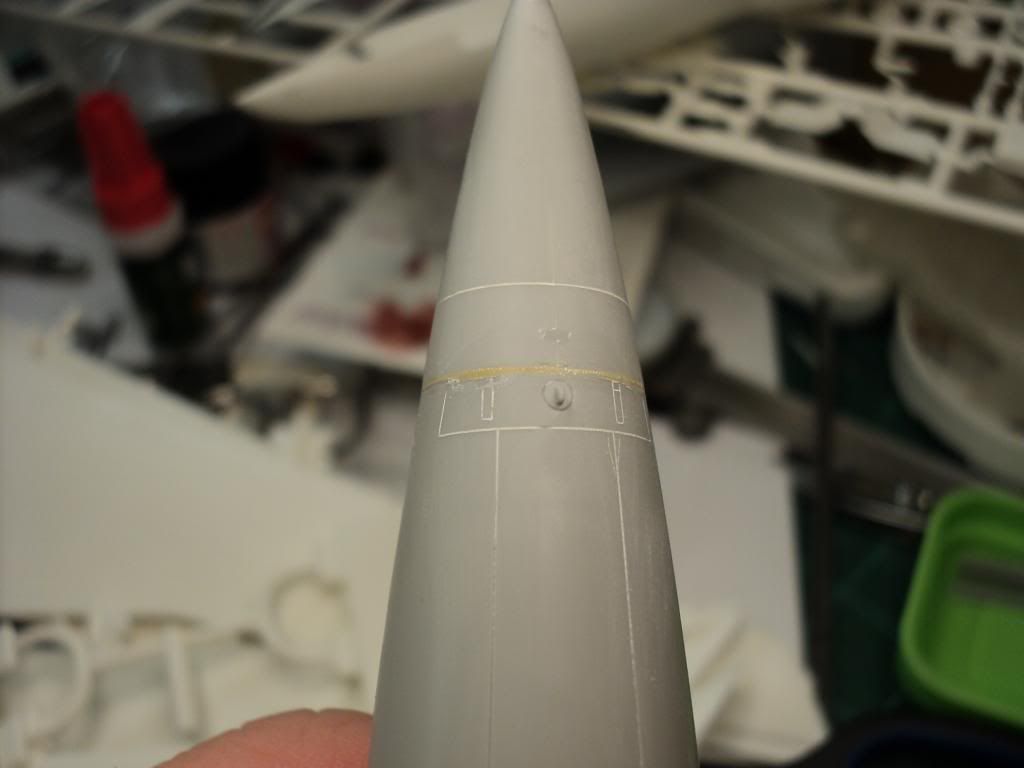
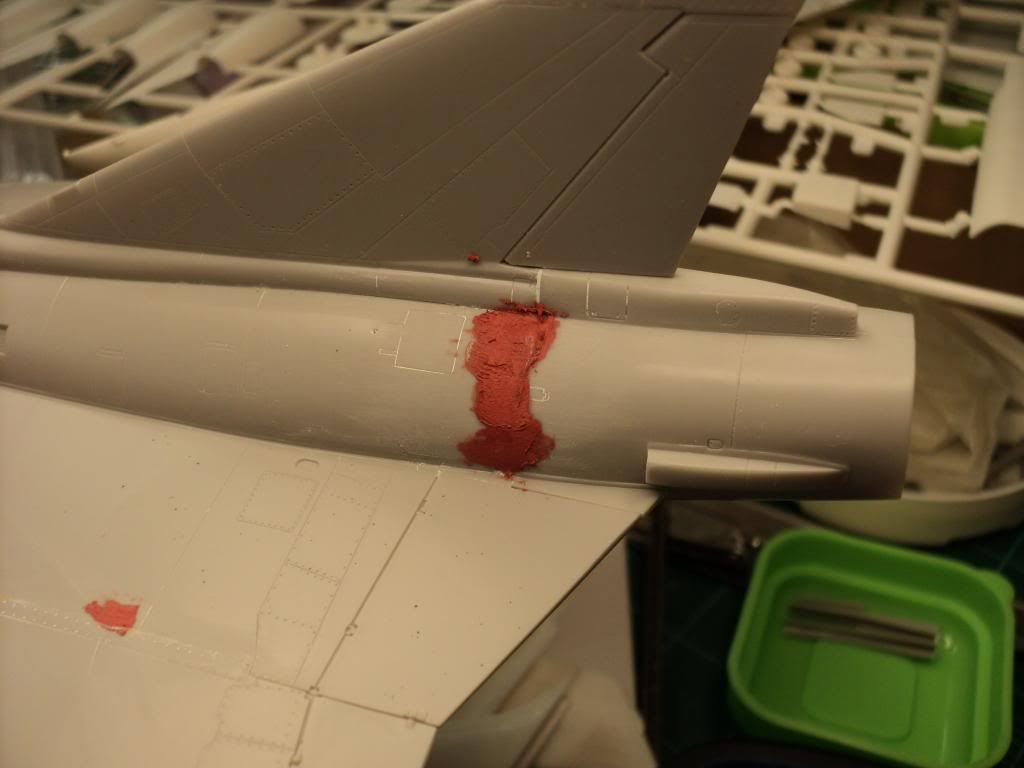
Managed to get the wings, engine housing & nose cone on today, and now I've begun the oh so fun task of cleaning all seams & gaps. One wing went on pretty easy, but the other left a gap and a step between the wing & fuselage that I have to deal w/ now. And the engine housing went on less than stellar and have a gap and a step almost all the way around. Definitely wont be getting any primer down this weekend, that's for sure. I'm going to be looking at how much I might be able to do w/ some Mr. Surfacer and how much (most of it) is going to require something more potent like glazing putty.
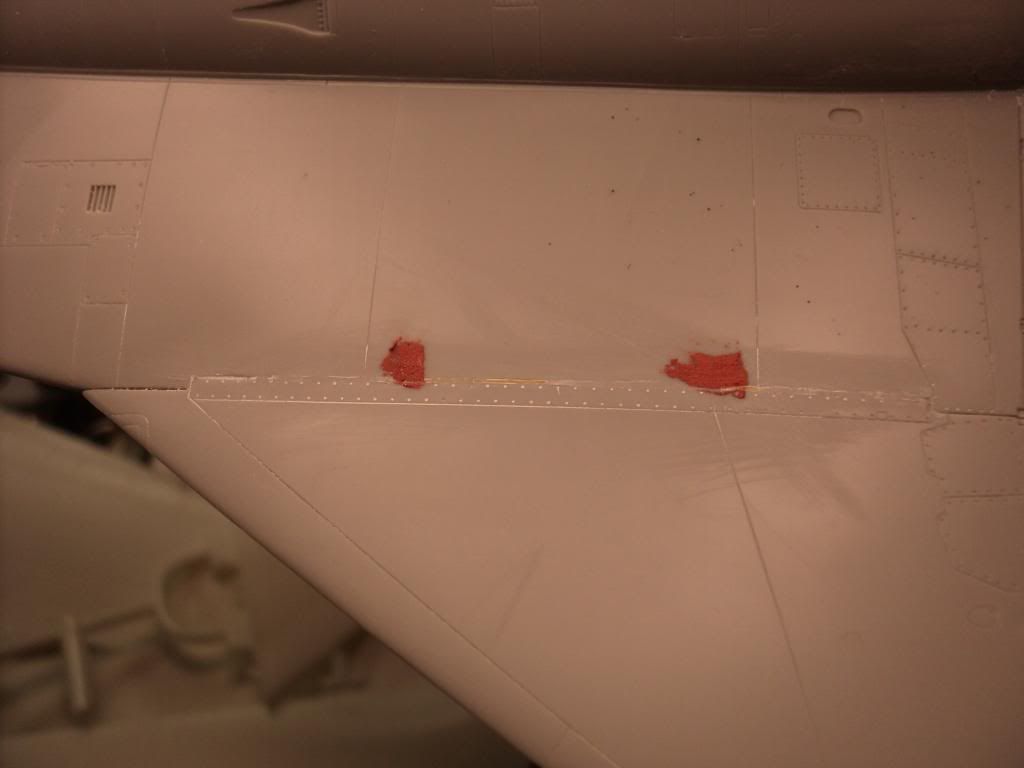
 
Re: CTA Entry: Adam Baker 1/48 Saab J-35 Draken

Some progress has been made. Working on filling all the gaps, and thanks to Chris (Phantom II) its going pretty nicely. I saw him mention in his CTA build, about using stretched sprue to fill in gaps, and I have to say I'm amazed I never thought of this method in the past for filling seams & gaps. I'm sold on it, and its going to be my go to method in the future for filling gaps, thats for sure.

So far its worked amazingly well. Most of the gaps went away completely w/ 1 or 2 pieces of sprue put in them, and then sanded smooth. Got a step/ridge where the engine portion of the fuselage meets the forward section that I filled in mostly w/ sprue, and then this evening I puttied over it to help blend it all together. Tomorrow evening I'll sand it smooth. Hopefully this weekend I'll be able to lay down some primer.

My ultimate hope is to get the red base coat laid down next week. I leave for California a week from Sunday, and I'd like to get the red down before I leave, so that it has a full week to dry & cure, and then I can work on finishing things when I get back.

Here you can see the tan colored sprue used to fill the gap around the nose cone.

Draken027_zps8e19708b.jpg


Draken029_zpse719ffea.jpg


Draken028_zpsaa127f0a.jpg
 
Re: CTA Entry: Adam Baker 1/48 Saab J-35 Draken

Made major progress on my build today. Managed to get all the seam filling pretty much finished and cleaned up. I have to give a huge thank you to comment Chris made about using stretched sprue, as it made a huge difference on this build.

Draken033_zps9876c53b.jpg


The intakes on both sides of the fuselage had pretty substantial steps that I wasn't real sure how to fix w/o smearing a ton of putty on it and hoping it feathered out well enough. Using some larger stretched sprue, I was able to blend it pretty nicely. Might take just a spot of putty to finish things up, but right now it looks great.

Draken034_zps5f205eeb.jpg


And had the same issue w/ the panels w/ the gun ports. These didnt blend quite as well as the intakes, but they look a whole lot better than when I started.

Draken035_zpse1803f3b.jpg


I'm also rescribing the lost panel lines, which is something I've never attempted, and so far the results are decent I think. Using a sewing needle chucked up in my pin vise and dymo label tape as a straight edge. I've got a few more panel lines to redo still, but I'm going to wait till after the primer is down before I rescribe those lines.
 
Re: CTA Entry: Adam Baker 1/48 Saab J-35 Draken

Looking pretty sharp Adam . Always liked that jet . They looked good even in their military green. Usually had some darker touch up paint where maintenance had occured.

Cheers, Christian B)
 
Re: CTA Entry: Adam Baker 1/48 Saab J-35 Draken

Thanks guys!

I managed to get the jet primed all in white today, and while most of the areas look good, there are a few that I'm gonna have to work on still. Not surprised but was really hoping I wouldnt have to do any more work on it.

Got it in my dehydrator right now, and it'll spend about 24hrs siting at 105° and then tomorrow evening after work it should hopefully be dry enough to work on it again, so that I can touch up the areas that need it still. Unfortunately as the week progresses, w/ my impending trip to California, I'll probably have less time to work on it each night.
 
Re: CTA Entry: Adam Baker 1/48 Saab J-35 Draken

We have paint!

Pulled it out of the dehydrator this evening, and amazingly, most of my filling jobs look pretty good. Got a few areas I'm not overly thrilled about, but this was a learning build, so instead of taking the chance of making things worse, I think I'm going to let them be, and move on. Polished out the primer as best as I could tonight, to remove some gritty areas as well as a few places where I had splatter from the airbrush.

In a little while I'm going to put down another coat of white, to prime the whole thing, I missed a few areas yesterday, then back into the dehydrator for 24 hrs. Tomorrow night get another polishing out and then I'll put down the silver in the landing gear bays. Then hopefully by Thursday, I might get the red down, but we'll see!

Draken037_zpse62b47c3.jpg
 
Re: CTA Entry: Adam Baker 1/48 Saab J-35 Draken

2nd coat of primer is down, and now it will spend the next 24 hrs in the dehydrator again. Hopefully I can get the silver for the wheel bays done tomorrow w/o any issues, and then maybe Thursday or Friday I can get the red down.
 
Re: CTA Entry: Adam Baker 1/48 Saab J-35 Draken

Was able to get the paint put down on the landing gear components, and the wheel bays. The instructions called for silver, but all the pictures I've seen, the parts look more like a dull aluminum color, so I went w/ Tamiya's Flat Aluminum instead. Looks a little bright to me right now, but I'll probably put a flat coat over the parts before I'm done, and that should tone it down, as well as doing some light detail washes should help too.

Draken040_zps3f3972c6.jpg


Draken044_zps1c9beefa.jpg


I think that I'm going to toss the fuselage back into the dehydrator, and give the primer a couple days to dry before I put the red down. Going to have to polish it out some, have some issues w/ spitting w/ my airbrush that I just cant seem to get rid of and b/c of that I have areas of paint that have to be sanded down.
 
Back
Top