• Modelers Alliance has updated the forum software on our website. We have migrated all post, content and user accounts but we could not migrate the passwords.
    This requires that you manually reset your password.
    Please click here, http://modelersalliance.org/forums/login to go to logon page and use the "Forgot your Password" option.

Colossus-Building the Bismarck-Trumpeter 1/200th

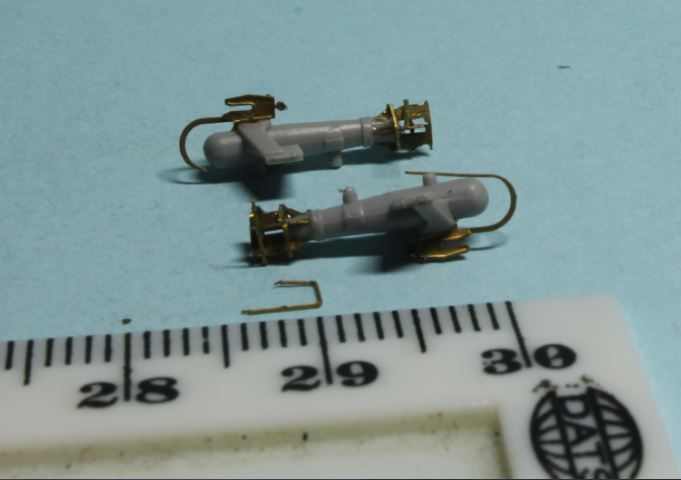
Progress on those pesky paravanes ....


hb147085.JPG


Few more things to attach and I'll have four done. Then four more to go :vmad


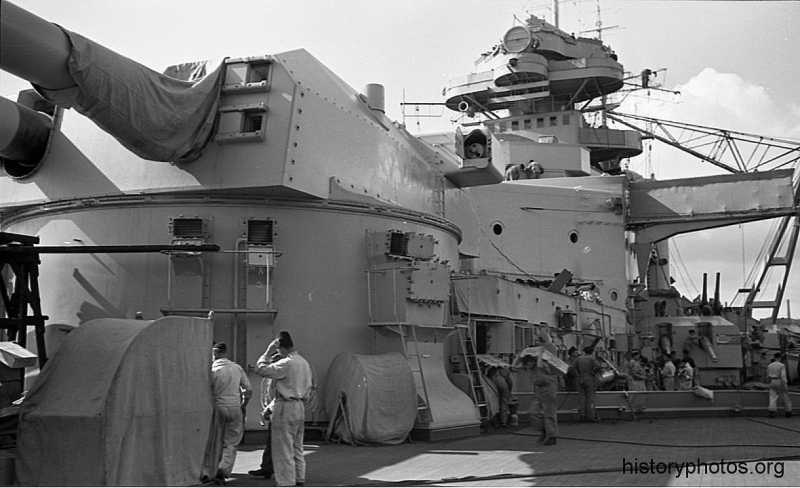
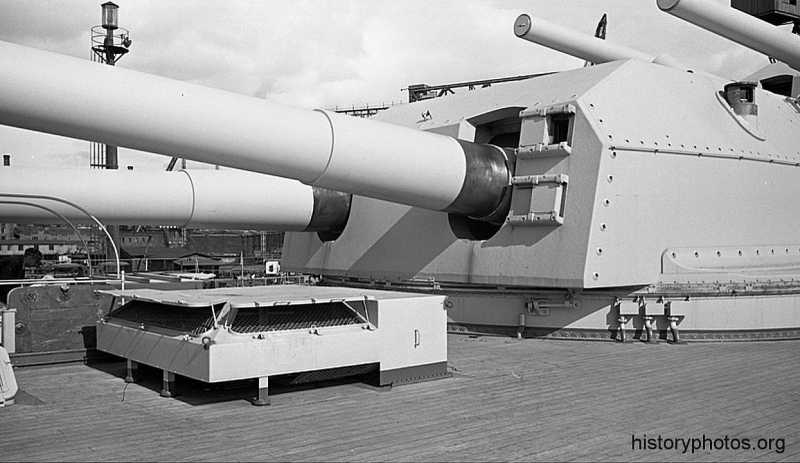
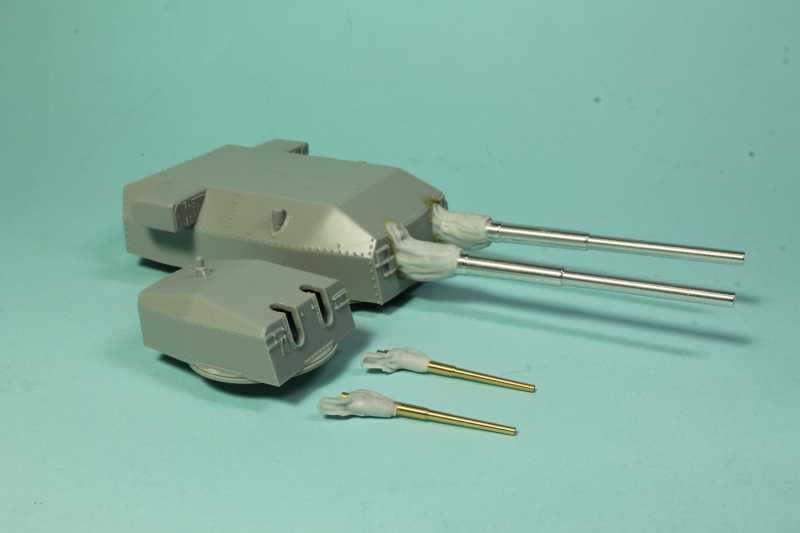
Had to pay some attention to the turrets Anton and Bruno, as I am moving from bow to stern. The thing that raised a few eyebrows is this:


hda85309.jpg


h0afa332.jpg


That piece of canvas that appears on one of the guns - I think most people mistook it for a blast bag. Judging by all the photos in that series, it appears that was only for protection during works - fitting etc. The same material appears to cover quite a few things on the ship.
I think many got fooled by that, and also by the fact that blast bags were not unusual. This is why the detail kit contains resin parts for blast bags, even though, technically, my conclusion is they did not really exist.

Anyway, long story short, I have still decided to have those resin parts on, as they allow for a different color plus some weathering, making them stand out and provide a splash of color too.

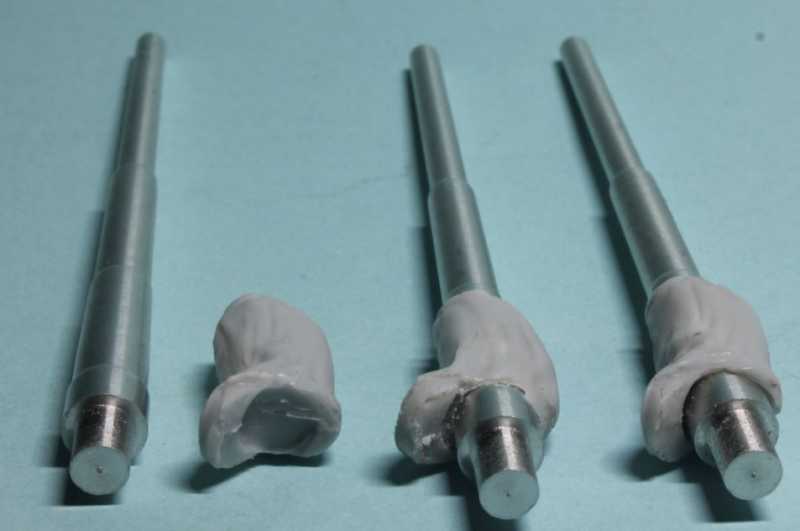
Turns out to be a pain ...


hbb6d68d.JPG


They don't come ready for the nice turned barrels to go in, I had to drill them. Diameter that I need is 5.70mm and there is no drill bit for that. Closest I could get was 5.5mm, then good old filing. The portion that needs drilling is around 5mm thick (for our American friends, 1 inch = 25.4 mm, apologies for stating something well known).

There are eight of them big things, then more for the 150mm guns - these were for the 380mm x 8 guns.

Well, it had to be done, so ....

Thanks for watching,

Laurence
 
Great job on the Paravanes. You did a lot of research on them. All that will pay off in the end result!

I agree about the canvas covers!

(y) (y) (y) (y) (y) (y)

Bob
 
Great job on the Paravanes. You did a lot of research on them. All that will pay off in the end result!

I agree about the canvas covers!

(y) (y) (y) (y) (y) (y)

Bob

Thanks Bob, yes I spent a considerable amount of time on the paravanes and I am sure I will spend a lot more on the things to come.

The canvas covers ... I don't think it's totally wrong, historically speaking to have them showing, as the Bismarck had work done even when she went out at sea for trials, which is what I am intending to show in the diorama. Besides, if it is not accurate, well, ummm .....not sorry :D

I really hope it will pay off.


Cheers,

Laurence
 
Sensational work Lawrence! I am stunned with the excellent construction on your paravanes. Good luck on those blast bags.
 
Right, minor update.

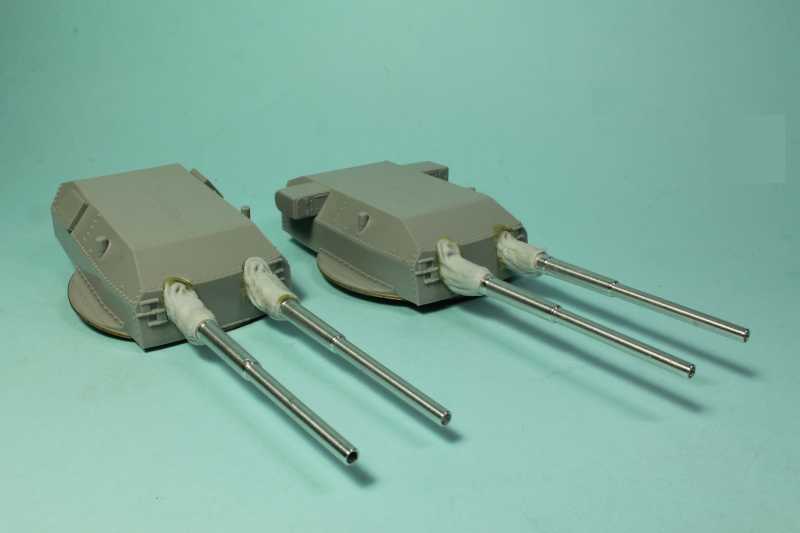
All canvases / blast bags in place on the big turrets.


hf156a7e.JPG


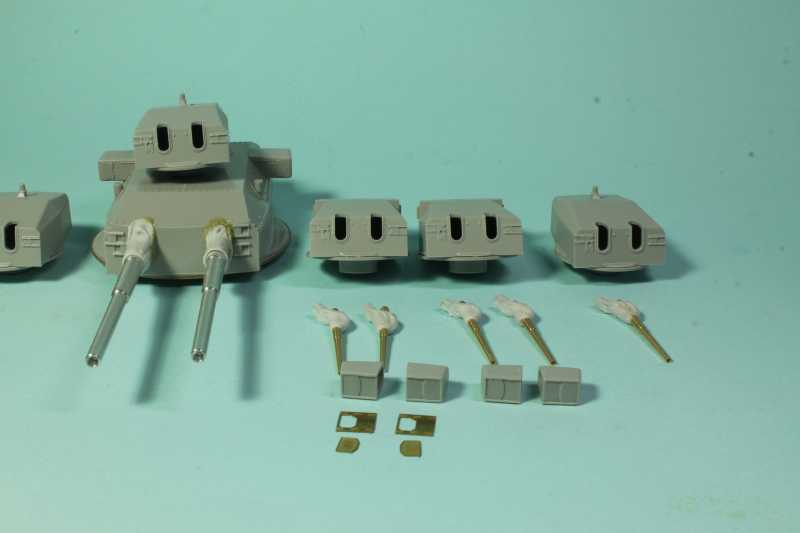
The 150mm gun turrets are work in progress - took some photos for comparison.


h589c647.JPG


This one shows some of the parts that go on the smaller turrets - range finders, barrels, blast bags again, and some of the PE - those bits are for one turret (two sets to do), not showing all the PE parts that have to be put in place - ladders, rails etc.


h1527f38.JPG


Back to work ...tons to do :D


Laurence
 
The adventure continues ...

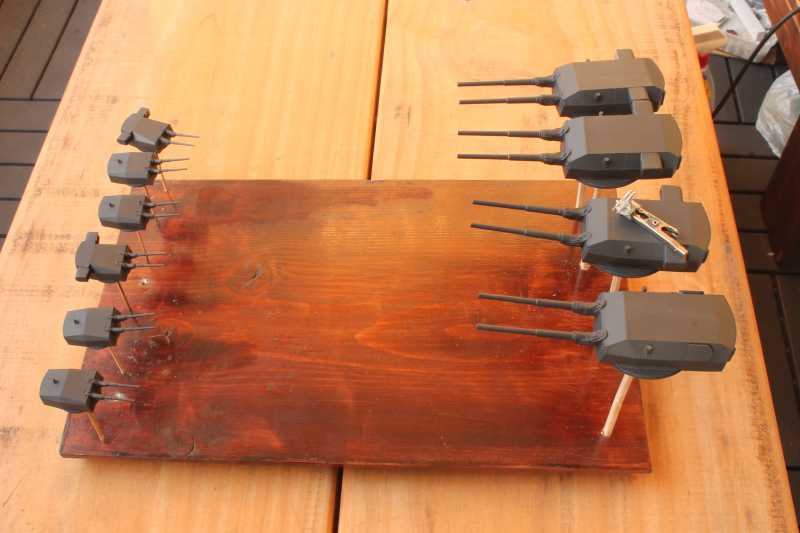
All 4 big 380mm turrets and the smaller 150mm turrets, 6 of them primed.

h044855e.JPG


One of the 37mm AA batteries on top the big one .... it's a proportions game ...

h69f0da7.JPG


And a zoom in on the 37mm - still WIP, few more PE bits to add to it. It's roughly 15mm in length.

hd6296fd.JPG


Bit of fun dry fitting stuff, the wooden deck on top the superstructure, the next layer of the superstructure, the big turrets and the 150mm.

hd5358b0.JPG


All turrets had received some more primer, grey this time, to do some pre-shading. I did it the other way around, but the outcome should still be good. Only another ton of PE to go on the turrets, rails, steps, the lot.


Thanks for watching this space, more to come. :captain


Laurence
 
A really exciting project!

(y) (y) (y) (y) (y)

Bob

Thanks Bob,

If you call challenging exciting, going to bed thinking about some darn PE bits and everything else, then,yes. I do too :D

BTW .... when you think the paravanes will fit nicely in their designated spots on the superstructure, think again ... I am now scratching a lot more than I thought I would .... :rotf


Laurence
 
The adventure continues ...

All 4 big 380mm turrets and the smaller 150mm turrets, 6 of them primed.
h044855e.JPG


One of the 37mm AA batteries on top the big one .... it's a proportions game ...
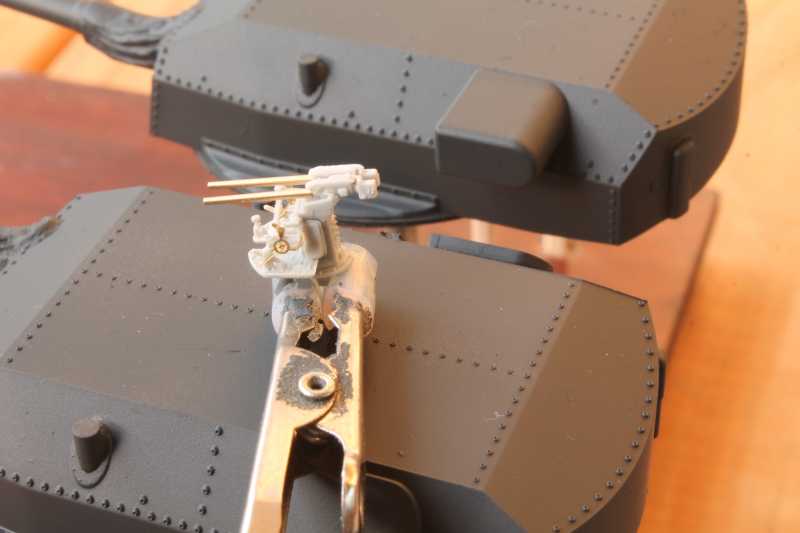
h69f0da7.JPG


And a zoom in on the 37mm - still WIP, few more PE bits to add to it. It's roughly 15mm in length.
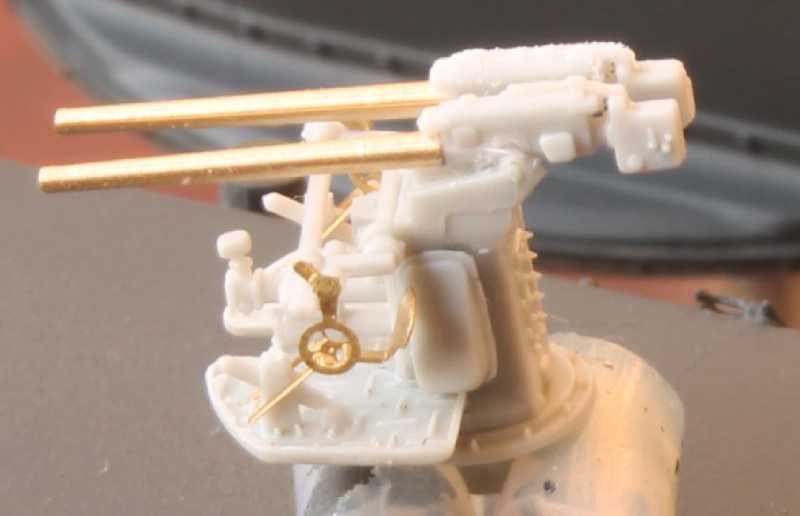
hd6296fd.JPG


Bit of fun dry fitting stuff, the wooden deck on top the superstructure, the next layer of the superstructure, the big turrets and the 150mm.
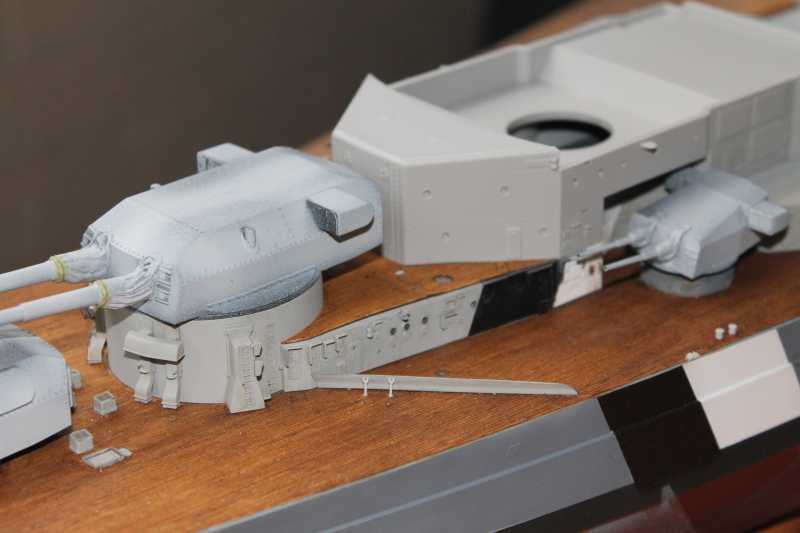
hd5358b0.JPG


All turrets had received some more primer, grey this time, to do some pre-shading. I did it the other way around, but the outcome should still be good. Only another ton of PE to go on the turrets, rails, steps, the lot.


Thanks for watching this space, more to come. :captain


Laurence

Makes me want to pull out the Graf Spee and give it another go. :captain
 
Back
Top